Author: Lisa

  • Healthy and Moist Chocolate Zucchini Muffins

    Healthy and Moist Chocolate Zucchini Muffins

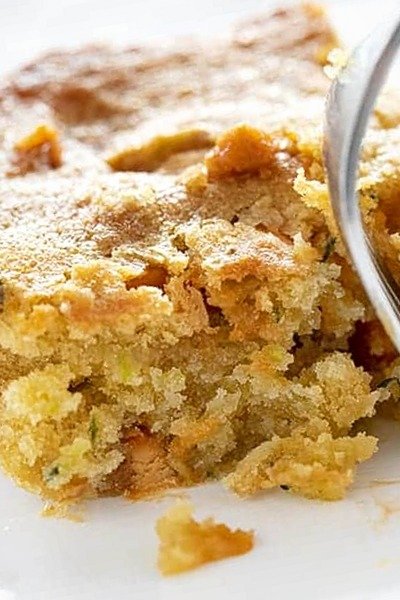
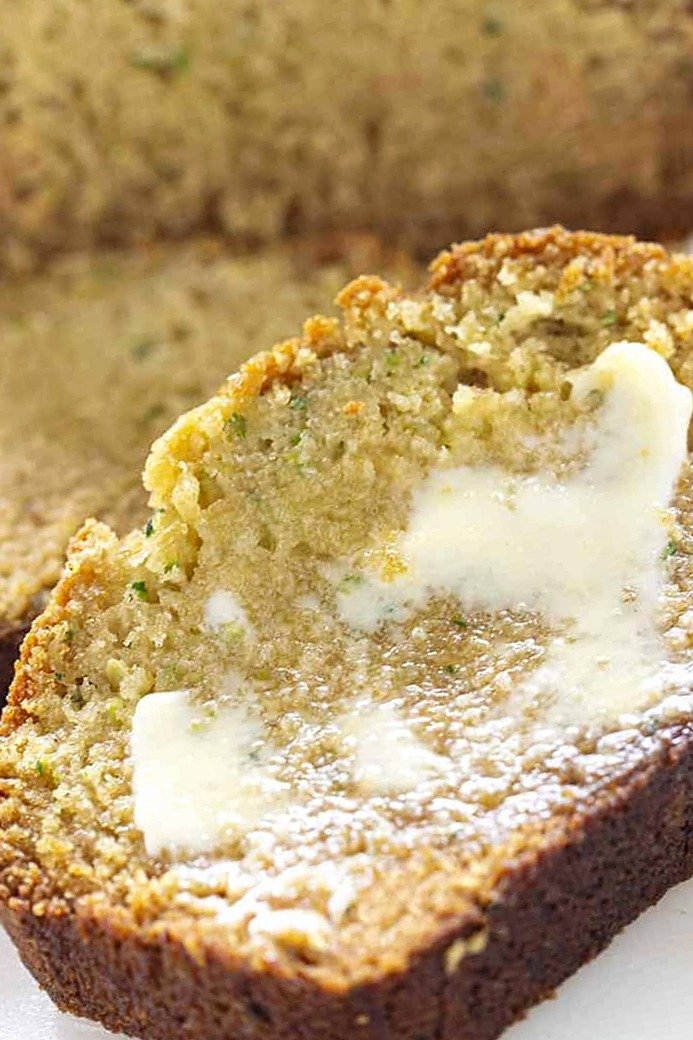
    These chocolate zucchini muffins provide a nutrient-dense breakfast or snack option using whole wheat flour and natural sweeteners. The addition of grated zucchini ensures a moist crumb while keeping the sugar content lower than traditional bakery muffins.

    Recipe image

    List of ingredients

    • 1½ cup grated zucchini – measure before squeezing out moisture
    • 2 large eggs – room temperature is ideal
    • ¼ cup avocado oil – olive oil can be used as an alternative
    • ⅓ cup maple syrup – provides natural sweetness
    • 2 teaspoons vanilla extract – for aromatic flavor
    • ⅔ cup unsweetened applesauce – adds moisture and replaces refined fats
    • 1¼ cups whole wheat flour – for added fiber and structure
    • ¼ cup unsweetened cocoa powder – provides deep chocolate flavor
    • ½ teaspoon baking soda – helps with leavening
    • 1 teaspoon baking powder – ensures a good lift
    • 1 teaspoon cinnamon – adds warmth to the chocolate
    • ½ teaspoon salt – balances the sweetness
    • ⅓ cup chocolate chips – plus extra for topping the muffins

    step-by-step instructions

    1. Prepare Oven: Preheat your oven to 375℉ and line a 12-hole muffin tin with liners or grease them thoroughly. Set the tin aside for later use.
    2. Drain Zucchini: Place the pre-measured shredded zucchini in the center of a paper towel or a clean kitchen towel. Wrap the towel tightly and squeeze out as much excess moisture as possible to prevent soggy muffins.
    3. Combine Wet Ingredients: Place the drained zucchini in a large mixing bowl. Add the eggs, avocado oil, maple syrup, vanilla extract, and unsweetened applesauce, then whisk all components together until well combined.
    4. Mix Dry Ingredients: Add the whole wheat flour, cocoa powder, baking soda, baking powder, cinnamon, and salt directly into the bowl with the wet ingredients. Stir with a spoon or spatula until just combined; avoid over-mixing to ensure the muffins remain fluffy rather than dense. Fold in the chocolate chips gently.
    5. Fill Muffin Tin: Divide the batter evenly among the 12 prepared muffin tin compartments, filling each one about ¾ of the way full. If desired, press a few additional chocolate chips onto the top of each muffin.
    6. Bake: Place the tin in the preheated oven and bake for 18-20 minutes. The muffins are done when a toothpick inserted into the center comes out clean or a kitchen thermometer reads 200℉ in the center.
    7. Cool and Store: Let the muffins cool in the pan for 10 minutes before moving them to a wire cooling rack. Once completely cooled, store leftovers in an air-tight container in the refrigerator for 4-5 days or in the freezer for up to one month.

    Optimization Techniques for Baking

    Squeeze Zucchini Thoroughly to Prevent Sogginess

    Zucchini has an extremely high water content that can release during the baking process. If you do not squeeze the shredded vegetable properly, the excess liquid will create steam pockets and a gummy, undercooked center. Use a clean kitchen towel to apply firm pressure until no more water drips out.

    Avoid Overmixing the Batter for a Lighter Crumb

    When you mix whole wheat flour, the gluten begins to develop more rapidly than with white flour. Over-stirring the batter activates too much gluten, which leads to a tough, dense, or rubbery texture. Mix only until the streaks of flour disappear to keep the muffins light and tender.

    Verify Internal Temperature for Precision

    While the toothpick test is a standard method, using a digital kitchen thermometer is more accurate. Aim for an internal temperature of 200℉ to ensure the starches are fully set. This prevents the common issue of muffins that look done on the outside but remain raw in the middle.

    Ingredient Swaps and Adaptations

    Use Mashed Banana Instead of Applesauce

    Mashed ripe banana is an excellent one-to-one substitute for unsweetened applesauce. Banana adds a slightly different flavor profile and more natural creaminess to the batter. Ensure the banana is very ripe and mashed until completely smooth to maintain a consistent muffin texture.

    Substitute Different Liquid Oils

    While avocado oil is recommended for its neutral taste and healthy fats, melted coconut oil is a great alternative for a slightly sweeter aroma. Olive oil also works well, though it may add a subtle peppery note to the chocolate. Avoid using butter if you want to maintain the specific moistness provided by liquid fats.

    Explore Gluten-Free Flour Alternatives

    To make these muffins gluten-free, you can use a high-quality 1:1 gluten-free baking blend that contains xanthan gum. Because gluten-free flours absorb moisture differently, you may need to let the batter sit for 10 minutes before baking. This allows the flour to hydrate, preventing a gritty texture.

    Replace Maple Syrup with Other Natural Sweeteners

    Honey or agave nectar can be used as a replacement for maple syrup in the same quantity. Note that honey has a stronger flavor and is slightly sweeter, which may subtly alter the taste of the chocolate. If using honey, you might find the muffins brown slightly faster due to the higher fructose content.

    Flavor and Texture Enhancements

    Incorporate Toasted Walnuts or Pecans

    Adding ¼ cup of finely chopped toasted walnuts or pecans provides a satisfying crunch that contrasts with the moist cake. Fold the nuts in at the same time as the chocolate chips. Toasting the nuts beforehand intensifies their flavor and prevents them from becoming soft during baking.

    Use Dark Chocolate Chunks for Richness

    For a more sophisticated flavor, swap standard semi-sweet chocolate chips for chunks of 70% dark chocolate. The bitterness of the dark chocolate complements the earthiness of the zucchini and whole wheat flour. Chunks also create larger pockets of melted chocolate compared to small chips.

    Add a Pinch of Espresso Powder

    Adding ¼ teaspoon of instant espresso powder to the dry ingredients does not make the muffins taste like coffee. Instead, it enhances the depth of the cocoa powder, making the chocolate flavor taste more intense and rich. This is a professional baking trick used to amplify chocolate notes.

    Storage and Freshness Tips

    Optimal Refrigeration Guidelines

    Because of the fresh zucchini and applesauce, these muffins have a higher moisture content than standard muffins. This makes them prone to spoiling if left at room temperature for too long. Store them in an airtight container in the fridge to maintain freshness for 4 to 5 days.

    Freezing and Thawing for Long-Term Use

    These muffins freeze exceptionally well for up to one month. Flash-freeze them on a baking sheet for an hour before transferring them to a freezer-safe bag to prevent them from sticking together. Thaw them overnight in the refrigerator or briefly in the microwave for a quick breakfast.

    Preventing Condensation in Storage

    When storing muffins in the fridge, ensure they are completely cool before sealing the container. If you trap warm air inside, condensation will form on the lids and drip onto the muffins, making the tops sticky. Placing a piece of parchment paper between layers of muffins also helps preserve the texture.

    Reheating Guidelines

    Microwave Quick-Heat Method

    For a soft, warm muffin, microwave a single muffin on a paper towel for 15 to 20 seconds. Avoid over-heating, as the sugar in the maple syrup and chocolate chips can burn quickly. This method is best for muffins that have been refrigerated or thawed from the freezer.

    Oven Warming for Better Texture

    To restore the slight crust on the outside of the muffin, reheat them in the oven at 300℉. Wrap the muffins loosely in aluminum foil to prevent them from drying out and heat for 5 to 10 minutes. This method is superior for larger batches of muffins.

    Troubleshooting Common Issues

    Addressing Dense or Heavy Texture

    If your muffins turned out too dense, the most likely cause is overmixing the batter. When flour is stirred too much, the gluten network becomes too strong, trapping less air. Next time, use a spatula to fold the ingredients together until the flour just disappears.

    Fixing Excessive Moisture or Sogginess

    Soggy muffins usually occur when the zucchini was not squeezed dry enough. The excess vegetable water interferes with the structure of the batter and prevents the center from setting. Ensure you use a towel to press out every possible drop of liquid from the shredded zucchini.

    Correcting a Lack of Lift

    If the muffins did not rise, check the expiration date of your baking soda and baking powder. Leavening agents lose their potency over time, especially if stored in humid environments. Always ensure your leavening agents are fresh to achieve the proper height and fluffiness.

    Frequently Asked Questions

    Can I use a food processor for the zucchini?

    Yes, you can use a food processor with the shredding disk to speed up the process. However, be careful not to over-process the zucchini into a puree, as this changes the texture and increases the water release. Always remember to squeeze out the excess liquid after shredding, regardless of the tool used.

    Do I need to peel the zucchini?

    There is no need to peel the zucchini. The skin is thin and contains a high concentration of nutrients and antioxidants. Once the zucchini is grated and baked, the skin becomes completely undetectable in both taste and texture.

    Can I bake these in a cake pan instead of a muffin tin?

    Yes, you can bake this batter as a loaf or a round cake. If using a loaf pan, increase the baking time to 45-55 minutes. If using a cake pan, bake for about 25-30 minutes. Always use the toothpick or thermometer method to ensure the center is fully cooked.

    Is whole wheat flour mandatory for this recipe?

    While whole wheat flour provides a heartier texture and more nutrition, you can use all-purpose flour for a lighter, more cake-like result. If using all-purpose flour, you may find the muffins rise slightly higher. The flavor will be slightly milder, but the moistness will remain the same.

    Print
    clock clock iconcutlery cutlery iconflag flag iconfolder folder iconinstagram instagram iconpinterest pinterest iconfacebook facebook iconprint print iconsquares squares iconheart heart iconheart solid heart solid icon
    Healthy and Moist Chocolate Zucchini Muffins

    Healthy and Moist Chocolate Zucchini Muffins


    5 Stars 4 Stars 3 Stars 2 Stars 1 Star

    No reviews

    • Author: Lisa
    • Total Time: 28 minutes
    • Yield: 12 muffins 1x
    • Diet: Vegetarian

    Description

    These Chocolate Zucchini Muffins are mixed all in one bowl, perfectly moist thanks to the addition of grated zucchini and have less added sugar than most muffin recipes. Made with whole wheat flour and naturally sweetened with maple syrup and applesauce, these decadent muffins get a boost of chocolate goodness from your favorite chocolate chips.


    Ingredients

    Scale
    • 1½ cup grated zucchini
    • 2 large eggs
    • ¼ cup avocado oil
    • ⅓ cup maple syrup
    • 2 teaspoons vanilla extract
    • ⅔ cup unsweetened applesauce
    • 1¼ cups whole wheat flour
    • ¼ cup unsweetened cocoa powder
    • ½ teaspoon baking soda
    • 1 teaspoon baking powder
    • 1 teaspoon cinnamon
    • ½ teaspoon salt
    • ⅓ cup chocolate chips

    Instructions

    1. Step 1: Preheat your oven to 375℉ and line a 12-hole muffin tin.
    2. Step 2: Place pre-measured shredded zucchini in the middle a paper towel or clean kitchen towel. Wrap it up and squeeze out excess moisture.
    3. Step 3: Place drained zucchini in a large bowl. Add eggs, oil, maple syrup, vanilla and applesauce. Whisk to combine.
    4. Step 4: Add flour, cocoa powder, baking soda, baking powder, cinnamon and salt to the bowl with the wet ingredients. Stir together with a spoon or spatula until just combined. Fold in chocolate chips.
    5. Step 5: Divide batter evenly between the prepared muffin tin compartments, filing each compartment about ¾ full. Top with additional chocolate chips, if desired.
    6. Step 6: Bake in preheated oven for 18-20 minutes or until a toothpick inserted into the middle comes out clean.
    7. Step 7: Let cool 10 minutes before transferring the muffins to a wire cooling rack.

    Notes

    For best results, use a kitchen thermometer to bake until muffins are 200℉ in the center. Store leftovers in an air-tight container in the fridge for 4-5 days or in the freezer for up to a month.

    • Prep Time: 10 minutes
    • Cook Time: 18 minutes
    • Category: Breakfast, Dessert
    • Method: Baking
    • Cuisine: American

    Nutrition

    • Serving Size: 1 muffin
    • Calories: 186 kcal
    • Sugar: 12 g
    • Sodium: 231 mg
    • Fat: 8 g
    • Saturated Fat: 2 g
    • Unsaturated Fat: 5 g
    • Trans Fat: 0 g
    • Carbohydrates: 26 g
    • Fiber: 3 g
    • Protein: 4 g
    • Cholesterol: 37 mg
  • Sautéed Zucchini and Yellow Squash with Rosemary

    Sautéed Zucchini and Yellow Squash with Rosemary

    This light and savory vegetable side dish combines fresh zucchini and yellow squash for a colorful presentation. It is a quick-cooking recipe that maintains a tender-crisp texture and a bright flavor profile.

    Recipe image

    List of ingredients

    • 1 tablespoon olive oil – used for sautéing and preventing sticking.
    • 1 medium yellow squash, cut into 1/4-inch thick slices – provides a mild, sweet flavor.
    • 1 medium zucchini, cut into 1/4-inch thick slices – adds a distinct color and earthy taste.
    • 1 teaspoon whole rosemary leaves, finely crushed – adds a fragrant, woody aroma.
    • 1/2 teaspoon garlic powder – provides a consistent, savory depth.
    • 1/4 teaspoon pure ground black pepper – adds a subtle spicy kick.
    • 1/4 teaspoon sea salt – enhances the natural flavors of the vegetables.
    • 1 cup grape tomatoes, halved – can be substituted with cherry tomatoes for a burst of acidity.

    step-by-step instructions

    1. Heat the Oil: Place a large nonstick skillet over medium-high heat and add the olive oil. Ensure the oil is shimmering before adding the vegetables to prevent sticking.
    2. Sauté the Squash: Add the sliced yellow squash and zucchini to the pan. Cook and stir for 3 minutes to develop a light golden sear on the edges.
    3. Season the Vegetables: Evenly sprinkle the crushed rosemary, garlic powder, black pepper, and sea salt over the squash. Stir well to ensure the spices are distributed.
    4. Add Tomatoes: Stir in the halved grape tomatoes. Continue to cook and stir for an additional 2 to 3 minutes until the vegetables are tender-crisp and the tomatoes have just begun to soften.

    Optimal Produce Selection

    Choosing Firm Summer Squash

    Select zucchini and yellow squash that feel heavy for their size and have a firm texture. Avoid any squash with soft spots, shriveled skin, or visible bruising. The skin should be glossy and tight, indicating the vegetable is fresh and hydrated.

    Picking the Best Grape Tomatoes

    Choose grape tomatoes that are bright red and plump. If the tomatoes are too soft, they will break down too quickly in the pan and create a sauce rather than remaining as distinct pieces. Ensure they are free from cracks or leaking juice.

    Evaluating Rosemary Freshness

    When using fresh rosemary leaves, look for needles that are deep green and flexible. Avoid sprigs that have turned brown or feel brittle. Crushing the leaves just before adding them to the pan releases the most aromatic oils.

    Advanced Sautéing Techniques

    Maintaining High Heat

    Keep the skillet at a medium-high temperature to ensure the vegetables sear rather than steam. If the heat is too low, the squash will release its moisture and boil in its own juices, resulting in a mushy texture. If the pan begins to smoke, lower the heat slightly.

    Avoiding Pan Overcrowding

    Use a large skillet to provide enough surface area for the vegetables to sit in a single layer. Overcrowding the pan forces the vegetables to stack, which traps steam and prevents the edges from browning. Cook in batches if your skillet is small.

    Defining Tender-Crisp Texture

    The goal is a tender-crisp finish, meaning the vegetable is cooked through but still offers a slight resistance when bitten. Remove the pan from the heat immediately once the squash is translucent but not collapsing. Residual heat will continue to cook the vegetables for a few minutes after plating.

    Flavor Customizations and Substitutions

    Using Fresh Garlic Instead of Powder

    If you prefer fresh garlic, use two minced cloves. Add the minced garlic to the pan during the last minute of the squash sauté, just before adding the tomatoes. This prevents the garlic from burning and becoming bitter.

    Alternative Herb Pairings

    Substitute the rosemary with fresh thyme or oregano for a different herbal profile. Thyme offers a more subtle, lemony note, while oregano provides a bolder, Mediterranean flavor. Use the same quantity as the rosemary.

    Adding Heat with Chili Flakes

    For a spicy variation, add a pinch of crushed red pepper flakes along with the sea salt and pepper. This adds a sharp heat that complements the sweetness of the yellow squash and the acidity of the tomatoes.

    Substituting Olive Oil for Butter

    You can use unsalted butter instead of olive oil for a richer, creamier taste. Melt the butter over medium heat, keeping a close eye on it to ensure it does not brown too deeply before the vegetables are added.

    Using Different Squash Varieties

    Pattypan squash is an excellent substitute for zucchini or yellow squash. Cut it into uniform wedges of about 1/4 inch thickness. It has a slightly nuttier flavor and holds its shape well during sautéing.

    Serving and Pairing Guide

    Combining with Grilled Proteins

    This dish pairs exceptionally well with grilled chicken breasts or baked salmon. The acidity of the tomatoes cuts through the richness of the protein, while the rosemary ties the flavors together. Serve the vegetables as a side platter or piled directly on top of the protein.

    Serving Over Whole Grains

    For a more substantial meal, serve the sautéed squash over a bed of quinoa, farro, or brown rice. The grains absorb the olive oil and juices from the tomatoes, creating a cohesive and nutritious bowl.

    Adding a Final Acidic Touch

    Squeeze a fresh lemon wedge over the dish immediately before serving. The citric acid brightens the rosemary and garlic flavors and enhances the natural sweetness of the summer squash.

    Incorporating Cheese Toppings

    Top the finished vegetables with a sprinkle of microbial-rennet feta or parmesan cheese. The saltiness of the cheese complements the mild flavor of the zucchini. Add the cheese while the vegetables are hot so it softens slightly.

    Storage and Reheating Instructions

    Refrigerating Leftovers

    Store leftover vegetables in an airtight glass container in the refrigerator. They will remain fresh for up to three to four days. To prevent the vegetables from absorbing other fridge odors, ensure the lid is sealed tightly.

    The Best Reheating Method

    Reheat the vegetables in a skillet over medium heat for 2-3 minutes. Avoid using a microwave if possible, as it can make the squash rubbery and cause the tomatoes to burst. Stir occasionally until heated through.

    Preventing Mushiness During Reheat

    When reheating, do not add extra oil or water. The vegetables already contain moisture, and adding more will lead to a soggy consistency. Heat them quickly and remove them from the pan the moment they are warm.

    Freezing Considerations

    This dish is not recommended for freezing. Summer squash has a very high water content, which expands during freezing and destroys the cellular structure. Upon thawing, the vegetables will become watery and lose their texture.

    Troubleshooting Common Issues

    Preventing Watery Vegetables

    If your vegetables are releasing too much water, increase the heat slightly and avoid stirring too frequently. Constant stirring can break down the vegetable walls and release moisture. Let them sear undisturbed for a minute or two.

    Stopping Overcooked Squash

    If the squash looks like it is becoming too soft, remove the skillet from the heat immediately. Move the vegetables to a cool platter to stop the cooking process. Overcooked squash loses its vibrant color and becomes mushy.

    Fixing Under-Seasoned Dishes

    Taste the vegetables after the final stir. If the flavor is too bland, add a tiny pinch more of sea salt or a drop of lemon juice. Be careful not to over-salt, as the flavors concentrate as the water evaporates.

    Frequently Asked Questions

    Should I peel the zucchini and yellow squash?

    No, peeling is not necessary. The skin of the zucchini and yellow squash is thin, edible, and contains a significant amount of the vegetable’s nutrients and color.

    Can I use frozen squash instead of fresh?

    Fresh squash is highly recommended for this recipe to achieve the tender-crisp texture. Frozen squash often releases significantly more water and becomes mushy when sautéed.

    How do I keep the colors bright?

    Keep the cooking time short and maintain a high heat. Overcooking causes the chlorophyll in the zucchini and the carotenoids in the yellow squash to break down, resulting in a duller appearance.

    What if I don’t have a nonstick skillet?

    You can use a stainless steel or cast iron skillet, but you may need to increase the olive oil slightly to prevent sticking. Ensure the pan is fully preheated before adding the vegetables.

    Can I add other vegetables to this mix?

    Yes, diced bell peppers or sliced carrots work well. However, add carrots first since they take longer to cook, and add peppers at the same time as the squash.

    Print
    clock clock iconcutlery cutlery iconflag flag iconfolder folder iconinstagram instagram iconpinterest pinterest iconfacebook facebook iconprint print iconsquares squares iconheart heart iconheart solid heart solid icon
    Savory Sautéed Yellow Squash and Zucchini with Tomatoes

    Sautéed Zucchini and Yellow Squash with Rosemary


    5 Stars 4 Stars 3 Stars 2 Stars 1 Star

    No reviews

    • Author: Lisa
    • Total Time: 16 minutes
    • Yield: 4 servings 1x
    • Diet: Keto

    Description

    Summer squash takes center stage with this seasonal side dish. This quick and easy recipe takes only 10 minutes to make and features summertime favorites like zucchini, grape tomatoes and yellow squash. Featuring a simple mixture of rosemary, garlic powder, salt and pepper, this keto-friendly sautéed zucchini and squash recipe is light, fresh and savory.


    Ingredients

    Scale
    • 1 tablespoon olive oil
    • 1 medium yellow squash, cut into 1/4-inch thick slices
    • 1 medium zucchini, cut into 1/4-inch thick slices
    • 1 teaspoon Whole Rosemary Leaves, finely crushed
    • 1/2 teaspoon Garlic Powder
    • 1/4 teaspoon Pure Ground Black Pepper
    • 1/4 teaspoon Sea Salt
    • 1 cup grape tomatoes, halved

    Instructions

    1. Step 1: Heat oil in large nonstick skillet on medium-high heat. Add squash and zucchini; cook and stir 3 minutes.
    2. Step 2: Sprinkle with rosemary, garlic powder, pepper and sea salt. Add tomatoes; cook and stir 2 to 3 minutes or until vegetables are tender-crisp.
    • Prep Time: 10 minutes
    • Cook Time: 6 minutes
    • Category: Side Dishes
    • Method: Sautéing
    • Cuisine: American

    Nutrition

    • Serving Size: 1 serving
    • Calories: 64 kcal
    • Sugar: 3 g
    • Sodium: 108 mg
    • Fat: 4 g
    • Saturated Fat: 0.6 g
    • Unsaturated Fat: 3.4 g
    • Trans Fat: 0 g
    • Carbohydrates: 5 g
    • Fiber: 2 g
    • Protein: 2 g
    • Cholesterol: 0 mg
  • Grilled Zucchini and Squash Foil Packets

    Grilled Zucchini and Squash Foil Packets

    These foil packets are a fast way to prepare seasonal summer vegetables with minimal cleanup. The combination of butter, parmesan, and mustard creates a savory glaze that steams the vegetables to perfection on the grill.

    Recipe image

    List of ingredients

    • 1/4 cup yellow mustard – provides acidity and emulsification for the sauce.
    • 1/4 cup butter, melted – adds richness and aids in heat conduction.
    • 2 tablespoons grated Parmesan cheese – adds salty, umami flavor (use microbial-rennet cheese).
    • 1/2 teaspoon basil leaves – provides a classic herbal note.
    • 1/2 teaspoon garlic powder – adds a concentrated savory depth.
    • 1 large zucchini, cut into 1/4-inch thick slices – ensures even cooking time.
    • 1 medium yellow squash, cut into 1/4-inch thick slices – complements the zucchini texture.
    • 1 small yellow onion, thinly sliced – adds a subtle sweetness when steamed.
    • 4 sheets (12×12-inch each) heavy duty aluminum foil – prevents tearing and retains steam.

    step-by-step instructions

    1. Prepare the seasoning: In a large mixing bowl, combine the yellow mustard, melted butter, grated Parmesan, basil leaves, and garlic powder. Stir until the ingredients are well blended and smooth.
    2. Coat the vegetables: Add the sliced zucchini, yellow squash, and thinly sliced onions to the bowl. Toss the vegetables thoroughly to ensure every piece is evenly coated with the butter-mustard mixture.
    3. Assemble the packets: Divide the seasoned vegetable mixture evenly across the four sheets of heavy-duty aluminum foil. Bring the sides of the foil upward and double-fold the top and ends to create a tight, leak-proof seal.
    4. Grill to tender: Place the packets on a grill preheated to medium-high heat. Cook for 10 to 12 minutes, or until the zucchini is tender when pierced with a fork.
    5. Final touch: Carefully open the packets and sprinkle with additional Parmesan cheese if desired before serving immediately.

    Selecting the Best Produce

    Choosing Firm Zucchini

    Select zucchini that feels heavy for its size and has a firm, glossy skin. Avoid specimens with soft spots or deep bruises, as these indicate the vegetable is overripe and may become too mushy during the steaming process.

    Identifying Quality Yellow Squash

    Look for yellow squash with a bright, uniform color and no visible shriveling at the neck. The squash should be firm to the touch, ensuring it maintains its structural integrity when grilled in foil.

    Selecting the Right Onion

    A small yellow onion is ideal because it provides a balanced sweetness that doesn’t overpower the zucchini. Ensure the onion is fresh and crisp to provide a slight textural contrast to the softened squash.

    Mastering Foil Packet Techniques

    The Importance of Heavy Duty Foil

    Using heavy-duty aluminum foil is critical to prevent the packets from tearing when flipped or moved on the grill. Thinner foil is prone to punctures, which allows the butter and mustard sauce to leak out, resulting in dry vegetables.

    Creating a Steam-Tight Seal

    A double fold at the top and ends is necessary to trap the moisture inside the packet. This creates a pressurized steaming environment that cooks the vegetables quickly while keeping them hydrated and tender.

    Optimizing Vegetable Distribution

    Avoid overcrowding the foil packets to ensure heat penetrates the center of the vegetable pile. Spreading the zucchini, squash, and onions in a single, slightly overlapping layer promotes more consistent cooking across the entire batch.

    Grill Heat and Temperature Management

    Defining Medium-High Heat

    Medium-high heat typically ranges between 375°F and 425°F on a grill thermometer. This temperature range is high enough to caramelize the butter and mustard without burning the exterior of the foil too quickly.

    Managing Gas Grill Hot Spots

    If using a gas grill, rotate the packets every few minutes to account for hot spots. Placing packets away from the direct center of the burner can prevent the bottom layer of vegetables from overcooking.

    Charcoal Grill Heat Distribution

    For charcoal grills, arrange the coals into a concentrated heat zone. Place the foil packets directly over the embers to ensure the internal steam temperature reaches the required level for softening the squash.

    Oven-Based Cooking Alternatives

    Setting the Oven Temperature

    When baking these packets instead of grilling, preheat your oven to 375°F or 400°F. A slightly higher temperature helps mimic the intense heat of a grill, though the cooking time will vary.

    Adjusting the Baking Duration

    Bake the sealed packets for 25 to 30 minutes at 375°F, or 10 to 12 minutes at 400°F. The vegetables are done when the zucchini slices are tender and the sauce has thickened.

    Using a Baking Sheet for Stability

    Always place the foil packets on a rimmed baking sheet when using an oven. This prevents any accidental leaks from dripping onto the oven floor and makes it easier to move multiple packets at once.

    Vegetable and Seasoning Substitutions

    Integrating Different Summer Squashes

    You can substitute the yellow squash with pattypan squash or baby zucchini for a different visual presentation. Keep the slicing thickness consistent at 1/4-inch to ensure they cook at the same rate as the other vegetables.

    Swapping the Cheese Variety

    While Parmesan provides a sharp saltiness, a microbial-rennet Pecorino Romano offers a similar profile with a slightly stronger tang. For a milder taste, use a small amount of crumbled feta added after grilling.

    Alternative Herb Pairings

    Replace the basil with dried oregano or thyme for a more earthy, Mediterranean flavor profile. Fresh parsley added at the end of cooking provides a bright, clean finish that complements the mustard glaze.

    Replacing the Yellow Mustard

    Dijon mustard can be used as a substitute for yellow mustard to provide a more sophisticated, spicy kick. If you prefer a sweeter profile, a small amount of honey-mustard can work well with the butter.

    Serving and Pairing Suggestions

    Complementary Protein Pairings

    These packets serve as an excellent side for grilled chicken breasts, seared salmon fillets, or lean steak. The acidity of the mustard sauce cuts through the richness of grilled meats.

    Adding Fresh Garnish

    Finish the dish with a sprinkle of fresh chopped basil or a squeeze of lemon juice. This adds a layer of brightness that enhances the savory notes of the garlic and Parmesan.

    Plating for Presentation

    For a rustic presentation, serve the vegetables directly inside the opened foil packets on a platter. Alternatively, transfer the vegetables to a shallow bowl to capture all the remaining melted butter sauce.

    Storage and Reheating Guidelines

    Cooling and Refrigeration

    Allow the vegetables to cool completely before transferring them to an airtight container. Store them in the refrigerator for up to three days to maintain the best texture.

    Reheating in the Oven

    To reheat, place the vegetables back into a foil packet and heat at 350°F for about 5-8 minutes. This method prevents the vegetables from drying out and keeps the sauce emulsified.

    Microwave Reheating Tips

    If using a microwave, place the vegetables in a microwave-safe dish and cover with a damp paper towel. Heat on medium power in 30-second intervals to avoid overcooking the squash into a mushy consistency.

    Common Troubleshooting

    Preventing Soggy Vegetables

    Sogginess often occurs if the vegetables are sliced too thin or if the packets are overcooked. Stick to 1/4-inch slices and check for tenderness at the 10-minute mark to prevent over-steaming.

    Fixing Overcooked Squash

    If the squash becomes too soft, avoid stirring it excessively, which can break the pieces. Instead, serve it as a chunky side mash by gently folding in extra cheese.

    Addressing Under-seasoned Packets

    If the flavors seem muted, it is usually because the vegetables weren’t tossed thoroughly in the sauce. Ensure every slice is coated before sealing the foil to guarantee a consistent taste.

    Frequently Asked Questions

    Can I add fresh garden tomatoes to the mix?

    Yes, fresh tomatoes can be added to the foil packets. It is recommended to cut the tomatoes in half lengthwise to prevent them from breaking down too quickly and making the sauce too watery.

    Can I use parchment paper instead of foil?

    Parchment paper is not recommended for grilling as it can burn or catch fire over direct heat. However, you can use parchment paper inside the foil packets if you want to prevent the vegetables from sticking.

    How long do these keep in the fridge?

    The cooked zucchini and squash packets will stay fresh for 3 to 4 days when stored in an airtight container. Ensure they are completely chilled before sealing the lid.

    Can I make these for a large crowd?

    Yes, you can scale the recipe by increasing the vegetable and sauce quantities proportionally. Use a larger mixing bowl for tossing and prepare multiple batches of foil packets to fit your grill space.

    Print
    clock clock iconcutlery cutlery iconflag flag iconfolder folder iconinstagram instagram iconpinterest pinterest iconfacebook facebook iconprint print iconsquares squares iconheart heart iconheart solid heart solid icon
    Cheesy Grilled Zucchini and Squash Foil Packets

    Grilled Zucchini and Squash Foil Packets


    5 Stars 4 Stars 3 Stars 2 Stars 1 Star

    No reviews

    • Author: Lisa
    • Total Time: 22 minutes
    • Yield: 4 servings 1x
    • Diet: Vegetarian

    Description

    An easy summer side dish featuring grilled zucchini and squash in foil packets, seasoned with Parmesan cheese, melted butter, basil, garlic powder, and onions.


    Ingredients

    Scale
    • 1/4 cup yellow mustard
    • 1/4 cup butter, melted
    • 2 tablespoons grated Parmesan cheese (microbial-rennet)
    • 1/2 teaspoon basil leaves
    • 1/2 teaspoon garlic powder
    • 1 large zucchini, cut into 1/4-inch thick slices
    • 1 medium yellow squash, cut into 1/4-inch thick slices
    • 1 small yellow onion, thinly sliced
    • 4 sheets (12×12-inch each) heavy duty aluminum foil

    Instructions

    1. Step 1: Mix mustard, butter, Parmesan, basil, and garlic powder in a large bowl until well blended. Add zucchini, squash, and onions; toss to coat well.
    2. Step 2: Divide vegetable mixture evenly among sheets of aluminum foil. Bring up sides of foil; double fold top and ends to tightly seal each packet.
    3. Step 3: Grill packets over medium-high heat for 10 to 12 minutes or until zucchini is tender. Sprinkle with additional Parmesan cheese before serving, if desired.

    Notes

    For an oven alternative, bake at 375°F for 25-30 minutes or 400°F for 10-12 minutes.

    • Prep Time: 10 minutes
    • Cook Time: 12 minutes
    • Category: Side Dishes
    • Method: Grilling
    • Cuisine: American

    Nutrition

    • Serving Size: 1 packet
    • Calories: 169 kcal
    • Sugar: 4 g
    • Sodium: 320 mg
    • Fat: 13 g
    • Saturated Fat: 8 g
    • Unsaturated Fat: 5 g
    • Trans Fat: 0 g
    • Carbohydrates: 10 g
    • Fiber: 2 g
    • Protein: 3 g
    • Cholesterol: 34 mg
  • Cheesy Zucchini Breadsticks

    Cheesy Zucchini Breadsticks

    These cheesy zucchini breadsticks are a low-carb, veggie-packed alternative to traditional garlic bread. They are baked until golden and crisp, making them an ideal side dish or appetizer for any occasion.

    Recipe image

    List of ingredients

    • 2 medium zucchinis (about 2 cups shredded) – Use firm, fresh zucchinis for the best texture.
    • 2 large eggs – These act as the binding agent to hold the crust together.
    • ½ cup shredded mozzarella cheese – Incorporates into the base for stretch and flavor.
    • ¼ cup grated Parmesan cheese – Adds a salty, nutty depth to the breadsticks.
    • 1 teaspoon garlic powder – Provides a consistent, savory garlic taste.
    • 1 teaspoon Italian seasoning – A blend of dried herbs for a classic flavor.
    • ½ teaspoon salt – Enhances the overall savoriness of the vegetable base.
    • ¼ teaspoon black pepper – Adds a subtle touch of warmth.
    • 1 cup shredded mozzarella cheese – Used specifically for the melted topping.
    • Optional: fresh parsley or basil for garnish – Provides a fresh, colorful finish.

    step-by-step instructions

    1. Prepare zucchini: Preheat your oven to 425°F (220°C) and line a baking sheet with parchment paper. Shred the zucchini using a box grater or food processor, then place the shreds in a clean kitchen towel or cheesecloth and squeeze out as much liquid as possible to avoid sogginess.
    2. Make the crust: In a large mixing bowl, combine the squeezed shredded zucchini, eggs, ½ cup mozzarella, Parmesan, garlic powder, Italian seasoning, salt, and pepper. Mix the ingredients thoroughly until they are well combined.
    3. Shape and bake: Spread the zucchini mixture onto the prepared baking sheet, pressing it down firmly into a thin, even rectangle. Bake for 20–25 minutes, or until the crust is golden brown and firm to the touch.
    4. Add cheese topping: Remove the baking sheet from the oven and sprinkle 1 cup of mozzarella evenly over the surface. Return the pan to the oven for another 5–7 minutes, or until the cheese is completely melted and bubbly.
    5. Slice and serve: Let the breadsticks cool slightly to allow the structure to set before slicing them into strips. Garnish with fresh herbs if desired and serve warm with marinara or ranch dipping sauce.

    Optimizing Your Ingredient Selection

    Choosing the Right Zucchini

    For the best results, select medium-sized zucchinis that feel heavy for their size and have a firm skin. Avoid oversized zucchinis, as they tend to have larger seeds and a higher water content, which can make the breadsticks softer. Firm, smaller vegetables provide a denser shred that creates a sturdier crust.

    Selecting Low-Moisture Mozzarella

    Use low-moisture shredded mozzarella rather than fresh mozzarella stored in water. Fresh mozzarella releases too much liquid during the baking process, which can cause the base to steam instead of crisp. Low-moisture varieties provide the classic stretchy pull and a better golden-brown finish.

    The Benefits of Aged Parmesan

    Using a high-quality, aged Parmesan cheese adds a concentrated salty and nutty flavor that complements the mildness of the zucchini. If possible, grate the cheese fresh from a block to avoid the anti-clumping agents found in pre-shredded versions, which can affect the melt.

    Ensuring Eggs are at Room Temperature

    Using eggs at room temperature helps them emulsify more effectively with the cheese and zucchini. This leads to a more uniform batter and a more consistent bake across the entire baking sheet. If you forget to take them out, place them in warm water for a few minutes.

    Advanced Texture Techniques

    The Essential Moisture Removal Process

    Zucchini is composed mostly of water, which is the primary enemy of a crispy breadstick. Using a kitchen towel or cheesecloth to squeeze the shreds is mandatory; otherwise, the eggs will be diluted, and the crust will be mushy. Squeeze until the towel is nearly dry and the zucchini shreds are clumped together.

    Utilizing the Salt-Draw Method

    For those who want an extra-crispy crust, sprinkle the shredded zucchini with a small amount of salt and let it sit for 10 to 15 minutes before squeezing. This process uses osmosis to pull water out of the zucchini cells, allowing you to remove even more liquid during the towel-squeeze phase.

    Achieving Uniform Crust Thickness

    When spreading the mixture on the baking sheet, aim for a thickness of about one-quarter inch. If the crust is too thick, the center may remain soft while the edges overcook. Use an offset spatula or the back of a spoon to ensure the rectangle is even from edge to edge.

    Preventing Sticking with Parchment Paper

    Parchment paper is superior to greasing the pan because it provides a non-stick surface that allows for easy removal of the crust. This prevents the zucchini base from tearing when you try to lift it for slicing. Silicone mats are also a viable alternative for those who prefer reusable options.

    Baking and Heat Management

    Oven Calibration and Temperature

    Ensure your oven is fully preheated to 425°F (220°C) before inserting the tray. High heat is necessary to evaporate remaining moisture quickly and trigger the Maillard reaction for a golden crust. If your oven runs hot, monitor the edges closely to prevent burning.

    Strategic Rack Placement

    Position your oven rack in the center to ensure that heat circulates evenly around the baking sheet. Placing the tray too high can burn the cheese topping too quickly, while placing it too low may result in a burnt bottom and an undercooked top.

    Rotating the Pan for Even Browning

    Most ovens have hotspots that can cause one side of the breadsticks to brown faster than the other. Rotate the baking sheet 180 degrees halfway through the initial 20-25 minute baking period. This ensures a consistent color and texture across the entire batch.

    Timing the Cheese Topping

    Only add the final cup of mozzarella once the base is fully set and firm. If you add the topping too early, the cheese may burn before the zucchini base has cooked through. The final 5-7 minutes should be dedicated solely to melting and bubbling the top layer.

    Flavor Variations and Customizations

    Adding a Spicy Element

    To introduce heat, mix half a teaspoon of red pepper flakes or finely chopped fresh jalapeños into the zucchini batter. The spice cuts through the richness of the mozzarella and Parmesan, adding a dynamic layer of flavor. For a milder heat, use diced canned green chiles.

    Creating a Beef Pepperoni Pizza Style

    Transform these into pizza sticks by spreading a very thin layer of marinara sauce over the baked base before adding the cheese. Top with thin slices of beef pepperoni and a pinch of extra oregano. Return to the oven until the pepperoni is crisp and the cheese is bubbly.

    Integrating Fresh Herb Mixes

    While dried Italian seasoning is convenient, adding freshly chopped basil or parsley into the batter increases the aromatic quality of the dish. Fresh herbs should be folded in at the very end to prevent them from bruising or discoloring during the mixing process.

    Experimenting with Gourmet Cheese Blends

    Substitute a portion of the mozzarella with Provolone, sharp Cheddar, or Monterey Jack for a bolder taste. A blend of Provolone and mozzarella provides a more sophisticated, creamy flavor profile and an excellent stretch. Ensure all cheeses are shredded finely for even melting.

    Serving and Pairing Ideas

    Developing a Homemade Marinara Dip

    Pair these breadsticks with a simple sauce made from crushed tomatoes, minced garlic, olive oil, and fresh basil. Simmer the ingredients on low heat for 15 minutes to concentrate the flavors. The acidity of the tomato sauce balances the richness of the cheesy breadsticks.

    Preparing a Creamy Garlic Ranch

    For a cool contrast, blend buttermilk, mayonnaise, garlic powder, and dried dill. This dipping sauce is particularly popular with children and adds a tangy element to the savory zucchini base. Store the dip in the refrigerator until the moment of serving.

    Pairing with Hearty Vegetable Soups

    These breadsticks serve as an excellent low-carb replacement for croutons or dinner rolls when served with tomato basil soup or minestrone. The crisp edges of the breadsticks are perfect for dipping into thick, chunky soups.

    Creating a Party Platter Arrangement

    For appetizers, arrange the sliced breadsticks in a radial pattern around a central bowl of dipping sauce. Garnish the platter with fresh basil leaves and cherry tomatoes to create a visually appealing presentation for guests.

    Storage and Preservation

    Refrigeration Best Practices

    Store any leftover breadsticks in an airtight container in the refrigerator for up to three days. To prevent them from becoming soggy, place a piece of parchment paper between layers of breadsticks. Keep the container tightly sealed to avoid absorbing other fridge odors.

    Freezing the Unbaked Crust

    You can prepare the zucchini base and freeze it before the final bake. Spread the mixture onto parchment, freeze it solid, and then wrap the entire sheet in plastic wrap and aluminum foil. Label the package with the date and store it for up to two months.

    Thawing and Final Baking

    Thaw the frozen crust in the refrigerator overnight before baking. Once thawed, follow the standard baking instructions, starting with the base and finishing with the cheese topping. This allows you to have a fresh appetizer ready on short notice.

    Avoiding Freezer Burn

    When freezing, ensure there is as little air as possible between the food and the packaging. Using a vacuum sealer is the most effective way to prevent freezer burn. If using foil, press it firmly against the surface of the wrapped crust.

    Reheating for Maximum Crispiness

    The Oven Reheating Method

    To restore the original texture, reheat the breadsticks in an oven preheated to 375°F (190°C). Place them on a wire rack over a baking sheet for 5-7 minutes. This allows hot air to circulate around the breadsticks, crisping the bottom and melting the cheese.

    Using an Air Fryer for Quick Results

    An air fryer is the most efficient tool for reheating these breadsticks. Cook them at 370°F (188°C) for 3-5 minutes. The intense convection heat quickly removes any moisture absorbed during refrigeration, returning the crust to its golden state.

    Why the Microwave Should be Avoided

    Avoid reheating zucchini breadsticks in the microwave, as this often results in a rubbery texture. The microwave heats the water molecules inside the vegetable, which can make the crust soggy and the cheese tough. If you must use one, use a low power setting and short intervals.

    Restoring the Cheese Melt

    If the cheese looks dry after reheating, lightly brush the top with a small amount of melted butter or a spray of olive oil. This adds a sheen back to the mozzarella and enhances the flavor. Avoid adding more cheese unless you are prepared to bake them for a longer period.

    Troubleshooting Common Issues

    Solving the Soggy Crust Problem

    If your breadsticks are too soft, it is likely due to insufficient moisture removal from the zucchini. Ensure you are using a clean towel and applying significant pressure when squeezing. Additionally, check that your oven is reaching the full 425°F temperature before baking.

    Preventing Burnt Cheese Toppings

    If the cheese browns too quickly before melting, lower the oven temperature by 25 degrees for the final step. You can also loosely cover the tray with aluminum foil to shield the cheese from direct heat while the center finishes melting.

    Fixing a Crumbling Base

    A base that falls apart may be caused by too much water in the zucchini, which prevents the eggs from binding. Alternatively, over-squeezing to the point of removing all structure can occur. Balance is key; squeeze well, but do not dry the zucchini into a powder.

    Managing Uneven Browning

    Uneven color often stems from the use of a dark-colored baking sheet, which absorbs more heat. Use a light-colored aluminum pan or a silicone mat to distribute heat more evenly. Rotating the pan halfway through the bake also mitigates this issue.

    Frequently Asked Questions

    Can I make these breadsticks ahead of time?

    Yes, you can bake the zucchini base, let it cool completely, and store it in the refrigerator. When you are ready to serve, simply add the mozzarella topping and bake until the cheese is melted and bubbly.

    How do I keep my breadsticks from being soggy?

    The most critical step is squeezing out as much liquid from the shredded zucchini as possible. You can further ensure crispiness by salting the zucchini and letting it sit for 10 minutes before the final squeeze.

    Can I freeze zucchini breadsticks?

    Yes, you can freeze the baked crust without the toppings. Cool the crust, store it in an airtight container, and then thaw and add cheese before the final bake when you are ready to eat.

    Can I make this recipe dairy-free?

    Absolutely. You can substitute the mozzarella and Parmesan with plant-based, dairy-free alternatives. While the flavor and stretch may differ slightly, the overall structure of the breadstick will remain similar.

    Do I need to peel the zucchini?

    There is no need to peel the zucchini. The skin is edible, provides extra nutrients and fiber, and gives the breadsticks a visually appealing speckled appearance.

    Can I use an air fryer instead of the oven?

    Yes, you can use an air fryer. Cook the base at 375°F (190°C) for 12-15 minutes, then add the cheese and air-fry for another 3-5 minutes until the topping is golden and bubbly.

    Print
    clock clock iconcutlery cutlery iconflag flag iconfolder folder iconinstagram instagram iconpinterest pinterest iconfacebook facebook iconprint print iconsquares squares iconheart heart iconheart solid heart solid icon
    Golden Cheesy Zucchini Breadsticks - Low Carb Zucchini Cheese Bread

    Cheesy Zucchini Breadsticks


    5 Stars 4 Stars 3 Stars 2 Stars 1 Star

    No reviews

    • Author: Lisa
    • Total Time: 40 minutes
    • Yield: 6 servings 1x
    • Diet: Low-Carb

    Description

    These Cheesy Zucchini Breadsticks are a low-carb, veggie-packed twist on a classic favorite! Made with shredded zucchini, cheese, and seasonings, they bake up golden, cheesy, and deliciously crisp. Perfect as an appetizer, snack, or side dish for pizza night—serve them with marinara or ranch for dipping!


    Ingredients

    Scale
    • 2 medium zucchinis (about 2 cups shredded)
    • 2 large eggs
    • ½ cup shredded mozzarella cheese
    • ¼ cup grated Parmesan cheese
    • 1 teaspoon garlic powder
    • 1 teaspoon Italian seasoning
    • ½ teaspoon salt
    • ¼ teaspoon black pepper
    • 1 cup shredded mozzarella cheese (for topping)
    • Optional: fresh parsley or basil for garnish

    Instructions

    1. Prepare zucchini: Preheat oven to 425°F (220°C). Line a baking sheet with parchment paper. Shred the zucchini using a box grater or food processor. Place the shredded zucchini in a clean kitchen towel or cheesecloth, and squeeze out as much liquid as possible.
    2. Make the crust: In a large mixing bowl, combine shredded zucchini, eggs, ½ cup mozzarella, Parmesan, garlic powder, Italian seasoning, salt, and pepper. Mix until well combined.
    3. Shape and bake: Spread the mixture onto the prepared baking sheet, pressing it into a thin, even rectangle. Bake for 20–25 minutes, or until golden brown and firm to the touch.
    4. Add cheese topping: Remove from the oven, sprinkle 1 cup mozzarella evenly on top. Return to the oven for 5–7 minutes, or until the cheese is melted and bubbly.
    5. Slice and serve: Let it cool slightly before slicing into breadsticks. Garnish with fresh herbs if desired, and serve with marinara or ranch dipping sauce.

    Notes

    The most crucial step is squeezing out as much moisture as possible from the shredded zucchini to prevent the breadsticks from becoming soggy.

    • Prep Time: 15 minutes
    • Cook Time: 25 minutes
    • Category: Appetizer
    • Method: Baking
    • Cuisine: American

    Nutrition

    • Serving Size: 1 serving
    • Calories: 145 kcal
    • Sugar: 4 g
    • Sodium: 410 mg
    • Fat: 9 g
    • Saturated Fat: 5 g
    • Unsaturated Fat: 4 g
    • Trans Fat: 0 g
    • Carbohydrates: 7 g
    • Fiber: 2 g
    • Protein: 10 g
    • Cholesterol: 45 mg
  • Zesty Lemon and Zucchini Bowtie Pasta

    Zesty Lemon and Zucchini Bowtie Pasta

    This quick pasta dish combines fresh summer zucchini with a bright lemon-garlic sauce. It is a light yet satisfying meal that comes together in under 30 minutes.

    Recipe image

    List of ingredients

    • 1 pound bowtie pasta – ensures a great shape for holding sauce
    • 2 tablespoons olive oil – used for searing the zucchini
    • 2 cups zucchini, cut into ¼ inch thick half moons – provides a fresh, sweet taste
    • 2 cloves garlic, minced – adds depth and earthiness
    • 1 teaspoon fresh thyme, minced – gives a subtle herbaceous note
    • ½ teaspoon crushed red pepper – adds a hint of spice, adjust to taste
    • 2 tablespoons butter – creates a rich, creamy emulsion
    • ½ lemon, juiced – provides a bright, citrusy acidity
    • ½ cup grated parmesan cheese – adds saltiness and umami
    • Fresh parsley, minced – used for a fresh garnish
    • Toasted pine nuts – adds a crunchy, nutty finish

    step-by-step instructions

    1. Boil the Pasta: Bring a large pot of very salty water to a boil. Cook the bowtie pasta until al dente according to the package directions. Reserve 1 cup of starchy pasta water before draining.
    2. Sear the Zucchini: Heat a large skillet over medium-high heat and add the olive oil. Add the zucchini and cook for 2 minutes without stirring, then stir and cook for another 2 minutes to achieve a hard sear.
    3. Sauté Aromatics: Add the minced garlic, fresh thyme, and crushed red pepper flakes to the skillet. Stir and cook for one additional minute until fragrant.
    4. Create the Sauce Base: Stir in the butter, lemon juice, and ¼ cup of the reserved pasta water. Continue stirring until the butter has completely melted.
    5. Emulsify and Combine: Stir ¼ cup of the grated parmesan cheese into the sauce. Add the cooked pasta and toss thoroughly to combine. Season with salt and pepper to taste.
    6. Adjust Consistency: If the sauce appears too thin, add another splash of the reserved pasta water.
    7. Garnish and Serve: Plate the pasta and top with the remaining parmesan, fresh chopped parsley, and toasted pine nuts. Serve immediately.

    Professional Cooking Techniques

    Use Highly Salted Pasta Water

    Adding a generous amount of salt to the boiling water is the only chance to season the pasta itself. This ensures the noodles are flavorful from the inside out rather than just tasting of the sauce on the surface. Aim for water that tastes like the sea for the best results.

    Achieve a Hard Sear on Zucchini

    To prevent the zucchini from steaming and becoming mushy, use medium-high heat and avoid stirring too frequently. Letting the zucchini sit undisturbed for two minutes creates a golden-brown crust. This caramelization adds a deeper, sweeter flavor to the vegetable.

    Master the Pasta Water Emulsion

    Reserved pasta water contains starch that acts as a thickening agent when combined with fats like butter and oil. This creates a silky emulsion that clings to the noodles instead of pooling at the bottom of the plate. Always stir vigorously while adding the water and cheese to activate this process.

    Time the Garlic Carefully

    Garlic burns quickly at high temperatures, which can introduce a bitter taste to the entire dish. Adding the garlic after the zucchini has already seared ensures the pan temperature has dropped slightly. Sautéing for just one minute is enough to release the aromatic oils without burning.

    Ingredient Substitutions

    Alternative Pasta Shapes

    While bowtie pasta is recommended for its ability to trap sauce, other shapes like fusilli, penne, or farfalle work well. Any short pasta with ridges or folds will effectively hold the lemon butter sauce. Avoid long, thin noodles like spaghetti if you want a more consistent distribution of zucchini pieces.

    Substituting Pine Nuts

    If pine nuts are unavailable or too expensive, toasted walnuts or slivered almonds are excellent alternatives. These nuts provide a similar crunch and earthy flavor profile. Ensure they are toasted similarly to the pine nuts to maximize their aroma.

    Using Dried Thyme Instead of Fresh

    If you do not have fresh thyme, you can use dried thyme in a 1:3 ratio. Use approximately 1/3 teaspoon of dried thyme for every teaspoon of fresh. Add the dried herbs slightly earlier in the sauté process to allow them to rehydrate in the oil.

    Non-Dairy Cheese Alternatives

    For a dairy-free version, replace the parmesan with nutritional yeast or a plant-based parmesan alternative. These options provide a similar salty, umami flavor. You can also swap the butter for a high-quality vegan butter or additional olive oil.

    Hearty Protein Additions

    Incorporating Grilled Shrimp

    Shrimp pairs perfectly with lemon and garlic. Sauté the shrimp in the skillet before adding the zucchini, then remove them and set them aside. Return the shrimp to the pan at the very end when tossing the pasta to avoid overcooking them.

    Adding Roasted Chicken

    Pre-cooked rotisserie chicken is a fast way to add lean protein. Shred the chicken and stir it in during the final combining step. The residual heat from the pasta will warm the chicken through without drying it out.

    Using Crispy Tofu

    For a plant-based protein, use extra-firm tofu cut into small cubes. Press the tofu to remove excess water, then pan-fry it until golden brown before starting the zucchini. Stir the crispy tofu in at the end to maintain its texture.

    Switching to Protein-Rich Pasta

    You can substitute traditional wheat pasta with chickpea or lentil pasta for increased protein and fiber. Note that these pastas often release more starch into the water. You may need slightly less reserved pasta water to achieve the desired sauce consistency.

    Flavor Enhancements and Variations

    Boosting the Citrus Profile

    Adding freshly grated lemon zest along with the juice provides a more intense lemon aroma. Zest contains essential oils that provide a bright, floral quality that juice alone lacks. Stir the zest in at the final step to keep the flavor fresh.

    Adding Fresh Baby Spinach

    Fresh spinach adds color and nutrients without altering the flavor significantly. Toss a handful of baby spinach into the skillet just after adding the pasta. The heat from the noodles will wilt the spinach in about 30 seconds.

    Introducing Sun-Dried Tomatoes

    Chopped sun-dried tomatoes add a concentrated tartness and a chewier texture. Add them at the same time as the garlic and thyme. The oil from the tomatoes will blend into the sauce, adding a rich Mediterranean flavor.

    Adding Sweet Green Peas

    Frozen peas provide a pop of sweetness that complements the savory parmesan. Add the peas during the last two minutes of the pasta boiling process. Drain them along with the pasta for a seamless integration.

    Serving and Pairing Ideas

    Pairing with a Fresh Side Salad

    A light arugula salad with a simple balsamic vinaigrette balances the richness of the butter and cheese. The peppery notes of arugula contrast well with the sweet zucchini. Keep the dressing light to avoid overpowering the pasta.

    Serving with Garlic Bread

    Warm garlic bread is an ideal accompaniment for scooping up extra lemon butter sauce. Brush a baguette with garlic butter and toast it in the oven until golden. Serve the bread warm on the side of the pasta bowl.

    Choosing the Right Beverage

    A sparkling water with a squeeze of lime or a chilled non-alcoholic white grape spritzer pairs well. These drinks mirror the acidity of the lemon in the dish. The carbonation helps cleanse the palate between bites of creamy pasta.

    Storage and Reheating Guidance

    Proper Refrigeration Methods

    Store leftover pasta in an airtight glass or plastic container to keep it from drying out. Ensure the pasta has cooled slightly before sealing the lid to prevent excess condensation. The dish will remain fresh in the refrigerator for up to three days.

    Microwave Reheating Technique

    To reheat in the microwave, place the pasta in a microwave-safe bowl and cover it loosely with a damp paper towel. This creates a small amount of steam that prevents the noodles from becoming hard. Heat in 1-minute intervals, stirring in between.

    Stovetop Reheating for Best Texture

    For the best results, reheat the pasta in a skillet over medium heat. Add a tablespoon of water or a small knob of butter to loosen the sauce. Toss gently until the pasta is heated through to avoid breaking the noodles.

    Make-Ahead Strategy

    Prepping Zucchini and Aromatics

    You can cut the zucchini into half moons and mince the garlic and thyme a day in advance. Store them in separate containers or a prepped meal kit. This reduces the active cooking time to just the sautéing and boiling phases.

    Par-boiling the Pasta

    If you are serving a crowd, cook the pasta for two minutes less than the package instructions. Drain it and toss it with a small amount of olive oil to prevent sticking. Store it in the fridge and finish cooking it in the sauce right before serving.

    Pre-grating the Cheese

    Grate the parmesan cheese fresh and store it in a small airtight container. Pre-measured cheese allows for a faster workflow during the emulsion process. Freshly grated cheese melts more smoothly than pre-shredded store-bought versions.

    Troubleshooting Common Issues

    Fixing a Sauce That is Too Thin

    If the sauce is too watery, simmer it for another minute before adding the pasta to reduce the liquid. Alternatively, stir in an extra tablespoon of parmesan cheese. The cheese will act as a binder and thicken the sauce instantly.

    Correcting an Overly Tart Sauce

    If the lemon juice makes the dish too acidic, add a tiny pinch of sugar or a small amount of extra butter. The fat in the butter helps neutralize the sharp citrus notes. Balance the flavor by tasting the sauce before adding the pasta.

    Preventing Mushy Zucchini

    Mushy zucchini usually happens due to overcrowding the pan or stirring too much. Cook the zucchini in batches if your skillet is small. Ensure the oil is shimmering hot before adding the vegetables to guarantee an immediate sear.

    Frequently Asked Questions

    Can I use yellow squash instead of zucchini?

    Yes, yellow summer squash is a perfect substitute for zucchini. It has a very similar texture and a slightly milder flavor. You can even use a mix of both for a more colorful presentation.

    How do I toast pine nuts without burning them?

    Place pine nuts in a small skillet over medium-low heat. Stir them constantly for 3-5 minutes until they become fragrant and lightly golden. Remove them from the pan immediately, as they continue to cook from the residual heat.

    Can this recipe be made gluten-free?

    Yes, simply replace the bowtie pasta with your favorite gluten-free alternative. Brown rice pasta or corn-based pasta works well. Be mindful that gluten-free pasta has different starch levels, so adjust the reserved pasta water accordingly.

    What is a good substitute for fresh thyme?

    Fresh oregano or fresh basil are great alternatives if thyme is unavailable. Oregano provides a bolder, more savory flavor, while basil adds a sweet, peppery note. Add basil at the very end of cooking to preserve its delicate flavor.

    How do I prevent the parmesan from clumping?

    Stir the cheese into the sauce slowly and constantly. Ensure the sauce is simmering but not boiling violently when the cheese is added. Using finely grated parmesan helps the cheese melt more evenly into the emulsion.

    Print
    clock clock iconcutlery cutlery iconflag flag iconfolder folder iconinstagram instagram iconpinterest pinterest iconfacebook facebook iconprint print iconsquares squares iconheart heart iconheart solid heart solid icon
    Zesty Lemon and Zucchini Bowtie Pasta

    Zesty Lemon and Zucchini Bowtie Pasta


    5 Stars 4 Stars 3 Stars 2 Stars 1 Star

    No reviews

    • Author: Lisa
    • Total Time: 25 minutes
    • Yield: 4 servings 1x
    • Diet: Vegetarian

    Description

    This lemon zucchini pasta has adorable bowtie noodles and sweet zucchini, mixed with earthy garlic and fresh lemon for the perfect summertime supper!


    Ingredients

    Scale
    • 1 pound bowtie pasta
    • 2 tablespoons olive oil
    • 2 cups zucchini, cut into ¼ inch thick half moons
    • 2 cloves garlic, minced
    • 1 teaspoon fresh thyme, minced
    • ½ teaspoon crushed red pepper
    • 2 tablespoons butter
    • ½ lemon, juiced
    • ½ cup grated parmesan cheese
    • Fresh parsley, minced, for topping
    • Toasted pine nuts, for topping

    Instructions

    1. Step: Bring a large pot of very salty water to a boil. Cook the bowtie pasta until al dente, according to the package directions. Before draining, reserve 1 cup of starchy pasta water.
    2. Step: Heat a large skillet over medium-high heat and add the olive oil.
    3. Step: When the oil is hot, add the zucchini. Cook the zucchini for 2 minutes, then stir and cook for an additional 2 minutes.
    4. Step: Add the garlic, thyme, and red pepper flakes. Stir and cook for an additional minute.
    5. Step: Add the butter, lemon juice, and ¼ cup of reserved pasta water. Stir until the butter has melted.
    6. Step: Add ¼ cup of parmesan cheese and stir it into the sauce. Add the pasta and toss to combine. Season with salt and pepper, to taste.
    7. Step: If the sauce becomes too thin, add another splash of reserved pasta water.
    8. Step: Serve the pasta with the remaining grated parmesan, fresh chopped parsley, and toasted pine nuts.

    Notes

    Store leftovers in an airtight container in the fridge for up to three days. To reheat, microwave in a safe dish covered loosely with a damp paper towel for 2-3 minutes.

    • Prep Time: 10 minutes
    • Cook Time: 15 minutes
    • Category: Pasta
    • Method: Sautéing
    • Cuisine: American

    Nutrition

    • Serving Size: 1 serving
    • Calories: 603 kcal
    • Sugar: 5 g
    • Sodium: 280 mg
    • Fat: 18 g
    • Saturated Fat: 7 g
    • Unsaturated Fat: 10 g
    • Trans Fat: 0.2 g
    • Carbohydrates: 90 g
    • Fiber: 5 g
    • Protein: 20 g
    • Cholesterol: 26 mg
  • Quick and Savory Chicken Zucchini Stir Fry

    Quick and Savory Chicken Zucchini Stir Fry

    This quick Chicken Zucchini Stir Fry combines tender protein and fresh vegetables for a nutritious dinner. It is an ideal choice for busy weeknights due to its short cooking time and simple preparation.

    Recipe image

    List of ingredients

    • 1 lb boneless chicken thighs – cut into bite-sized pieces for even cooking.
    • 1 medium zucchini – sliced into half-moons.
    • 3 cloves garlic – smashed to release aromatic oils.
    • 1 teaspoon cornstarch – used to thicken the sauce and tenderize the meat.
    • 1/4 cup light soy sauce – provides the primary salty base.
    • 1 teaspoon sesame oil – adds a toasted, nutty aroma.
    • 2 teaspoons sugar or honey – balances the saltiness of the soy sauce.
    • 1 tablespoon rice apple vinegar (optional) – adds a subtle tanginess.
    • 1 tablespoon cooking oil – for searing the meat and vegetables.
    • 1 tablespoon oyster sauce – enhances the umami depth.
    • Ground black pepper (optional) – for a hint of spice.

    step-by-step instructions

    1. Marinate the chicken: Cut the chicken thighs into bite-sized pieces. In a mixing bowl, combine the chicken with cornstarch, light soy sauce, sesame oil, sugar or honey, and rice apple vinegar. Let it marinate for at least 30 minutes to ensure flavor penetration.
    2. Sear the chicken: Heat the cooking oil in a wok or large frying pan over medium-high heat. Sauté the smashed garlic until it becomes fragrant, then add the marinated chicken along with the leftover marinade. Stir-fry for about 2 minutes until the chicken is no longer translucent.
    3. Prepare the zucchini: Remove the cooked chicken from the pan and set it aside in a bowl. If the pan is too dry, add a small amount of oil, then add the sliced zucchini. Stir-fry for 5 minutes until the zucchini is tender but still retains a slight crunch.
    4. Combine and finish: Return the chicken to the pan with the zucchini. Add the oyster sauce and sprinkle with ground black pepper if desired. Stir-fry everything together for another 2-3 minutes until the chicken is fully cooked through.
    5. Serve: Remove the mixture from the heat immediately to prevent overcooking. Serve the stir fry hot over a bed of steamed rice or noodles.

    Pro Tips for the Best Stir Fry

    Ensure a Proper Marination Time

    Allowing the chicken to soak in the marinade for at least 30 minutes is crucial for texture. The cornstarch creates a protective barrier that keeps the meat juicy while the soy sauce penetrates deep into the fibers. This process ensures the chicken remains tender even under high heat.

    Maintain Consistent High Heat

    Stir-frying requires a hot pan to achieve the signature seared exterior without overcooking the interior. Use a wok or a heavy-bottomed stainless steel skillet to maintain a steady temperature. This prevents the vegetables from steaming in their own juices and keeps them crisp.

    Avoid Overcrowding the Cooking Surface

    Adding too many ingredients at once lowers the pan temperature and causes moisture to build up. If you are doubling the recipe, cook the chicken and zucchini in batches. This ensures each piece of meat is browned properly and the zucchini stays vibrant.

    Select Firm and Fresh Zucchini

    Choose zucchini that feels heavy for its size and has a firm skin without soft spots. Fresh zucchini holds its shape better during the rapid cooking process. Overripe zucchini tends to release more water, which can make the final sauce too thin.

    Ingredient Substitutions and Variations

    Use Chicken Breast for Leaner Protein

    While thighs are more flavorful, boneless skinless chicken breasts are a great lean alternative. To prevent breasts from drying out, ensure you do not overcook them during the final combination step. You may want to slice them slightly thicker to retain moisture.

    Integrate Additional Garden Vegetables

    You can easily add sliced bell peppers, broccoli florets, or julienned carrots to this dish. Add harder vegetables like carrots or broccoli a few minutes before the zucchini to account for their longer cooking time. This increases the nutrient density and visual appeal of the meal.

    Swap Sugar for Honey or Maple Syrup

    Honey provides a thicker consistency and a deeper flavor profile than granulated sugar. Maple syrup is another excellent alternative for a subtle earthiness. Adjust the amount slightly as liquid sweeteners can be more potent than dry sugar.

    Increase Heat with Chili Additions

    For a spicy kick, add a teaspoon of red pepper flakes or a drizzle of Sriracha during the final stir-fry stage. Freshly sliced Thai chilies can also be sautéed with the garlic for a more intense heat. Adjust the quantity based on your personal tolerance.

    Serving Suggestions

    Pair with Steamed Jasmine Rice

    Fluffy jasmine rice is the classic accompaniment for this stir fry. The neutral flavor of the rice absorbs the savory oyster and soy sauce perfectly. For a healthier option, you can substitute white rice with brown rice or quinoa.

    Toss with Rice or Egg Noodles

    Mixing the stir fry directly into cooked noodles creates a complete one-pan meal. Rice noodles offer a gluten-free option with a soft texture, while egg noodles provide more heartiness. Toss the noodles in the pan during the last minute of cooking to coat them in sauce.

    Wrap in Fresh Lettuce Leaves

    For a low-carb or keto-friendly version, serve the chicken and zucchini in large romaine or butter lettuce leaves. This adds a refreshing crunch and a cool contrast to the hot stir fry. It is an excellent way to make the meal feel lighter.

    Garnish with Toasted Sesame Seeds

    Sprinkling toasted sesame seeds on top adds a professional finish and a subtle nuttiness. The seeds provide a small amount of texture that complements the tenderness of the chicken. You can toast them quickly in a dry pan for one minute before serving.

    Side Pairings for Extra Balance

    A side of chilled cucumber salad with a rice vinegar dressing cuts through the richness of the sesame oil. Alternatively, a bowl of clear vegetable broth or egg drop soup provides a warming start to the meal. These sides add freshness and balance to the savory main dish.

    Storage and Reheating Methods

    Proper Refrigeration Guidelines

    Store any leftover stir fry in an airtight glass or plastic container. Keep it in the main body of the refrigerator, where it will remain fresh for up to 3 days. Ensure the food is cooled slightly before sealing to prevent excess condensation.

    Freezing for Long Term Storage

    This dish can be frozen for up to 2 months in freezer-safe bags or containers. While the zucchini may lose some of its crispness upon thawing, the chicken remains flavorful. Squeeze out any excess air from the bags to prevent freezer burn.

    Quick Microwave Reheating

    Heat the leftovers on medium power in short 1-minute intervals. Stir the mixture between intervals to ensure the heat is distributed evenly. Adding a teaspoon of water before heating helps recreate the sauce’s original consistency.

    Stovetop Reheating for Better Texture

    For the best results, reheat the stir fry in a pan over medium heat. Add a splash of water or a teaspoon of oil to prevent sticking. Toss frequently until the chicken is heated through and the sauce begins to bubble.

    Oven Reheating Instructions

    Preheat your oven to 350°F (175°C) and place the stir fry in a baking dish. Cover the dish tightly with aluminum foil to trap the moisture. Heat for 15 to 20 minutes, or until the center is hot to the touch.

    Troubleshooting Common Issues

    Preventing Mushy Zucchini

    Zucchini has a high water content and can become mushy if overcooked. Stir-fry the zucchini only until it is tender-crisp and remove it or combine it with the meat quickly. Avoid covering the pan during the vegetable stage as this traps steam.

    Managing a Too-Thin Sauce

    If the sauce is too watery, you can mix a small amount of cornstarch with cold water to create a slurry. Stir this into the pan during the final 2 minutes of cooking. This will thicken the sauce and help it cling to the ingredients.

    Stopping Garlic from Burning

    Garlic burns quickly at high temperatures, which can introduce a bitter taste to the dish. Sauté the garlic just until it becomes fragrant, usually about 30 seconds. Immediately add the chicken and marinade to lower the pan’s surface temperature.

    Correcting Bland Meat

    If the chicken tastes bland, it is likely due to a lack of marination time or insufficient soy sauce. You can fix this by adding an extra splash of soy sauce or a pinch of salt during the final stir-fry stage. Always taste the sauce before the final plating.

    Frequently Asked Questions

    Which cut of chicken is best for this recipe?

    Boneless chicken thighs are recommended because they remain moist and tender under high heat. Chicken breasts can be used but are more prone to drying out if overcooked. If using breasts, keep the cooking time slightly shorter.

    Can I use other vegetables in the stir fry?

    Yes, this recipe is very flexible. Bell peppers, snap peas, broccoli, and carrots all work well. Just be sure to add the denser vegetables first so everything finishes cooking at the same time.

    How can I make this stir fry spicier?

    The easiest way to add heat is by adding red pepper flakes, sriracha, or chili garlic sauce. For a fresh heat, add sliced bird’s eye chilies to the pan when you sauté the garlic. Adjust the amount to suit your spice preference.

    Is this a healthy meal option?

    Yes, this dish is packed with lean protein from the chicken and essential vitamins from the zucchini. It is relatively low in calories and can be made even healthier by serving it with brown rice or cauliflower rice.

    Print
    clock clock iconcutlery cutlery iconflag flag iconfolder folder iconinstagram instagram iconpinterest pinterest iconfacebook facebook iconprint print iconsquares squares iconheart heart iconheart solid heart solid icon
    Quick and Savory Chicken Zucchini Stir Fry

    Quick and Savory Chicken Zucchini Stir Fry


    5 Stars 4 Stars 3 Stars 2 Stars 1 Star

    No reviews

    • Author: Lisa
    • Total Time: 40 minutes
    • Yield: 4 servings 1x
    • Diet: General

    Description

    Discover the vibrant flavors of this Chicken Zucchini Stir Fry, a quick and nutritious dish that will elevate your weeknight dinners. Combining tender chicken with fresh zucchini in a savory marinade, this delightful stir fry is not only easy to prepare but also packed with protein and essential nutrients.


    Ingredients

    Scale
    • 1 lb boneless chicken thighs
    • 1 medium zucchini
    • 3 cloves garlic
    • 1 teaspoon cornstarch
    • 1/4 cup light soy sauce
    • 1 teaspoon sesame oil
    • 2 teaspoons sugar or honey
    • 1 tablespoon rice apple vinegar
    • 1 tablespoon cooking oil
    • 1 tablespoon oyster sauce
    • Ground black pepper

    Instructions

    1. Step 1: Cut chicken into bite-sized pieces and marinate with cornstarch, soy sauce, sesame oil, sugar (or honey), and rice apple vinegar for at least 30 minutes.
    2. Step 2: Heat oil in a wok over medium-high heat. Sauté smashed garlic until fragrant, then add marinated chicken and cook for about 2 minutes.
    3. Step 3: Remove chicken from pan; add sliced zucchini and stir-fry for 5 minutes until tender.
    4. Step 4: Combine chicken with zucchini, add oyster sauce and pepper if desired, stir-frying for another 2-3 minutes until fully cooked.
    5. Step 5: Serve hot over rice or noodles.

    Notes

    Allowing the chicken to marinate for at least 30 minutes ensures it absorbs all the flavors. Use medium-high heat to keep the zucchini crisp-tender.

    • Prep Time: 30 minutes
    • Cook Time: 10 minutes
    • Category: Dinner
    • Method: Stir Fry
    • Cuisine: Asian

    Nutrition

    • Serving Size: 1 cup (210g)
    • Calories: 290 kcal
    • Sugar: 6 g
    • Sodium: 800 mg
    • Fat: 10 g
    • Saturated Fat: 2 g
    • Unsaturated Fat: 7 g
    • Trans Fat: 0 g
    • Carbohydrates: 12 g
    • Fiber: 2 g
    • Protein: 38 g
    • Cholesterol: 150 mg
  • Grilled Zucchini and Crispy Chickpea Salad with Burrata

    Grilled Zucchini and Crispy Chickpea Salad with Burrata

    This vibrant Mediterranean-style salad combines smoky grilled zucchini and crispy seasoned chickpeas. Topped with creamy burrata and a spicy chili oil drizzle, it is a nutrient-dense meal that comes together quickly.

    Recipe image

    List of ingredients

    • 1 ball burrata cheese – provides a creamy center.
    • 2 tablespoons fresh mint, chopped – adds a refreshing cooling element.
    • 1 tablespoon red wine vinegar – provides a sharp, tangy base.
    • 2 medium zucchinis, sliced into 1/4-inch rounds – for a smoky, grilled base.
    • 1 tablespoon lemon juice – brightens the overall flavor.
    • 1 can (15 oz) chickpeas, rinsed and drained – for protein and texture.
    • 1 teaspoon smoked paprika – adds depth and a wood-fired taste.
    • 1 clove garlic, finely chopped – provides aromatic savory notes.
    • 2 tablespoons olive oil, divided – used for grilling and sautéing.
    • Salt and pepper, to taste – essential for seasoning.
    • 1/4 cup chopped fresh parsley – adds color and earthy freshness.
    • Chili oil, for drizzling – adds a spicy finish.

    step-by-step instructions

    1. Grill the zucchini: Toss the zucchini rounds with 1 tablespoon of olive oil, salt, and pepper. Grill for 2–3 minutes per side until they are tender and have visible char marks, then set them aside.
    2. Sauté the chickpeas: Heat 1 tablespoon of olive oil in a skillet over medium-high heat. Add the rinsed chickpeas, smoked paprika, garlic, and salt, cooking for 6–8 minutes until they become golden and crispy.
    3. Prepare the herb dressing: In a small mixing bowl, stir together the chopped parsley, fresh mint, lemon juice, and red wine vinegar. Set this dressing aside to let the flavors meld.
    4. Layer the base: Arrange the grilled zucchini and sautéed chickpeas on a large serving plate. Drizzle the prepared herb dressing evenly over the top of the vegetables.
    5. Add the final touches: Place the burrata ball in the center of the salad. Drizzle the chili oil generously over the cheese and vegetables, then sprinkle with extra salt and pepper.
    6. Serve: Serve the salad immediately while the zucchini and chickpeas are still warm, allowing the burrata to soften.

    Cooking Techniques for Optimal Texture

    Achieving a Perfect Char on Zucchini

    Preheat your grill or grill pan to medium-high heat before adding the vegetables. Avoid overcrowding the grate to ensure the zucchini sears rather than steams. Grill each side for roughly 3 minutes without moving them too often to achieve distinct grill marks.

    Ensuring Chickpeas are Crispy

    Pat the canned chickpeas completely dry with a paper towel after rinsing them. This removes excess moisture that would otherwise prevent them from browning in the pan. Sauté them undisturbed for a few minutes to develop a firm, golden crust.

    Handling Burrata Gently

    Keep the burrata chilled until just before assembly to maintain its structural integrity. Carefully place it on top of the warm vegetables to allow the outer shell to soften while the creamy center remains cool. Use a knife to gently break the center open just before serving.

    Emulsifying the Herb Dressing

    Whisk the lemon juice and red wine vinegar together before adding the chopped herbs. This ensures the acidity is evenly distributed. Stir in the mint and parsley at the end to prevent the herbs from bruising or losing their bright green color.

    Ingredient Substitutions

    Using Fresh Mozzarella Instead of Burrata

    If burrata is unavailable, use a ball of fresh mozzarella or buffalo mozzarella. While mozzarella is less creamy than burrata, it provides a similar mild flavor and chewy texture. Tear the cheese into chunks rather than slicing it for a more rustic look.

    Replacing Zucchini with Yellow Squash

    Yellow summer squash can be used as a direct replacement for zucchini. It has a very similar texture and flavor profile but adds a bright yellow hue to the plate. Use the same 1/4-inch thickness for consistent grilling results.

    Substituting Red Wine Vinegar with Balsamic

    Balsamic vinegar can be used for a sweeter, richer flavor profile. Since balsamic is denser and sweeter than red wine vinegar, you may want to slightly reduce the amount of salt used in the dressing. This pairs exceptionally well with the smoked paprika.

    Alternative Herbs for Mint and Parsley

    Fresh basil or cilantro can be used if mint or parsley are not available. Basil adds a peppery sweetness that complements the burrata, while cilantro provides a brighter, citrusy note. Adjust the quantities to match the original herb measurements.

    Vegan and Dairy-Free Options

    Replace the burrata with a large scoop of seasoned avocado or a high-quality vegan cream cheese. Avocado provides the necessary creaminess and healthy fats to balance the acidity of the dressing. Ensure the vegan cheese is heated slightly to mimic the melting burrata.

    Customizing the Flavor Profile

    Adding Supplemental Vegetables

    Roasted red bell peppers or blistered cherry tomatoes can be added to the base. Sauté the tomatoes in the same pan as the chickpeas for the last 2 minutes of cooking. This adds a burst of juicy sweetness and extra vitamins to the dish.

    Incorporating Extra Proteins

    Grilled chicken strips or sautéed shrimp are excellent additions for a heartier meal. Season the protein with the same smoked paprika and garlic used for the chickpeas. Place them on the plate alongside the zucchini before adding the cheese.

    Transforming the Salad into a Grain Bowl

    Mix in one cup of cooked quinoa, farro, or couscous to create a more filling lunch. The grains will absorb the herb dressing and the melted burrata, creating a cohesive texture. This is an ideal way to turn a side salad into a main course.

    Increasing the Heat Level

    For those who prefer more spice, add diced fresh jalapeños or a pinch of red pepper flakes to the chickpea sauté. You can also increase the amount of chili oil used for the final drizzle. Balance the extra heat with a bit more fresh mint.

    Storage and Preparation Advice

    Prepping Components for Weeknight Meals

    You can grill the zucchini and sauté the chickpeas up to two days in advance. Store them in separate airtight containers in the refrigerator. Reheat them quickly in a pan before assembly to restore their texture.

    Storing Leftover Salad

    Store any remaining salad in an airtight container for up to 48 hours. Keep the burrata separate if you have not yet added it to the salad. Once the cheese is mixed in, the salad should be consumed within 24 hours.

    Reheating Grilled Zucchini

    To avoid the zucchini becoming mushy, reheat it in a skillet over medium heat for 2 minutes. Avoid using the microwave, as it can make the vegetables rubbery. A quick sear in a pan restores the charred exterior.

    Managing the Freshness of the Dressing

    Prepare the herb dressing in a small jar and keep it refrigerated until the moment of assembly. This prevents the lemon juice from breaking down the herbs too quickly. Shake the jar well before drizzling to redistribute the oils and acids.

    Serving and Presentation Ideas

    Selecting the Right Serving Platter

    Use a wide, flat ceramic platter or a rustic wooden board for the best presentation. Arrange the zucchini in a circular pattern to create a nest for the chickpeas and burrata. This ensures every guest gets a bit of every component.

    Pairing with Crusty Garlic Bread

    Serve the salad with toasted sourdough or a baguette rubbed with garlic and olive oil. The bread is perfect for scooping up the melted burrata and the remnants of the chili oil. Warm the bread in the oven just before serving.

    Choosing the Best Beverage Pairings

    A chilled sparkling water with a slice of lime complements the acidity of the dressing. For a more formal setting, a crisp white wine or a non-alcoholic sparkling cider works well. The bubbles help cleanse the palate between the creamy cheese and spicy oil.

    Professional Garnish Suggestions

    Add a few whole mint leaves and a sprinkle of toasted pine nuts on top for added crunch. A final crack of fresh black pepper over the burrata creates a visually appealing contrast. Use a squeeze bottle for the chili oil to create precise patterns.

    Troubleshooting Common Issues

    Preventing Watery Zucchini

    Zucchini has a high water content and can release liquid when grilled. To prevent a watery salad, ensure the grill is very hot to sear the outside quickly. Pat the slices dry with a paper towel after grilling if they seem too moist.

    Fixing an Overly Acidic Dressing

    If the red wine vinegar and lemon juice make the dressing too sharp, add a small pinch of sugar or a drop of maple syrup. This balances the acidity without making the dressing taste sweet. Stir well and taste before adding it to the salad.

    Avoiding Burnt Garlic

    Garlic burns quickly and can become bitter if added too early to the skillet. Add the chopped garlic to the chickpeas during the last 2 minutes of sautéing. This allows the garlic to soften and fragrance the oil without scorching.

    Managing Chili Oil Intensity

    Chili oil varies in spice level depending on the brand. Start with a small drizzle and taste the salad before adding more. If the oil is too spicy, add an extra dollop of burrata to neutralize the heat.

    Frequently Asked Questions

    Can I prepare this salad in advance?

    Yes, you can grill the zucchini and sauté the chickpeas ahead of time. Store them in the fridge and assemble the salad with fresh burrata and dressing just before serving to maintain the best texture.

    What is the best way to drain canned chickpeas?

    Pour the chickpeas into a colander and rinse them thoroughly under cold running water. Use a clean kitchen towel to pat them completely dry to ensure they get crispy when sautéed.

    Does this recipe work with a grill pan?

    Yes, a cast-iron grill pan is an excellent substitute for an outdoor grill. Heat the pan until it is smoking slightly before adding the oiled zucchini to get professional char marks.

    Is this salad naturally gluten-free?

    Yes, all the ingredients used in this recipe are naturally gluten-free. It is a safe and healthy option for those with gluten sensitivities or celiac disease.

    Can I use dried herbs instead of fresh?

    You can use dried mint and parsley, but reduce the quantity to one-third of the fresh amount. Be aware that the flavor will be less vibrant, and the visual appeal of the dressing will change.

    Print
    clock clock iconcutlery cutlery iconflag flag iconfolder folder iconinstagram instagram iconpinterest pinterest iconfacebook facebook iconprint print iconsquares squares iconheart heart iconheart solid heart solid icon
    Grilled Zucchini and Crispy Chickpea Salad with Burrata

    Grilled Zucchini and Crispy Chickpea Salad with Burrata


    5 Stars 4 Stars 3 Stars 2 Stars 1 Star

    No reviews

    • Author: Lisa
    • Total Time: 25 minutes
    • Yield: 4 servings 1x
    • Diet: Vegetarian

    Description

    A delicious and vibrant Grilled Zucchini Chickpea Salad topped with creamy burrata and a drizzle of chili oil, perfect for a healthy meal.


    Ingredients

    Scale
    • 1 ball burrata cheese
    • 2 tablespoons fresh mint, chopped
    • 1 tablespoon red wine vinegar
    • 2 medium zucchinis, sliced into 1/4-inch rounds
    • 1 tablespoon lemon juice
    • 1 can (15 oz) chickpeas, rinsed and drained
    • 1 teaspoon smoked paprika
    • 1 clove garlic, finely chopped
    • 2 tablespoons olive oil, divided
    • Salt and pepper, to taste
    • 1/4 cup chopped fresh parsley
    • Chili oil, for drizzling

    Instructions

    1. Step 1: Toss zucchini with 1 tbsp olive oil, salt, and pepper. Grill 2–3 minutes per side until tender and charred. Set aside.
    2. Step 2: Heat 1 tbsp olive oil in a skillet. Add chickpeas, paprika, garlic, salt, and cook for 6–8 minutes until crispy. Set aside.
    3. Step 3: Stir parsley, mint, lemon juice, and vinegar in a small bowl. Set aside.
    4. Step 4: Arrange zucchini and chickpeas on a large plate. Drizzle the herb dressing evenly over the top.
    5. Step 5: Place burrata in the center. Drizzle generously with chili oil. Sprinkle with extra salt and pepper.
    6. Step 6: Serve right away while warm, letting the burrata soften into the salad.

    Notes

    This salad can be served warm or at room temperature. Feel free to add other vegetables, such as bell peppers or cherry tomatoes, for extra color and nutrition. The salad can be made ahead of time, just add the burrata and chili oil just before serving.

    • Prep Time: 15 minutes
    • Cook Time: 10 minutes
    • Category: Salad
    • Method: Grilling and Sautéing
    • Cuisine: Mediterranean

    Nutrition

    • Serving Size: 1 serving
    • Calories: 250 kcal
    • Sugar: 2 g
    • Sodium: 400 mg
    • Fat: 15 g
    • Saturated Fat: 5 g
    • Unsaturated Fat: 8 g
    • Trans Fat: 0 g
    • Carbohydrates: 24 g
    • Fiber: 6 g
    • Protein: 9 g
    • Cholesterol: 15 mg
  • Butterscotch Zucchini Bars

    Butterscotch Zucchini Bars

    These butterscotch zucchini bars are moist, sweet treats that blend the richness of butterscotch with the hidden texture of fresh zucchini. They offer a flavor profile similar to a blondie and are an ideal way to utilize a garden surplus of summer squash.

    Recipe image

    List of ingredients

    • 1 cup (227g) butter, room temperature – provides the necessary fat for a tender crumb.
    • 1 3/4 cup (350g) brown sugar, packed – adds deep sweetness and a moist texture.
    • 2 large eggs, room temperature – binds the batter and provides structure.
    • 1 teaspoon vanilla – enhances the overall flavor profile of the bars.
    • 2 cups (250g) all-purpose flour – the primary structural component.
    • 1 teaspoon baking powder – helps the bars rise slightly during baking.
    • 1/4 teaspoon salt – balances the sweetness of the brown sugar and chips.
    • 1 1/2 cups finely grated and drained zucchini, packed – adds moisture and a soft texture.
    • 1 1/2 cups butterscotch morsels – provides the signature butterscotch sweetness.

    step-by-step instructions

    1. Prepare Oven and Pan: Preheat your oven to 350°F. Grease a 9×13 inch baking pan with non-stick cooking spray or use the butter and flour method to prevent sticking.
    2. Cream Butter and Sugar: Place the room temperature butter and packed brown sugar in a large mixing bowl. Use a handheld electric mixer to cream them together until the mixture becomes lighter in color and fluffier in texture.
    3. Mix in Wet Ingredients: Add the eggs and vanilla to the creamed butter mixture. Mix on medium speed for 1 to 2 minutes until fully combined, scraping down the sides of the bowl as needed.
    4. Combine Dry Ingredients: Add the all-purpose flour, baking powder, and salt to the bowl. Mix on medium-low speed just until the flour is incorporated; do not overmix.
    5. Fold in Zucchini: Incorporate the grated and drained zucchini on low speed. The resulting batter should be runny; if it appears too dry, let it sit for 5 minutes to allow the zucchini to release its moisture.
    6. Stir in Chips: Use a spatula to stir in 1 cup of the butterscotch morsels by hand.
    7. Fill and Top: Pour the batter evenly into the prepared 9×13 pan. Sprinkle the remaining 1/2 cup of butterscotch morsels over the surface.
    8. Bake and Test: Bake for 40 minutes. To check for doneness, insert a toothpick into the center; it should come out with a few crumbs attached but no wet batter. The top and edges should appear dark brown.

    Zucchini Preparation Guidelines

    Using a Fine Grate for Seamless Texture

    When preparing the zucchini, use the smallest holes on your box grater. A fine grate ensures that the vegetable blends into the batter and doesn’t leave large, noticeable chunks. This allows the zucchini to provide moisture without altering the smooth consistency of the bar.

    Draining the Zucchini Properly

    After grating, lightly drain the zucchini to remove excess water. You want the zucchini to release its juices during the baking process, but too much free-standing water in the raw state can make the batter too thin. Avoid squeezing it completely dry with a towel unless the zucchini is exceptionally watery.

    Selecting the Right Zucchini Size

    Medium to small zucchini are generally preferred for this recipe because they contain more moisture and have fewer tough fibers. Larger zucchinis tend to be drier and have larger seeds, which can affect the texture of the final dessert. If using a large zucchini, be sure to scoop out the center seeds before grating.

    Pro Baking Tips for Success

    Maintaining Room Temperature Ingredients

    Ensure that both the butter and the eggs are at room temperature before you begin mixing. Cold eggs can cause the creamed butter to seize or break, resulting in a grainy batter. If you forget to take them out, place the eggs in a bowl of warm water for several minutes.

    Avoiding Overmixing the Flour

    Once the flour, baking powder, and salt are added, mix only until the streaks of white disappear. Overmixing develops too much gluten in the flour, which can lead to a tough or rubbery bar. A gentle mix on medium-low speed is sufficient for the best crumb.

    Identifying the Correct Bake Level

    Do not be alarmed if the edges and top of the bars look dark brown upon removal from the oven. This caramelization is a natural result of the high brown sugar content and contributes to the rich flavor. Use a toothpick to verify that the center is set without being overcooked.

    Ingredient Substitutions

    Alternative Flour Options

    For a gluten-free version, replace the all-purpose flour with a 1:1 gluten-free baking blend that contains xanthan gum. Ensure the blend is specifically designed for baking to maintain the structure of the bar. You may need to add an extra tablespoon of moisture if the batter seems too thick.

    Substituting Brown Sugar

    If you do not have brown sugar, you can use granulated white sugar mixed with a tablespoon of molasses. This mimics the moisture and deep flavor of brown sugar. Alternatively, coconut sugar can be used for a slightly more earthy, caramel-like taste.

    Butter Alternatives

    Unsalted butter is standard, but salted butter can be used if you reduce the added salt by a pinch. For a different flavor profile, some bakers use a high-quality plant-based butter substitute. Ensure the substitute has a high fat content to keep the bars moist.

    Flavor Variations and Add-ins

    Swapping Butterscotch Morsels

    While butterscotch is the highlight, you can replace the morsels with semi-sweet chocolate chips or white chocolate chips. Peanut butter chips also pair exceptionally well with the moisture provided by the zucchini. You can even use a mix of two different types of chips for added complexity.

    Adding Texture with Nuts

    Adding 1/2 cup of chopped walnuts or pecans provides a satisfying crunch that contrasts with the soft texture of the bar. Fold the nuts in at the same time as the butterscotch morsels. Toasted nuts offer a deeper flavor than raw ones.

    Incorporating Dried Fruits

    Dried cranberries or golden raisins add a tart contrast to the sweet butterscotch. Use about 1/2 cup of dried fruit and fold them into the batter before pouring into the pan. Ensure the fruit is chopped into small pieces so they distribute evenly.

    Serving and Presentation

    Creating a Butterscotch Drizzle

    For a professional finish, melt 1/4 cup of butterscotch morsels with a small teaspoon of butter in the microwave. Stir until smooth and drizzle the glaze over the cooled bars in a zig-zag pattern. This adds an extra layer of sweetness and visual appeal.

    Achieving Clean Slices

    Allow the bars to cool completely in the pan before attempting to cut them. Using a sharp chef’s knife and wiping the blade clean between cuts ensures clean, sharp edges. Cutting them while warm can cause the bars to squish or crumble.

    Suggested Beverage Pairings

    These rich bars pair perfectly with a cold glass of milk or a hot cup of black coffee. The bitterness of coffee cuts through the sweetness of the butterscotch and brown sugar. A light herbal tea is also a great option for a lighter pairing.

    Storage and Preservation

    Storing at Room Temperature

    Keep the bars in an airtight container at room temperature for up to three days. Ensure they are completely cool before sealing the container to prevent condensation. Store them in a cool, dry place away from direct sunlight.

    Refrigeration for Freshness

    For longer storage, keep the bars in the refrigerator for up to one week. Refrigeration helps maintain the moisture of the zucchini and keeps the bars firm. You can serve them chilled for a denser, fudgy consistency.

    Freezing Instructions

    These bars freeze exceptionally well for up to three months. Wrap individual squares in parchment paper and place them in a freezer-safe bag. Thaw them in the refrigerator overnight or at room temperature for two hours before serving.

    Reheating Methods

    Quick Microwave Reheating

    To get the butterscotch morsels melty again, heat a single square in the microwave for 10 to 15 seconds. Be careful not to overheat, as the sugar content can cause the bars to become too soft or burn quickly. Serve immediately while warm.

    Oven Reheating for Crisp Edges

    Place the bars on a baking sheet and heat them in a 300°F oven for about 5 minutes. This method warms the center while slightly crisping the outer edges. This is ideal if you prefer the texture of a freshly baked bar.

    Troubleshooting Common Issues

    What to Do if the Batter is Too Dry

    If the batter appears thick or dry after adding the zucchini, let it rest for 5 to 10 minutes. The salt and sugar will draw more moisture out of the grated zucchini, naturally thinning the batter. Avoid adding extra liquid, as this can interfere with the baking time.

    Handling Gooey or Underbaked Centers

    If the center remains too gooey after the suggested baking time, bake for an additional 5 minutes. Ensure your oven is properly calibrated to 350°F. Remember that the bars will continue to set as they cool in the pan.

    Managing Large Zucchini Pieces

    If you notice large pieces of zucchini in your finished bars, it means the grate was too coarse. For the next batch, ensure you use the finest side of the grater. You can also pulse the grated zucchini in a food processor briefly for a more uniform consistency.

    Frequently Asked Questions

    Can I use frozen zucchini in this recipe?

    Yes, you can use frozen zucchini, but it must be completely thawed and very well drained. Frozen zucchini releases significantly more water than fresh zucchini, so you may need to squeeze it more firmly with a towel to avoid making the batter too runny.

    How can I tell if my butter is at the correct room temperature?

    The butter should be soft enough that your finger leaves an indentation when pressed, but it should not be greasy or melting. If the butter is too soft, the creamed mixture will not hold as much air, and the bars may be flatter.

    Can I use a different pan size?

    You can use a 9×9 inch square pan, but you will need to increase the baking time by 10 to 15 minutes because the batter will be thicker. Use a toothpick to check for doneness frequently toward the end of the baking process.

    Print
    clock clock iconcutlery cutlery iconflag flag iconfolder folder iconinstagram instagram iconpinterest pinterest iconfacebook facebook iconprint print iconsquares squares iconheart heart iconheart solid heart solid icon
    Butterscotch Zucchini Bars

    Butterscotch Zucchini Bars


    5 Stars 4 Stars 3 Stars 2 Stars 1 Star

    No reviews

    • Author: Lisa
    • Total Time: 50 minutes
    • Yield: 24 servings 1x
    • Diet: General

    Description

    Ever had a blondie? This one tastes AMAZING but just happens to be loaded with zucchini!


    Ingredients

    Scale
    • 1 cup (227g) butter, room temperature
    • 1 3/4 cup (350g) brown sugar, packed
    • 2 large eggs, room temperature
    • 1 teaspoon vanilla
    • 2 cups (250g) all-purpose flour
    • 1 teaspoon baking powder
    • 1/4 teaspoon salt
    • 1 1/2 cup finely grated and drained zucchini, packed
    • 1 1/2 cups butterscotch morsels

    Instructions

    1. Step 1: Preheat oven to 350°F. Spray a 9×13 pan with non-stick spray or use the butter & flour method.
    2. Step 2: In a large bowl add the butter and brown sugar. Using a hand-held mixer, cream them together until they are lighter and fluffier.
    3. Step 3: Add the eggs and vanilla to the butter mixture and mix until fully combined, 1-2 minutes. Scrape down the bowl as needed.
    4. Step 4: Add the flour, baking powder, and salt to the bowl and mix on medium-low until just combined.
    5. Step 5: Add in the zucchini and mix on low. It should be a runny mixture. If it appears dry at all, let it sit for 5 minutes.
    6. Step 6: Add in 1 cup of butterscotch morsels and stir with a spatula.
    7. Step 7: Pour the batter into the prepared pan and then top with remaining butterscotch morsels.
    8. Step 8: Bake for 40 minutes and check for doneness. An inserted toothpick should be removed with a few crumbs on it, but not wet batter. It should appear dark on top and the edges.

    Notes

    Use the fine side of the grater for the zucchini to ensure a smoother texture. Ensure eggs and butter are at room temperature for a more evenly textured batter.

    • Prep Time: 10 minutes
    • Cook Time: 40 minutes
    • Category: Dessert
    • Method: Baking
    • Cuisine: American

    Nutrition

    • Serving Size: 1 bar
    • Calories: 253 kcal
    • Sugar: 22 g
    • Sodium: 160 mg
    • Fat: 13 g
    • Saturated Fat: 7 g
    • Unsaturated Fat: 6 g
    • Trans Fat: 0 g
    • Carbohydrates: 34 g
    • Fiber: 1 g
    • Protein: 3 g
    • Cholesterol: 55 mg
  • Healthy Double Chocolate Zucchini Protein Muffins

    Healthy Double Chocolate Zucchini Protein Muffins

    These nutrient-dense chocolate zucchini muffins offer a fudgy texture and a rich chocolate flavor while incorporating hidden vegetables. They are entirely gluten-free and refined sugar-free, making them a perfect high-protein breakfast or snack option.

    Recipe image

    List of ingredients

    • 1 + 1/4 cup blanched almond flour – provides a moist base and healthy fats.
    • 1/3 cup unsweetened cocoa powder – for a deep, rich chocolate taste.
    • 1 teaspoon baking soda – the primary leavening agent for lift.
    • 1/2 teaspoon kosher salt – balances the sweetness and enhances chocolate.
    • 1 large egg – lightly whisked to bind the batter together.
    • 1/3 cup maple syrup – a natural sweetener for a caramel-like depth.
    • 1/4 cup unsweetened applesauce – adds moisture and natural sweetness.
    • 1/4 cup creamy almond butter – adds protein and a smooth texture.
    • 1/4 cup non-dairy milk – almond or coconut milk works best.
    • 1 tablespoon olive oil or coconut oil – ensures the muffins stay tender.
    • 1 teaspoon vanilla extract – enhances the overall flavor profile.
    • 1 cup shredded zucchini – with all extra water squeezed out.
    • 2/3 cup chocolate chips – plus extra for topping the muffins.

    step-by-step instructions

    1. Prepare Oven and Pan: Preheat your oven to 400°F and line a 12-cup muffin pan with paper liners to prevent sticking.
    2. Process Zucchini: Shred the zucchini using a box grater. Place the shreds into a clean kitchen towel and wring them out firmly to remove excess moisture.
    3. Combine Dry Ingredients: In a medium mixing bowl, whisk together the blanched almond flour, unsweetened cocoa powder, baking soda, and kosher salt.
    4. Mix Wet Ingredients: In a separate bowl, combine the whisked egg, maple syrup, unsweetened applesauce, almond butter, non-dairy milk, olive oil, and vanilla extract.
    5. Create Batter: Pour the wet ingredients into the dry ingredients and mix until well combined. Gently fold in the squeezed shredded zucchini and chocolate chips.
    6. Fill and Bake: Evenly distribute the batter into the 12 muffin liners. Bake at 400°F for 22-25 minutes, or until a toothpick inserted in the center comes out mostly clean.
    7. Cool and Serve: Remove the pan from the oven and let the muffins cool in the pan for about 15-20 minutes before serving.

    Optimal Preparation Techniques

    Removing Excess Moisture from Zucchini

    Zucchini has a very high water content which can make gluten-free batters too thin. By using a kitchen towel to squeeze the shreds, you ensure the muffins maintain a fudgy consistency rather than becoming soggy. This step is critical for achieving the correct rise and crumb structure.

    Measuring Almond Flour Correctly

    Almond flour can easily clump or pack down in a measuring cup, leading to too much flour in the recipe. To avoid this, fluff the flour with a spoon before scooping it into the measuring cup and leveling it off with a knife. For the most accurate results, using a digital kitchen scale is recommended.

    Selecting the Right Cocoa Powder

    For a deeper, more intense chocolate flavor, use a high-quality unsweetened Dutch-processed cocoa powder. Dutch-processed cocoa is treated with an alkalizing agent that reduces acidity and creates a darker color. This pairs well with the almond flour to create a decadent, brownie-like appearance.

    Ingredient Substitutions and Variations

    Replacing Almond Flour with Coconut Flour

    While you can use coconut flour, it is much more absorbent than almond flour and cannot be swapped 1:1. If you choose coconut flour, you will likely need to increase the amount of liquid and eggs significantly. A general rule is to use about one-fourth the amount of coconut flour compared to almond flour.

    Using Honey as a Sweetener

    Honey is a viable alternative to maple syrup and provides a similar level of sweetness. Note that honey has a stronger distinct flavor and is slightly thicker than maple syrup. You may need to warm the honey slightly to ensure it incorporates smoothly into the wet ingredients.

    Nut-Free Butter Alternatives

    If you need to avoid almond butter, sunflower seed butter or tahini are excellent substitutes. Sunflower seed butter maintains a similar creamy texture and protein content. Tahini adds a slightly nuttier, more savory note that complements the dark chocolate well.

    Dairy-Free Milk Options

    Any unsweetened non-dairy milk will work for this recipe, including soy, oat, or cashew milk. Coconut milk provides the creamiest result due to its higher fat content. Almond milk offers a lighter profile that allows the cocoa powder to stand out more.

    Baking and Texture Mastery

    Avoiding Overfilled Muffin Tins

    Overfilling muffin cups can lead to muffins that spill over the edges or fail to cook evenly in the center. Using a medium-sized ice cream scoop ensures an equal distribution of batter across all 12 cavities. Fill each cup about three-quarters full to allow room for the baking soda to lift the batter.

    Determining Exact Doneness

    Because these muffins are fudgy and contain zucchini, the toothpick test can be tricky. Look for a toothpick that comes out with a few moist crumbs attached rather than completely dry. Overbaking gluten-free muffins can lead to a dry, crumbly texture that loses the decadent feel.

    The Importance of the Cooling Phase

    Allowing the muffins to cool for 15-20 minutes in the pan is essential for the internal structure to set. If you remove them too early, they may collapse or stick to the paper liners. This resting period allows the moisture to redistribute, ensuring a consistent texture throughout.

    Storage and Longevity Advice

    Room Temperature Storage

    Store these muffins in an airtight container at room temperature for up to three days. Ensure they are completely cooled before sealing the container to prevent condensation from making them soggy. Keep the container in a cool, dry place away from direct sunlight.

    Freezing for Long Term Use

    These muffins freeze exceptionally well for up to one month. Place them in a single layer on a baking sheet to freeze individually before transferring them to a freezer-safe bag. This prevents them from clumping together and allows you to remove only what you need.

    Effective Reheating Methods

    To reheat a frozen muffin, thaw it in the refrigerator overnight or microwave it for 20-30 seconds. For a fresher taste, warm the muffin in a 300°F oven for 5-8 minutes. This restores the softness of the almond butter and melts the chocolate chips perfectly.

    Troubleshooting Common Issues

    Solving Soggy Texture

    If your muffins turned out too wet, it is likely because the zucchini was not squeezed sufficiently. Next time, ensure you wring the zucchini until no more water drips from the towel. You can also slightly increase the baking time by 2-3 minutes if your oven runs cool.

    Preventing Dry Muffins

    Dryness in gluten-free baking often results from overbaking or using too much flour. Check the muffins at the 22-minute mark to prevent them from drying out. If they feel too dry, try adding an extra tablespoon of non-dairy milk to the wet ingredients in your next batch.

    Fixing Lack of Rise

    If the muffins are too flat, your baking soda may be expired or the oven temperature was too low. Test your baking soda by adding a pinch to vinegar; if it doesn’t bubble vigorously, replace it. Ensure the oven is fully preheated to 400°F before sliding the pan inside.

    Frequently Asked Questions

    Do I really need to squeeze the zucchini?

    Yes, squeezing the zucchini is essential because the recipe already contains several wet ingredients like applesauce and maple syrup. Without this step, the batter will be too thin, and the muffins will be gummy in the center.

    Can I use white sugar instead of maple syrup?

    You can use coconut sugar or brown sugar, but you will need to adjust the liquid ratios. Since maple syrup provides both sweetness and moisture, replacing it with a dry sugar requires adding more oil or milk to maintain the texture.

    Are these muffins vegan?

    As written, these muffins are not vegan because they contain one egg. To make them vegan, you can replace the egg with a flax egg (1 tablespoon ground flaxseed meal mixed with 3 tablespoons water) and let it sit for 5 minutes before adding it to the batter.

    Can I use a different type of flour?

    Blanched almond flour is used for its specific protein and fat content. While you can use oat flour, the texture will be more cake-like and less fudgy. Always ensure any flour substitute is certified gluten-free if you have a strict dietary requirement.

    How do I stop the chocolate chips from sinking?

    To keep the chocolate chips suspended, toss them in a small amount of almond flour before folding them into the batter. This creates a surface that helps the chips grip the batter rather than sinking to the bottom of the muffin cup.

    Print
    clock clock iconcutlery cutlery iconflag flag iconfolder folder iconinstagram instagram iconpinterest pinterest iconfacebook facebook iconprint print iconsquares squares iconheart heart iconheart solid heart solid icon
    Healthy Double Chocolate Zucchini Protein Muffins

    Healthy Double Chocolate Zucchini Protein Muffins


    5 Stars 4 Stars 3 Stars 2 Stars 1 Star

    No reviews

    • Author: Lisa
    • Total Time: 32 minutes
    • Yield: 12 muffins 1x
    • Diet: Gluten Free

    Description

    These double chocolate zucchini muffins are perfectly fudge, chocolatey and decadent and are the best summer sweet treat. Nobody will believe they are actually healthy! Enjoy these muffins for breakfast or a snack anytime!


    Ingredients

    Scale
    • 1 + 1/4 cup blanched almond flour
    • 1/3 cup cocoa powder – unsweetened
    • 1 teaspoon baking soda
    • 1/2 teaspoon kosher salt
    • 1 large egg – lightly whisked
    • 1/3 cup maple syrup
    • 1/4 cup unsweetened applesauce
    • 1/4 cup creamy almond butter
    • 1/4 cup non-dairy milk – like almond or coconut milk
    • 1 tablespoon olive oil or coconut oil
    • 1 teaspoon vanilla extract
    • 1 cup shredded zucchini – with the extra water squeezed out
    • 2/3 cup chocolate chips – plus more for topping

    Instructions

    1. Step 1: Preheat the oven to 400° F and line a 12-cup muffin pan with muffin liners. Set aside.
    2. Step 2: shred the zucchini using a box grater. Place the shredded Zucchini into a clean kitchen towel and wring out the extra water from the zucchini. Set aside.
    3. Step 3: In a medium size mixing bowl, mix up the dry ingredients: almond flour, cocoa powder, baking soda and salt.
    4. Step 4: In a separate mixing bowl mix up the wet ingredients: egg, maple syrup, applesauce, almond butter, milk, olive oil, vanilla extract.
    5. Step 5: Combine the wet and dry ingredients and mix well then fold in the shredded zucchini and chocolate chips.
    6. Step 6: Divide the batter evenly between 12 muffin cavities of a 12-cup lined muffin pan and bake at 400°F for 22-25 minutes, until a toothpick inserted in the center of one of the muffins comes out mostly clean.
    7. Step 7: Remove, let cool and enjoy these incredible chocolate zucchini muffins!

    Notes

    Finely shred the zucchini and squeeze the extra water out by using a clean kitchen towel. This will make the zucchini the perfect texture in these chocolate zucchini muffins. Mix up the batter well so that the zucchini is well distributed throughout the batter. Don’t over fill the muffin cups with too much batter. Use an ice cream scoop to evenly distribute the batter between the muffin cup cavities. Check the muffins at around 22 minutes of baking and insert a clean toothpick in the center of one of the muffins to see if they are done. Let the muffins cool for 15-20 minutes after baking. Storage: You can store these muffins in a container on the counter for up to 3 days or freeze them in a freezer-friendly container for up to 1 month.

    • Prep Time: 10 minutes
    • Cook Time: 22 minutes
    • Category: Healthy Breakfast Ideas
    • Method: Baked
    • Cuisine: American

    Nutrition

    • Serving Size: 1 muffin
    • Calories: 210 kcal
    • Sugar: 7.5 g
    • Sodium: 145 mg
    • Fat: 11 g
    • Saturated Fat: 1.7 g
    • Unsaturated Fat: 9.3 g
    • Trans Fat: 0 g
    • Carbohydrates: 12.5 g
    • Fiber: 2.6 g
    • Protein: 4 g
    • Cholesterol: 15.5 mg
  • Moist and Tender Zucchini Bread

    Moist and Tender Zucchini Bread

    This quick bread is a practical way to use garden zucchini for a moist and flavorful treat. It relies on simple pantry staples and requires minimal preparation time for a dense, satisfying result.

    Recipe image

    List of ingredients

    • 2 cups (250 g) all-purpose flour – provides the primary structure for the loaf.
    • ¾ teaspoon baking powder – acting as a chemical leavening agent for lift.
    • ¾ teaspoon baking soda – reacts with acidic components to ensure a light crumb.
    • 1 teaspoon kosher salt – balances the sugar and enhances overall flavor.
    • 1 cup (200 g) light brown sugar – adds a deep, molasses-like sweetness and moisture.
    • ½ cup (100 g) granulated sugar – contributes to the sweetness and helps create the crust.
    • ¾ cup (164 g) vegetable oil – use canola or a similar neutral oil for a moist texture.
    • 1 teaspoon vanilla extract – provides a classic aromatic base.
    • 2 large eggs – use room temperature eggs for better emulsification.
    • 2 ½ cups grated zucchini – gently press out excess moisture by hand, but do not squeeze aggressively.

    step-by-step instructions

    1. Prepare oven and pan: Preheat your oven to 350°F. Grease a 9×5-inch or 8.5×4.5-inch loaf pan using non-stick spray or the butter and flour method to prevent sticking.
    2. Mix dry and wet base: Combine all ingredients in a large mixing bowl, excluding the zucchini. Stir the mixture until all ingredients are well incorporated and the batter is thick.
    3. Fold in zucchini: Add the grated zucchini to the batter. Stir until the zucchini is evenly distributed; you will notice the batter becomes thinner and easier to pour.
    4. Bake the loaf: Pour the batter into the prepared loaf pan. Bake for 65-75 minutes, or until a toothpick inserted into the center comes out clean or with a few moist crumbs attached.
    5. Adjust for browning: If the top of the loaf is darkening too quickly before the center is done, place a piece of aluminum foil loosely over the top for the final 10-15 minutes of baking.
    6. Cool and serve: Remove the pan from the oven and let the bread cool slightly before slicing to ensure the structure is set.

    Zucchini Selection and Preparation

    Choosing the Right Size Zucchini

    The size of the zucchini impacts the moisture content of your final bread. Medium to small zucchini are preferable for this recipe because they contain a higher ratio of moisture to fiber. Larger zucchini tend to be drier, which may result in a less tender crumb if not adjusted.

    Selecting the Proper Grating Side

    Use the fine side of a box grater if you prefer a uniform texture where the zucchini blends seamlessly into the batter. If you prefer visible flecks of zucchini and a more rustic texture, use the larger grating holes. The fine grate ensures a more consistent distribution of moisture throughout the loaf.

    Managing Moisture Levels

    Avoid aggressively squeezing the grated zucchini in a kitchen towel, as this removes too much essential moisture. Instead, use a gentle press with your hands to remove only the most excess water. This balance prevents the bread from becoming soggy while maintaining the characteristic moistness of a quick bread.

    Bakeware Recommendations

    Benefits of Glass Baking Dishes

    Glass bakeware is highly recommended for quick breads due to its insulating properties. Glass heats more evenly than metal, which helps the center of the loaf cook through without over-browning the exterior. Additionally, glass retains heat longer, keeping the bread warm for a greater period after removal from the oven.

    Using Metal Loaf Pans

    Metal pans conduct heat more rapidly than glass, which can lead to faster browning on the bottom and sides. If using metal, monitor the bake time closely and be more vigilant about using a foil tent. Metal pans also lose heat almost immediately upon removal from the oven.

    Ensuring Proper Pan Dimensions

    This recipe is designed for a 9×5-inch or 8.5×4.5-inch pan to ensure the correct depth of batter. Using a pan that is too large will result in a thinner loaf that may overbake and dry out. A pan that is too small may cause the batter to overflow or lead to an undercooked center.

    Storage and Preservation

    Room Temperature Storage

    Zucchini bread can be stored at room temperature for 1-2 days. To prevent the bread from drying out, wrap it tightly in aluminum foil or place it in a sealed plastic bag. Keep it in a cool, dry place away from direct sunlight.

    Refrigerator Storage

    For longer storage, wrap the loaf tightly in plastic wrap and place it in the refrigerator. This method extends the shelf life to approximately one week. Refrigeration helps prevent mold growth, especially in very moist environments.

    Freezing the Bread

    To freeze the bread, allow it to cool completely to room temperature. Wrap the loaf tightly in parchment paper, then place it inside a heavy-duty sealable freezer bag. The bread will maintain its quality for about 3 months in the freezer.

    Proper Thawing Process

    Thaw the frozen bread by placing it on the kitchen counter at room temperature. Keep the bread inside its packaging during the thawing process. This allows the bread to re-absorb some of its moisture, preventing it from becoming dry or crumbly.

    Flavor Customizations and Variations

    Adding Warm Spices

    While the base recipe omits cinnamon to let the zucchini flavor shine, you can add it as a topping. Serve the warm slices with cinnamon butter for a concentrated spice flavor without altering the bread’s crumb. Alternatively, add 1 teaspoon of ground cinnamon to the dry ingredients for a traditional taste.

    Incorporating Nuts for Texture

    Fold in 1/2 cup of chopped walnuts or pecans during the final mixing step. The nuts provide a textural contrast to the soft crumb and add a nutty depth. Ensure the nuts are toasted lightly before adding for maximum flavor.

    Adding Dried Fruits

    Incorporate 1/2 cup of raisins or dried cranberries to add bursts of sweetness. Dried fruits should be stirred in gently at the end to avoid over-mixing the batter. This variation pairs well with the neutral oil used in the recipe.

    Zucchini and Chocolate Chip Variation

    Replace the cinnamon option with 1/2 cup of semi-sweet chocolate chips. Stir the chips in just before pouring the batter into the pan. This transforms the quick bread into a dessert-like treat suitable for snacks.

    Troubleshooting Common Issues

    Preventing a Sunken Center

    A sunken center often occurs due to over-mixing the batter after adding the flour, which develops too much gluten. Mix only until the ingredients are combined. Additionally, ensure your baking soda and powder are fresh, as expired leaveners will not provide enough lift to support the zucchini’s weight.

    Avoiding Burnt Edges

    If the edges are browning too quickly, check that your oven is properly calibrated. Using a foil tent over the top of the loaf during the final 15 minutes protects the crust from excessive heat. Placing the rack in the center of the oven also ensures even heat distribution.

    Handling Dry Bread Results

    Dry bread is usually the result of over-baking or using zucchini that was too large and dry. Use a toothpick to check for doneness frequently after the 60-minute mark. Ensure you are measuring the oil accurately, as it is the primary fat source for moisture.

    Managing Batter Consistency

    If the batter seems too thin, avoid adding more flour, as this can make the bread tough. This is often caused by zucchini with exceptionally high water content. Proceed with baking, as the excess moisture usually evaporates during the 65-75 minute bake time.

    Frequently Asked Questions

    Can I use yellow zucchini?

    Yes, yellow zucchini can be used interchangeably with green zucchini. The flavor and moisture content are nearly identical, and it will not affect the bake time or the final texture of the bread.

    Do I need to peel the zucchini?

    No, peeling the zucchini is unnecessary. The skin is tender and contains nutrients and color that contribute to the visual appeal of the bread. Simply wash the zucchini thoroughly before grating.

    Why is cinnamon omitted from this recipe?

    Omitting cinnamon allows the natural, fresh flavor of the zucchini to be the primary taste profile. This results in a purer flavor experience that highlights the vegetable rather than masking it with strong spices.

    Can I use applesauce instead of oil?

    You can substitute the oil with an equal amount of unsweetened applesauce for a lower-fat version. However, this will change the texture, making the bread denser and potentially reducing the shelf life.

    What is a quick bread?

    A quick bread is a type of bread leavened with chemical agents like baking soda or baking powder instead of yeast. This eliminates the need for kneading and rising time, allowing the bread to be baked immediately after mixing.

    Print
    clock clock iconcutlery cutlery iconflag flag iconfolder folder iconinstagram instagram iconpinterest pinterest iconfacebook facebook iconprint print iconsquares squares iconheart heart iconheart solid heart solid icon
    The Best Zucchini Bread

    Moist and Tender Zucchini Bread


    5 Stars 4 Stars 3 Stars 2 Stars 1 Star

    No reviews

    • Author: Lisa
    • Total Time: 75 minutes
    • Yield: 8 servings 1x
    • Diet: General

    Description

    The Best Zucchini Bread is a quick bread that will be quickly eaten! It is perfectly moist and delicious!


    Ingredients

    Scale
    • 2 cups (250 g) all-purpose flour
    • ¾ teaspoon baking powder
    • ¾ teaspoon baking soda
    • 1 teaspoon kosher salt
    • 1 cup (200 g) light brown sugar
    • ½ cup (100 g) granulated sugar
    • ¾ cup (164 g) vegetable oil
    • 1 teaspoon vanilla extract
    • 2 large eggs, room temperature
    • 2 ½ cups grated zucchini, gently pressed

    Instructions

    1. Preheat: Preheat the oven to 350°F.
    2. Prepare Pan: Prepare a 9×5 (or 8 1/2 x 4 1/2-inch) loaf pan with non-stick spray or the butter & flour method.
    3. Mix Base: Add all the ingredients to a bowl, except for the zucchini, and stir to incorporate.
    4. Add Zucchini: Add the shredded zucchini to the mixture and stir until combined.
    5. Pour: Pour into the prepared pan.
    6. Bake: Bake until a toothpick comes out clean, about 65-75 minutes.
    7. Cool: Let the bread cool slightly before cutting and serving.

    Notes

    Use medium to small zucchini for maximum moisture. Glass bakeware is recommended for more even heating. If the loaf browns too quickly, use a foil tent for the last 10-15 minutes.

    • Prep Time: 10 minutes
    • Cook Time: 65 minutes
    • Category: Breakfast, Dessert, Side Dish, Snack
    • Method: Baking
    • Cuisine: American

    Nutrition

    • Serving Size: 1 slice
    • Calories: 458 kcal
    • Sugar: 35 g
    • Sodium: 410 mg
    • Fat: 21 g
    • Saturated Fat: 3 g
    • Unsaturated Fat: 18 g
    • Trans Fat: 0 g
    • Carbohydrates: 52 g
    • Fiber: 2 g
    • Protein: 6 g
    • Cholesterol: 65 mg