Category: Blog

Your blog category

  • Moist and Tender Zucchini Bread

    Moist and Tender Zucchini Bread

    This quick bread is a practical way to use garden zucchini for a moist and flavorful treat. It relies on simple pantry staples and requires minimal preparation time for a dense, satisfying result.
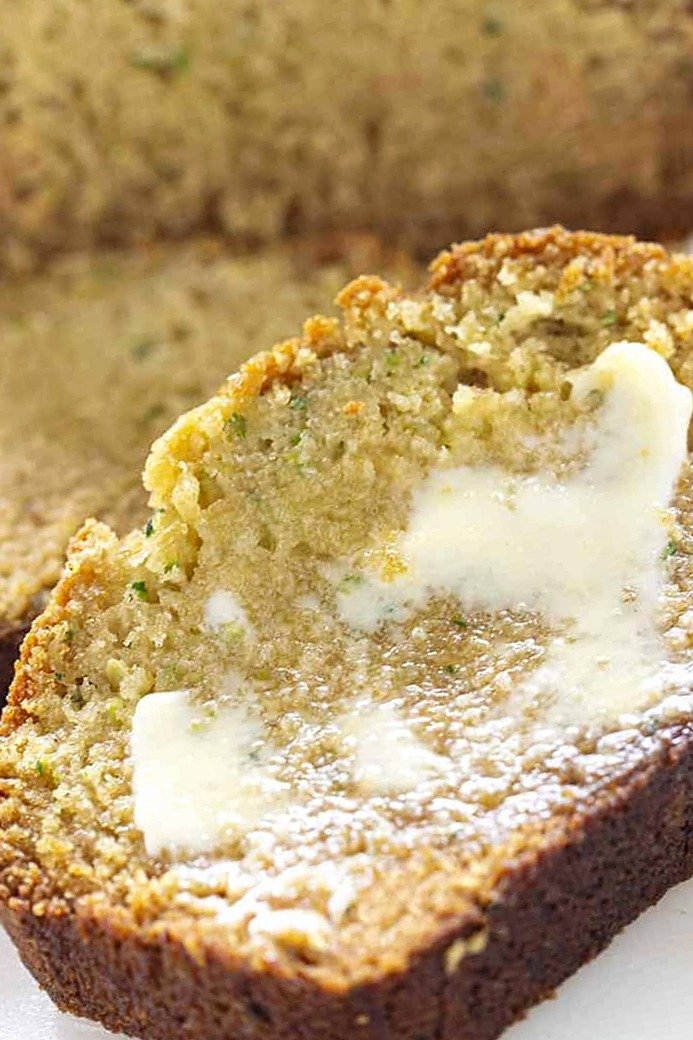
    Recipe image

    List of ingredients

    • 2 cups (250 g) all-purpose flour – provides the primary structure for the loaf.
    • ¾ teaspoon baking powder – acting as a chemical leavening agent for lift.
    • ¾ teaspoon baking soda – reacts with acidic components to ensure a light crumb.
    • 1 teaspoon kosher salt – balances the sugar and enhances overall flavor.
    • 1 cup (200 g) light brown sugar – adds a deep, molasses-like sweetness and moisture.
    • ½ cup (100 g) granulated sugar – contributes to the sweetness and helps create the crust.
    • ¾ cup (164 g) vegetable oil – use canola or a similar neutral oil for a moist texture.
    • 1 teaspoon vanilla extract – provides a classic aromatic base.
    • 2 large eggs – use room temperature eggs for better emulsification.
    • 2 ½ cups grated zucchini – gently press out excess moisture by hand, but do not squeeze aggressively.

    step-by-step instructions

    1. Prepare oven and pan: Preheat your oven to 350°F. Grease a 9×5-inch or 8.5×4.5-inch loaf pan using non-stick spray or the butter and flour method to prevent sticking.
    2. Mix dry and wet base: Combine all ingredients in a large mixing bowl, excluding the zucchini. Stir the mixture until all ingredients are well incorporated and the batter is thick.
    3. Fold in zucchini: Add the grated zucchini to the batter. Stir until the zucchini is evenly distributed; you will notice the batter becomes thinner and easier to pour.
    4. Bake the loaf: Pour the batter into the prepared loaf pan. Bake for 65-75 minutes, or until a toothpick inserted into the center comes out clean or with a few moist crumbs attached.
    5. Adjust for browning: If the top of the loaf is darkening too quickly before the center is done, place a piece of aluminum foil loosely over the top for the final 10-15 minutes of baking.
    6. Cool and serve: Remove the pan from the oven and let the bread cool slightly before slicing to ensure the structure is set.

    Zucchini Selection and Preparation

    Choosing the Right Size Zucchini

    The size of the zucchini impacts the moisture content of your final bread. Medium to small zucchini are preferable for this recipe because they contain a higher ratio of moisture to fiber. Larger zucchini tend to be drier, which may result in a less tender crumb if not adjusted.

    Selecting the Proper Grating Side

    Use the fine side of a box grater if you prefer a uniform texture where the zucchini blends seamlessly into the batter. If you prefer visible flecks of zucchini and a more rustic texture, use the larger grating holes. The fine grate ensures a more consistent distribution of moisture throughout the loaf.

    Managing Moisture Levels

    Avoid aggressively squeezing the grated zucchini in a kitchen towel, as this removes too much essential moisture. Instead, use a gentle press with your hands to remove only the most excess water. This balance prevents the bread from becoming soggy while maintaining the characteristic moistness of a quick bread.

    Bakeware Recommendations

    Benefits of Glass Baking Dishes

    Glass bakeware is highly recommended for quick breads due to its insulating properties. Glass heats more evenly than metal, which helps the center of the loaf cook through without over-browning the exterior. Additionally, glass retains heat longer, keeping the bread warm for a greater period after removal from the oven.

    Using Metal Loaf Pans

    Metal pans conduct heat more rapidly than glass, which can lead to faster browning on the bottom and sides. If using metal, monitor the bake time closely and be more vigilant about using a foil tent. Metal pans also lose heat almost immediately upon removal from the oven.

    Ensuring Proper Pan Dimensions

    This recipe is designed for a 9×5-inch or 8.5×4.5-inch pan to ensure the correct depth of batter. Using a pan that is too large will result in a thinner loaf that may overbake and dry out. A pan that is too small may cause the batter to overflow or lead to an undercooked center.

    Storage and Preservation

    Room Temperature Storage

    Zucchini bread can be stored at room temperature for 1-2 days. To prevent the bread from drying out, wrap it tightly in aluminum foil or place it in a sealed plastic bag. Keep it in a cool, dry place away from direct sunlight.

    Refrigerator Storage

    For longer storage, wrap the loaf tightly in plastic wrap and place it in the refrigerator. This method extends the shelf life to approximately one week. Refrigeration helps prevent mold growth, especially in very moist environments.

    Freezing the Bread

    To freeze the bread, allow it to cool completely to room temperature. Wrap the loaf tightly in parchment paper, then place it inside a heavy-duty sealable freezer bag. The bread will maintain its quality for about 3 months in the freezer.

    Proper Thawing Process

    Thaw the frozen bread by placing it on the kitchen counter at room temperature. Keep the bread inside its packaging during the thawing process. This allows the bread to re-absorb some of its moisture, preventing it from becoming dry or crumbly.

    Flavor Customizations and Variations

    Adding Warm Spices

    While the base recipe omits cinnamon to let the zucchini flavor shine, you can add it as a topping. Serve the warm slices with cinnamon butter for a concentrated spice flavor without altering the bread’s crumb. Alternatively, add 1 teaspoon of ground cinnamon to the dry ingredients for a traditional taste.

    Incorporating Nuts for Texture

    Fold in 1/2 cup of chopped walnuts or pecans during the final mixing step. The nuts provide a textural contrast to the soft crumb and add a nutty depth. Ensure the nuts are toasted lightly before adding for maximum flavor.

    Adding Dried Fruits

    Incorporate 1/2 cup of raisins or dried cranberries to add bursts of sweetness. Dried fruits should be stirred in gently at the end to avoid over-mixing the batter. This variation pairs well with the neutral oil used in the recipe.

    Zucchini and Chocolate Chip Variation

    Replace the cinnamon option with 1/2 cup of semi-sweet chocolate chips. Stir the chips in just before pouring the batter into the pan. This transforms the quick bread into a dessert-like treat suitable for snacks.

    Troubleshooting Common Issues

    Preventing a Sunken Center

    A sunken center often occurs due to over-mixing the batter after adding the flour, which develops too much gluten. Mix only until the ingredients are combined. Additionally, ensure your baking soda and powder are fresh, as expired leaveners will not provide enough lift to support the zucchini’s weight.

    Avoiding Burnt Edges

    If the edges are browning too quickly, check that your oven is properly calibrated. Using a foil tent over the top of the loaf during the final 15 minutes protects the crust from excessive heat. Placing the rack in the center of the oven also ensures even heat distribution.

    Handling Dry Bread Results

    Dry bread is usually the result of over-baking or using zucchini that was too large and dry. Use a toothpick to check for doneness frequently after the 60-minute mark. Ensure you are measuring the oil accurately, as it is the primary fat source for moisture.

    Managing Batter Consistency

    If the batter seems too thin, avoid adding more flour, as this can make the bread tough. This is often caused by zucchini with exceptionally high water content. Proceed with baking, as the excess moisture usually evaporates during the 65-75 minute bake time.

    Frequently Asked Questions

    Can I use yellow zucchini?

    Yes, yellow zucchini can be used interchangeably with green zucchini. The flavor and moisture content are nearly identical, and it will not affect the bake time or the final texture of the bread.

    Do I need to peel the zucchini?

    No, peeling the zucchini is unnecessary. The skin is tender and contains nutrients and color that contribute to the visual appeal of the bread. Simply wash the zucchini thoroughly before grating.

    Why is cinnamon omitted from this recipe?

    Omitting cinnamon allows the natural, fresh flavor of the zucchini to be the primary taste profile. This results in a purer flavor experience that highlights the vegetable rather than masking it with strong spices.

    Can I use applesauce instead of oil?

    You can substitute the oil with an equal amount of unsweetened applesauce for a lower-fat version. However, this will change the texture, making the bread denser and potentially reducing the shelf life.

    What is a quick bread?

    A quick bread is a type of bread leavened with chemical agents like baking soda or baking powder instead of yeast. This eliminates the need for kneading and rising time, allowing the bread to be baked immediately after mixing.

    Print
    clock clock iconcutlery cutlery iconflag flag iconfolder folder iconinstagram instagram iconpinterest pinterest iconfacebook facebook iconprint print iconsquares squares iconheart heart iconheart solid heart solid icon
    The Best Zucchini Bread

    Moist and Tender Zucchini Bread


    5 Stars 4 Stars 3 Stars 2 Stars 1 Star

    No reviews

    • Author: Lisa
    • Total Time: 75 minutes
    • Yield: 8 servings 1x
    • Diet: General

    Description

    The Best Zucchini Bread is a quick bread that will be quickly eaten! It is perfectly moist and delicious!


    Ingredients

    Scale
    • 2 cups (250 g) all-purpose flour
    • ¾ teaspoon baking powder
    • ¾ teaspoon baking soda
    • 1 teaspoon kosher salt
    • 1 cup (200 g) light brown sugar
    • ½ cup (100 g) granulated sugar
    • ¾ cup (164 g) vegetable oil
    • 1 teaspoon vanilla extract
    • 2 large eggs, room temperature
    • 2 ½ cups grated zucchini, gently pressed

    Instructions

    1. Preheat: Preheat the oven to 350°F.
    2. Prepare Pan: Prepare a 9×5 (or 8 1/2 x 4 1/2-inch) loaf pan with non-stick spray or the butter & flour method.
    3. Mix Base: Add all the ingredients to a bowl, except for the zucchini, and stir to incorporate.
    4. Add Zucchini: Add the shredded zucchini to the mixture and stir until combined.
    5. Pour: Pour into the prepared pan.
    6. Bake: Bake until a toothpick comes out clean, about 65-75 minutes.
    7. Cool: Let the bread cool slightly before cutting and serving.

    Notes

    Use medium to small zucchini for maximum moisture. Glass bakeware is recommended for more even heating. If the loaf browns too quickly, use a foil tent for the last 10-15 minutes.

    • Prep Time: 10 minutes
    • Cook Time: 65 minutes
    • Category: Breakfast, Dessert, Side Dish, Snack
    • Method: Baking
    • Cuisine: American

    Nutrition

    • Serving Size: 1 slice
    • Calories: 458 kcal
    • Sugar: 35 g
    • Sodium: 410 mg
    • Fat: 21 g
    • Saturated Fat: 3 g
    • Unsaturated Fat: 18 g
    • Trans Fat: 0 g
    • Carbohydrates: 52 g
    • Fiber: 2 g
    • Protein: 6 g
    • Cholesterol: 65 mg
  • Cheesy Grilled Zucchini and Squash Foil Packets

    Cheesy Grilled Zucchini and Squash Foil Packets

    These grilled vegetable packets are a fast and flavorful side dish perfect for summer gatherings. They utilize simple pantry staples and require minimal cleanup since the ingredients cook entirely within aluminum foil.

    Recipe image

    List of ingredients

    • 1/4 cup yellow mustard – adds a tangy base to the sauce.
    • 1/4 cup butter, melted – provides richness and prevents vegetables from sticking.
    • 2 tablespoons grated Parmesan cheese (microbial-rennet) – adds a salty, nutty flavor.
    • 1/2 teaspoon dried basil leaves – contributes an aromatic herbal note.
    • 1/2 teaspoon garlic powder – adds savory depth to the seasoning.
    • 1 large zucchini, cut into 1/4-inch thick slices – the primary vegetable base.
    • 1 medium yellow squash, cut into 1/4-inch thick slices – adds color and a mild sweetness.
    • 1 small yellow onion, thinly sliced – provides a caramelized flavor.
    • 4 sheets heavy duty aluminum foil (12×12-inch each) – used to contain juices and steam the vegetables.

    step-by-step instructions

    1. Prepare the sauce: In a large mixing bowl, combine the yellow mustard, melted butter, grated Parmesan cheese, basil leaves, and garlic powder. Stir the mixture until it is well blended and smooth.
    2. Coat the vegetables: Add the sliced zucchini, yellow squash, and thinly sliced onion to the bowl. Toss the vegetables thoroughly to ensure every piece is evenly coated with the sauce.
    3. Create the packets: Divide the coated vegetable mixture evenly among the four sheets of aluminum foil. Bring up the sides of the foil and double-fold the top and ends to create a tightly sealed packet.
    4. Grill the packets: Place the foil packets on a grill preheated to medium-high heat. Cook for 10 to 12 minutes, or until the zucchini and squash are tender.
    5. Final touch: Carefully remove the packets from the grill. If desired, sprinkle additional Parmesan cheese over the vegetables before serving.

    Vegetable Preparation Guidelines

    Slice Thickness for Even Cooking

    Use a mandoline or a sharp chef’s knife to ensure all slices are exactly 1/4 inch thick. Uniform thickness ensures that all vegetables cook at the same rate. If some slices are too thin, they will overcook and become mushy while others remain raw.

    Preventing Watery Vegetables

    Zucchini and squash have high water content. To prevent the packets from becoming too liquid, avoid over-salting the vegetables before they go into the foil. The Parmesan cheese provides enough salt to season the dish without drawing out excessive moisture prematurely.

    Selecting Firm Produce

    Choose zucchini and squash that feel firm to the touch and have a glossy skin. Avoid vegetables with soft spots or shriveled ends, as these will break down too quickly on the grill. Firm vegetables maintain their structure better during the steaming process.

    Foil Packet Construction Techniques

    Using Heavy Duty Foil for Durability

    Heavy duty aluminum foil is recommended to prevent the packets from tearing when being moved on the grill. Thin foil can puncture easily, allowing the butter and mustard sauce to leak out. This prevents the vegetables from steaming properly and can cause grill flare-ups.

    Creating an Airtight Seal

    When folding the foil, ensure there are no gaps at the corners or the top seam. A tight seal traps the steam inside, which is what actually cooks the vegetables through. If steam escapes, the cooking time will increase and the vegetables may dry out.

    Dividing Portions Equitably

    Distribute the vegetable mixture evenly across the four sheets to ensure consistent cooking times. Overfilling a packet can lead to uneven heat distribution, leaving the center vegetables undercooked. Keep a small amount of space at the top for the steam to circulate.

    Grilling Temperature and Timing

    Achieving Medium-High Heat

    Preheat your grill until it reaches a medium-high temperature, typically between 375°F and 400°F. If the grill is too hot, the foil may scorch the bottom of the vegetables before the centers are tender. If it is too cool, the vegetables will stew rather than roast.

    Monitoring Tenderness without Opening

    Avoid opening the packets frequently to check for doneness, as this releases the trapped steam. Instead, gently press the top of the packet with tongs; it should feel soft and give slightly. You can also use a toothpick to pierce the foil and check the center slice.

    Adjusting Time for Larger Vegetables

    If you choose to cut the vegetables into thicker chunks instead of 1/4-inch slices, increase the grill time by 3 to 5 minutes. Thicker cuts require more time for the heat to penetrate to the core. Always check the largest piece of zucchini for tenderness.

    Ingredient Modifications

    Substituting Dijon Mustard for Yellow Mustard

    For a more sophisticated, spicy flavor, replace the classic yellow mustard with Dijon mustard. Dijon provides a sharper tang and a slightly more complex heat. This substitution pairs particularly well with the Parmesan cheese and basil.

    Using Nutritional Yeast for Dairy-Free Options

    To make this recipe dairy-free, replace the Parmesan cheese with nutritional yeast and the butter with a plant-based butter alternative. Nutritional yeast offers a similar nutty and cheesy flavor profile. This keeps the savory essence of the dish intact.

    Adding Smoked Paprika for Depth

    Adding 1/4 teaspoon of smoked paprika to the sauce mixture introduces a subtle wood-fired taste. This complements the grilling process and adds a rich, red hue to the vegetables. It is especially effective when serving as a side for grilled meats.

    Replacing Butter with Olive Oil

    If you prefer not to use butter, extra virgin olive oil is an excellent substitute. Use the same 1/4 cup measurement. Olive oil provides a cleaner taste and is a heart-healthy alternative that still prevents the vegetables from sticking.

    Alternative Vegetable Additions

    Integrating Sliced Bell Peppers

    Adding thinly sliced red or green bell peppers adds a bright sweetness and visual contrast. Since peppers have a similar cooking time to zucchini, they can be tossed in the sauce and added to the packets. Limit the addition to one medium pepper to avoid overcrowding.

    Adding Whole Cherry Tomatoes

    Whole cherry tomatoes can be added to the packets to provide bursts of acidity. The tomatoes will blister and release their juices, blending with the mustard and butter sauce. They typically cook through in the same 10 to 12 minute window.

    Incorporating Sliced Carrots

    If using carrots, slice them into very thin rounds or matchsticks to ensure they cook at the same rate as the squash. Carrots are denser and require more heat to soften. Slicing them thinly prevents them from remaining crunchy while the zucchini overcooks.

    Serving and Presentation Ideas

    Pairing with Grilled Salmon

    These packets pair exceptionally well with grilled salmon fillets. The acidity of the mustard sauce cuts through the richness of the fish. Serve the vegetables on a platter next to the salmon for a complete omega-3 rich meal.

    Serving with Roasted Chicken

    The savory garlic and basil notes make this a great accompaniment to roast chicken. The buttery sauce complements the skin of the chicken perfectly. Serve the vegetables immediately while they are hot and steaming.

    Adding a Fresh Parsley Garnish

    Freshly chopped parsley added just before serving provides a pop of color and a fresh, clean taste. This balances the richness of the melted butter and Parmesan. Sprinkle the parsley over the top of the opened foil packets.

    Storage and Preservation

    Proper Refrigeration Methods

    Store leftover vegetables in an airtight container in the refrigerator for up to three days. Do not store them inside the foil, as the vegetables can continue to soften and lose their texture. Cool the vegetables to room temperature before sealing the container.

    Reheating in the Oven

    The best way to reheat these vegetables is in the oven at 350°F. Place them in a baking dish and cover with foil to retain moisture. Heat for 5 to 7 minutes until warmed through to avoid the mushiness associated with microwaves.

    Reheating in a Microwave

    If using a microwave, place the vegetables in a microwave-safe dish and cover with a damp paper towel. Heat on medium power in 30-second intervals. Be careful not to overheat, as the zucchini can quickly become rubbery.

    Troubleshooting Common Issues

    Fixing Mushy Texture

    If the vegetables turn out too mushy, it is likely due to overcooking or slicing the vegetables too thin. Reduce the grill time by 2 minutes for the next batch. Ensure the heat is truly medium-high rather than low, which causes steaming without roasting.

    Preventing Burned Foil Bottoms

    If the bottom of the vegetables burns before the top is cooked, your grill may have hot spots. Rotate the packets every 5 minutes to ensure even heat exposure. Using a grill mat under the foil can also help distribute heat more evenly.

    Correcting Bland Flavor

    If the dish lacks flavor, increase the amount of garlic powder or add a squeeze of fresh lemon juice after grilling. The lemon juice adds a bright acidity that enhances the existing salt and herbs. Avoid adding more salt if you already used a significant amount of Parmesan.

    Frequently Asked Questions

    Can I make these in the oven?

    Yes, you can bake these packets in the oven at 400°F for 15 to 20 minutes. Place the sealed packets on a baking sheet to catch any potential leaks. The result is very similar to grilling, though you miss the slight smokiness.

    Do I need to peel the squash?

    No, peeling is not necessary for zucchini or yellow squash. The skins are tender and contain most of the nutrients and color. Leaving the skin on also helps the vegetable slices hold their shape during cooking.

    How long do these stay fresh?

    When refrigerated in an airtight container, these vegetables remain high quality for about 72 hours. After this point, the zucchini may begin to release more water and lose its structural integrity.

    Do I need to pre-salt the zucchini?

    Pre-salting is not required for this recipe because the Parmesan cheese and mustard provide sufficient seasoning. Pre-salting is typically used to remove moisture for frying, whereas here, the moisture helps steam the vegetables in the foil.

    Print
    clock clock iconcutlery cutlery iconflag flag iconfolder folder iconinstagram instagram iconpinterest pinterest iconfacebook facebook iconprint print iconsquares squares iconheart heart iconheart solid heart solid icon
    Cheesy Grilled Zucchini and Squash Foil Packets

    Cheesy Grilled Zucchini and Squash Foil Packets


    5 Stars 4 Stars 3 Stars 2 Stars 1 Star

    No reviews

    • Author: Emily
    • Total Time: 22 minutes
    • Yield: 4 servings 1x
    • Diet: Vegetarian

    Description

    If you’ve ever wondered how to grill zucchini and squash, look no further! Our recipe for grilled vegetables in foil is one of the easiest summer side dishes around. With grated Parmesan cheese, melted butter, basil leaves, garlic powder, and onions, this zucchini on the grill recipe is perfect for your chicken, seafood, and meat dishes.


    Ingredients

    Scale
    • 1/4 cup Yellow Mustard
    • 1/4 cup butter, melted
    • 2 tablespoons grated Parmesan cheese
    • 1/2 teaspoon Basil Leaves
    • 1/2 teaspoon Garlic Powder
    • 1 large zucchini, cut into 1/4-inch thick slices
    • 1 medium yellow squash, cut into 1/4-inch thick slices
    • 1 small yellow onion, thinly sliced
    • 4 sheets (12×12-inch each) heavy duty aluminum foil

    Instructions

    1. Step 1: Mix mustard, butter, Parmesan, basil, and garlic powder in a large bowl until well blended. Add zucchini, squash, and onions; toss to coat well.
    2. Step 2: Divide vegetable mixture evenly among sheets of aluminum foil. Bring up sides of foil; double fold top and ends to tightly seal each packet.
    3. Step 3: Grill packets over medium-high heat for 10 to 12 minutes or until zucchini is tender. Sprinkle with additional Parmesan cheese before serving, if desired.

    Notes

    An easy and flavorful summer side dish that pairs well with grilled proteins.

    • Prep Time: 10 minutes
    • Cook Time: 12 minutes
    • Category: Side Dishes
    • Method: Grilling
    • Cuisine: American

    Nutrition

    • Serving Size: 1 serving
    • Calories: 169 kcal
    • Sugar: 4 g
    • Sodium: 320 mg
    • Fat: 13 g
    • Saturated Fat: 8 g
    • Unsaturated Fat: 5 g
    • Trans Fat: 0 g
    • Carbohydrates: 10 g
    • Fiber: 2 g
    • Protein: 3 g
    • Cholesterol: 34 mg
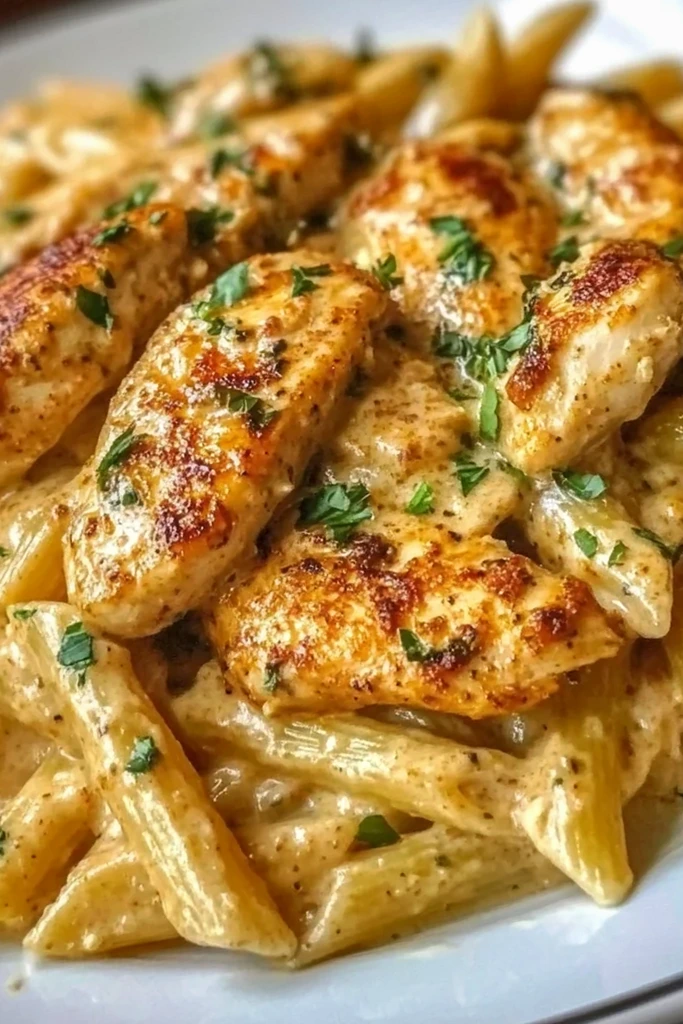
  • Creamy Cajun Chicken Penne Pasta

    Creamy Cajun Chicken Penne Pasta

    This creamy Cajun chicken pasta is a fast dinner solution that delivers bold flavors in about 30 minutes. It combines spicy seasoning with a rich cheese sauce for a satisfying meal.

    Recipe image

    List of ingredients

    • 8 oz penne pasta – use dried durum wheat for the best al dente texture.
    • 1 lb chicken breast, sliced – cut into uniform strips to ensure even cooking times.
    • 2 tbsp Cajun seasoning – choose a blend that matches your preferred spice level.
    • 1 tbsp olive oil – provides a stable cooking medium for searing chicken.
    • 2 cups heavy cream – creates the thick, velvety base for the sauce.
    • 1 cup grated Parmesan cheese – freshly grated cheese melts more smoothly.
    • 1 clove garlic, minced – adds a sharp, aromatic depth to the sauce.
    • Salt and pepper to taste – use for final seasoning adjustments.
    • Chopped parsley for garnish – adds a fresh, herbaceous finish to the plate.

    step-by-step instructions

    1. Boil the pasta: Cook the penne pasta in a large pot of boiling salted water according to package instructions until al dente. Drain and set aside.
    2. Sear the chicken: Heat olive oil in a skillet over medium heat. Add the sliced chicken seasoned with Cajun spices and sauté until browned and fully cooked through.
    3. Build the cream base: Add the minced garlic to the skillet and sauté for about one minute. Pour in the heavy cream and stir until the liquid is well combined with the pan drippings.
    4. Melt the cheese: Gradually stir in the grated Parmesan cheese, mixing continuously until the sauce is smooth and the cheese is completely melted.
    5. Combine and serve: Toss the cooked penne into the skillet, seasoning with salt and pepper. Garnish with chopped parsley before serving hot.

    Professional Cooking Techniques

    Achieving the Perfect Sear on Chicken

    To get a golden-brown crust, ensure the olive oil is shimmering before adding the chicken. Avoid overcrowding the skillet, as too much meat releases moisture and causes the chicken to steam rather than sear. Let the chicken sit undisturbed for 2-3 minutes per side to develop a deep color.

    Mastering the Al Dente Texture

    Pasta should have a slight resistance when bitten, which is the definition of al dente. Start tasting the penne two minutes before the package directions suggest. This prevents the pasta from becoming mushy when it is later simmered in the creamy sauce.

    Emulsifying the Parmesan Sauce

    Adding cheese too quickly can lead to clumping or a grainy texture. Incorporate the Parmesan in small handfuls, stirring constantly over medium-low heat. This allows the fats to emulsify properly with the cream, resulting in a glossy, uniform sauce.

    Utilizing Pan Drippings

    After sautéing the chicken, do not wipe out the skillet. The brown bits left behind, known as fond, contain concentrated flavor from the Cajun spices. When the heavy cream is added, these bits dissolve into the sauce, adding depth and complexity.

    Customization and Substitutions

    Substituting Heavy Cream

    For a slightly lighter version, you can use half-and-half, although the sauce will be thinner. For a dairy-free alternative, full-fat coconut cream provides a similar richness, though it adds a slight coconut flavor. Cashew cream is another plant-based option that maintains a neutral taste.

    Alternative Pasta Shapes

    While penne is traditional, other tubular pastas like rigatoni or ziti work well because they trap the sauce inside. Spiral shapes like fusilli or farfalle also provide excellent surface area for the cream to cling to. Always adjust boiling times based on the specific shape used.

    Incorporating Fresh Vegetables

    Adding sliced red or green bell peppers provides a classic Cajun aesthetic and a crunchy texture. Sauté the peppers with the chicken or add them just before the cream. Fresh spinach can be stirred in at the very end until it wilts from the residual heat.

    Adjusting the Heat Level

    If the dish is too spicy, stir in an extra tablespoon of heavy cream or a pinch of sugar to balance the heat. To increase the kick, add a pinch of cayenne pepper or a few dashes of a hot sauce. Always taste the sauce before adding the pasta to gauge the spice level.

    Serving and Pairing Recommendations

    Balancing Richness with Acidic Salads

    The heavy nature of the cream and cheese pairs best with a bright, acidic side. A Caesar salad with a lemon-forward dressing provides a sharp contrast that cleanses the palate. A simple arugula salad with balsamic vinaigrette is another excellent choice for cutting through the richness.

    Choosing the Right Bread Accompaniments

    Garlic bread is the most popular pairing, as the toasted crust helps soak up excess sauce. A warm, crusty baguette or slices of toasted sourdough also work well. Brush the bread with garlic butter and bake until golden for maximum flavor.

    Garnishing for Visual and Flavor Contrast

    Beyond parsley, consider adding thinly sliced green onions for a mild onion bite. A sprinkle of red pepper flakes adds a pop of color and an extra layer of heat. Freshly grated lemon zest stirred in at the end can brighten the overall flavor profile.

    Storage and Food Safety

    Optimal Refrigeration Methods

    Transfer leftover pasta into an airtight glass container once it has cooled slightly. Store it in the main body of the refrigerator rather than the door to maintain a consistent temperature. The dish will stay fresh for up to three days when stored properly.

    Freezing Cream-Based Pastas

    Freezing is not recommended for cream-based sauces as they tend to separate upon thawing. However, if necessary, freeze in a freezer-safe container for up to two months. Be prepared to add a splash of milk or cream during the reheating process to restore the emulsion.

    Accurate Reheating Procedures

    When reheating on a stovetop, add a small amount of milk or vegetable broth to the skillet. Heat over medium-low, stirring frequently to prevent the sauce from burning. For microwave reheating, use short 60-second intervals and stir between each to ensure even heating.

    Common Troubleshooting

    Correcting a Thickened Sauce

    Cream sauces can thicken quickly as they cool or overcook. To thin the sauce, add a tablespoon of reserved pasta water or milk. Stir gently over low heat until the desired consistency is reached without breaking the sauce.

    Handling Overcooked Pasta

    If the penne is overcooked, avoid simmering it in the sauce for too long. Simply toss the pasta in the sauce quickly and serve immediately. Adding a bit of extra Parmesan can sometimes help provide structure to softer noodles.

    Reducing Excess Saltiness

    Cajun seasoning blends often contain significant amounts of salt. If the final dish tastes too salty, add a splash of heavy cream or a squeeze of fresh lemon juice. The acidity of the lemon helps neutralize the perception of salt on the tongue.

    Frequently Asked Questions

    How can I make my Creamy Cajun Chicken Penne Pasta spicier?

    You can increase the amount of Cajun seasoning during the searing process or add cayenne pepper to the sauce. Adding sliced jalapeños or red chili flakes during the garlic sauté stage also provides a sharper heat.

    Can I use other types of pasta?

    Yes, any short pasta like farfalle, fusilli, or rigatoni will work. Ensure you cook them to al dente so they hold their shape when mixed with the heavy sauce.

    What can I substitute for heavy cream?

    Half-and-half is a suitable substitute for a lighter texture. For dairy-free options, coconut cream or blended soaked cashews can provide the necessary creaminess.

    Can I make this recipe ahead of time?

    You can prepare the chicken and the sauce in advance. Store them separately and combine them with freshly cooked pasta just before serving to ensure the best texture.

    Print
    clock clock iconcutlery cutlery iconflag flag iconfolder folder iconinstagram instagram iconpinterest pinterest iconfacebook facebook iconprint print iconsquares squares iconheart heart iconheart solid heart solid icon
    Creamy Cajun Chicken Penne Pasta

    Creamy Cajun Chicken Penne Pasta


    5 Stars 4 Stars 3 Stars 2 Stars 1 Star

    No reviews

    • Author: Emily
    • Total Time: 30 minutes
    • Yield: 4 servings 1x
    • Diet: General

    Description

    Indulge in the rich, creamy goodness of Creamy Cajun Chicken Penne Pasta—a culinary delight that combines tender chicken, perfectly cooked penne, and a bold sauce infused with zesty Cajun flavors. This dish is not only quick to prepare, making it an ideal choice for busy weeknights, but also versatile enough to customize with your favorite vegetables or spices.


    Ingredients

    Scale
    • 8 oz penne pasta
    • 1 lb chicken breast, sliced
    • 2 tbsp Cajun seasoning
    • 1 tbsp olive oil
    • 2 cups heavy cream
    • 1 cup grated Parmesan cheese
    • 1 clove garlic, minced
    • Salt and pepper to taste
    • Chopped parsley for garnish

    Instructions

    1. Step: Cook the penne pasta according to package instructions until al dente. Drain and set aside.
    2. Step: In a skillet over medium heat, add olive oil. Once hot, sauté the sliced chicken seasoned with Cajun spices until browned and cooked through.
    3. Step: Add minced garlic to the skillet and sauté briefly before pouring in heavy cream. Stir until combined.
    4. Step: Gradually mix in Parmesan cheese until melted and smooth.
    5. Step: Toss in the cooked penne pasta and season with salt and pepper. Serve garnished with chopped parsley.

    Notes

    For the best results, cook the pasta just before combining it with the sauce. To add nutrition and color, consider incorporating bell peppers or spinach.

    • Prep Time: 10 minutes
    • Cook Time: 20 minutes
    • Category: Dinner
    • Method: Sautéing
    • Cuisine: Cajun

    Nutrition

    • Serving Size: 1 cup (about 250g)
    • Calories: 620 kcal
    • Sugar: 4 g
    • Sodium: 820 mg
    • Fat: 36 g
    • Saturated Fat: 18 g
    • Unsaturated Fat: 16 g
    • Trans Fat: 0 g
    • Carbohydrates: 50 g
    • Fiber: 3 g
    • Protein: 28 g
    • Cholesterol: 110 mg
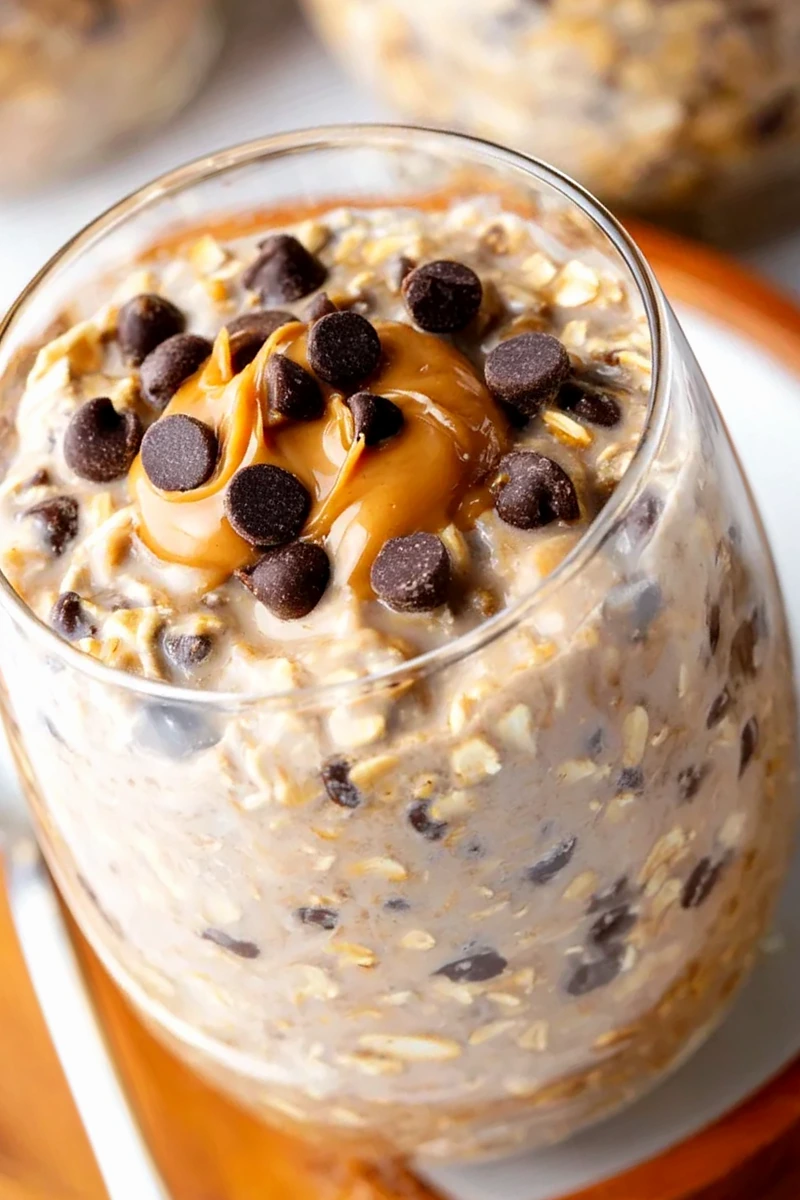
  • Creamy Peanut Butter and Chocolate Chip Overnight Oats

    Creamy Peanut Butter and Chocolate Chip Overnight Oats

    These peanut butter chocolate chip overnight oats provide a hearty, ready-to-eat breakfast that requires zero morning preparation. They are an ideal solution for meal prepping and combine nutrient-dense ingredients for a satisfying start to the day.

    Recipe image

    List of ingredients

    • 1 1/2 cups Rolled oats – provide a chewy, hearty texture.
    • 1/4 cup Honey – serves as a natural sweetener (sugar-free honey is a lighter alternative).
    • 1/4 cup Chocolate chips – optional addition for a dessert-like flavor (sugar-free chips available).
    • 2 tablespoons Peanut butter – creamy, natural variety is preferred for best flavor.
    • 1 1/2 tablespoons Chia seeds – essential for thickening the oats into a pudding consistency.
    • 1 teaspoon Vanilla extract – adds a fragrant, aromatic depth to the base.
    • 1/4 teaspoon Sea salt – balances the sweetness of the honey and chocolate.
    • 2 cups Unsweetened almond milk – used as the liquid base, divided into 2/3 cup per serving.

    step-by-step instructions

    1. Combine Base Ingredients: In a large mixing bowl, stir together the rolled oats, honey, chocolate chips, peanut butter, chia seeds, vanilla extract, and sea salt. Mix thoroughly until the peanut butter is evenly distributed among the dry ingredients.
    2. Divide and Hydrate: Spoon the mixture equally into three separate jars or airtight containers. Pour approximately 2/3 cup of unsweetened almond milk into each container and stir again to ensure all ingredients are fully coated.
    3. Chill and Set: Seal the containers tightly and place them in the refrigerator. Let the oats soak for at least 5 hours, though leaving them overnight produces the thickest and creamiest texture.

    Flavor Customization and Variations

    Substituting Almond Butter for a Different Nut Profile

    You can replace the peanut butter with an equal amount of almond butter for a more subtle, nutty flavor. Almond butter often provides a smoother consistency that blends seamlessly into the oats during the soaking process.

    Using Cashew Butter for Extra Creaminess

    Cashew butter is a great alternative if you prefer a milder, creamier taste than peanut butter. It adds a rich, buttery quality to the overnight oats that pairs exceptionally well with the chocolate chips.

    Swapping Peanut Butter for Sunflower Seed Butter

    For those with nut allergies, sunflower seed butter is a practical substitute. It maintains the creamy texture and earthy flavor profile while keeping the recipe nut-free.

    Incorporating Fresh Sliced Bananas

    Adding sliced bananas on top or stirring them in before chilling adds natural sweetness and potassium. Bananas complement the peanut butter and chocolate combination perfectly for a classic flavor pairing.

    Adding Fresh Blueberries for Tartness

    Fresh blueberries provide a burst of acidity and antioxidants that cut through the richness of the peanut butter. Stir them in just before serving to keep the berries from bursting during the soaking period.

    Using Maple Syrup as a Vegan Sweetener

    If you prefer a vegan option, replace the honey with pure maple syrup. Maple syrup offers a distinct woody sweetness that works well with the rolled oats and chia seeds.

    Using Agave Nectar for a Neutral Sweetness

    Agave nectar is another excellent alternative to honey for those seeking a plant-based sweetener. It has a thinner consistency and a neutral flavor that allows the peanut butter to shine.

    Adding Protein Powder for Increased Satiety

    Mix one scoop of vanilla or chocolate protein powder into the dry ingredients before adding the milk. This increases the protein content, making the breakfast more filling for those with active lifestyles.

    Stirring in Flaxseed Meal for Omega-3s

    Add a tablespoon of ground flaxseed meal to the mixture for additional fiber and healthy fats. Flaxseeds blend in easily and do not significantly alter the flavor of the oats.

    Including Hemp Seeds for Added Texture

    Hemp seeds provide a slight nuttiness and a boost of plant-based protein. Sprinkle them on top after the oats have chilled to maintain a slight crunch.

    Essential Preparation Tips

    Choosing Rolled Oats Over Quick Oats

    Rolled oats are highly recommended because they maintain their structure and provide a pleasant chew. Quick oats tend to break down too much during the overnight soak, which can lead to a mushy texture.

    Selecting the Right Airtight Containers

    Mason jars with tight-fitting lids are the best choice for storing overnight oats. They prevent the oats from absorbing odors from other foods in the refrigerator and make them easy to transport.

    Ensuring Even Distribution of Peanut Butter

    Since natural peanut butter can be thick, stir it thoroughly into the oats and honey before adding the milk. This prevents large clumps of nut butter from settling at the bottom of the jar.

    Adjusting the Milk Ratio for Preferred Thickness

    If you prefer a thinner consistency, add an extra tablespoon of almond milk per jar. Conversely, if the oats are too runny, stir in an extra teaspoon of chia seeds to absorb the excess liquid.

    Properly Mixing Chia Seeds to Avoid Clumps

    Whisk the chia seeds well with the other dry ingredients before introducing the liquid. This ensures the seeds are suspended evenly, allowing them to thicken the entire mixture consistently.

    Storage and Freshness Guidelines

    Maximum Refrigeration Time for Quality

    Stored in airtight containers, these oats remain fresh and safe to eat for 3 to 5 days. After the third day, the texture may become softer, but the flavor remains consistent.

    Preventing Liquid Separation

    It is common for some liquid to separate or settle at the top after a few days of refrigeration. Simply give the oats a vigorous stir before eating to reintegrate the moisture.

    Maintaining Optimal Temperature

    Always keep your prepared oats in the coldest part of the refrigerator. Avoid leaving them at room temperature for more than two hours to ensure the ingredients remain fresh.

    Avoiding Freezer Storage

    Overnight oats are not recommended for freezing as the texture of the oats and the chia seeds changes significantly upon thawing. Stick to refrigeration for the best culinary result.

    Serving and Presentation Ideas

    Layering Ingredients for Visual Appeal

    To create a visually appealing breakfast, layer the peanut butter and chocolate chips between layers of soaked oats. This creates a marbled effect when viewed through a glass mason jar.

    Adding Crunchy Toppings Before Serving

    Top your chilled oats with chopped walnuts, sliced almonds, or pumpkin seeds just before eating. This adds a necessary textural contrast to the creamy consistency of the soaked oats.

    Warming the Oats for Cold Mornings

    While traditionally served cold, you can microwave a serving for 30 to 60 seconds. Stir halfway through the heating process to ensure the peanut butter and chocolate are melted evenly.

    Finishing with a Drizzle of Extra Honey

    For an extra touch of sweetness, drizzle a small amount of honey or maple syrup over the top. This adds a glossy finish and a fresh hit of sweetness to the first few bites.

    Serving with a Side of Fresh Raspberries

    Pairing the oats with a side of tart raspberries creates a balanced flavor profile. The brightness of the berries complements the rich, fatty nature of the peanut butter.

    Troubleshooting Common Issues

    Fixing Oats That Are Too Thick

    If the oats have absorbed too much liquid and feel overly dense, stir in a splash of additional almond milk. Do this slowly until you reach your desired creamy consistency.

    Resolving Runny or Watery Consistency

    If the oats are too thin, it is usually due to a lack of chia seeds or using a very thin milk alternative. Stir in an additional teaspoon of chia seeds and let them sit for another hour to thicken.

    Preventing Sogginess in the Oats

    Ensure you are using old-fashioned rolled oats rather than instant oats. Rolled oats have a thicker hull that resists over-saturation, preventing the mixture from becoming a paste.

    Managing Bitter Tastes from Certain Protein Powders

    If adding protein powder makes the oats taste bitter, increase the amount of vanilla extract or honey. The sweetness and aromatics help mask the aftertaste of some plant-based proteins.

    Frequently Asked Questions

    Can I use coconut milk instead of almond milk?

    Yes, you can use the coconut milk found in cartons for a creamy, tropical flavor. Avoid using canned coconut cream unless you dilute it with water, as it may be too thick for the oats to absorb.

    Are the chocolate chips mandatory for this recipe?

    No, the chocolate chips are completely optional. The oats remain delicious and creamy with just the peanut butter and honey, making it a simpler option for those avoiding chocolate.

    How long do I really need to soak the oats?

    While 5 hours is the minimum, soaking overnight (8-12 hours) is ideal. This allows the chia seeds and oats to fully hydrate, resulting in a smoother and more cohesive texture.

    Can I make a larger batch for the entire week?

    Yes, you can scale the ingredients proportionally to make 5 or 7 servings. Just ensure you have enough airtight containers and keep them refrigerated for no more than 5 days.

    What happens if I omit the chia seeds?

    Without chia seeds, the oats will be much thinner and will lack the pudding-like consistency. Chia seeds are the primary thickening agent that creates the signature overnight oats texture.

    Can I use a different type of salt?

    You can use kosher salt or table salt if sea salt is unavailable. Sea salt is preferred for its clean flavor, but any fine-grain salt will serve to balance the sweetness of the recipe.

    Is it possible to use steel-cut oats?

    Steel-cut oats are generally too hard for the overnight soaking method and will remain gritty. If you wish to use them, you must simmer them on the stove first, then let them cool before adding the other ingredients.

    Print
    clock clock iconcutlery cutlery iconflag flag iconfolder folder iconinstagram instagram iconpinterest pinterest iconfacebook facebook iconprint print iconsquares squares iconheart heart iconheart solid heart solid icon
    Dreamy Peanut Butter Chocolate Chip Overnight Oats

    Creamy Peanut Butter and Chocolate Chip Overnight Oats


    5 Stars 4 Stars 3 Stars 2 Stars 1 Star

    No reviews

    • Author: imageuploader
    • Total Time: 5 hours 5 minutes
    • Yield: 3 servings 1x
    • Diet: Vegetarian

    Description

    Wake up to a perfectly prepped, healthy, and satisfying breakfast!


    Ingredients

    Scale
    • 1 1/2 cups Rolled oats
    • 1/4 cup Honey
    • 1/4 cup Chocolate chips
    • 2 tablespoons Peanut butter
    • 1 1/2 tablespoons Chia seeds
    • 1 teaspoon Vanilla extract
    • 1/4 teaspoon Sea salt
    • 2 cups Unsweetened almond milk

    Instructions

    1. Step 1: In a spacious bowl, gently combine the rolled oats, honey, chocolate chips (if you’re using them), rich peanut butter, tiny chia seeds, fragrant vanilla extract, and a touch of sea salt. Stir everything together until nicely mixed.
    2. Step 2: Carefully spoon this delightful mixture into three individual serving containers, such as small jars. Now, pour about 2/3 cup of your chosen milk over each portion, and give it another soft stir to ensure all ingredients are coated.
    3. Step 3: Cover your containers securely and place them in the refrigerator. Let them chill for a minimum of 5 hours, but for the best creamy and thick texture, allow them to sit overnight.

    Notes

    Store in airtight containers in the refrigerator for 3 to 5 days. If too thick, add a splash more milk before serving.

    • Prep Time: 5 minutes
    • Cook Time: 0 minutes
    • Category: Breakfast
    • Method: Chilling
    • Cuisine: American

    Nutrition

    • Serving Size: 1 serving
    • Calories: 338 kcal
    • Sugar: 32 g
    • Sodium: 167 mg
    • Fat: 15.3 g
    • Saturated Fat: 3.5 g
    • Unsaturated Fat: 11.8 g
    • Trans Fat: 0 g
    • Carbohydrates: 46.9 g
    • Fiber: 20.8 g
    • Protein: 9.7 g
    • Cholesterol: 0 mg
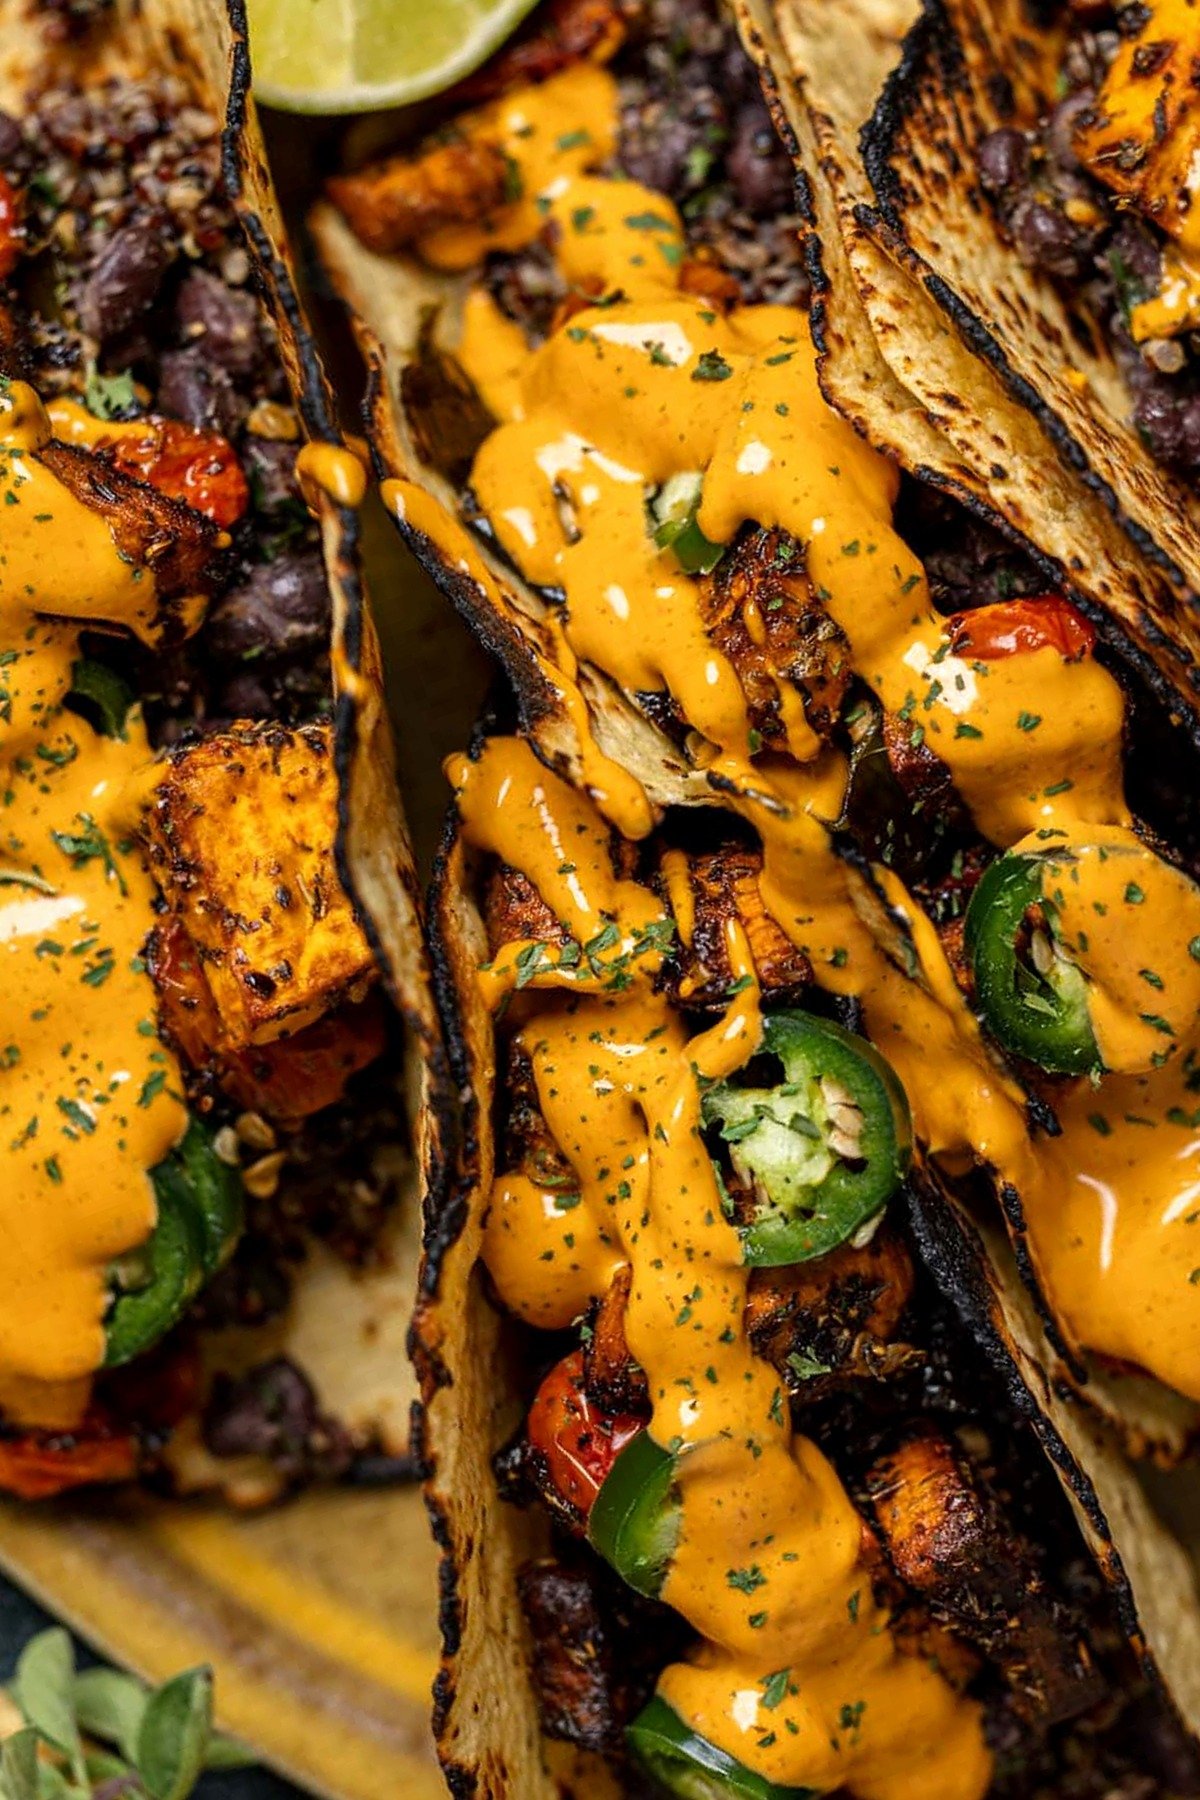
  • Chipotle Sweet Potato Quinoa Tacos

    Chipotle Sweet Potato Quinoa Tacos

    These plant-based tacos feature a hearty blend of roasted sweet potatoes, savory quinoa, and smoky chipotle sauce. They provide a nutrient-dense meal that is perfect for a casual dinner or a themed taco night. The combination of textures and smoky flavors makes them a satisfying meat-free alternative.

    Recipe image

    List of ingredients

    • 1 cup red quinoa, uncooked – white or multi-color varieties also work.
    • 3 cups organic vegetable stock/broth – used for cooking the quinoa.
    • 1/2 tsp sea salt – for seasoning the quinoa.
    • 1/2 tsp black pepper – for seasoning the quinoa.
    • 1/2 tsp smoked paprika – adds a smoky depth to the quinoa.
    • 1/2 tsp garlic powder – enhances the quinoa flavor.
    • 2 large sweet potatoes, peeled and cubed – the main filling.
    • 2 Tbsp extra virgin olive oil – for roasting the vegetables.
    • 1 tsp dried oregano – for seasoning the vegetables.
    • 1 tsp dried parsley – for seasoning the vegetables.
    • 1 tsp dried basil – for seasoning the vegetables.
    • 1 tsp smoked paprika – for seasoning the vegetables.
    • 1 tsp garlic powder – for seasoning the vegetables.
    • 2 cups roasted herb tomatoes – a flavorful addition to the filling.
    • 2 poblano peppers – adds mild heat and earthiness.
    • 1 (15 oz.) can black beans, drained and rinsed – for added protein.
    • 1 Tbsp extra virgin olive oil – for sautéing the beans.
    • 1 tsp dried oregano – for seasoning the black beans.
    • 1 tsp smoked paprika – for seasoning the black beans.
    • 1 tsp dried parsley – for seasoning the black beans.
    • 1 tsp garlic powder – for seasoning the black beans.
    • 1/2 tsp ground cumin – adds a traditional taco flavor to the beans.
    • Homemade corn or flour tortillas, charred – the base for the tacos.
    • Jalapeños, chopped – for a spicy kick.
    • 1 serving Dairy-Free Chipotle Sauce/Dressing – for the signature smoky creaminess.

    step-by-step instructions

    1. Prepare the roasted herb tomatoes: Roast your tomatoes according to a roasted herb tomato recipe before starting the other components.
    2. Roast the vegetables: Preheat your oven to 400 degrees Fahrenheit and line a baking sheet with parchment paper. In a bowl, toss the cubed sweet potatoes and poblano peppers with olive oil and the listed seasonings until fully coated. Spread them in a single layer on the sheet and bake for 20-25 minutes until charred and golden. Once removed from the oven, chop the charred poblano peppers into smaller pieces.
    3. Cook the quinoa: Heat vegetable stock in a medium saucepan over medium-high heat until it reaches a boil. Add the quinoa and whisk continuously for 1-2 minutes. Reduce the heat to a simmer and whisk every 3-4 minutes until the stock is absorbed and the quinoa has thickened. Stir in the salt, black pepper, garlic powder, and smoked paprika until well combined.
    4. Sauté the black beans: Heat olive oil in a medium skillet over medium-high heat. Add the drained black beans, garlic powder, oregano, smoked paprika, parsley, and cumin. Stir occasionally for 5-6 minutes before removing from heat to cool slightly.
    5. Prepare the chipotle sauce: Prepare your favorite dairy-free chipotle dressing or sauce to use as a topping.
    6. Warm the tortillas: To toast in the oven, preheat to 350 degrees Fahrenheit and place tortillas directly on the rack for 2 minutes after turning off the oven. For stovetop charring, place a tortilla directly over a gas burner until lightly charred, rotating frequently.
    7. Assemble the tacos: Place a few spoonfuls of cooked quinoa on a charred tortilla. Layer on the roasted poblano peppers, sweet potatoes, black beans, chopped jalapeños, and a drizzle of chipotle sauce. Garnish with fresh cilantro if desired.

    Pro Cooking Tips for Better Tacos

    Rinse Quinoa Thoroughly

    Rinse the red quinoa under cold water in a fine-mesh strainer before cooking. This removes the natural saponin coating, which can otherwise leave a bitter taste in the finished tacos.

    Avoid Crowding the Baking Sheet

    Spread the sweet potatoes and poblano peppers in a single layer with space between them. Overcrowding the pan causes the vegetables to steam rather than roast, preventing the desired charred edges.

    Use High-Quality Vegetable Broth

    Choose a low-sodium organic vegetable broth to control the salt levels. The broth infuses the quinoa with more flavor than plain water, creating a more savory base for the tacos.

    Char Tortillas for Better Flavor

    Charring tortillas over an open flame adds a smoky dimension that complements the chipotle sauce. If using a gas stove, use tongs to rotate the tortilla quickly to avoid burning.

    Sauté Beans Until Fragrant

    Ensure the oil is shimmering before adding the black beans and spices. Sautéing the spices briefly in oil awakens the aromatic compounds in the cumin and paprika for a deeper flavor.

    Ingredient Substitutions

    Alternative Grain Choices

    If red quinoa is unavailable, white or tri-color quinoa works perfectly. For a different texture, you can use brown rice or cauliflower rice, though you will need to adjust the cooking liquid.

    Different Root Vegetable Options

    Butternut squash or carrots can replace sweet potatoes for a similar sweetness. Ensure you cut them into similar sized cubes to maintain consistent roasting times.

    Substituting Black Beans

    Pinto beans or kidney beans are excellent alternatives to black beans. These provide similar protein and texture while adding a slightly different earthy flavor to the filling.

    Adjusting the Heat Levels

    If poblano peppers are too mild, try using anaheim peppers. For more heat, increase the amount of chopped jalapeños or use a spicier chipotle pepper in the sauce.

    Gluten-Free Tortilla Options

    Corn tortillas are naturally gluten-free and provide a traditional taste. If using flour tortillas, ensure they are certified gluten-free to accommodate dietary restrictions.

    Alternative Liquid for Quinoa

    If vegetable broth is not available, use water mixed with a pinch of salt and a teaspoon of nutritional yeast. This provides a savory, umami flavor similar to broth.

    Taco Variation Ideas

    Adding Fresh Toppings

    Top your tacos with thinly sliced red cabbage or shredded romaine lettuce for a fresh crunch. Adding diced avocado or a scoop of guacamole adds a creamy element that balances the spice.

    Incorporating Zesty Acidity

    Squeeze fresh lime juice over the assembled tacos just before serving. The acidity cuts through the richness of the roasted sweet potatoes and the creaminess of the chipotle sauce.

    Adding a Tangy Slaw

    Create a quick slaw using shredded carrots, lime juice, and a touch of maple syrup. This adds a sweet and tangy contrast to the smoky flavors of the chipotle and paprika.

    Creating a Creamier Sauce Base

    Blend soaked cashews with lemon juice and water to create a thicker, creamier base for your chipotle sauce. This increases the richness and provides a more indulgent mouthfeel.

    Adding Toasted Seeds

    Sprinkle toasted pepitas or sesame seeds on top for an extra layer of texture. These seeds add a nutty flavor that pairs well with the earthy roasted poblanos.

    Including Fresh Herbs

    While cilantro is traditional, fresh parsley or mint can add a unique brightness. Mix chopped herbs directly into the quinoa after cooking for an integrated flavor.

    Storage and Meal Prep Advice

    Refrigerating Component Parts

    Store the cooked quinoa, roasted vegetables, and sautéed beans in separate airtight containers. This prevents the textures from merging and keeps the ingredients fresh for up to 4 days.

    Freezing Roasted Vegetables

    Roasted sweet potatoes and poblanos can be frozen in a single layer on a tray before transferring to a bag. This allows you to quickly reheat them for future taco nights.

    Storing the Chipotle Sauce

    Keep the dairy-free chipotle sauce in a glass jar with a tight lid. It will stay fresh in the refrigerator for about one week, though it may thicken slightly over time.

    Managing Tortilla Freshness

    Keep tortillas in a breathable cloth wrap or a sealed plastic bag to prevent them from drying out. Store them at room temperature for a few days or freeze them for longer storage.

    Batch Cooking Quinoa

    Cook a large batch of seasoned quinoa at the beginning of the week. It serves as a versatile base that can be used in salads or bowls if you don’t use it all for tacos.

    Reheating Instructions

    Oven Reheating for Texture

    Place roasted vegetables and beans on a baking sheet at 350 degrees Fahrenheit for 10 minutes. This restores the roasted texture better than a microwave.

    Quick Microwave Method

    Heat the quinoa and bean mixture in a microwave-safe bowl with a damp paper towel on top. Warm in 30-second intervals to avoid overcooking the quinoa.

    Skillet Warming for Tortillas

    Heat a dry skillet over medium heat and warm tortillas for 30 seconds per side. This ensures they are pliable and warm without becoming too hard.

    Reheating the Chipotle Sauce

    If the sauce has thickened in the fridge, stir in a teaspoon of warm water. This restores the original consistency without altering the flavor profile.

    Troubleshooting Common Issues

    Preventing Mushy Quinoa

    If your quinoa is too soft, reduce the broth slightly next time or simmer for a shorter period. Ensure you let the quinoa sit covered for 5 minutes after turning off the heat.

    Handling Burnt Vegetables

    If the sweet potatoes char too quickly, lower the oven temperature to 375 degrees Fahrenheit. Ensure the cubes are uniform in size so they cook at the same rate.

    Correcting Bland Beans

    If the black beans lack flavor, add a pinch of salt or an extra squeeze of lime juice. Sautéing them longer over medium heat can also concentrate the flavors.

    Fixing a Thin Sauce

    If your chipotle sauce is too runny, blend in a small amount of avocado or cashew cream. This will thicken the consistency while maintaining the smoky flavor.

    Preventing Tortilla Tearing

    If tortillas tear during charring, they may be too cold or dry. Warm them slightly in the oven before placing them on the gas burner for a quick char.

    Frequently Asked Questions

    Can I make these tacos gluten-free?

    Yes, these tacos are naturally gluten-free if you use 100% corn tortillas. Always check the labels on your vegetable broth and chipotle sauce to ensure no gluten-containing thickeners are used.

    How do I remove the skin from poblano peppers?

    After roasting, place the poblanos in a sealed bag or bowl covered with plastic wrap for 10 minutes. The steam will loosen the skin, making it easy to peel off with your fingers.

    What can I use instead of vegetable broth?

    You can use water with a bit of salt or a mushroom-based broth for a deeper flavor. Avoid using beef or chicken broth to keep the recipe plant-based.

    How long do the roasted tomatoes last?

    Roasted herb tomatoes typically stay fresh in the refrigerator for 5 to 7 days. They can also be frozen for up to 3 months in an airtight container.

    Can I use frozen sweet potatoes?

    Yes, you can use frozen cubed sweet potatoes, but roast them directly from frozen at a slightly higher temperature. You may need to add 5-10 minutes to the cooking time.

    Do I have to peel the sweet potatoes?

    Peeling is optional depending on your preference for texture. If you leave the skin on, scrub the potatoes thoroughly with a vegetable brush before cubing.

    Print
    clock clock iconcutlery cutlery iconflag flag iconfolder folder iconinstagram instagram iconpinterest pinterest iconfacebook facebook iconprint print iconsquares squares iconheart heart iconheart solid heart solid icon
    Chipotle Sweet Potato and Quinoa Tacos

    Chipotle Sweet Potato Quinoa Tacos


    5 Stars 4 Stars 3 Stars 2 Stars 1 Star

    No reviews

    • Author: imageuploader
    • Total Time: 40 minutes
    • Yield: 6 servings 1x
    • Diet: Plant-based

    Description

    Get ready to devour the most amazing Chipotle Sweet Potato Quinoa Tacos! Loaded with a tasty homemade chipotle sauce, roasted sweet potatoes, poblano peppers, tomatoes, black beans, quinoa, and a hint of jalapeños – these tacos are a flavor explosion, ideal for spicing up your Taco Tuesday or any casual night! All Plant-based + Dairy-free.


    Ingredients

    Scale
    • 1 cup red quinoa, uncooked
    • 3 cups organic vegetable stock/broth
    • 1/2 tsp sea salt
    • 1/2 tsp black pepper
    • 1/2 tsp smoked paprika
    • 1/2 tsp garlic powder
    • 2 large sweet potatoes, peeled + cubed
    • 2 Tbps Extra virgin olive oil
    • 1 tsp dried oregano
    • 1 tsp dried parsley
    • 1 tsp dried basil
    • 1 tsp smoked paprika
    • 1 tsp garlic powder
    • 2 cups roasted herb tomatoes
    • 2 poblano peppers
    • 1 (15 oz.) can black beans, drained + rinsed
    • 1 Tbsp Extra virgin olive oil
    • 1 tsp dried oregano
    • 1 tsp smoked paprika
    • 1 tsp dried parsley
    • 1 tsp garlic powder
    • 1/2 tsp ground cumin
    • homemade Corn or Flour tortillas, charred
    • Jalapeños, chopped
    • 1 Dairy-Free Chipotle Sauce/Dressing

    Instructions

    1. Roasted Herb Tomatoes: To roast your tomatoes, follow my Roasted Herb Tomato recipe.
    2. Roasted Veggies: Preheat oven to 400 degrees Fahrenheit and line a baking sheet with parchment paper. Mix cubed sweet potatoes, poblano peppers, olive oil, and seasonings; bake for 20-25 minutes. Chop charred poblano peppers.
    3. Quinoa: Boil veggie stock in a medium saucepan. Add quinoa, whisk for 1-2 minutes, then simmer until cooked and stock is absorbed. Stir in salt, black pepper, garlic powder, and smoked paprika.
    4. Black Beans: Sauté black beans in olive oil with garlic powder, oregano, smoked paprika, parsley, and cumin for 5-6 minutes.
    5. Chipotle Sauce: See the recipe for Dairy-Free Chipotle Dressing/Sauce.
    6. Tortillas: Heat tortillas in a 350 degree Fahrenheit oven or char directly on a gas burner.
    7. Assembly: Top charred tortilla with cooked quinoa, roasted poblano peppers, sweet potatoes, black beans, chopped jalapeños, and chipotle sauce. Garnish with fresh cilantro.

    Notes

    STORAGE: Place leftover ingredients in a tightly sealed container in the refrigerator for up to 3-4 days. MAKE AHEAD: All ingredients (excluding tortillas) can be made and individually stored as meal prep.

    • Prep Time: 15 minutes
    • Cook Time: 25 minutes
    • Category: Main Course
    • Method: Roasting
    • Cuisine: Mexican-inspired

    Nutrition

    • Serving Size: 1 taco
    • Calories: 211 kcal
    • Sugar: 10 g
    • Sodium: 837 mg
    • Fat: 8 g
    • Saturated Fat: 1 g
    • Unsaturated Fat: 6 g
    • Trans Fat: 0 g
    • Carbohydrates: 34 g
    • Fiber: 6 g
    • Protein: 4 g
    • Cholesterol: 0 mg
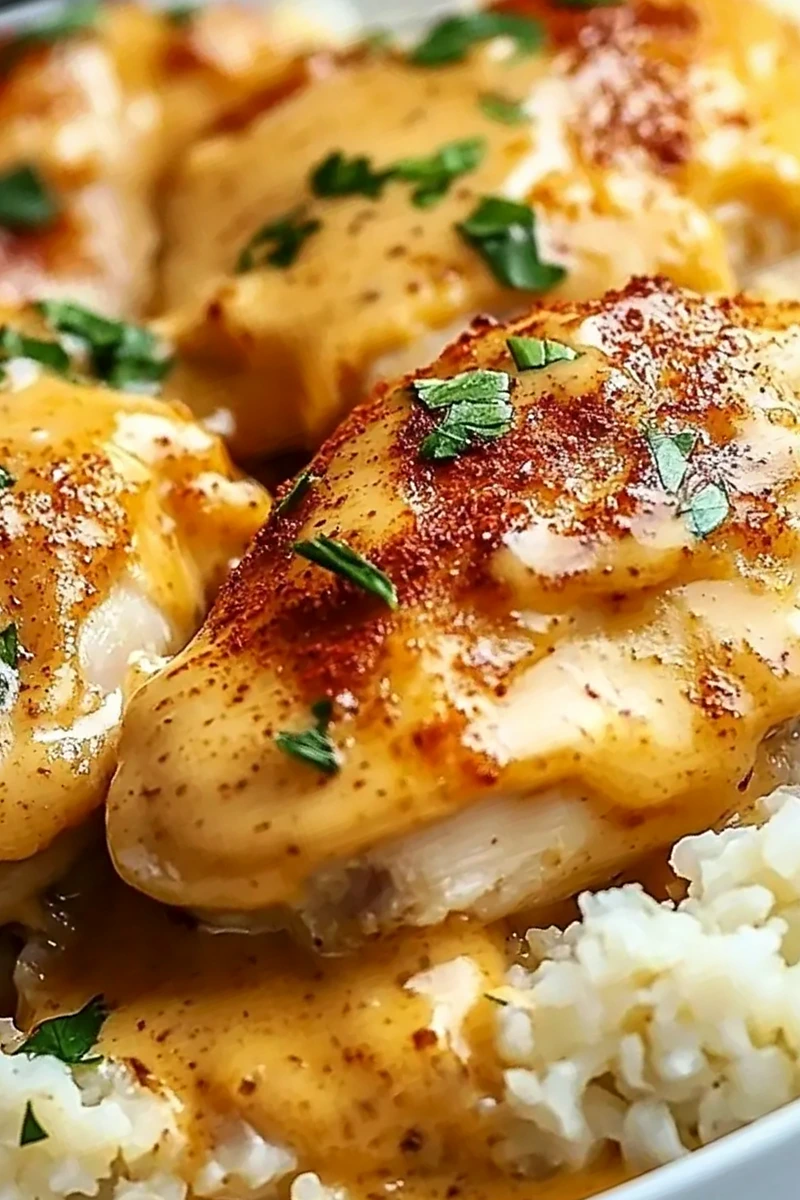
  • Creamy Keto Smothered Chicken and Cauliflower Rice

    Creamy Keto Smothered Chicken and Cauliflower Rice

    This low-carb dinner features tender chicken thighs simmered in a rich cream sauce and served over cauliflower rice. It provides a comforting, one-pan meal option that is easy to prepare on busy weeknights.

    Recipe image

    List of ingredients

    • 4 boneless, skinless chicken thighs – provides protein and richness.
    • 2 cups cauliflower rice – a low-carb substitute for grains.
    • 1 cup chicken broth – adds savory depth to the sauce.
    • 1 cup heavy cream – creates a thick, creamy texture.
    • 1 tablespoon olive oil – used for searing the meat.
    • 1 teaspoon garlic powder – adds a pungent, savory flavor.
    • 1 teaspoon onion powder – provides a subtle aromatic sweetness.
    • 1 teaspoon paprika – contributes color and a smoky hint.
    • Salt and pepper to taste – balances the overall seasoning.

    step-by-step instructions

    1. Heat the Oil: Heat olive oil in a pan over medium-high heat until it begins to shimmer.
    2. Season the Meat: Season chicken thighs evenly with salt, pepper, garlic powder, onion powder, and paprika.
    3. Sear the Chicken: Brown chicken thighs in the pan until golden brown, about 5-7 minutes per side.
    4. Create the Sauce: Add chicken broth and heavy cream to the pan, then bring the mixture to a simmer.
    5. Cook the Rice: Add cauliflower rice, cover the pan, and cook for 10-15 minutes.
    6. Rest and Serve: Remove from heat and let the dish rest for a few minutes before serving to allow the sauce to thicken.

    Expert Cooking Techniques

    Achieving a Golden Brown Sear

    To get the best crust on your chicken, ensure the pan is fully heated before adding the meat. Avoid overcrowding the pan, as this lowers the temperature and causes the chicken to steam rather than brown.

    Managing Pan Temperature

    Keep the heat at medium-high during the searing process to lock in juices. Once you add the broth and cream, reduce the heat to a simmer to prevent the dairy from curdling or boiling over.

    Using a Meat Thermometer

    Use an instant-read thermometer to ensure the chicken thighs reach an internal temperature of 165°F. This guarantees the meat is cooked through while remaining juicy and tender.

    Ingredient Swaps and Alternatives

    Leaner Protein Alternatives

    You can substitute chicken thighs with boneless, skinless chicken breasts for a leaner option. Be aware that breasts cook faster and can dry out, so reduce the searing time slightly.

    Dairy-Free Cream Options

    For a dairy-free version, replace the heavy cream with full-fat coconut cream or a cashew-based cream. Coconut cream adds a subtle sweetness, so you may want to increase the salt or pepper slightly.

    Alternative Low-Carb Bases

    If you do not have cauliflower rice, riced broccoli or thinly sliced cabbage work well. These alternatives maintain the low-carb profile while offering a slightly different flavor and texture.

    Flavor Enhancements and Additions

    Adding Sautéed Mushrooms

    Sauté sliced mushrooms in the olive oil before browning the chicken. Mushrooms add an earthy depth and a meaty texture that complements the cream sauce perfectly.

    Incorporating Fresh Spinach

    Stir in two cups of fresh baby spinach during the last two minutes of cooking. The residual heat will wilt the spinach without overcooking it, adding color and nutrition.

    Adding Acid for Balance

    Squeeze a teaspoon of fresh lemon juice over the dish right before serving. The acidity cuts through the richness of the heavy cream and brightens the overall flavor profile.

    Increasing the Heat

    For those who prefer a spicy kick, add a pinch of cayenne pepper or red pepper flakes to the seasoning mix. This adds a warm glow to the dish without overpowering the savory spices.

    Recommended Serving Suggestions

    Fresh Green Salad Pairings

    Serve this dish with a side of mixed leafy greens, cherry tomatoes, and a simple vinaigrette. The crispness of the salad provides a refreshing contrast to the creamy chicken.

    Steamed Green Bean Accompaniments

    Blanched or steamed green beans are an excellent side for this meal. Their snap and brightness balance the soft texture of the cauliflower rice.

    Garnish with Fresh Herbs

    Top each serving with freshly chopped parsley or chives. These herbs add a pop of color and a clean, fresh taste that enhances the presentation.

    Adding a Cheese Topping

    Sprinkle a small amount of crumbled feta or goat cheese on top of the chicken. The tanginess of these cheeses pairs beautifully with the savory cream sauce.

    Storage and Reheating Guidelines

    Refrigeration and Shelf Life

    Store leftovers in airtight glass containers in the refrigerator for up to four days. Ensure the dish is cooled slightly before sealing to prevent excess moisture buildup.

    Freezing for Long-Term Storage

    This dish can be frozen for up to two months. To maintain quality, freeze the chicken and sauce together, but consider adding fresh cauliflower rice upon reheating.

    Best Reheating Methods

    Reheat the dish on the stovetop over low heat with a tablespoon of chicken broth or water. This helps loosen the sauce and prevents the chicken from drying out.

    Meal Prep Strategies

    Weekly Portioning

    Divide the cooked meal into four equal containers immediately after cooking. This ensures you have pre-measured, low-carb lunches ready for the work week.

    Advance Ingredient Preparation

    Pre-rice your cauliflower in a food processor and measure your spices into a small bowl ahead of time. This reduces active kitchen time to under 30 minutes.

    Common Troubleshooting Solutions

    Fixing a Thin Sauce

    If the sauce is too thin, simmer it without the lid for an additional 5 minutes. This allows the liquid to reduce and the cream to thicken naturally.

    Preventing Dry Chicken

    Avoid overcooking the chicken thighs during the simmering phase. Since thighs are more forgiving than breasts, they stay moist, but excessive heat can still toughen the meat.

    Reducing Excessive Salt

    If the sauce tastes too salty, stir in an extra tablespoon of heavy cream or a splash of water. This dilutes the salt concentration without ruining the creamy texture.

    Frequently Asked Questions

    What is KETO Smothered Chicken and Rice?

    It is a low-carb meal featuring seasoned chicken thighs cooked in a creamy sauce and served over a base of cauliflower rice.

    How many calories are in this recipe?

    Each serving contains approximately 400 calories, providing a balanced mix of proteins and healthy fats.

    Can I meal prep this dish?

    Yes, this recipe is ideal for meal prep and can be stored in the refrigerator for several days without losing flavor.

    What can I substitute for cauliflower rice?

    You can use riced broccoli, zucchini noodles, or shredded cabbage as low-carb alternatives to cauliflower rice.

    How can I adjust the flavor of this dish?

    You can add red pepper flakes for heat, fresh lemon juice for acidity, or fresh herbs like thyme for a more aromatic profile.

    Print
    clock clock iconcutlery cutlery iconflag flag iconfolder folder iconinstagram instagram iconpinterest pinterest iconfacebook facebook iconprint print iconsquares squares iconheart heart iconheart solid heart solid icon
    Keto Smothered Chicken and Rice

    Creamy Keto Smothered Chicken and Cauliflower Rice


    5 Stars 4 Stars 3 Stars 2 Stars 1 Star

    No reviews

    • Author: imageuploader
    • Total Time: 40 minutes
    • Yield: 4 servings 1x
    • Diet: Keto

    Description

    A delicious and low-carb smothered chicken dish served over cauliflower rice for a KETO-friendly meal.


    Ingredients

    Scale
    • 4 boneless, skinless chicken thighs
    • 2 cups cauliflower rice
    • 1 cup chicken broth
    • 1 cup heavy cream
    • 1 tablespoon olive oil
    • 1 teaspoon garlic powder
    • 1 teaspoon onion powder
    • 1 teaspoon paprika
    • Salt and pepper to taste

    Instructions

    1. Step 1: Heat olive oil in a pan over medium-high heat.
    2. Step 2: Season chicken thighs with salt, pepper, garlic powder, onion powder, and paprika.
    3. Step 3: Brown chicken thighs in the pan until golden brown, about 5-7 minutes per side.
    4. Step 4: Add chicken broth and heavy cream, bring to a simmer.
    5. Step 5: Add cauliflower rice, cover, and cook for 10-15 minutes.
    6. Step 6: Remove from heat and let rest for a few minutes before serving.

    Notes

    This recipe is great for meal prep. Adjust seasoning according to your taste. Cauliflower rice can be substituted with any low-carb grain if desired.

    • Prep Time: 10 minutes
    • Cook Time: 30 minutes
    • Category: Dinner
    • Method: Stovetop
    • Cuisine: American

    Nutrition

    • Serving Size: 1 serving
    • Calories: 400 kcal
    • Sugar: 2 g
    • Sodium: 800 mg
    • Fat: 30 g
    • Saturated Fat: 15 g
    • Unsaturated Fat: 10 g
    • Trans Fat: 0 g
    • Carbohydrates: 8 g
    • Fiber: 3 g
    • Protein: 25 g
    • Cholesterol: 100 mg
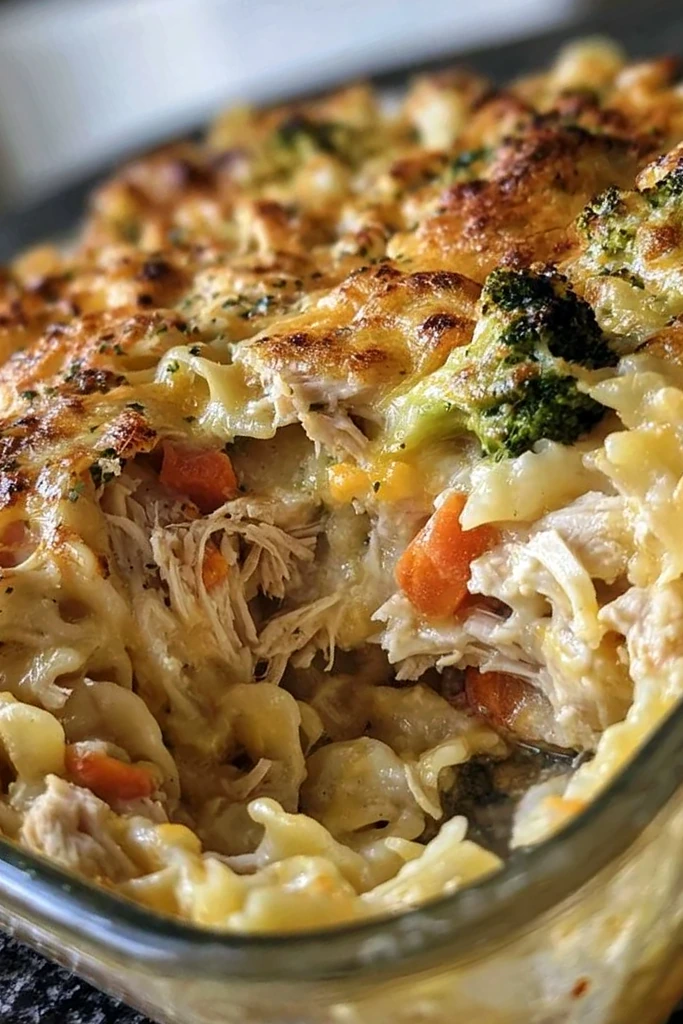
  • Quick Healthy Rotisserie Chicken and Vegetable Bake

    Quick Healthy Rotisserie Chicken and Vegetable Bake

    This nutritious rotisserie chicken casserole is designed for efficiency and flavor, making it an ideal choice for weeknight dinners. By combining pre-cooked chicken with fresh vegetables and a creamy sauce, you get a comforting meal in under an hour.

    Recipe image

    List of ingredients

    • 2 cups shredded rotisserie chicken – pre-cooked and shredded for convenience.
    • 1 cup chopped broccoli – use fresh florets for the best texture.
    • 1 cup diced carrots – cut into small, even pieces for consistent cooking.
    • 1/2 cup diced onions – finely chopped to blend into the sauce.
    • 1 cup low-fat milk – provides a creamy base without excess calories.
    • 1/2 cup shredded low-fat cheese – choose a variety that melts smoothly.
    • 1 tsp garlic powder – adds a savory, aromatic depth.
    • 1 tsp black pepper – provides a mild, spicy warmth.
    • 1 tsp salt – enhances the natural flavors of the chicken and vegetables.

    step-by-step instructions

    1. Prepare the oven: Preheat your oven to 375°F. Ensure the oven rack is in the center position for even heat distribution.
    2. Combine base ingredients: In a large mixing bowl, combine the shredded rotisserie chicken, chopped broccoli, diced carrots, and diced onions. Toss them gently to ensure the vegetables are evenly distributed.
    3. Create the sauce: In a separate mixing bowl, whisk together the low-fat milk, shredded low-fat cheese, garlic powder, black pepper, and salt until the mixture is well combined.
    4. Coat the mixture: Pour the prepared sauce over the chicken and vegetable mixture. Fold everything together with a spatula until every piece is thoroughly coated.
    5. Transfer to dish: Pour the mixture into a greased baking dish. Spread the ingredients evenly to ensure the casserole cooks uniformly.
    6. Bake: Place the dish in the oven and bake for 25 minutes. Remove when the sauce is bubbly and the top is lightly golden.

    Optimizing Your Baking Technique

    Maintain Uniform Vegetable Sizes

    Cutting your carrots and broccoli into small, consistent pieces ensures they cook at the same rate. If the pieces are too large, they may remain crunchy while the chicken overcooks. Aim for bite-sized chunks to keep the texture balanced.

    Temper Cold Chicken Before Mixing

    If your rotisserie chicken is coming straight from the refrigerator, warm it slightly in the microwave for 20-30 seconds. This helps the milk-based sauce absorb more effectively and ensures the entire dish reaches the safe internal temperature faster.

    Prevent Sticking With Proper Greasing

    Lightly coat your baking dish with non-stick spray or a small amount of vegetable oil before adding the mixture. This prevents the cheese from sticking to the edges and makes serving much easier. It also helps in cleaning the dish after the meal.

    Manage Oven Hot Spots

    Every oven has areas that heat more quickly than others. If you notice one side of your casserole browning faster than the rest, rotate the pan 180 degrees halfway through the baking time. This ensures a consistent golden-brown finish across the top.

    Allow the Dish to Rest

    Let the casserole sit for five to ten minutes after removing it from the oven. This resting period allows the sauce to thicken and set, which prevents the dish from appearing runny when served. It also makes slicing the portions much cleaner.

    Ingredient Substitutions and Adaptations

    Using Turkey Instead of Chicken

    Cooked turkey breast is an excellent substitute for rotisserie chicken. Shred the turkey in the same manner and follow the rest of the recipe exactly. The flavor profile remains very similar, making it a great way to use holiday leftovers.

    Dairy-Free Milk Alternatives

    For a dairy-free version, replace the low-fat milk with unsweetened almond, soy, or oat milk. These plant-based options maintain the creaminess of the sauce without adding a strong distinct flavor. Ensure the milk is unsweetened to avoid an accidental sweet taste.

    Incorporating Vegan Cheese Options

    Swap the shredded low-fat cheese for a plant-based cheese alternative or a tablespoon of nutritional yeast. Nutritional yeast provides a savory, nutty, and cheesy flavor that pairs well with broccoli and carrots. Adjust the salt levels if your vegan cheese is already heavily salted.

    Handling Frozen Vegetables

    If using frozen broccoli or carrots, thaw them completely and squeeze out any excess moisture using a clean kitchen towel. Excess water from frozen produce can dilute the sauce and lead to a soggy casserole. Patting them dry ensures the creamy consistency is preserved.

    Grated Carrots for a Softer Profile

    Instead of dicing the carrots, you can grate them using a box grater. Grated carrots cook faster and blend more seamlessly into the creamy sauce. This is a great option for children who prefer a less chunky texture in their meals.

    Flavor Variations and Customizations

    Adding a Spicy Element

    Stir in a teaspoon of smoked paprika or a pinch of cayenne pepper into the sauce for a deeper, spicier profile. You can also fold in diced jalapeños with the vegetables for a fresh heat. Top the dish with pepper jack cheese for an integrated spicy kick.

    Mediterranean Style Twist

    Replace the garlic powder with dried oregano and stir in chopped sun-dried tomatoes and fresh basil. This transforms the dish into a Mediterranean-inspired bake. You can also use a sprinkle of feta cheese on top for a salty, tangy finish.

    South Asian Inspired Flavors

    Add a teaspoon of mild curry powder to the milk mixture and swap the broccoli for green peas. This combination creates a warm, aromatic dish reminiscent of a korma. Serve it with basmati rice for a complete meal experience.

    Creating a Kid-Friendly Mild Version

    Reduce the amount of garlic powder and use a very mild cheese like mozzarella or mild provolone. These cheeses melt exceptionally well and have a creamy taste that appeals to picky eaters. Avoid adding black pepper if the children are sensitive to spice.

    Adding a Crunchy Breadcrumb Topping

    Mix a quarter cup of Panko breadcrumbs with a teaspoon of melted butter and sprinkle it over the top before baking. This adds a contrasting crunch to the creamy interior of the casserole. For a gluten-free version, use crushed almond flour or gluten-free crackers.

    Serving and Pairing Suggestions

    Fresh Side Salad Pairings

    A crisp green salad with a lemon-based vinaigrette provides a sharp contrast to the richness of the cheese sauce. Use mixed greens, sliced cucumbers, and cherry tomatoes to add freshness to the plate. The acidity of the dressing helps cleanse the palate between bites.

    Warm Bread Accompaniments

    Serve the casserole with warm dinner rolls or a slice of toasted rustic sourdough bread. The bread is perfect for soaking up the extra creamy sauce left on the plate. Garlic bread is also a popular choice that complements the garlic powder in the recipe.

    Light Beverage Pairings

    Pair this meal with a chilled sparkling water infused with lemon or lime to keep the meal feeling light. A glass of unsweetened iced tea also works well, as the tannins in the tea cut through the creaminess of the cheese. For a warm option, an herbal infusion is a cozy choice.

    Balanced Dessert Options

    Finish the meal with a light dessert such as a fruit crumble or a bowl of mixed berries with a dollop of Greek yogurt. A citrus sorbet is another excellent choice, as the acidity refreshes the mouth after the savory flavors of the casserole. Keep the dessert light to maintain the healthy nature of the dinner.

    Plating for Visual Appeal

    Scoop the casserole into shallow bowls and garnish with a sprinkle of fresh chopped parsley or chives. The bright green color of the herbs contrasts beautifully with the creamy sauce and orange carrots. Using a colorful ceramic bowl can make the simple meal feel more intentional.

    Storage, Freezing, and Reheating

    Proper Refrigeration Method

    Store leftover casserole in an airtight glass or plastic container in the refrigerator for up to four days. Ensure the food has cooled slightly before sealing to prevent excessive condensation from forming inside the container. This helps maintain the texture of the vegetables.

    Freezing Unbaked Casseroles

    You can assemble the casserole in a freezer-safe dish and freeze it before baking for up to three months. Wrap the dish tightly with foil and plastic wrap to prevent freezer burn. Thaw the dish in the refrigerator overnight before placing it in the oven to bake.

    Oven Reheating for Best Texture

    To maintain the best consistency, reheat individual portions in a 350°F oven for about 15 minutes. This method prevents the sauce from separating and keeps the top from becoming too soft. Cover the portion with foil to retain moisture during the process.

    Microwave Reheating Tips

    If you are in a rush, microwave the casserole in 30-second intervals, stirring gently in between. Place a damp paper towel over the dish to create a steam effect, which prevents the chicken from drying out. Avoid overheating, as this can cause the cheese sauce to break.

    Managing Leftover Liquid

    If you notice liquid pooling at the bottom of the dish after refrigeration, do not worry. Gently stir the casserole before reheating to re-incorporate the moisture into the sauce. If it remains too watery, you can simmer it in a skillet for a few minutes to reduce the liquid.

    Common Troubleshooting and FAQs

    Can I use cold rotisserie chicken?

    Yes, cold chicken works perfectly well in this recipe. However, warming it for a few seconds in the microwave ensures it integrates better with the milk and cheese sauce, leading to a more uniform heat distribution during the baking process.

    What cheese melts best in this dish?

    Low-fat mozzarella and mild cheddar are the best options for a smooth melt. If you prefer a sharper taste, an extra-sharp cheddar works well, though it may not be as creamy as mozzarella. Always use shredded cheese for the fastest melting time.

    How do I stop the casserole from becoming watery?

    The most common cause of wateriness is excess moisture from the vegetables. Ensure you drain chopped broccoli and carrots well, especially if using frozen varieties. Additionally, avoid overfilling the pan, which allows steam to escape more easily during baking.

    Why is my sauce not thickening?

    If the sauce is too thin, you can bake the dish for an additional 5-10 minutes without a cover. Alternatively, you can whisk a small amount of cornstarch or flour into the milk before mixing it with the other ingredients to provide more structure to the sauce.

    Can this be made in a slow cooker?

    Yes, you can adapt this for a slow cooker by reducing the milk by a quarter cup to prevent it from becoming too liquid. Cook on low for 4-6 hours or on high for 2-3 hours. Note that the top will not brown unless you transfer it to the oven for a final broil.

    Print
    clock clock iconcutlery cutlery iconflag flag iconfolder folder iconinstagram instagram iconpinterest pinterest iconfacebook facebook iconprint print iconsquares squares iconheart heart iconheart solid heart solid icon
    Quick and Healthy Rotisserie Chicken Casserole

    Quick Healthy Rotisserie Chicken and Vegetable Bake


    5 Stars 4 Stars 3 Stars 2 Stars 1 Star

    No reviews

    • Author: imageuploader
    • Total Time: 35 minutes
    • Yield: 4 servings 1x
    • Diet: Gluten-Free, Dairy-Light

    Description

    A comforting and quick casserole made with rotisserie chicken, broccoli, carrots, and cheese, perfect for busy weeknights.


    Ingredients

    Scale
    • 2 cups shredded rotisserie chicken
    • 1 cup chopped broccoli
    • 1 cup diced carrots
    • 1/2 cup diced onions
    • 1 cup low-fat milk
    • 1/2 cup shredded low-fat cheese
    • 1 tsp garlic powder
    • 1 tsp black pepper
    • 1 tsp salt

    Instructions

    1. Preheat: Preheat oven to 375°F.
    2. Combine: Mix chicken, broccoli, carrots, and onions in a bowl.
    3. Mix Sauce: In a separate bowl, combine milk, cheese, garlic powder, pepper, and salt.
    4. Coat: Pour the sauce over the chicken and vegetables.
    5. Transfer: Transfer to a greased baking dish and spread evenly.
    6. Bake: Bake for 25 minutes or until bubbly.

    Notes

    Use fresh or leftover chicken and adjust cheese for preference. Let rest before slicing for better serving consistency.

    • Prep Time: 10 minutes
    • Cook Time: 25 minutes
    • Category: Casserole
    • Method: Baking
    • Cuisine: Comfort Fusion

    Nutrition

    • Serving Size: 1 cup
    • Calories: 320 kcal
    • Sugar: 5 g
    • Sodium: 600 mg
    • Fat: 14 g
    • Saturated Fat: 6 g
    • Unsaturated Fat: 8 g
    • Trans Fat: 0 g
    • Carbohydrates: 12 g
    • Fiber: 3 g
    • Protein: 28 g
    • Cholesterol: 70 mg
  • Easy Make-Ahead Breakfast Sandwiches for Busy Mornings

    Easy Make-Ahead Breakfast Sandwiches for Busy Mornings

    Streamline your morning routine with these high-protein, freezer-friendly breakfast sandwiches. These make-ahead meals are designed to stay fresh and flavorful, providing a quick and nutritious start to your day.

    Recipe image

    List of ingredients

    • 6 slices turkey bacon – cooked until crispy for a salty, smoky element.
    • ½ yellow onion, diced – sautéed to provide a sweet, savory base.
    • 4–5 handfuls fresh spinach – wilted and mixed into the eggs for added nutrients.
    • 5 large eggs – provides the main structure and protein of the patty.
    • 1½ cups liquid egg whites – increases protein content while keeping the texture light.
    • ½ cup milk – any variety works to ensure the eggs stay fluffy.
    • ½ tsp salt – enhances the overall flavor of the egg mixture.
    • ¼ tsp pepper – adds a subtle touch of spice.
    • 6 slices cheese – cheddar is recommended for its strong flavor and meltability.
    • 6 English muffins – can be swapped for bagels or sandwich thins.

    step-by-step instructions

    1. Oven Preparation: Preheat your oven to 350°F and thoroughly grease a 9×13 inch baking dish to prevent the eggs from sticking.
    2. Cook the Protein: Fry the turkey bacon until it reaches your desired crispiness, then set the slices aside on paper towels to drain excess fat. Remove most of the grease from the pan, leaving just a small amount for the vegetables.
    3. Sauté the Vegetables: In the same pan, cook the diced onions until they become soft and translucent, which usually takes 5 to 8 minutes. Stir in the spinach and cook only until wilted, then remove the mixture from the heat and let it cool completely.
    4. Prepare the Egg Mix: In a large mixing bowl, whisk together the whole eggs, liquid egg whites, milk, salt, and pepper until well combined. Stir in the cooled onion and spinach mixture and pour the entire batter into the greased baking dish.
    5. Bake the Base: Place the dish in the oven and bake for 20 to 25 minutes, or until the center is set and no longer jiggles when moved. Remove from the oven and allow the egg slab to cool completely before proceeding.
    6. Cut the Patties: Use a circular biscuit cutter or an English muffin as a template to cut the baked eggs into six even rounds.
    7. Assemble the Sandwiches: Split the English muffins and layer one round of egg, a slice of cheese, and a strip of turkey bacon on each muffin.
    8. Store and Freeze: Wrap each completed sandwich tightly in aluminum foil. To prevent freezer burn, place the wrapped sandwiches inside a large zip-top freezer bag.

    Protein Substitution Options

    Using Turkey Sausage Patties

    If you prefer a heartier meat, substitute the turkey bacon with pre-cooked turkey sausage patties. Ensure the patties are the same diameter as your egg rounds so they fit perfectly within the muffin.

    Implementing Lean Deli Ham

    Thinly sliced lean deli ham is a great alternative that adds a different salty profile to the sandwich. Sear the ham in a pan for one minute per side to improve the texture before assembling.

    Plant-Based Protein Alternatives

    For a meat-free version, use plant-based bacon strips or seasoned smoked tofu slices. Ensure these are cooked until firm to provide a satisfying contrast to the soft egg patty.

    Adding Smoked Salmon

    For a more gourmet breakfast, replace the meat with smoked salmon and swap the cheddar for cream cheese. This variation works best when using bagels instead of English muffins.

    Vegetable Customization Ideas

    Incorporating Sautéed Mushrooms

    Diced mushrooms add an earthy flavor and a meatier texture to the egg base. Sauté them along with the onions until their moisture has evaporated to avoid a watery egg patty.

    Including Red Bell Peppers

    Finely diced red bell peppers provide a bright color and a slight sweetness. Cook them until tender-crisp before stirring them into the whisked eggs.

    Swapping Spinach for Kale

    Kale is a robust alternative to spinach that holds its texture better during the baking process. Be sure to remove the tough stems and chop the leaves finely before sautéing.

    Adding Diced Zucchini

    Grated or finely diced zucchini adds moisture and nutrients without altering the flavor significantly. Squeeze out excess water from the zucchini before adding it to the mix.

    Bread Selection Guide

    Using Whole Wheat English Muffins

    Whole wheat muffins increase the fiber content of the meal, keeping you full for longer. Toast them lightly before assembling to create a moisture barrier against the eggs.

    Opting for Bagel Thins

    Bagel thins provide the flavor of a traditional bagel with fewer calories and a thinner profile. They are ideal for those who prefer a chewier bread texture.

    Sourdough Bread Rounds

    Sourdough offers a tangy flavor and is often easier on the digestive system. Use a round cutter to create sourdough circles that match the size of your egg patties.

    Gluten-Free Bread Alternatives

    Use certified gluten-free English muffins or large gluten-free wraps. Since these breads can be more fragile, avoid over-toasting them before the freezing process.

    Optimal Storage and Freezing Techniques

    Refrigeration Guidelines

    If you plan to eat the sandwiches within a week, store them in the refrigerator. Keep them wrapped tightly in foil or placed in an airtight container to prevent them from absorbing other fridge odors.

    Long-Term Freezer Storage

    These sandwiches can be kept in the freezer for up to three months. The combination of foil and a freezer bag is essential to protect the bread from drying out.

    Preventing Freezer Burn

    Remove as much air as possible from the zip-top bag before sealing it. This minimizes the oxygen contact with the foil, which preserves the quality of the turkey bacon and cheese.

    Proper Defrosting Methods

    For the best texture, move a sandwich from the freezer to the fridge the night before. This slow thaw ensures the bread doesn’t become soggy during the reheating process.

    Detailed Reheating Methods

    Conventional Oven Method

    Keep the sandwich wrapped in foil and bake at 425°F for 8 to 10 minutes if reheating from the fridge. This method preserves the moisture of the egg while warming the center.

    Open-Faced Broiling for Crispiness

    To get a toasted finish, remove the foil and place the open-faced sandwich under the broiler for 3 to 5 minutes. Watch closely to prevent the cheese from burning.

    Quick Microwave Instructions

    Remove the foil and wrap the sandwich in a paper towel to absorb excess steam. Microwave on defrost for one minute, flip the sandwich, and heat for another 30 to 60 seconds.

    Air Fryer Reheating

    Place the unwrapped sandwich in the air fryer at 350°F for 3 to 5 minutes. This is the fastest way to achieve a crispy muffin and melty cheese simultaneously.

    Tips for the Perfect Egg Base

    Cooling Sautéed Vegetables to Prevent Sogginess

    Always let the onion and spinach mixture cool to room temperature before whisking it into the eggs. Adding hot vegetables can cause the eggs to cook prematurely or release excess water.

    Utilizing Carton Egg Whites

    Using liquid egg whites from a carton reduces waste and saves time on separating shells. It also allows you to easily control the ratio of whole eggs to whites for a leaner patty.

    Ensuring the Eggs are Fully Set

    Avoid removing the egg slab from the oven if the center is still jiggly. A fully set egg is easier to cut into clean rounds and stores much better in the freezer.

    Using Non-Stick Baking Surfaces

    If you find the eggs sticking to the pan, use a silicone baking mat or a heavy coating of non-stick spray. This ensures the slab lifts out cleanly for precise cutting.

    Cheese Variety Recommendations

    Sharp Cheddar for Bold Flavor

    Sharp cheddar provides a strong, salty contrast to the mild eggs and turkey bacon. It is one of the best melting cheeses for make-ahead meals.

    Swiss Cheese for a Nutty Taste

    Swiss cheese offers a more sophisticated, nutty flavor that pairs exceptionally well with spinach and mushrooms. It melts smoothly without becoming overly oily.

    Pepper Jack for a Spicy Kick

    If you enjoy a bit of heat, Pepper Jack is an excellent choice. The embedded jalapeños add a layer of flavor that eliminates the need for extra condiments.

    Provolone for Better Meltability

    Provolone is highly pliable and creates a gooey texture that binds the egg and protein together. It is a milder option that appeals to children and picky eaters.

    Post-Reheat Topping Suggestions

    Adding Sliced Avocado

    Fresh avocado adds a creamy texture and healthy fats to the sandwich. Add the slices only after the sandwich has been reheated to avoid a bitter taste from cooked avocado.

    Fresh Tomato Slices

    A thin slice of salted tomato adds acidity and freshness. Place the tomato between the egg and the cheese for the best structural stability.

    Spicy Condiments and Hot Sauce

    Sriracha, Cholula, or a dash of hot honey can elevate the flavor profile. Apply these condiments after reheating to keep the bread from becoming soggy.

    A Smear of Pesto or Aioli

    Basil pesto or a garlic aioli adds a gourmet touch to the English muffin. Spread the sauce on the toasted muffin before adding the egg patty.

    Troubleshooting and Common Fixes

    Dealing with Watery Eggs

    If your eggs seem watery, it is usually due to undercooked vegetables. Ensure all spinach and onions are fully sautéed and drained of liquid before adding them to the eggs.

    Fixing Soggy Bread

    Sogginess often occurs when reheating in the microwave. To fix this, toast the muffin separately or use the oven method to evaporate surface moisture.

    Preventing Eggs from Sticking

    If the egg rounds break while cutting, let the slab cool completely in the refrigerator for 30 minutes. Cold eggs are much firmer and easier to slice cleanly.

    Managing Uneven Heating

    If the center of the sandwich is cold but the outside is hot, use a lower microwave power setting. Heating at 50% power for a longer duration ensures an even temperature.

    Using Leftover Egg Fragments

    Making Breakfast Scrambles

    The scraps left over from cutting circles can be sautéed in a pan. Mix them with extra cheese and serve as a side dish or a quick breakfast bowl.

    Filling Breakfast Burritos

    Combine the egg fragments with black beans, salsa, and avocado in a flour tortilla. This is an efficient way to use every bit of the egg base without waste.

    Creating Mini Egg Muffins

    Place the remaining egg mixture into a greased mini-muffin tin and bake for 10 minutes. These make great protein-packed snacks for the rest of the week.

    Frequently Asked Questions

    Can I meal prep a breakfast sandwich?

    Yes, these sandwiches are specifically designed for meal prep. By baking the eggs in a slab and freezing the assembled sandwiches, you can save significant time during the week.

    How long do meal prepped breakfast sandwiches last?

    When stored in the refrigerator, they remain fresh for up to 7 days. In the freezer, they can be kept for approximately 3 months without losing quality.

    How long can breakfast sandwiches stay in the fridge?

    They should be kept for no more than 5 to 7 days. Ensure they are wrapped tightly in foil or kept in an airtight container to maintain freshness.

    What is a good breakfast to meal prep?

    Breakfast sandwiches are ideal, but other great options include egg casseroles, overnight oats, and baked protein pancake bowls for a variety of textures and flavors.

    Print
    clock clock iconcutlery cutlery iconflag flag iconfolder folder iconinstagram instagram iconpinterest pinterest iconfacebook facebook iconprint print iconsquares squares iconheart heart iconheart solid heart solid icon
    High-Protein Meal Prep Breakfast Sandwiches

    Easy Make-Ahead Breakfast Sandwiches for Busy Mornings


    5 Stars 4 Stars 3 Stars 2 Stars 1 Star

    No reviews

    • Author: imageuploader
    • Total Time: 45 minutes
    • Yield: 6 sandwiches 1x
    • Diet: General

    Description

    Baked eggs with spinach and onion, topped with turkey bacon and cheese, layered on English muffins. Great for busy mornings and fully customizable.


    Ingredients

    Scale
    • 6 slices turkey bacon
    • ½ yellow onion, diced
    • 45 handfuls spinach
    • 5 large eggs
    • 1½ cups liquid egg whites
    • ½ cup milk (any kind)
    • ½ tsp salt
    • ¼ tsp pepper
    • 6 slices cheese (cheddar recommended)
    • 6 English muffins

    Instructions

    1. Step 1: Preheat oven to 350°F and grease a 9×13 baking dish.
    2. Step 2: Cook turkey bacon until crispy; set aside on paper towels. Remove most grease.
    3. Step 3: In the same pan, cook onions until soft (5–8 min). Add spinach, cook until wilted. Cool mixture.
    4. Step 4: In a bowl, whisk eggs, egg whites, milk, salt, and pepper. Add cooled spinach/onion mix. Pour into greased dish.
    5. Step 5: Bake for 20–25 minutes until eggs are set. Cool completely.
    6. Step 6: Cut baked eggs into 6 rounds using a cutter or muffin as a guide.
    7. Step 7: Assemble sandwiches: layer egg, turkey bacon, and cheese on muffins.
    8. Step 8: Wrap sandwiches in foil and freeze.

    Notes

    Use carton egg whites to avoid waste. Add or substitute any veggies (e.g., mushrooms, red peppers) or meats (e.g., turkey sausage). Let cooked veggies cool before mixing into eggs to avoid scrambling. Save leftover egg scraps for scrambles or burritos. Enhance with tomato slices, avocado, or hot sauce.

    • Prep Time: 20 minutes
    • Cook Time: 25 minutes
    • Category: Breakfast
    • Method: Assemble, Bake
    • Cuisine: American

    Nutrition

    • Serving Size: 1 sandwich
    • Calories: 361 kcal
    • Sugar: 2 g
    • Sodium: 811 mg
    • Fat: 16 g
    • Saturated Fat: 8 g
    • Unsaturated Fat: 7 g
    • Trans Fat: 1 g
    • Carbohydrates: 30 g
    • Fiber: 2 g
    • Protein: 24 g
    • Cholesterol: 169 mg
  • Savory Baked Egg Cups with Cheese and Veggies

    Savory Baked Egg Cups with Cheese and Veggies

    These savory egg muffins are an ideal solution for high-protein meal prepping. They combine eggs, vegetables, and cheese into a portable format suitable for busy schedules.

    Recipe image

    List of ingredients

    • 12 large eggs – provides the main protein base.
    • 1 cup shredded cheddar cheese – adds richness and flavor.
    • ½ cup red bell pepper, diced – adds crunch and sweetness.
    • ½ cup fresh spinach, chopped – adds vitamins and color.
    • ½ cup cooked and crumbled beef bacon – provides a salty, savory taste.
    • ½ teaspoon salt – balances the flavors.
    • ¼ teaspoon pepper – adds a subtle spice.

    step-by-step instructions

    1. Prepare Oven: Preheat the oven to 350°F and coat a 12-cup muffin tin with non-stick spray to ensure easy release.
    2. Beat Eggs: Crack the eggs into a large bowl and beat them until they are light and frothy for better texture.
    3. Combine Mix: Stir in the shredded cheese, diced bell pepper, chopped spinach, crumbled beef bacon, salt, and pepper until fully combined.
    4. Fill Pan: Pour the mixture into the muffin cups, leaving a small gap at the top to prevent overflow while rising.
    5. Bake and Cool: Bake for 15 to 20 minutes until the centers are firm and no longer jiggle, then let them cool briefly before serving.

    Practical Baking Advice

    Beating Eggs for Fluffiness

    Beating the eggs until they are frothy incorporates air into the mixture. This aeration creates a lighter, more airy texture in the final bake.

    Pre-Cooking Meat Ingredients

    Ensure the beef bacon is fully cooked and drained of excess grease before adding it to the eggs. This prevents the muffins from becoming oily or soggy.

    Consistent Ingredient Distribution

    Stir the mixture thoroughly before pouring it into the tin. This ensures every muffin contains an equal amount of cheese and vegetables.

    Using a Ladle for Filling

    Use a small ladle or a measuring cup to pour the egg mixture. This prevents spills and ensures equal portions across all 12 cups.

    The Touch Test for Doneness

    Gently press the center of a muffin with your finger. It should spring back and not jiggle to ensure the eggs are fully set.

    Customizing Your Ingredients

    Substituting Beef Bacon with Turkey

    Turkey bacon is a leaner alternative to beef bacon. Cook it until crisp to maintain the same savory profile and texture.

    Using Different Cheeses

    Pepper Jack adds heat, while Feta provides a tangy, salty taste. Swiss cheese offers a milder, nuttier flavor profile.

    Adding Different Leafy Greens

    Kale or Swiss chard can replace spinach. Chop them very finely to ensure they distribute evenly throughout the egg mixture.

    Swapping Red Pepper for Yellow or Green

    Yellow and orange peppers are sweeter than red. Green peppers provide a more bitter and sharp flavor profile.

    Incorporating Mushrooms or Onions

    Sauté mushrooms and onions in a pan first. Adding raw mushrooms can release too much water during baking, making the muffins wet.

    Flavor Profiles and Variations

    Mediterranean-Inspired Mix

    Use feta cheese, diced Kalamata olives, and sun-dried tomatoes. This combination creates a salty and tangy flavor profile.

    Southwestern Style

    Add diced jalapeños, corn kernels, and pepper jack cheese. Serve these muffins with a side of fresh salsa for extra zest.

    Garden Vegetable Blend

    Mix in shredded carrots, diced zucchini, and chopped green onions. This increases the nutrient density and adds a fresh taste.

    Basil Pesto Swirl

    Add a teaspoon of basil pesto to the top of each muffin before baking. Swirl it with a toothpick for a marbled appearance.

    Herbed Egg Cups

    Incorporate fresh parsley, chives, and dill into the mix. These herbs add a fresh, aromatic quality to the eggs.

    Best Serving and Pairing Ideas

    Adding Fresh Fruit Sides

    Serve the egg muffins with sliced strawberries, blueberries, or melon. The sweetness of the fruit balances the savory flavors of the eggs.

    Topping with Avocado or Salsa

    Place a slice of fresh avocado or a spoonful of salsa on top of each muffin. This adds creaminess and a bright acidity.

    Pairing with Toasted Whole Grain Bread

    Serve the muffins alongside a slice of toasted sourdough or rye bread. This adds complex carbohydrates for sustained energy.

    Complementary Morning Drinks

    Pair with a black coffee or a green smoothie. A smoothie made with spinach and apple complements the vegetable-heavy muffins.

    Serving as Protein Appetizers

    Cut the muffins into halves or quarters to serve on a party platter. Pair them with a side of Greek yogurt dip.

    Storage and Preservation Guide

    Refrigeration Parameters

    Store leftover muffins in an airtight container in the refrigerator. They remain fresh and safe to eat for up to 5 days.

    Flash Freezing Technique

    Freeze muffins on a baking sheet first until solid. Once frozen, transfer them to a freezer bag to prevent them from sticking together.

    Microwave Reheating Process

    Heat the muffins for 30-45 seconds on medium power. This prevents the eggs from becoming rubbery or overcooked.

    Restoring Texture in the Oven

    Reheat the muffins at 300°F for 5-10 minutes. This helps the cheese regain its melt and the edges stay firm.

    Using an Air Fryer

    Heat at 320°F for 3-5 minutes. This is the fastest way to restore a slightly crisp exterior to the egg cups.

    Common Baking Troubleshooting

    Preventing Watery Bases

    Squeeze excess moisture out of spinach or frozen vegetables before adding them. This stops water from pooling at the bottom of the muffin.

    Avoiding Rubbery Eggs

    Do not overbake the muffins beyond the recommended time. Remove them as soon as the centers are firm to maintain tenderness.

    Solving Sticking Issues

    Use a high-quality non-stick spray or silicone muffin liners. Let the muffins cool for 2 minutes before attempting to remove them.

    Stopping Muffins from Collapsing

    Allow the muffins to set in the pan for a few minutes after removing them from the oven. This stabilizes the structure.

    Ensuring Even Browning

    Rotate the muffin pan halfway through the baking time. This accounts for oven hot spots and ensures even cooking.

    Frequently Asked Questions

    Can I use a different pan?

    Yes, silicone muffin molds work well. They are naturally non-stick and make it easier to pop the muffins out.

    How to make these low-carb?

    These are naturally low-carb as they use eggs and vegetables. Avoid pairing them with bread to keep the carb count low.

    Can I add milk for creaminess?

    Adding 2 tablespoons of milk can make the texture softer. However, adding too much liquid may prevent the muffins from setting properly.

    How long do they last in the freezer?

    Stored in an airtight bag, they last up to 3 months. Reheat them thoroughly before consuming.

    What is the best way to transport them?

    Use a rigid airtight container. This prevents the tops of the muffins from being crushed during a commute.

    Print
    clock clock iconcutlery cutlery iconflag flag iconfolder folder iconinstagram instagram iconpinterest pinterest iconfacebook facebook iconprint print iconsquares squares iconheart heart iconheart solid heart solid icon
    Savory Baked Egg Muffins with Cheese and Veggies

    Savory Baked Egg Cups with Cheese and Veggies


    5 Stars 4 Stars 3 Stars 2 Stars 1 Star

    No reviews

    • Author: imageuploader
    • Total Time: 30 minutes
    • Yield: 12 muffins 1x
    • Diet: General

    Description

    These quick and versatile breakfast egg muffins are easy to make and packed with flavor and nutrition, perfect for busy mornings.


    Ingredients

    Scale
    • 12 large eggs
    • 1 cup Shredded cheddar cheese
    • ½ cup Red bell pepper, diced
    • ½ cup Fresh spinach, chopped
    • ½ cup Cooked and crumbled beef bacon
    • ½ teaspoon Salt
    • ¼ teaspoon Pepper

    Instructions

    1. Step 1: Preheat the oven to 350°F and prepare a 12-cup muffin pan by spraying it with non-stick spray.
    2. Step 2: In a large mixing bowl, crack in the eggs and beat them until they are light and frothy.
    3. Step 3: Add the shredded cheddar cheese, diced red bell pepper, chopped spinach, crumbled bacon, salt, and pepper into the beaten eggs. Stir everything together until well combined.
    4. Step 4: Carefully fill each muffin cup with the egg mixture, leaving a little room for the muffins to rise.
    5. Step 5: Place the muffin pan in the preheated oven and bake for 15-20 minutes until the tops feel firm and no longer jiggle. Allow them to cool slightly before serving.

    Notes

    For best results, use fresh ingredients, avoid overmixing, and store leftovers in an airtight container in the refrigerator for up to 5 days.

    • Prep Time: 10 minutes
    • Cook Time: 20 minutes
    • Category: Breakfast
    • Method: Baking
    • Cuisine: American

    Nutrition

    • Serving Size: 1 muffin
    • Calories: 150 kcal
    • Sugar: 1 g
    • Sodium: 220 mg
    • Fat: 11 g
    • Saturated Fat: 5 g
    • Unsaturated Fat: 6 g
    • Trans Fat: 0 g
    • Carbohydrates: 2 g
    • Fiber: 1 g
    • Protein: 10 g
    • Cholesterol: 185 mg
  • Creamy Chicken Broccoli Orzo with Cheddar

    Creamy Chicken Broccoli Orzo with Cheddar

    This one-pan meal combines tender chicken and broccoli with pasta in a rich cheese sauce. It is a fast, satisfying dinner option that simplifies cleanup and provides a balanced meal.

    Recipe image

    List of ingredients

    • 2 cups broccoli florets, bite-sized (about 1-inch pieces), fresh or fully thawed and drained frozen – provides texture and nutrients.
    • 2 cups cooked shredded chicken, such as rotisserie – ensures quick cooking time.
    • 2 cups shredded cheddar cheese, preferably sharp – adds bold flavor and thickness.
    • 1 cup heavy cream – creates a velvety sauce base.
    • 1 cup orzo pasta – small rice-shaped pasta that thickens the dish.
    • 2 cups chicken broth – used for cooking the pasta and adding savory depth.
    • 1 tbsp olive oil – prevents sticking and helps sauté vegetables.
    • 1 tbsp butter – adds richness and helps toast the pasta.
    • 1/2 medium onion, chopped – provides a savory aromatic base.
    • 3 cloves garlic, minced – enhances the overall flavor profile.
    • 1/2 tsp Italian seasoning – a blend of herbs for classic savory notes.
    • 1 tsp Worcestershire sauce – adds a complex umami taste.
    • Salt and pepper to taste – for final seasoning adjustment.

    step-by-step instructions

    1. Heat the base: Place a large 12-inch skillet over medium heat and melt the olive oil and butter together until bubbling.
    2. Sauté the onion: Add the chopped onions to the skillet and cook for 3 to 4 minutes until they are soft and translucent.
    3. Cook the broccoli: Toss in the broccoli florets and sauté for approximately 2 minutes so they stay bright green and crisp.
    4. Add aromatics: Stir in the minced garlic and Italian seasoning, cooking for 30 seconds to release the fragrances.
    5. Toast the orzo: Add the dry orzo pasta to the pan and stir with the vegetables for a minute to lightly toast the grains.
    6. Simmer the pasta: Pour in the chicken broth, heavy cream, and Worcestershire sauce, bring to a boil, and then reduce to a simmer.
    7. Cook until tender: Let the mixture simmer uncovered for about 10 minutes, stirring frequently to prevent sticking; add 1/4 cup more broth if the sauce becomes too dry.
    8. Incorporate chicken and cheese: Fold in the shredded chicken until heated through, then remove from heat and stir in cheddar cheese until melted.
    9. Final seasoning: Season with salt and pepper to taste and let the dish rest for 2 to 3 minutes to thicken before serving.

    Pro Tips for the Best Texture

    Toast the Orzo for Deeper Flavor

    Sautéing the dry orzo in butter and oil before adding liquids creates a nuttier taste. This process prevents the pasta from becoming too mushy and adds a toasted aroma to the final dish.

    Maintain Broccoli Crispness

    Avoid overcooking the broccoli in the initial sauté phase. By adding it just before the garlic and simmering it briefly with the pasta, you ensure it retains a bright green color and a slight bite.

    Prevent Sauce Clumping

    Remove the skillet from the heat before stirring in the shredded cheese. This prevents the cheese from separating or becoming grainy due to excessive heat, resulting in a smoother sauce.

    Control the Liquid Levels

    Because orzo absorbs liquid quickly, keep a small amount of extra chicken broth nearby. If the mixture looks too thick before the pasta is fully cooked, a splash of broth will restore the creaminess.

    Ingredient Substitutions and Swaps

    Experiment with Different Cheeses

    While sharp cheddar is the standard, you can substitute it with Gruyere for a nuttier taste or Monterey Jack for a milder flavor. A mix of Parmesan and Mozzarella also works well for a different stretch and saltiness.

    Dairy-Free Cream Alternatives

    Substitute heavy cream with full-fat coconut milk or a cashew-based cream for a dairy-free version. Ensure you also use a plant-based cheddar substitute to maintain the cheesy profile.

    Alternative Protein Options

    Replace chicken with diced turkey or chickpeas for a different protein source. If using chickpeas, add them at the same time as the shredded chicken to heat them through.

    Gluten-Free Pasta Choices

    Use a gluten-free orzo made from brown rice or quinoa to accommodate dietary restrictions. Be mindful that gluten-free pastas may have different absorption rates, so adjust the liquid accordingly.

    Substitute for Broccoli

    If broccoli is unavailable, cauliflower or frozen peas are excellent substitutes. Spinach can also be stirred in at the very end until wilted for a similar nutritional boost.

    Flavor Variations to Try

    Add a Spicy Element

    Include a pinch of crushed red pepper flakes or finely diced jalapeños when sautéing the onions. This adds a subtle heat that cuts through the richness of the cream and cheese.

    Incorporate Fresh Green Herbs

    Stir in chopped fresh parsley or basil just before serving. These herbs add a bright, fresh contrast to the heavy flavors of the cheddar and cream.

    Enhance the Umami Profile

    Add a tablespoon of nutritional yeast or a dash of soy sauce along with the Worcestershire sauce. This deepens the savory qualities of the dish without changing the overall texture.

    Introduce a Citrus Twist

    Stir in a teaspoon of lemon zest and a squeeze of fresh lemon juice at the end of cooking. The acidity brightens the dish and balances the fat from the heavy cream.

    Serving and Presentation Ideas

    Pair with a Crisp Side Salad

    Serve this rich pasta alongside a garden salad with a light lemon vinaigrette. The acidity of the salad cleanses the palate between bites of the creamy orzo.

    Garnish for Visual Appeal

    Sprinkle extra shredded cheddar or a dusting of paprika on top before serving. Adding a sprig of fresh parsley makes the dish look professionally plated and appetizing.

    Complementary Side Dishes

    Garlic bread or toasted sourdough slices are perfect for scooping up any remaining cheese sauce. Sliced cucumbers or raw carrot sticks also provide a refreshing crunch.

    Storage and Preservation

    Refrigeration Guidelines

    Store leftovers in an airtight container in the refrigerator for up to 4 days. Ensure the dish is cooled slightly before sealing to prevent excessive condensation inside the container.

    Freezing for Future Meals

    Place cooled orzo in freezer-safe bags or containers for up to 3 months. This is an excellent way to prepare meals in bulk for busy weeks.

    Proper Thawing Process

    Thaw frozen portions overnight in the refrigerator before reheating. This ensures the ingredients warm evenly and prevents the sauce from breaking.

    Reheating Techniques

    Stovetop Reheating Method

    Place the leftovers in a small saucepan over medium-low heat. Add a tablespoon of chicken broth or cream to loosen the sauce as it warms to restore the original consistency.

    Microwave Reheating Tips

    Heat the orzo in short 30-second bursts, stirring in between. Adding a tiny splash of water or milk helps prevent the pasta from drying out in the microwave.

    Troubleshooting Common Issues

    What to Do if the Sauce is Too Thick

    If the dish becomes too dense, stir in a small amount of warm chicken broth or heavy cream. Do this slowly until the desired creamy consistency is achieved.

    Fixing a Sauce That is Too Thin

    If the sauce is too watery, simmer the mixture for an additional 2 to 3 minutes without a lid. Alternatively, stir in an extra handful of shredded cheese to thicken it instantly.

    Handling Clumped Cheese

    If the cheese clumps together, it is likely due to overheating. Stir vigorously over very low heat or add a teaspoon of warm broth to help the cheese emulsify into the sauce.

    Correcting Underdone Pasta

    If the orzo is still too firm, add a splash of broth, cover the skillet with a lid, and simmer for another 2 minutes. The trapped steam will cook the pasta through quickly.

    Frequently Asked Questions

    Can I use raw chicken instead of shredded chicken?

    Yes, dice raw chicken breast into small pieces and sauté them with the onions at the beginning. Cook the chicken completely before adding the broccoli and other ingredients.

    Can I use a different pasta shape?

    Small shapes like ditalini, shells, or macaroni work well. However, since these shapes differ in size, you may need to adjust the simmering time to ensure they are cooked perfectly.

    Can I make this dish ahead of time?

    You can prepare the recipe up until the point of adding the cheese. Store the base in the fridge and stir in the cheddar and chicken just before serving for the best texture.

    Is frozen broccoli a good substitute for fresh?

    Frozen broccoli works well as long as it is fully thawed and drained. This prevents excess water from entering the pan, which would otherwise thin out the cheese sauce.

    Print
    clock clock iconcutlery cutlery iconflag flag iconfolder folder iconinstagram instagram iconpinterest pinterest iconfacebook facebook iconprint print iconsquares squares iconheart heart iconheart solid heart solid icon
    Cheesy Chicken Broccoli Orzo

    Creamy Chicken Broccoli Orzo with Cheddar


    5 Stars 4 Stars 3 Stars 2 Stars 1 Star

    No reviews

    • Author: imageuploader
    • Total Time: 30 minutes
    • Yield: 4 servings 1x
    • Diet: General

    Description

    A comforting dish combining tender chicken, orzo pasta, fresh broccoli, and melty cheddar cheese, perfect for quick dinners or meal prepping.


    Ingredients

    Scale
    • 2 cups broccoli florets, bite-sized
    • 2 cups cooked shredded chicken
    • 2 cups shredded cheddar cheese
    • 1 cup heavy cream
    • 1 cup orzo pasta
    • 2 cups chicken broth
    • 1 tbsp olive oil
    • 1 tbsp butter
    • 1/2 medium onion, chopped
    • 3 cloves garlic, minced
    • 1/2 tsp Italian seasoning
    • 1 tsp Worcestershire sauce
    • Salt and pepper to taste

    Instructions

    1. Heat: Heat a large 12-inch skillet over medium heat and melt the olive oil and butter together.
    2. Sauté: Add the chopped onions and sauté for about 3 to 4 minutes until they become soft and translucent.
    3. Broccoli: Toss in the broccoli florets and cook for another 2 minutes until they are bright green but still crisp.
    4. Season: Stir in the minced garlic and Italian seasoning, cooking for an additional 30 seconds.
    5. Toast: Add the orzo pasta to the skillet, stirring it with the vegetables to toast it slightly.
    6. Liquids: Pour in the chicken broth, heavy cream, and Worcestershire sauce. Bring to a boil then reduce to a simmer.
    7. Simmer: Let the mixture simmer uncovered for about 10 minutes, stirring often, until orzo is tender.
    8. Combine: Stir in the shredded chicken until heated through, then mix in cheddar cheese until melted.
    9. Finish: Season with salt and pepper to taste and allow to sit for 2 to 3 minutes to thicken before serving.

    Notes

    Serve the dish as is or with a side salad. Add parsley or red pepper flakes for garnish. Store leftovers in an airtight container in the refrigerator for up to 4 days, or freeze for up to 3 months.

    • Prep Time: 10 minutes
    • Cook Time: 20 minutes
    • Category: Dinner
    • Method: Skillet
    • Cuisine: American

    Nutrition

    • Serving Size: 1 serving
    • Calories: 600 kcal
    • Sugar: 8 g
    • Sodium: 920 mg
    • Fat: 36 g
    • Saturated Fat: 22 g
    • Unsaturated Fat: 14 g
    • Trans Fat: 0 g
    • Carbohydrates: 38 g
    • Fiber: 5 g
    • Protein: 34 g
    • Cholesterol: 125 mg