Author: Emily

  • Brown Sugar Rhubarb Cookies

    Brown Sugar Rhubarb Cookies

    These cookies balance the tartness of fresh rhubarb with the sweetness of light brown sugar. They offer a soft, chewy texture that makes them an ideal accompaniment to coffee or tea.
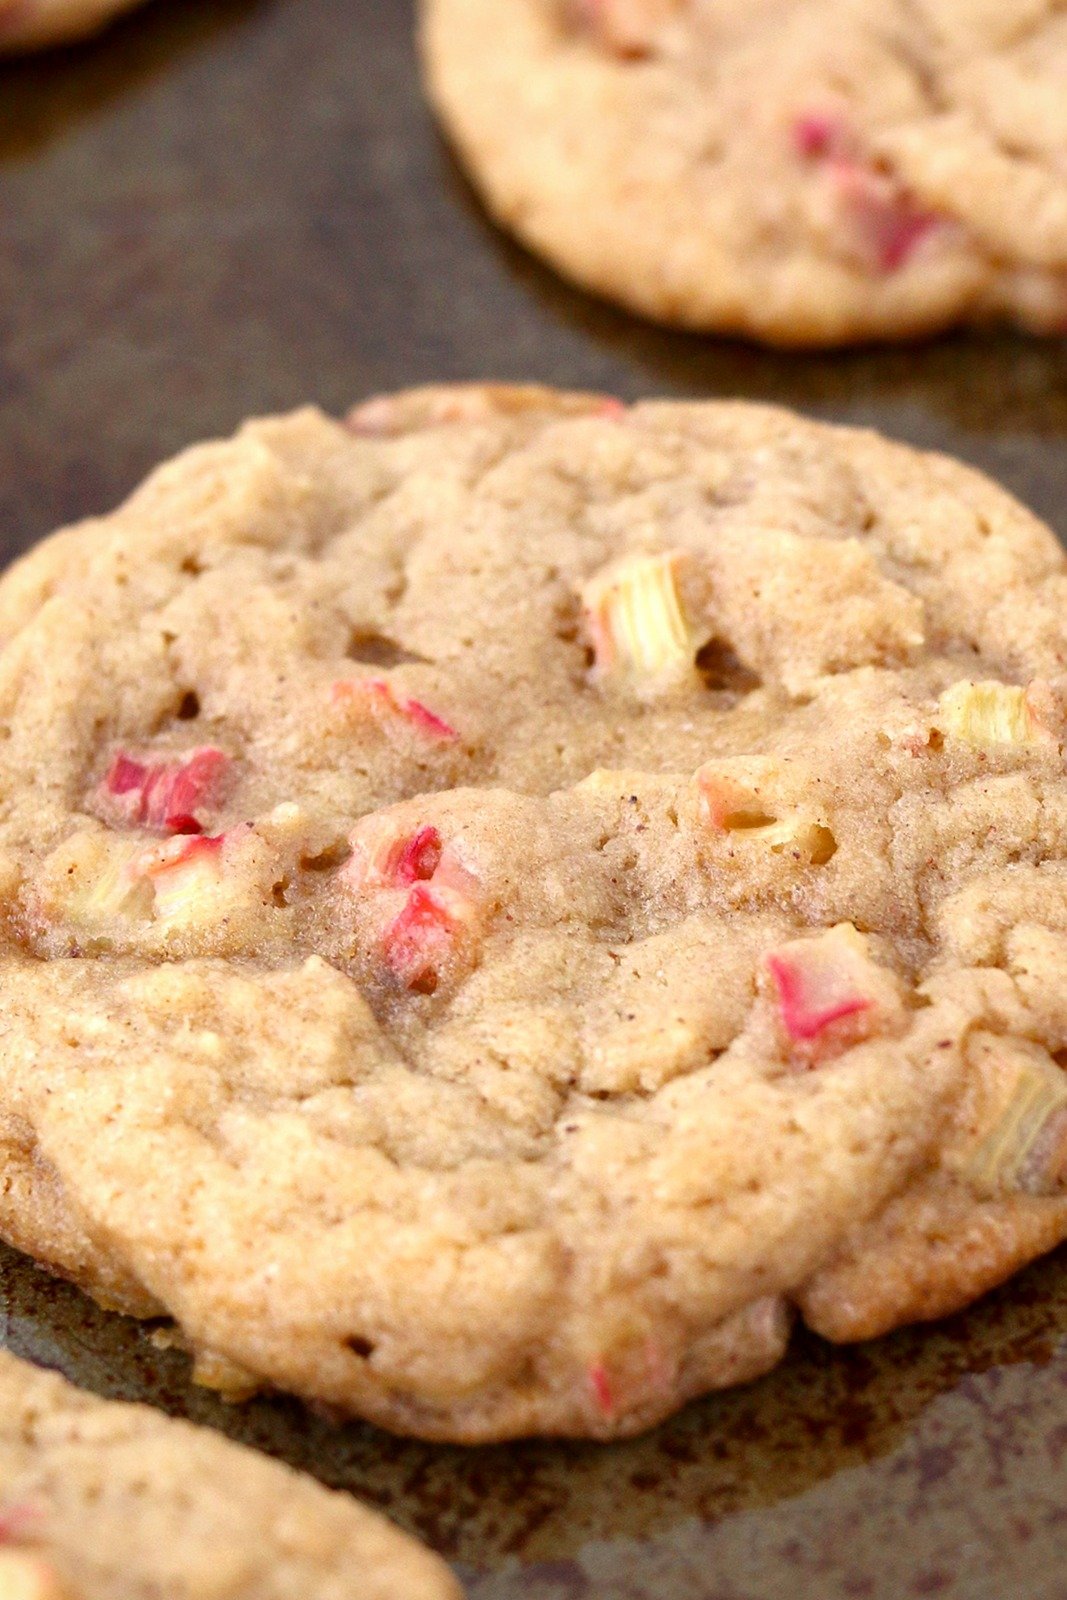
    Recipe image

    List of ingredients

    • 1 cup light brown sugar – provides sweetness and a chewy texture.
    • 1/2 cup butter, softened – creates a rich and tender crumb.
    • 1 teaspoon vanilla extract – adds a fragrant aromatic layer.
    • 1 large egg – acts as the primary binding agent for the dough.
    • 1 3/4 cups all purpose flour – gives the cookies their essential structure.
    • 1 teaspoon cinnamon – introduces a warm, spicy undertone.
    • 1/2 teaspoon salt – balances the sugar and enhances other flavors.
    • 1/2 teaspoon baking soda – helps the cookies rise and brown.
    • 1/2 teaspoon baking powder – contributes to a soft, cake-like lift.
    • 1 cup finely diced rhubarb – adds a bright, tart fruit contrast.

    step-by-step instructions

    1. Prepare the oven: Preheat your oven to 375 degrees F to ensure it is at the correct temperature before the cookies go in.
    2. Cream the base: In a large mixing bowl, beat the light brown sugar, softened butter, vanilla extract, and egg together using an electric mixer until the mixture is smooth.
    3. Mix in dry ingredients: Add the all purpose flour, cinnamon, salt, baking soda, and baking powder to the bowl. Beat the mixture well until a consistent dough forms.
    4. Incorporate the fruit: Add the finely diced rhubarb to the dough and beat again briefly until the rhubarb is evenly distributed.
    5. Scoop the dough: Using a 1-inch cookie dough scoop, form balls of dough and place them on a baking sheet lined with parchment paper.
    6. Bake the cookies: Place the baking sheet in the oven and bake for 12-14 minutes or until the cookies are baked through.
    7. Cool and set: Let the cookies cool on the baking sheet for 2 minutes, then transfer them to a wire baking rack to cool completely.

    Expert Tips for Better Results

    Dice the Rhubarb into Small Uniform Cubes

    Cutting the rhubarb into very small, consistent pieces ensures that every bite has a bit of fruit. Large chunks can create wet spots in the dough and cause the cookies to break apart.

    Ensure Butter is Properly Softened

    Butter should be soft enough to indent with a finger but still hold its shape. If the butter is melted, the cookies will spread too much; if it is too cold, the sugar will not cream properly.

    Measure Flour Using the Spoon-and-Level Method

    Spoon the flour into the measuring cup and level it off with a flat edge. Packing the flour directly with the cup can lead to too much flour, resulting in dry and crumbly cookies.

    Avoid Overmixing the Dough

    Stop mixing as soon as the flour is fully incorporated. Overmixing develops too much gluten, which can turn a soft, chewy cookie into one that is tough and bready.

    Use Fresh Parchment Paper

    Lining your baking sheet with parchment paper prevents the cookies from sticking and ensures an even bake. It also makes cleanup much easier compared to greasing the pan.

    Allow Proper Cooling Time

    Letting the cookies sit on the pan for two minutes allows the structure to set. Moving them to a wire rack immediately after that prevents the bottoms from overcooking due to residual heat.

    Ingredient Alternatives

    Substitute with Gluten-Free Flour

    You can use a 1:1 gluten-free baking flour blend that includes xanthan gum. This allows the cookies to maintain their shape and moisture without using wheat flour.

    Replace Brown Sugar with Coconut Sugar

    Coconut sugar is a great alternative for a deeper, caramel-like flavor. It behaves similarly to brown sugar in terms of moisture and sweetness.

    Use Unsalted Margarine for a Dairy-Free Option

    Unsalted margarine or a plant-based butter substitute can replace the dairy butter. Keep the ratio the same to ensure the texture remains consistent.

    Egg Substitutes for Dietary Needs

    A flax egg, made from one tablespoon of ground flaxseed and three tablespoons of water, can replace the egg. This provides the necessary binding while keeping the recipe plant-based.

    Creative Flavor Twists

    Add Ground Ginger for Extra Zest

    Adding half a teaspoon of ground ginger to the dry ingredients complements the tartness of the rhubarb. This creates a more complex, spicy flavor profile.

    Incorporate White Chocolate Chips

    Folding in a half cup of white chocolate chips adds a creamy sweetness. The chocolate balances the acidity of the rhubarb for a more dessert-like taste.

    Experiment with Citrus Zest

    Grate the zest of one fresh orange or lemon into the butter mixture. Citrus oils enhance the brightness of the rhubarb and add a fresh aroma.

    Swap Cinnamon for Cardamom

    Replacing the cinnamon with ground cardamom gives the cookies a floral, sophisticated note. This is particularly effective if you prefer a less traditional spice profile.

    Serving and Storage Guide

    Pair with Hot Beverages

    These cookies pair exceptionally well with a hot cup of black tea or a dark roast coffee. The bitterness of the drink cuts through the richness of the brown sugar.

    Room Temperature Storage

    Store the cookies in an airtight container at room temperature for up to three days. This keeps them soft and prevents them from absorbing odors from the fridge.

    Refrigeration for Longevity

    If you live in a very humid environment, store the cookies in the refrigerator for up to one week. This prevents the fruit pieces from spoiling and keeps the cookies fresh.

    Freezing Baked Cookies

    Place the cooled cookies in a single layer in a freezer-safe bag with parchment paper between them. They can be stored for up to three months and thawed at room temperature.

    Freezing Raw Dough Balls

    Scoop the dough into balls and freeze them on a tray before transferring them to a bag. Bake them directly from the freezer, adding one to two minutes to the total baking time.

    Common Baking Troubleshooting

    Cookies Are Spreading Too Much

    This usually happens if the butter was too warm or the oven was not fully preheated. Try chilling the scooped dough balls in the fridge for 30 minutes before baking.

    Cookies Feel Too Dry

    Dryness is often caused by overbaking or using too much flour. Ensure you are measuring flour accurately and remove the cookies as soon as the edges are golden.

    Rhubarb Releases Too Much Moisture

    If the cookies seem soggy, the rhubarb may have been too wet. Pat the diced rhubarb with a paper towel to remove excess surface moisture before adding it to the dough.

    Cookies Are Not Browning

    Check the expiration date of your baking soda and baking powder. Old leavening agents lose their potency, which can affect the rise and the browning process.

    Dough is Too Sticky to Scoop

    If the dough is too soft to handle, refrigerate it for 15 to 20 minutes. This firms up the fats and makes the dough much easier to scoop into balls.

    Frequently Asked Questions

    Can I use frozen rhubarb?

    Yes, you can use frozen rhubarb, but you must thaw it completely first. Pat the thawed pieces dry with paper towels to prevent adding too much extra water to the dough.

    How long do these cookies stay fresh?

    They remain fresh for about three days in an airtight container at room temperature. For longer storage, use the freezer or refrigerator as described in the storage guide.

    Can I use granulated white sugar instead?

    You can, but the texture will change significantly. White sugar produces a crispier, thinner cookie, whereas brown sugar provides the characteristic chewiness and moisture.

    Do I need to peel the rhubarb stalks?

    No, there is no need to peel rhubarb. The skins are thin and edible, and they provide a nice color and texture to the finished cookies.

    Print
    clock clock iconcutlery cutlery iconflag flag iconfolder folder iconinstagram instagram iconpinterest pinterest iconfacebook facebook iconprint print iconsquares squares iconheart heart iconheart solid heart solid icon
    Brown Sugar Rhubarb Cookies

    Brown Sugar Rhubarb Cookies


    5 Stars 4 Stars 3 Stars 2 Stars 1 Star

    No reviews

    • Author: Emily
    • Total Time: 24 minutes
    • Yield: 24 cookies 1x
    • Diet: Vegetarian

    Description

    These delicious Brown Sugar Rhubarb Cookies combine the warmth of cinnamon and brown sugar with the tart, fresh taste of diced rhubarb for a unique seasonal treat.


    Ingredients

    Scale
    • 1 cup light brown sugar
    • 1/2 cup butter, softened
    • 1 teaspoon vanilla extract
    • 1 large egg
    • 1 3/4 cups all purpose flour
    • 1 teaspoon cinnamon
    • 1/2 teaspoon salt
    • 1/2 teaspoon baking soda
    • 1/2 teaspoon baking powder
    • 1 cup finely diced rhubarb

    Instructions

    1. Preheat: Preheat oven to 375 degrees F.
    2. Mix: In a large bowl, beat brown sugar, butter, vanilla extract and egg together with an electric mixer.
    3. Combine: Add flour, cinnamon, salt, baking soda, and baking powder. Beat well until dough forms.
    4. Fold: Add rhubarb and beat again.
    5. Shape: Using a 1-inch cookie dough scoop, form balls of dough and place them on a parchment lined baking sheet.
    6. Bake: Bake cookies for 12-14 minutes or until baked through.
    7. Cool: Cool cookies on baking sheet for 2 minutes, then remove cookies from baking sheet and cool on a wire baking rack.

    Notes

    Ensure rhubarb is finely diced to distribute evenly throughout the dough.

    • Prep Time: 10 minutes
    • Cook Time: 14 minutes
    • Category: Dessert
    • Method: Baking
    • Cuisine: American

    Nutrition

    • Serving Size: 1 cookie
    • Calories: 125 kcal
    • Sugar: 9 g
    • Sodium: 115 mg
    • Fat: 5 g
    • Saturated Fat: 3 g
    • Unsaturated Fat: 2 g
    • Trans Fat: 0 g
    • Carbohydrates: 16 g
    • Fiber: 1 g
    • Protein: 2 g
    • Cholesterol: 28 mg
  • Savory Sautéed Yellow Squash and Zucchini with Tomatoes

    Savory Sautéed Yellow Squash and Zucchini with Tomatoes

    This light and flavorful side dish highlights the natural sweetness of seasonal summer squash and juicy cherry tomatoes. It is a quick, nutrient-dense preparation that brings together garden-fresh vegetables and aromatic herbs in under 20 minutes.

    Recipe image

    List of ingredients

    • 1 tablespoon olive oil – used for sautéing the vegetables.
    • 1 medium yellow squash – cut into 1/4-inch thick slices.
    • 1 medium zucchini – cut into 1/4-inch thick slices.
    • 1 teaspoon whole rosemary leaves – finely crushed for a woody aroma.
    • 1/2 teaspoon garlic powder – provides a consistent savory base.
    • 1/4 teaspoon pure ground black pepper – adds a mild spicy bite.
    • 1/4 teaspoon sea salt – enhances all the natural flavors.
    • 1 cup grape tomatoes – halved; cherry tomatoes can be used as a substitute.

    step-by-step instructions

    1. Heat the oil: Place a large nonstick skillet over medium-high heat and add the olive oil. Ensure the oil is shimmering before adding vegetables to prevent sticking.
    2. Sauté the squash: Add the sliced yellow squash and zucchini to the pan. Cook and stir for approximately 3 minutes until they begin to soften.
    3. Season the mixture: Evenly sprinkle the crushed rosemary, garlic powder, black pepper, and sea salt over the vegetables. Stir well to ensure every slice is coated in the seasoning.
    4. Add tomatoes and finish: Stir in the halved grape tomatoes. Continue to cook and stir for another 2 to 3 minutes until the vegetables are tender-crisp and the tomatoes have just begun to soften.

    Pro Techniques for Sautéing Squash

    Maintain Uniform Slice Thickness

    Cutting your zucchini and yellow squash into consistent 1/4-inch slices ensures that every piece cooks at the same rate. If some slices are thicker than others, the thin ones will overcook and become mushy while the thick ones remain raw. A mandoline slicer is a great tool for achieving this precision quickly.

    Regulate Heat to Prevent Stewing

    Keeping the skillet on medium-high heat is critical for achieving a proper sauté rather than steaming the vegetables. High heat allows the moisture on the surface of the squash to evaporate quickly, promoting light browning. If the pan is too cool, the vegetables will release their internal juices and boil in their own liquid.

    Avoid Overcrowding the Skillet

    If you are doubling the recipe, use two pans or cook in batches to avoid overcrowding the skillet. When the pan is too full, the temperature drops rapidly and steam gets trapped between the vegetable slices. This results in a soft, pale texture instead of the desired tender-crisp finish.

    Identify the Tender-Crisp Stage

    The goal for summer squash is a tender-crisp texture, meaning the vegetable is cooked through but still retains a slight snap. Overcooking zucchini and yellow squash leads to a watery consistency and loss of structural integrity. Remove the pan from the heat immediately once the vegetables are translucent but still firm.

    Ingredient Substitutions and Alternatives

    Using Different Squash Varieties

    While yellow squash and zucchini are standard, you can use pattypan squash or delicata squash for a different shape and flavor profile. Pattypan squash offers a slightly nuttier taste and a beautiful scalloped edge. Ensure you slice these to the same 1/4-inch thickness to maintain the cooking time.

    Selecting Alternative Tomato Types

    Grape and cherry tomatoes are ideal because they hold their shape well under heat. If you only have larger Roma tomatoes, dice them into small, uniform chunks to mimic the size of grape tomatoes. Note that larger tomatoes release more moisture, so you may need an extra minute of sautéing to reduce the liquid.

    Substituting Dried Herbs

    If you do not have whole rosemary leaves, dried thyme or dried oregano are excellent alternatives. Thyme provides a more subtle, earthy flavor, while oregano adds a Mediterranean touch. Use the same quantity as the rosemary, but ensure the herbs are finely crushed to release their oils.

    Choosing Different Cooking Fats

    Olive oil is preferred for its flavor and health benefits, but avocado oil is a great substitute due to its higher smoke point. For a richer, more buttery taste, you can use unsalted butter or a blend of butter and oil. Be cautious with butter on medium-high heat, as it can burn more quickly than oil.

    Flavor Enhancements and Variations

    Adding Fresh Citrus Accents

    Adding a squeeze of fresh lemon juice or a pinch of lemon zest right before serving brightens the entire dish. The acidity of the lemon cuts through the richness of the olive oil and enhances the aromatic quality of the rosemary. This is particularly effective if you are serving the squash alongside a heavy protein.

    Incorporating Hard Cheeses

    For an added layer of savory depth, sprinkle a tablespoon of grated Parmesan or Pecorino Romano over the vegetables in the final minute of cooking. The cheese melts slightly and clings to the squash, adding a salty, umami finish. Avoid adding the cheese too early, as it can brown too quickly and become bitter.

    Introducing Spicy Elements

    If you prefer a bit of heat, add a pinch of red pepper flakes or a dash of cayenne pepper along with the garlic powder. The spicy notes complement the sweetness of the yellow squash and the acidity of the tomatoes. Adjust the quantity based on your heat tolerance, starting with a small pinch.

    Adding Umami Boosters

    A small splash of soy sauce or a sprinkle of nutritional yeast can add a deeper savory flavor to the dish. Nutritional yeast is especially useful for those seeking a cheesy flavor without using dairy. Stir these ingredients in during the last two minutes of sautéing to prevent them from burning.

    Serving Suggestions and Pairings

    Complementing Grilled Proteins

    This sautéed squash dish pairs perfectly with grilled chicken breasts, seared salmon fillets, or grilled tofu steaks. The lightness of the vegetables balances the charred flavors of grilled meats. Serve the squash as a side bed for the protein to allow the juices to mingle on the plate.

    Integrating with Whole Grains

    Transform this side dish into a main meal by serving it over a bed of quinoa, farro, or brown rice. The grains absorb the olive oil and tomato juices, creating a cohesive and filling bowl. You can also stir the sautéed vegetables directly into cooked couscous for a quick summer salad.

    Plating for Visual Appeal

    To make the dish look professional, arrange the squash slices in an overlapping circular pattern on the plate. Scatter the halved tomatoes and crushed rosemary leaves over the top for a pop of color. A final drizzle of high-quality extra virgin olive oil can add a glossy, appetizing finish.

    Storage and Reheating Guidelines

    Proper Refrigeration Methods

    Store any leftover sautéed squash in an airtight glass container in the refrigerator. The vegetables will stay fresh and safe to eat for up to three to five days. Keep the container tightly sealed to prevent the squash from absorbing other odors from the fridge.

    Effective Reheating Techniques

    The best way to reheat this dish is in a skillet over medium heat for 2-3 minutes. Avoid the microwave if possible, as it can make the squash excessively soft and watery. If using a microwave, heat in short 30-second intervals and stir in between to distribute the heat evenly.

    Understanding Freezing Limitations

    Sautéed summer squash is not recommended for freezing due to its high water content. Upon thawing, the cellular structure of the zucchini and yellow squash breaks down, resulting in a mushy and unappealing texture. It is best to cook only what you need or use leftovers in a soup.

    Troubleshooting Common Issues

    Managing Watery Vegetables

    If your squash releases too much water in the pan, increase the heat slightly to encourage evaporation. You can also salt the sliced squash in a colander for 15 minutes before cooking and pat them dry with a paper towel. This process draws out excess moisture, ensuring a better sear.

    Preventing Burnt Garlic Powder

    Garlic powder can burn quickly if it hits the hot oil directly before the vegetables are added. Always sprinkle the seasoning over the vegetables once they are already in the pan and stirring. This protects the garlic particles and ensures a mellow, savory taste rather than a bitter one.

    Fixing Under-seasoned Flavor

    If the dish tastes bland after cooking, avoid adding more salt immediately. Instead, try adding a small amount of acid, such as a drop of balsamic vinegar or lemon juice. Acid often wakes up the other seasonings and makes the natural flavors of the vegetables more prominent.

    Frequently Asked Questions

    Can I use a stainless steel pan instead of nonstick?

    Yes, you can use stainless steel, but you may need to increase the amount of olive oil slightly to prevent sticking. Ensure the pan is fully preheated before adding the oil and vegetables to create a natural non-stick surface.

    How do I keep the tomatoes from breaking down?

    To keep the tomatoes intact, add them at the very end of the cooking process. Only sauté them for 2-3 minutes; this is enough to warm them through and soften the skin without causing them to burst and lose their shape.

    Is this recipe suitable for a vegan diet?

    Yes, this recipe is naturally vegan as it uses only plant-based ingredients like olive oil, vegetables, and herbs. Ensure your salt and garlic powder are pure and do not contain any animal-derived additives.

    Print
    clock clock iconcutlery cutlery iconflag flag iconfolder folder iconinstagram instagram iconpinterest pinterest iconfacebook facebook iconprint print iconsquares squares iconheart heart iconheart solid heart solid icon
    Savory Sautéed Yellow Squash and Zucchini with Tomatoes

    Savory Sautéed Yellow Squash and Zucchini with Tomatoes


    5 Stars 4 Stars 3 Stars 2 Stars 1 Star

    No reviews

    • Author: Emily
    • Total Time: 16 minutes
    • Yield: 4 servings 1x
    • Diet: Keto

    Description

    Summer squash takes center stage with this seasonal side dish. This quick and easy recipe takes only 10 minutes to make and features summertime favorites like zucchini, grape tomatoes and yellow squash. Featuring a simple mixture of rosemary, garlic powder, salt and pepper, this keto-friendly sautéed zucchini and squash recipe is light, fresh and savory.


    Ingredients

    Scale
    • 1 tablespoon olive oil
    • 1 medium yellow squash, cut into 1/4-inch thick slices
    • 1 medium zucchini, cut into 1/4-inch thick slices
    • 1 teaspoon whole rosemary leaves, finely crushed
    • 1/2 teaspoon garlic powder
    • 1/4 teaspoon ground black pepper
    • 1/4 teaspoon sea salt
    • 1 cup grape tomatoes, halved

    Instructions

    1. Step: Heat oil in large nonstick skillet on medium-high heat. Add squash and zucchini; cook and stir 3 minutes.
    2. Step: Sprinkle with rosemary, garlic powder, pepper and sea salt. Add tomatoes; cook and stir 2 to 3 minutes or until vegetables are tender-crisp.

    Notes

    Cherry tomatoes may be used as a substitute for grape tomatoes.

    • Prep Time: 10 minutes
    • Cook Time: 6 minutes
    • Category: Side Dishes
    • Method: Sautéing
    • Cuisine: American

    Nutrition

    • Serving Size: 1 serving
    • Calories: 64 kcal
    • Sugar: 3 g
    • Sodium: 108 mg
    • Fat: 4 g
    • Saturated Fat: 0.5 g
    • Unsaturated Fat: 3.5 g
    • Trans Fat: 0 g
    • Carbohydrates: 5 g
    • Fiber: 2 g
    • Protein: 2 g
    • Cholesterol: 0 mg
  • The Best Zucchini Bread

    The Best Zucchini Bread

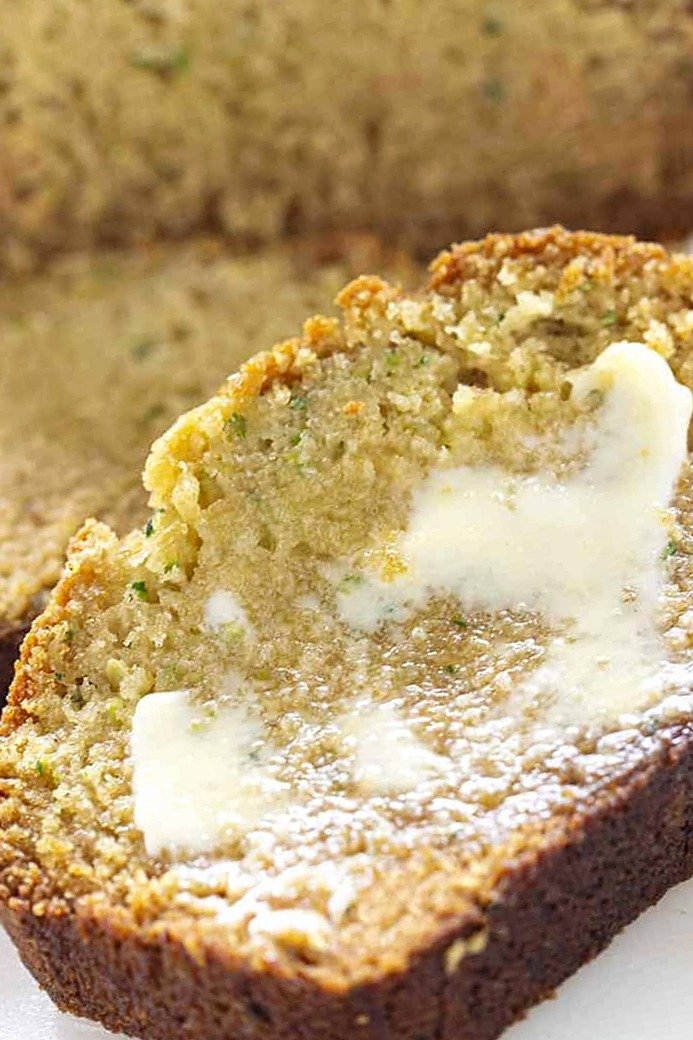
    This moist and dense quick bread is a simple yet satisfying treat perfect for breakfast or snacking. By utilizing a few pantry staples and fresh zucchini, you can create a tender loaf that is consistently delicious.

    Recipe image

    List of ingredients

    • 2 cups (250 g) all-purpose flour – provides the main structure.
    • ¾ teaspoon baking powder – helps the bread rise.
    • ¾ teaspoon baking soda – works with acidic components for lift.
    • 1 teaspoon kosher salt – balances the sweet flavors.
    • 1 cup (200 g) light brown sugar – adds moisture and a deep flavor.
    • ½ cup (100 g) granulated sugar – contributes to the crust and sweetness.
    • ¾ cup (164 g) vegetable oil (canola) – ensures a moist crumb.
    • 1 teaspoon vanilla extract – adds aromatic depth.
    • 2 large eggs (room temperature) – binds the ingredients together.
    • 2 ½ cups grated zucchini (gently press out excess moisture with hands, but don’t aggressively squeeze) – the primary flavor and moisture source.

    step-by-step instructions

    1. Prepare the Oven and Pan: Preheat your oven to 350°F. Grease a 9×5 (or 8 1/2 x 4 1/2-inch) loaf pan using non-stick spray or a combination of butter and flour.
    2. Mix Dry and Wet Ingredients: Add all ingredients to a mixing bowl except for the zucchini. Stir the mixture thoroughly until everything is incorporated; the batter will be quite thick at this stage.
    3. Incorporate the Zucchini: Add the shredded zucchini to the bowl. Stir until the vegetable is evenly combined; the batter will become thinner and easier to pour.
    4. Bake the Loaf: Pour the batter into the prepared pan. Bake for 65 to 75 minutes, or until a toothpick inserted into the center comes out clean with a few crumbs.
    5. Manage the Crust: If the top of the bread is browning too quickly, place a foil tent loosely over the pan for the final 10 to 15 minutes of baking.
    6. Cool and Serve: Remove the bread from the oven and allow it to cool slightly in the pan before slicing and serving.

    Optimizing Your Zucchini Preparation

    Selecting the Right Zucchini Size

    Medium to small zucchini are the best choice for this recipe. These smaller varieties generally contain more moisture than very large zucchini, which contributes to a more tender and moist finished loaf.

    Using a Fine Grater for Texture

    If you prefer a fine, uniform crumb where the zucchini is nearly invisible, use the fine side of your grater. This method ensures the vegetable is dispersed evenly throughout the batter without large clumps.

    Using a Coarse Grater for Texture

    For those who enjoy a more rustic texture with visible shreds of zucchini, the larger holes of the grater are more appropriate. This allows the zucchini pieces to stand out more in each slice.

    The Correct Way to Press Moisture

    Gently press the grated zucchini with your hands to remove excess surface water. Do not aggressively squeeze the zucchini, as removing too much moisture will result in a drier, less tender bread.

    Choosing the Right Bakeware

    Benefits of Using Glass Loaf Pans

    Glass bakeware is highly recommended because it heats more evenly than metal. This helps the quick bread bake at a consistent rate, reducing the risk of raw centers and burnt edges.

    Comparing Glass and Metal Pans

    Glass acts as an insulator and retains heat much longer than metal after being removed from the oven. This ensures the bread stays warm for a longer period during the serving process.

    Ingredient Substitutions and Variations

    Substituting Oil with Melted Butter

    You can replace the canola oil with an equal amount of melted unsalted butter. This will result in a richer, more buttery flavor, although the texture may be slightly denser than when using oil.

    Replacing Canola Oil with Coconut Oil

    Melted coconut oil is a suitable alternative for vegetable oil. Use the same measurement to maintain the moisture level, which will add a very subtle coconut note to the bread.

    Adjusting the Brown Sugar Ratio

    Increasing the proportion of brown sugar relative to white sugar will result in a darker loaf with a stronger molasses flavor. This also slightly increases the overall moisture content of the bread.

    Adding Nuts for Crunch

    Fold in half a cup of chopped walnuts or pecans during the final mixing step. This adds a contrasting crunch and a nutty flavor that complements the fresh zucchini.

    Adding Chocolate Chips for Sweetness

    Semi-sweet or dark chocolate chips can be added to the batter for a dessert-style loaf. Ensure the chips are folded in gently at the end to prevent them from sinking to the bottom.

    Storage and Long-Term Preservation

    Storing Bread at Room Temperature

    The zucchini bread will stay fresh for one to two days when kept at room temperature. To prevent it from drying out, wrap the loaf tightly in aluminum foil or place it in a sealed plastic bag.

    Refrigeration Guidelines for Longevity

    For extended storage, wrap the bread securely and store it in the refrigerator. This method preserves the loaf for approximately one week while maintaining the moist crumb.

    Freezing the Loaf for Future Use

    Allow the bread to cool completely before wrapping it tightly in parchment paper. Place the wrapped loaf inside a heavy-duty sealable freezer bag to store it for up to three months.

    Correct Thawing Procedures

    Move the frozen bread to the counter and allow it to reach room temperature while still inside its packaging. This prevents condensation and allows the bread to re-absorb its moisture.

    Serving Suggestions and Enhancements

    The Best Temperature for Serving

    This quick bread is best enjoyed while still warm from the oven. If the bread has cooled, briefly warm individual slices in a toaster oven for the best experience.

    Creating a Cinnamon Butter Spread

    Since this specific recipe omits cinnamon in the batter, you can add that flavor during serving. Mix softened butter with a pinch of ground cinnamon and honey to create a rich spread for the slices.

    Essential Baking Tips for Success

    How Baking Soda and Powder Work Together

    The combination of baking soda and baking powder provides the necessary lift for a quick bread. Baking soda reacts with acidic components, while baking powder provides a secondary lift during the heating process.

    The Benefit of Room Temperature Eggs

    Using eggs at room temperature allows them to emulsify more effectively with the sugars and oils. This results in a smoother batter and a more consistent rise during baking.

    The Role of Kosher Salt in Flavor

    Kosher salt is used to balance the sweetness of the sugars and enhance the natural flavor of the zucchini. It prevents the bread from tasting overly sweet or flat.

    Common Baking Troubleshooting

    Preventing a Raw or Gummy Center

    A gummy center often occurs if the oven temperature is incorrect or the pan is too small. Ensure you use a 9×5 inch pan and always verify the center with a toothpick before removing from the oven.

    Using a Foil Tent to Prevent Burning

    If the top of the loaf is darkening too quickly before the middle is done, loosely cover it with aluminum foil. This protects the surface from further browning while the interior finishes cooking.

    Adjusting for Different Pan Sizes

    An 8 1/2 by 4 1/2 inch pan is a successful alternative to the 9×5 inch pan. Be sure to monitor the bake time closely, as smaller pans may require slightly different timing.

    The Impact of Too Much Zucchini Moisture

    If the zucchini is not pressed gently, the excess water can lead to an uneven bake. This may cause the bread to collapse in the center or create a soggy texture around the edges.

    Adapting the Recipe for Gluten-Free Flour

    You can use a 1:1 gluten-free flour blend that includes xanthan gum as a substitute for all-purpose flour. Keep all other measurements exactly the same to achieve a similar result.

    Using Thawed Frozen Zucchini

    If using frozen zucchini, ensure it is completely thawed before grating or measuring. Press out the excess water carefully, as frozen vegetables often release more liquid than fresh ones.

    Print
    clock clock iconcutlery cutlery iconflag flag iconfolder folder iconinstagram instagram iconpinterest pinterest iconfacebook facebook iconprint print iconsquares squares iconheart heart iconheart solid heart solid icon
    The Best Zucchini Bread

    The Best Zucchini Bread


    5 Stars 4 Stars 3 Stars 2 Stars 1 Star

    No reviews

    • Author: Emily
    • Total Time: 75 minutes
    • Yield: 8 servings 1x
    • Diet: Vegetarian

    Description

    The Best Zucchini Bread is a quick bread that will be quickly eaten! It is perfectly moist and delicious!


    Ingredients

    Scale
    • 2 cups (250 g) all-purpose flour
    • ¾ teaspoon baking powder
    • ¾ teaspoon baking soda
    • 1 teaspoon kosher salt
    • 1 cup (200 g) light brown sugar
    • ½ cup (100 g) granulated sugar
    • ¾ cup (164 g) vegetable oil
    • 1 teaspoon vanilla extract
    • 2 large eggs, room temperature
    • 2 ½ cups grated zucchini

    Instructions

    1. Step: Preheat the oven to 350°F.
    2. Step: Prepare a 9×5 (or 8 1/2 x 4 1/2-inch) loaf pan with non-stick spray or the butter & flour method.
    3. Step: Add all the ingredients to a bowl, except for the zucchini. Stir to incorporate.
    4. Step: Add the shredded zucchini to the mixture to the bowl, and stir until combined.
    5. Step: Pour into the prepared pan.
    6. Step: Bake until a toothpick comes out clean, about 65-75 minutes.
    7. Step: Let the bread cool slightly before cutting and serving.

    Notes

    Use medium to small zucchini for maximum moisture. Glass bakeware is recommended for even heating. Store wrapped in foil or plastic for 1-2 days at room temperature, or up to a week in the refrigerator. Can be frozen for 3 months.

    • Prep Time: 10 minutes
    • Cook Time: 65 minutes
    • Category: Breakfast, Dessert, Side Dish, Snack
    • Method: Baking
    • Cuisine: American

    Nutrition

    • Serving Size: 1 slice
    • Calories: 458 kcal
    • Sugar: 32 g
    • Sodium: 350 mg
    • Fat: 18 g
    • Saturated Fat: 2 g
    • Unsaturated Fat: 16 g
    • Trans Fat: 0 g
    • Carbohydrates: 55 g
    • Fiber: 2 g
    • Protein: 5 g
    • Cholesterol: 60 mg
  • Cheesy Grilled Zucchini and Squash Foil Packets

    Cheesy Grilled Zucchini and Squash Foil Packets

    These grilled vegetable packets are a fast and flavorful side dish perfect for summer gatherings. They utilize simple pantry staples and require minimal cleanup since the ingredients cook entirely within aluminum foil.

    Recipe image

    List of ingredients

    • 1/4 cup yellow mustard – adds a tangy base to the sauce.
    • 1/4 cup butter, melted – provides richness and prevents vegetables from sticking.
    • 2 tablespoons grated Parmesan cheese (microbial-rennet) – adds a salty, nutty flavor.
    • 1/2 teaspoon dried basil leaves – contributes an aromatic herbal note.
    • 1/2 teaspoon garlic powder – adds savory depth to the seasoning.
    • 1 large zucchini, cut into 1/4-inch thick slices – the primary vegetable base.
    • 1 medium yellow squash, cut into 1/4-inch thick slices – adds color and a mild sweetness.
    • 1 small yellow onion, thinly sliced – provides a caramelized flavor.
    • 4 sheets heavy duty aluminum foil (12×12-inch each) – used to contain juices and steam the vegetables.

    step-by-step instructions

    1. Prepare the sauce: In a large mixing bowl, combine the yellow mustard, melted butter, grated Parmesan cheese, basil leaves, and garlic powder. Stir the mixture until it is well blended and smooth.
    2. Coat the vegetables: Add the sliced zucchini, yellow squash, and thinly sliced onion to the bowl. Toss the vegetables thoroughly to ensure every piece is evenly coated with the sauce.
    3. Create the packets: Divide the coated vegetable mixture evenly among the four sheets of aluminum foil. Bring up the sides of the foil and double-fold the top and ends to create a tightly sealed packet.
    4. Grill the packets: Place the foil packets on a grill preheated to medium-high heat. Cook for 10 to 12 minutes, or until the zucchini and squash are tender.
    5. Final touch: Carefully remove the packets from the grill. If desired, sprinkle additional Parmesan cheese over the vegetables before serving.

    Vegetable Preparation Guidelines

    Slice Thickness for Even Cooking

    Use a mandoline or a sharp chef’s knife to ensure all slices are exactly 1/4 inch thick. Uniform thickness ensures that all vegetables cook at the same rate. If some slices are too thin, they will overcook and become mushy while others remain raw.

    Preventing Watery Vegetables

    Zucchini and squash have high water content. To prevent the packets from becoming too liquid, avoid over-salting the vegetables before they go into the foil. The Parmesan cheese provides enough salt to season the dish without drawing out excessive moisture prematurely.

    Selecting Firm Produce

    Choose zucchini and squash that feel firm to the touch and have a glossy skin. Avoid vegetables with soft spots or shriveled ends, as these will break down too quickly on the grill. Firm vegetables maintain their structure better during the steaming process.

    Foil Packet Construction Techniques

    Using Heavy Duty Foil for Durability

    Heavy duty aluminum foil is recommended to prevent the packets from tearing when being moved on the grill. Thin foil can puncture easily, allowing the butter and mustard sauce to leak out. This prevents the vegetables from steaming properly and can cause grill flare-ups.

    Creating an Airtight Seal

    When folding the foil, ensure there are no gaps at the corners or the top seam. A tight seal traps the steam inside, which is what actually cooks the vegetables through. If steam escapes, the cooking time will increase and the vegetables may dry out.

    Dividing Portions Equitably

    Distribute the vegetable mixture evenly across the four sheets to ensure consistent cooking times. Overfilling a packet can lead to uneven heat distribution, leaving the center vegetables undercooked. Keep a small amount of space at the top for the steam to circulate.

    Grilling Temperature and Timing

    Achieving Medium-High Heat

    Preheat your grill until it reaches a medium-high temperature, typically between 375°F and 400°F. If the grill is too hot, the foil may scorch the bottom of the vegetables before the centers are tender. If it is too cool, the vegetables will stew rather than roast.

    Monitoring Tenderness without Opening

    Avoid opening the packets frequently to check for doneness, as this releases the trapped steam. Instead, gently press the top of the packet with tongs; it should feel soft and give slightly. You can also use a toothpick to pierce the foil and check the center slice.

    Adjusting Time for Larger Vegetables

    If you choose to cut the vegetables into thicker chunks instead of 1/4-inch slices, increase the grill time by 3 to 5 minutes. Thicker cuts require more time for the heat to penetrate to the core. Always check the largest piece of zucchini for tenderness.

    Ingredient Modifications

    Substituting Dijon Mustard for Yellow Mustard

    For a more sophisticated, spicy flavor, replace the classic yellow mustard with Dijon mustard. Dijon provides a sharper tang and a slightly more complex heat. This substitution pairs particularly well with the Parmesan cheese and basil.

    Using Nutritional Yeast for Dairy-Free Options

    To make this recipe dairy-free, replace the Parmesan cheese with nutritional yeast and the butter with a plant-based butter alternative. Nutritional yeast offers a similar nutty and cheesy flavor profile. This keeps the savory essence of the dish intact.

    Adding Smoked Paprika for Depth

    Adding 1/4 teaspoon of smoked paprika to the sauce mixture introduces a subtle wood-fired taste. This complements the grilling process and adds a rich, red hue to the vegetables. It is especially effective when serving as a side for grilled meats.

    Replacing Butter with Olive Oil

    If you prefer not to use butter, extra virgin olive oil is an excellent substitute. Use the same 1/4 cup measurement. Olive oil provides a cleaner taste and is a heart-healthy alternative that still prevents the vegetables from sticking.

    Alternative Vegetable Additions

    Integrating Sliced Bell Peppers

    Adding thinly sliced red or green bell peppers adds a bright sweetness and visual contrast. Since peppers have a similar cooking time to zucchini, they can be tossed in the sauce and added to the packets. Limit the addition to one medium pepper to avoid overcrowding.

    Adding Whole Cherry Tomatoes

    Whole cherry tomatoes can be added to the packets to provide bursts of acidity. The tomatoes will blister and release their juices, blending with the mustard and butter sauce. They typically cook through in the same 10 to 12 minute window.

    Incorporating Sliced Carrots

    If using carrots, slice them into very thin rounds or matchsticks to ensure they cook at the same rate as the squash. Carrots are denser and require more heat to soften. Slicing them thinly prevents them from remaining crunchy while the zucchini overcooks.

    Serving and Presentation Ideas

    Pairing with Grilled Salmon

    These packets pair exceptionally well with grilled salmon fillets. The acidity of the mustard sauce cuts through the richness of the fish. Serve the vegetables on a platter next to the salmon for a complete omega-3 rich meal.

    Serving with Roasted Chicken

    The savory garlic and basil notes make this a great accompaniment to roast chicken. The buttery sauce complements the skin of the chicken perfectly. Serve the vegetables immediately while they are hot and steaming.

    Adding a Fresh Parsley Garnish

    Freshly chopped parsley added just before serving provides a pop of color and a fresh, clean taste. This balances the richness of the melted butter and Parmesan. Sprinkle the parsley over the top of the opened foil packets.

    Storage and Preservation

    Proper Refrigeration Methods

    Store leftover vegetables in an airtight container in the refrigerator for up to three days. Do not store them inside the foil, as the vegetables can continue to soften and lose their texture. Cool the vegetables to room temperature before sealing the container.

    Reheating in the Oven

    The best way to reheat these vegetables is in the oven at 350°F. Place them in a baking dish and cover with foil to retain moisture. Heat for 5 to 7 minutes until warmed through to avoid the mushiness associated with microwaves.

    Reheating in a Microwave

    If using a microwave, place the vegetables in a microwave-safe dish and cover with a damp paper towel. Heat on medium power in 30-second intervals. Be careful not to overheat, as the zucchini can quickly become rubbery.

    Troubleshooting Common Issues

    Fixing Mushy Texture

    If the vegetables turn out too mushy, it is likely due to overcooking or slicing the vegetables too thin. Reduce the grill time by 2 minutes for the next batch. Ensure the heat is truly medium-high rather than low, which causes steaming without roasting.

    Preventing Burned Foil Bottoms

    If the bottom of the vegetables burns before the top is cooked, your grill may have hot spots. Rotate the packets every 5 minutes to ensure even heat exposure. Using a grill mat under the foil can also help distribute heat more evenly.

    Correcting Bland Flavor

    If the dish lacks flavor, increase the amount of garlic powder or add a squeeze of fresh lemon juice after grilling. The lemon juice adds a bright acidity that enhances the existing salt and herbs. Avoid adding more salt if you already used a significant amount of Parmesan.

    Frequently Asked Questions

    Can I make these in the oven?

    Yes, you can bake these packets in the oven at 400°F for 15 to 20 minutes. Place the sealed packets on a baking sheet to catch any potential leaks. The result is very similar to grilling, though you miss the slight smokiness.

    Do I need to peel the squash?

    No, peeling is not necessary for zucchini or yellow squash. The skins are tender and contain most of the nutrients and color. Leaving the skin on also helps the vegetable slices hold their shape during cooking.

    How long do these stay fresh?

    When refrigerated in an airtight container, these vegetables remain high quality for about 72 hours. After this point, the zucchini may begin to release more water and lose its structural integrity.

    Do I need to pre-salt the zucchini?

    Pre-salting is not required for this recipe because the Parmesan cheese and mustard provide sufficient seasoning. Pre-salting is typically used to remove moisture for frying, whereas here, the moisture helps steam the vegetables in the foil.

    Print
    clock clock iconcutlery cutlery iconflag flag iconfolder folder iconinstagram instagram iconpinterest pinterest iconfacebook facebook iconprint print iconsquares squares iconheart heart iconheart solid heart solid icon
    Cheesy Grilled Zucchini and Squash Foil Packets

    Cheesy Grilled Zucchini and Squash Foil Packets


    5 Stars 4 Stars 3 Stars 2 Stars 1 Star

    No reviews

    • Author: Emily
    • Total Time: 22 minutes
    • Yield: 4 servings 1x
    • Diet: Vegetarian

    Description

    If you’ve ever wondered how to grill zucchini and squash, look no further! Our recipe for grilled vegetables in foil is one of the easiest summer side dishes around. With grated Parmesan cheese, melted butter, basil leaves, garlic powder, and onions, this zucchini on the grill recipe is perfect for your chicken, seafood, and meat dishes.


    Ingredients

    Scale
    • 1/4 cup Yellow Mustard
    • 1/4 cup butter, melted
    • 2 tablespoons grated Parmesan cheese
    • 1/2 teaspoon Basil Leaves
    • 1/2 teaspoon Garlic Powder
    • 1 large zucchini, cut into 1/4-inch thick slices
    • 1 medium yellow squash, cut into 1/4-inch thick slices
    • 1 small yellow onion, thinly sliced
    • 4 sheets (12×12-inch each) heavy duty aluminum foil

    Instructions

    1. Step 1: Mix mustard, butter, Parmesan, basil, and garlic powder in a large bowl until well blended. Add zucchini, squash, and onions; toss to coat well.
    2. Step 2: Divide vegetable mixture evenly among sheets of aluminum foil. Bring up sides of foil; double fold top and ends to tightly seal each packet.
    3. Step 3: Grill packets over medium-high heat for 10 to 12 minutes or until zucchini is tender. Sprinkle with additional Parmesan cheese before serving, if desired.

    Notes

    An easy and flavorful summer side dish that pairs well with grilled proteins.

    • Prep Time: 10 minutes
    • Cook Time: 12 minutes
    • Category: Side Dishes
    • Method: Grilling
    • Cuisine: American

    Nutrition

    • Serving Size: 1 serving
    • Calories: 169 kcal
    • Sugar: 4 g
    • Sodium: 320 mg
    • Fat: 13 g
    • Saturated Fat: 8 g
    • Unsaturated Fat: 5 g
    • Trans Fat: 0 g
    • Carbohydrates: 10 g
    • Fiber: 2 g
    • Protein: 3 g
    • Cholesterol: 34 mg
  • Creamy Cajun Chicken Penne Pasta

    Creamy Cajun Chicken Penne Pasta

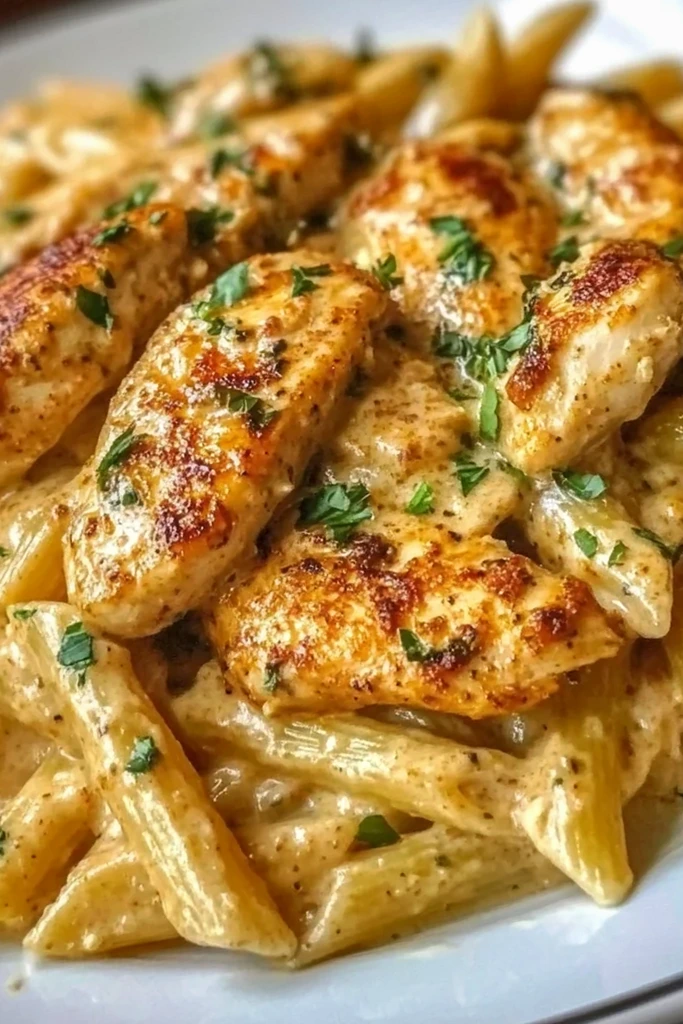
    This creamy Cajun chicken pasta is a fast dinner solution that delivers bold flavors in about 30 minutes. It combines spicy seasoning with a rich cheese sauce for a satisfying meal.

    Recipe image

    List of ingredients

    • 8 oz penne pasta – use dried durum wheat for the best al dente texture.
    • 1 lb chicken breast, sliced – cut into uniform strips to ensure even cooking times.
    • 2 tbsp Cajun seasoning – choose a blend that matches your preferred spice level.
    • 1 tbsp olive oil – provides a stable cooking medium for searing chicken.
    • 2 cups heavy cream – creates the thick, velvety base for the sauce.
    • 1 cup grated Parmesan cheese – freshly grated cheese melts more smoothly.
    • 1 clove garlic, minced – adds a sharp, aromatic depth to the sauce.
    • Salt and pepper to taste – use for final seasoning adjustments.
    • Chopped parsley for garnish – adds a fresh, herbaceous finish to the plate.

    step-by-step instructions

    1. Boil the pasta: Cook the penne pasta in a large pot of boiling salted water according to package instructions until al dente. Drain and set aside.
    2. Sear the chicken: Heat olive oil in a skillet over medium heat. Add the sliced chicken seasoned with Cajun spices and sauté until browned and fully cooked through.
    3. Build the cream base: Add the minced garlic to the skillet and sauté for about one minute. Pour in the heavy cream and stir until the liquid is well combined with the pan drippings.
    4. Melt the cheese: Gradually stir in the grated Parmesan cheese, mixing continuously until the sauce is smooth and the cheese is completely melted.
    5. Combine and serve: Toss the cooked penne into the skillet, seasoning with salt and pepper. Garnish with chopped parsley before serving hot.

    Professional Cooking Techniques

    Achieving the Perfect Sear on Chicken

    To get a golden-brown crust, ensure the olive oil is shimmering before adding the chicken. Avoid overcrowding the skillet, as too much meat releases moisture and causes the chicken to steam rather than sear. Let the chicken sit undisturbed for 2-3 minutes per side to develop a deep color.

    Mastering the Al Dente Texture

    Pasta should have a slight resistance when bitten, which is the definition of al dente. Start tasting the penne two minutes before the package directions suggest. This prevents the pasta from becoming mushy when it is later simmered in the creamy sauce.

    Emulsifying the Parmesan Sauce

    Adding cheese too quickly can lead to clumping or a grainy texture. Incorporate the Parmesan in small handfuls, stirring constantly over medium-low heat. This allows the fats to emulsify properly with the cream, resulting in a glossy, uniform sauce.

    Utilizing Pan Drippings

    After sautéing the chicken, do not wipe out the skillet. The brown bits left behind, known as fond, contain concentrated flavor from the Cajun spices. When the heavy cream is added, these bits dissolve into the sauce, adding depth and complexity.

    Customization and Substitutions

    Substituting Heavy Cream

    For a slightly lighter version, you can use half-and-half, although the sauce will be thinner. For a dairy-free alternative, full-fat coconut cream provides a similar richness, though it adds a slight coconut flavor. Cashew cream is another plant-based option that maintains a neutral taste.

    Alternative Pasta Shapes

    While penne is traditional, other tubular pastas like rigatoni or ziti work well because they trap the sauce inside. Spiral shapes like fusilli or farfalle also provide excellent surface area for the cream to cling to. Always adjust boiling times based on the specific shape used.

    Incorporating Fresh Vegetables

    Adding sliced red or green bell peppers provides a classic Cajun aesthetic and a crunchy texture. Sauté the peppers with the chicken or add them just before the cream. Fresh spinach can be stirred in at the very end until it wilts from the residual heat.

    Adjusting the Heat Level

    If the dish is too spicy, stir in an extra tablespoon of heavy cream or a pinch of sugar to balance the heat. To increase the kick, add a pinch of cayenne pepper or a few dashes of a hot sauce. Always taste the sauce before adding the pasta to gauge the spice level.

    Serving and Pairing Recommendations

    Balancing Richness with Acidic Salads

    The heavy nature of the cream and cheese pairs best with a bright, acidic side. A Caesar salad with a lemon-forward dressing provides a sharp contrast that cleanses the palate. A simple arugula salad with balsamic vinaigrette is another excellent choice for cutting through the richness.

    Choosing the Right Bread Accompaniments

    Garlic bread is the most popular pairing, as the toasted crust helps soak up excess sauce. A warm, crusty baguette or slices of toasted sourdough also work well. Brush the bread with garlic butter and bake until golden for maximum flavor.

    Garnishing for Visual and Flavor Contrast

    Beyond parsley, consider adding thinly sliced green onions for a mild onion bite. A sprinkle of red pepper flakes adds a pop of color and an extra layer of heat. Freshly grated lemon zest stirred in at the end can brighten the overall flavor profile.

    Storage and Food Safety

    Optimal Refrigeration Methods

    Transfer leftover pasta into an airtight glass container once it has cooled slightly. Store it in the main body of the refrigerator rather than the door to maintain a consistent temperature. The dish will stay fresh for up to three days when stored properly.

    Freezing Cream-Based Pastas

    Freezing is not recommended for cream-based sauces as they tend to separate upon thawing. However, if necessary, freeze in a freezer-safe container for up to two months. Be prepared to add a splash of milk or cream during the reheating process to restore the emulsion.

    Accurate Reheating Procedures

    When reheating on a stovetop, add a small amount of milk or vegetable broth to the skillet. Heat over medium-low, stirring frequently to prevent the sauce from burning. For microwave reheating, use short 60-second intervals and stir between each to ensure even heating.

    Common Troubleshooting

    Correcting a Thickened Sauce

    Cream sauces can thicken quickly as they cool or overcook. To thin the sauce, add a tablespoon of reserved pasta water or milk. Stir gently over low heat until the desired consistency is reached without breaking the sauce.

    Handling Overcooked Pasta

    If the penne is overcooked, avoid simmering it in the sauce for too long. Simply toss the pasta in the sauce quickly and serve immediately. Adding a bit of extra Parmesan can sometimes help provide structure to softer noodles.

    Reducing Excess Saltiness

    Cajun seasoning blends often contain significant amounts of salt. If the final dish tastes too salty, add a splash of heavy cream or a squeeze of fresh lemon juice. The acidity of the lemon helps neutralize the perception of salt on the tongue.

    Frequently Asked Questions

    How can I make my Creamy Cajun Chicken Penne Pasta spicier?

    You can increase the amount of Cajun seasoning during the searing process or add cayenne pepper to the sauce. Adding sliced jalapeños or red chili flakes during the garlic sauté stage also provides a sharper heat.

    Can I use other types of pasta?

    Yes, any short pasta like farfalle, fusilli, or rigatoni will work. Ensure you cook them to al dente so they hold their shape when mixed with the heavy sauce.

    What can I substitute for heavy cream?

    Half-and-half is a suitable substitute for a lighter texture. For dairy-free options, coconut cream or blended soaked cashews can provide the necessary creaminess.

    Can I make this recipe ahead of time?

    You can prepare the chicken and the sauce in advance. Store them separately and combine them with freshly cooked pasta just before serving to ensure the best texture.

    Print
    clock clock iconcutlery cutlery iconflag flag iconfolder folder iconinstagram instagram iconpinterest pinterest iconfacebook facebook iconprint print iconsquares squares iconheart heart iconheart solid heart solid icon
    Creamy Cajun Chicken Penne Pasta

    Creamy Cajun Chicken Penne Pasta


    5 Stars 4 Stars 3 Stars 2 Stars 1 Star

    No reviews

    • Author: Emily
    • Total Time: 30 minutes
    • Yield: 4 servings 1x
    • Diet: General

    Description

    Indulge in the rich, creamy goodness of Creamy Cajun Chicken Penne Pasta—a culinary delight that combines tender chicken, perfectly cooked penne, and a bold sauce infused with zesty Cajun flavors. This dish is not only quick to prepare, making it an ideal choice for busy weeknights, but also versatile enough to customize with your favorite vegetables or spices.


    Ingredients

    Scale
    • 8 oz penne pasta
    • 1 lb chicken breast, sliced
    • 2 tbsp Cajun seasoning
    • 1 tbsp olive oil
    • 2 cups heavy cream
    • 1 cup grated Parmesan cheese
    • 1 clove garlic, minced
    • Salt and pepper to taste
    • Chopped parsley for garnish

    Instructions

    1. Step: Cook the penne pasta according to package instructions until al dente. Drain and set aside.
    2. Step: In a skillet over medium heat, add olive oil. Once hot, sauté the sliced chicken seasoned with Cajun spices until browned and cooked through.
    3. Step: Add minced garlic to the skillet and sauté briefly before pouring in heavy cream. Stir until combined.
    4. Step: Gradually mix in Parmesan cheese until melted and smooth.
    5. Step: Toss in the cooked penne pasta and season with salt and pepper. Serve garnished with chopped parsley.

    Notes

    For the best results, cook the pasta just before combining it with the sauce. To add nutrition and color, consider incorporating bell peppers or spinach.

    • Prep Time: 10 minutes
    • Cook Time: 20 minutes
    • Category: Dinner
    • Method: Sautéing
    • Cuisine: Cajun

    Nutrition

    • Serving Size: 1 cup (about 250g)
    • Calories: 620 kcal
    • Sugar: 4 g
    • Sodium: 820 mg
    • Fat: 36 g
    • Saturated Fat: 18 g
    • Unsaturated Fat: 16 g
    • Trans Fat: 0 g
    • Carbohydrates: 50 g
    • Fiber: 3 g
    • Protein: 28 g
    • Cholesterol: 110 mg