Author: Emily

  • Garlic Butter Shrimp Pasta

    Garlic Butter Shrimp Pasta

    Create a restaurant-quality meal in your own kitchen with this quick, creamy garlic butter shrimp pasta. This dish brings together tender succulent shrimp and perfectly cooked fettuccine in a rich, buttery sauce that takes only minutes to prepare. It is an ideal solution for those busy weeknights when you want something that tastes gourmet but requires minimal time and effort.
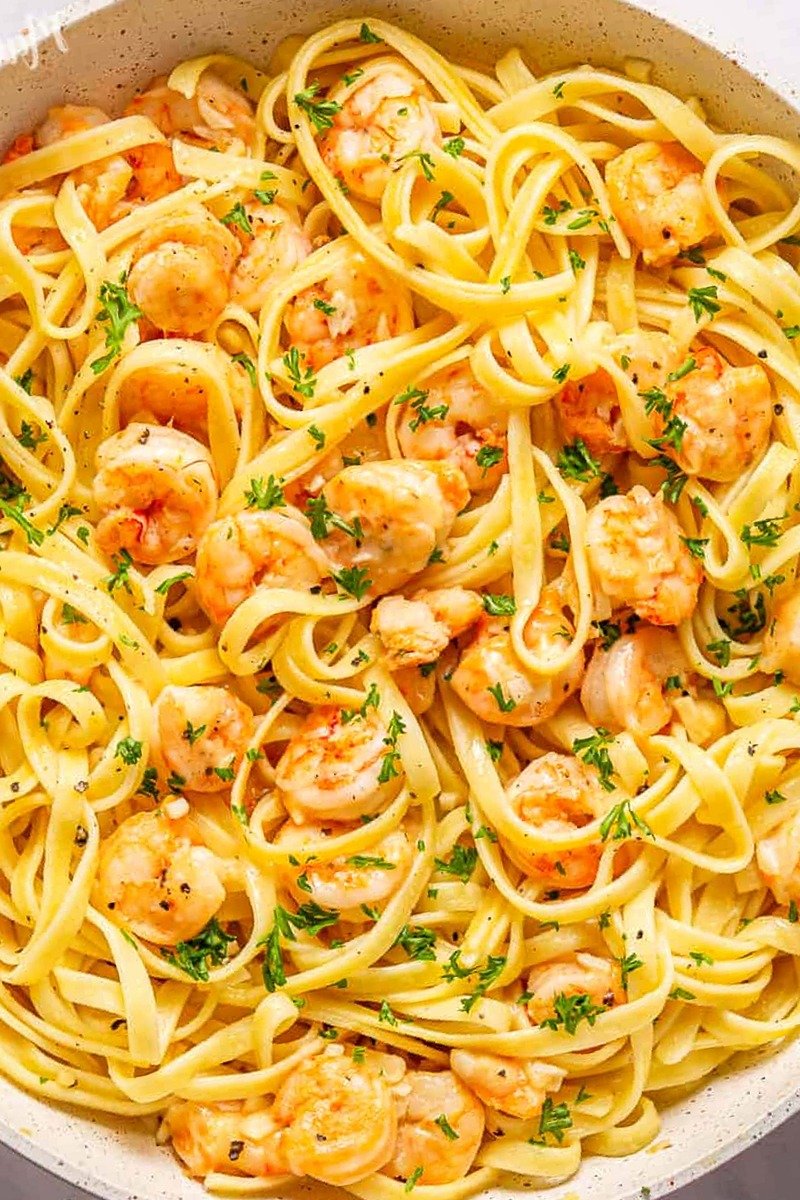
    Garlic Butter Shrimp Pasta

    List of ingredients

    • 12 oz Fettuccine
    • 1 lb Shrimp
    • 4 cloves Garlic
    • ½ cup Parmesan Cheese
    • 4 tbsp Butter
    • ¼ Lemon (juiced)
    • ¼ Lemon (zested)
    • 2 tbsp Cooking Oil
    • Sea Salt
    • Black Pepper

    step-by-step instructions

    1. Step: In a large pot boiling salted water, cook fettuccine pasta until al dente, drain well then set aside.
    2. Step: In a pan, heat cooking oil over medium heat. Cook garlic until fragrant for 2 minutes.
    3. Step: Melt butter in the same pan then cook shrimp. Stir occasionally until the shrimp turn opaque white with some pink for about 4-6 minutes.
    4. Step: Add lemon juice, lemon zest, parmesan cheese, salt, and black pepper. Stir until combined and the parmesan cheese is melted.
    5. Step: Transfer the fettuccine into a pan, stir until evenly distributed.
    6. Step: Garnish with parsley before serving.

    Mastering the Perfect Sauce Consistency

    Utilizing Starchy Pasta Water

    If you find that your sauce is too thick or not clinging to the noodles as effectively as you would like, add one or two tablespoons of the reserved pasta cooking water. The starch in the water acts as an emulsifier, helping the butter, cheese, and lemon juice bond together into a silky, cohesive sauce that coats every strand of pasta perfectly.

    Selecting the Right Cheese Texture

    Always use freshly grated Parmesan cheese rather than pre-grated varieties found in bags. Pre-grated cheese is often coated in cellulose to prevent clumping, which interferes with the melting process and can leave your sauce feeling gritty. A fine microplane grater is the best tool for achieving the light, fluffy texture that dissolves instantly into a hot sauce.

    Selecting and Preparing Your Protein

    Determining Quality and Freshness

    When selecting shrimp, look for those that are firm to the touch with a mild, ocean-like scent rather than a strong or fishy odor. If you are using frozen shrimp, make sure they are completely thawed and patted dry with paper towels before hitting the pan. Excess water on the shrimp will steam them rather than sear them, preventing that desirable golden-brown color.

    Maintaining the Tail for Presentation

    Leaving the tails on during the cooking process provides a professional, restaurant-style appearance that makes the dish look much more intricate than it actually is. Furthermore, the shells and tails contain a significant amount of concentrated flavor that infuses the butter sauce while they cook. Just remind your guests to remove them before eating if they prefer a cleaner dining experience.

    Maximizing Freshness and Flavor

    Balancing the Lemon Component

    The lemon zest is just as important as the juice because it contains the aromatic essential oils of the fruit. Be careful to zest only the bright yellow outer layer and avoid the bitter white pith underneath. Adding the zest at the very end ensures the delicate citrus oils remain vibrant rather than cooking out during the high-heat searing process.

    Adding Fresh Herbal Notes

    While the recipe suggests parsley as a finishing touch, do not underestimate the impact of a fresh herb addition. Parsley brings a clean, earthy note that cuts through the richness of the butter and cheese. You can also experiment with finely sliced chives or fresh basil to add a different aromatic profile depending on what you have available in your herb garden.

    Frequently Asked Questions

    Can I prepare this dish ahead of time for a dinner party?

    This recipe is best enjoyed immediately after preparation as pasta continues to absorb sauce while it sits, which can make the dish feel dry if left to stand too long. If you must prepare elements in advance, cook the shrimp and make the sauce, but keep the pasta slightly undercooked and toss it together just before serving.

    What are the best pasta alternatives if I run out of fettuccine?

    You can substitute the fettuccine with almost any long-strand pasta like linguine or spaghetti, which provide a similar surface area for the sauce. If you prefer short pasta shapes, penne or fusilli work exceptionally well as they have crevices that trap the garlic butter and Parmesan, ensuring every bite is flavor-packed.

    How do I store and reheat leftovers properly?

    Store any leftovers in an airtight container in the refrigerator for up to two days. When reheating, place the pasta in a skillet over low heat and add a tiny splash of water or a small knob of butter. Stir gently until heated through to prevent the shrimp from becoming rubbery or overcooked from excessive heat.

    Troubleshooting Common Cooking Issues

    Preventing Chewy or Rubbery Shrimp

    Shrimp have a very narrow window of doneness; they are fully cooked the moment they turn opaque and pink. If you leave them in the pan for even a minute too long, the proteins tighten and the texture becomes rubbery. If you are worried about timing, remove the shrimp from the pan once cooked and stir them back in only at the very end when the sauce is ready.

    Fixing a Broken or Separated Sauce

    If your butter and lemon sauce appears to separate or look greasy, it usually means the heat was too high or the cheese was added too quickly. Take the pan off the heat immediately and whisk in a small splash of heavy cream or plain water to re-emulsify the fats. Consistent, low-to-medium heat is the key to maintaining a smooth, emulsified finish.

    Optimizing the Cooking Process

    Managing the Heat Levels

    The combination of butter and oil is deliberate, as the cooking oil provides a higher smoke point that protects the butter from burning before the garlic has a chance to soften. Keep your burner set to a consistent medium-low heat throughout the sauce-making stage to ensure the garlic sweetens without turning bitter or dark brown.

    Creating a Uniform Meal

    To ensure your meal comes together without stress, gather and prep all of your ingredients before you even turn on the stove. Because this pasta dish moves very quickly once the garlic hits the pan, having your cheese grated, your lemon zested, and your pasta drained beforehand will make the cooking process feel like a smooth, professional performance rather than a hectic scramble.

    Print
    clock clock iconcutlery cutlery iconflag flag iconfolder folder iconinstagram instagram iconpinterest pinterest iconfacebook facebook iconprint print iconsquares squares iconheart heart iconheart solid heart solid icon
    Garlic Butter Shrimp Pasta

    Garlic Butter Shrimp Pasta


    5 Stars 4 Stars 3 Stars 2 Stars 1 Star

    No reviews

    • Author: Emily
    • Total Time: 60 minutes
    • Yield: 5 servings 1x
    • Diet: Pescatarian

    Description

    A delicious and creamy shrimp pasta dish made with aromatic garlic, melted butter, fresh lemon, and parmesan cheese. This elegant restaurant-style meal is simple, fast, and easy to prepare at home for a fancy dinner.


    Ingredients

    Scale
    • 12 oz Fettuccine
    • 1 lb Shrimp
    • 4 cloves Garlic
    • ½ cup Parmesan Cheese
    • 4 tbsp Butter
    • ¼ Lemon (juiced)
    • ¼ Lemon (zested)
    • 2 tbsp Cooking Oil
    • Sea Salt
    • Black Pepper

    Instructions

    1. Step: In a large pot boiling salted water, cook fettuccine pasta until al dente, drain well then set aside.
    2. Step: In a pan, heat cooking oil over medium heat. Cook garlic until fragrant for 2 minutes.
    3. Step: Melt butter in the same pan then cook shrimp. Stir occasionally until the shrimp turn opaque white with some pink for about 4-6 minutes.
    4. Step: Add lemon juice, lemon zest, parmesan cheese, salt, and black pepper. Stir until combined and the parmesan cheese is melted.
    5. Step: Transfer the fettuccine into a pan, stir until evenly distributed.
    6. Step: Garnish with parsley before serving.

    Notes

    Prepare all ingredients before starting, as the recipe cooks very quickly. The combination of butter and oil prevents the butter from burning. Ensure you do not overcook the shrimp; they are done when they turn opaque pink and reach a tender texture.

    • Prep Time: 15 minutes
    • Cook Time: 45 minutes
    • Category: Main Course
    • Method: Stovetop
    • Cuisine: American

    Nutrition

    • Serving Size: 1 serving
    • Calories: 480 kcal
    • Sugar: 2 g
    • Sodium: 550 mg
    • Fat: 18 g
    • Saturated Fat: 9 g
    • Unsaturated Fat: 7 g
    • Trans Fat: 0 g
    • Carbohydrates: 52 g
    • Fiber: 3 g
    • Protein: 30 g
    • Cholesterol: 165 mg
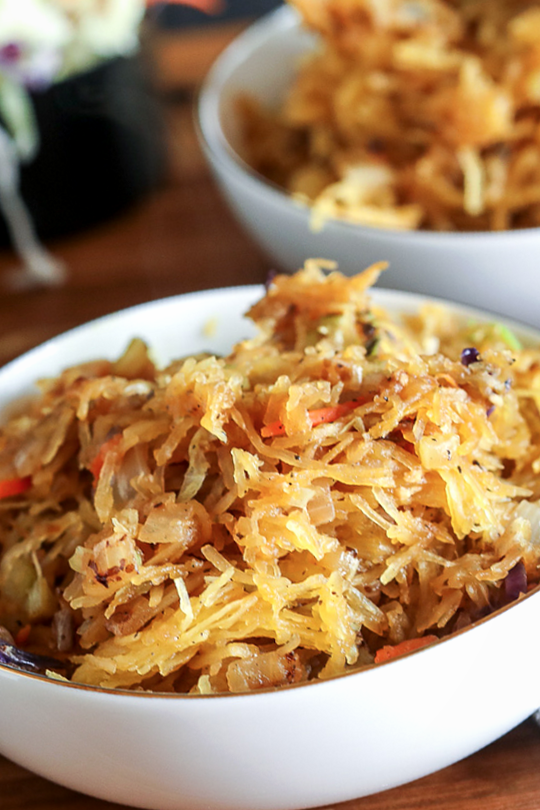
  • Spaghetti Squash Chow Mein

    Spaghetti Squash Chow Mein

    This vibrant stir-fry offers a satisfying, low-carb alternative to traditional noodle dishes, utilizing the unique texture of roasted spaghetti squash. By combining fresh, crisp vegetables with a savory ginger-garlic sauce, this meal achieves a depth of flavor that is both light and nourishing. It is an excellent choice for those seeking a plant-forward, nutrient-dense dinner that comes together with minimal effort and clean, wholesome ingredients.

    Spaghetti Squash Chow Mein

    List of ingredients

    • 1 large spaghetti squash
    • 1/4 cup coconut aminos
    • 3 cloves garlic, minced
    • 1 tablespoon coconut sugar
    • 2 teaspoons freshly grated ginger
    • 1/4 teaspoon white pepper
    • 2 tablespoons olive oil
    • 1 onion, diced
    • 3 stalks celery, sliced diagonally
    • 2 cups cole slaw mix (shredded cabbage and carrots)

    step-by-step instructions

    1. Step: Cut a spaghetti squash in half length wise and scoop out seeds. Lay skin side up in a 13 x 9 pyrex and pour 1/2 inch of water in the bottom of the pan. Bake at 400 degrees for 30-40 minutes, until flesh is very tender. Once done, scoop out flesh with a fork so it breaks apart into strings, set aside.
    2. Step: In a small bowl, whisk together coconut aminos, garlic, coconut sugar, ginger and white pepper; set aside.
    3. Step: Heat olive oil in a large skillet over medium high heat. Add onion and celery, and cook, stirring often, until tender, about 3-4 minutes. Stir in cabbage until heated through, about 1 minute.
    4. Step: Stir in spaghetti squash and sauce mixture until well combined, about 2 minutes.
    5. Step: Serve immediately.

    Refining your stir-fry technique

    Why high-heat searing matters for vegetables

    Cooking your vegetables over medium-high heat is essential to achieve a professional stir-fry texture. If the heat is too low, the onions and celery will steam rather than sear, leading to a mushy consistency. A quick, high-heat sear ensures the edges of the vegetables become tender while the centers stay crisp, mimicking the authentic feel of traditional takeout dishes.

    Selecting the right squash

    Choose a spaghetti squash that feels firm and heavy for its size, indicating high water content and fresh, stringy flesh. Avoid squash with soft spots, deep cracks, or significant bruising, as these can affect the overall flavor and structure of the dish. A properly matured squash will yield long, smooth strands rather than clumps of mushy fibers when scraped with a fork.

    Customizing your vegetable blend

    Incorporating extra protein sources

    If you wish to increase the heartiness of this meal, consider adding cubed extra-firm tofu or sliced tempeh to the skillet during the initial sautéing phase. These plant-based proteins absorb the savory sauce exceptionally well and provide a dense texture that pairs perfectly with the light squash strands. Ensure the protein is patted dry before hitting the pan to ensure a nice golden brown surface.

    Adding more color with seasonal vegetables

    For additional visual appeal and nutritional variety, consider adding sliced bell peppers or snap peas to the mix. These vegetables cook at a similar speed to the cabbage and celery, making them perfect additions without requiring extra steps. For a touch of color, a handful of thinly sliced red cabbage provides a vibrant contrast to the golden yellow squash.

    Serving suggestions for balanced meals

    Pairing with grain-free sides

    While this dish is substantial on its own, it pairs wonderfully with sides that complement the Asian-inspired flavor profile. Consider serving this alongside smashed cucumber salad tossed in rice vinegar or a side of lightly steamed bok choy finished with a drizzle of sesame oil. These pairings enhance the fresh, clean aesthetic of the meal without adding heavy carbohydrates.

    Enhancing the finish

    Top your serving with fresh cilantro, sliced green onions, or toasted sesame seeds for an immediate boost in aroma and texture. These simple garnishes provide a bright, finishing touch that balances the savory, fermented notes of the coconut aminos. If you enjoy a bit more heat, a sprinkle of red chili flakes adds a nice punch that cuts through the subtle sweetness of the coconut sugar.

    Managing leftovers and freshness

    Best practices for immediate consumption

    This dish is specifically designed to be enjoyed immediately after preparation, as the water content in the squash can release over time. Storing the dish for long periods often results in a texture that is less crisp and more watery. If you must have leftovers, keep the sauce, roasted squash, and sautéed vegetables separate in the refrigerator and combine them only when you are ready to reheat the meal.

    Reviving the texture

    If you find your reheated dish has become too liquid, you can fix it by returning the mixture to a hot, dry skillet for a minute. The high heat will evaporate the excess moisture released by the squash and vegetables. Avoid using a microwave to reheat, as this method accelerates the breakdown of the vegetable fibers, leading to a soggy result.

    Common preparation questions

    How can I ensure the squash strands are long and not mushy?

    The key to perfect strands is avoiding overcooking the squash in the oven. Test the squash by pressing the skin; if it yields easily but is not falling apart, it is ready to be pulled from the oven. Raking the squash with a fork in long, sweeping motions from the outer edge toward the center will yield the longest strands.

    Is it possible to make this dish without white pepper?

    White pepper has a very distinct, earthy heat that is central to many traditional stir-fry recipes, but black pepper is a perfectly acceptable substitute. Keep in mind that black pepper will contribute visible dark specks to your sauce and a slightly sharper, more pungent flavor profile. If you are sensitive to heat, you can reduce the amount of pepper by half or omit it entirely without compromising the structural integrity of the recipe.

    How can I thicken the sauce if it appears too thin?

    Because this recipe relies on a simple sauce, it is meant to have a light coating rather than a thick, syrupy glaze. However, if you prefer a thicker consistency, you can stir in a small amount of arrowroot starch or cornstarch mixed with a splash of water. Add this slurry during the final minute of cooking, and the sauce will thicken instantly as it comes into contact with the heat of the skillet.

    Can the coconut sugar be replaced?

    Coconut sugar is used for its gentle, caramel-like sweetness that complements the coconut aminos. If you do not have it, brown sugar works as an effective alternative, as it offers a similar depth of flavor. Avoid using granulated white sugar if possible, as it lacks the molasses notes that help round out the savory, salty elements of the sauce.

    What is the benefit of slicing the celery diagonally?

    Slicing celery on a bias, or diagonally, increases the surface area of each slice. This allows the vegetable to cook more evenly and pick up more of the flavorful sauce in the skillet. Furthermore, this technique provides a more refined aesthetic, contributing to the overall visual presentation of the meal, making the dish look as good as it tastes.

    Why should I use fresh ginger instead of powdered?

    Fresh ginger contains volatile oils and aromatic compounds that provide a sharp, bright, and clean heat that is entirely absent in dried, powdered ginger. When using fresh ginger, you are adding not only flavor but also a fresh fragrance that helps elevate the entire dish. Grating the ginger finely ensures it distributes evenly throughout the sauce, preventing any overpowering bites of fiber.

    Print
    clock clock iconcutlery cutlery iconflag flag iconfolder folder iconinstagram instagram iconpinterest pinterest iconfacebook facebook iconprint print iconsquares squares iconheart heart iconheart solid heart solid icon
    Spaghetti Squash Chow Mein

    Spaghetti Squash Chow Mein


    5 Stars 4 Stars 3 Stars 2 Stars 1 Star

    No reviews

    • Author: Emily
    • Total Time: 60 minutes
    • Yield: 4 servings 1x
    • Diet: Paleo, Whole30, Vegetarian, Vegan

    Description

    Discover a healthier twist with our Spaghetti Squash Chow Mein recipe! Low-carb, flavorful, and easy to make. Perfect for a nutritious meal.


    Ingredients

    Scale
    • 1 large spaghetti squash
    • 1/4 cup coconut aminos
    • 3 cloves garlic, minced
    • 1 tablespoon coconut sugar
    • 2 teaspoons freshly grated ginger
    • 1/4 teaspoon white pepper
    • 2 tablespoons olive oil
    • 1 onion, diced
    • 3 stalks celery, sliced diagonally
    • 2 cups cole slaw mix (shredded cabbage and carrots)

    Instructions

    1. Step: Cut a spaghetti squash in half length wise and scoop out seeds. Lay skin side up in a 13 x 9 pyrex and pour 1/2 inch of water in the bottom of the pan. Bake at 400 degrees for 30-40 minutes, until flesh is very tender. Once done, scoop out flesh with a fork so it breaks apart into strings, set aside.
    2. Step: In a small bowl, whisk together coconut aminos, garlic, coconut sugar, ginger and white pepper; set aside.
    3. Step: Heat olive oil in a large skillet over medium high heat. Add onion and celery, and cook, stirring often, until tender, about 3-4 minutes. Stir in cabbage until heated through, about 1 minute.
    4. Step: Stir in spaghetti squash and sauce mixture until well combined, about 2 minutes.
    5. Step: Serve immediately.

    Notes

    For best results, serve this dish immediately. Spaghetti squash does not hold up well when stored in the refrigerator.

    • Prep Time: 15 minutes
    • Cook Time: 45 minutes
    • Category: Main Course
    • Method: Stir-fry and Bake
    • Cuisine: Asian-Inspired

    Nutrition

    • Serving Size: 1 serving
    • Calories: 145 kcal
    • Sugar: 6 g
    • Sodium: 380 mg
    • Fat: 8 g
    • Saturated Fat: 1 g
    • Unsaturated Fat: 7 g
    • Trans Fat: 0 g
    • Carbohydrates: 19 g
    • Fiber: 4 g
    • Protein: 3 g
    • Cholesterol: 0 mg
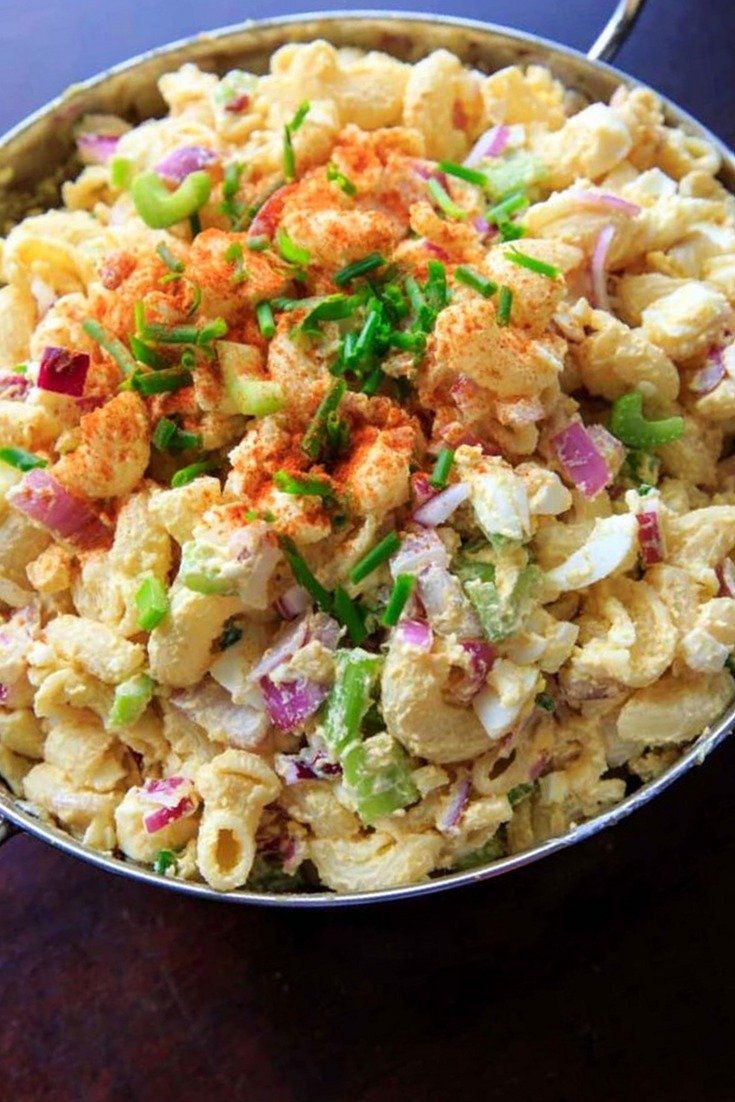
  • Deviled Egg Pasta Salad

    Deviled Egg Pasta Salad

    This vibrant pasta salad brings the classic flavors of deviled eggs to a hearty macaroni base, creating a crowd-pleasing dish perfect for any outdoor gathering. By balancing creamy Greek yogurt with a touch of mayonnaise and tangy Dijon mustard, you achieve a lighter profile without sacrificing the rich, savory taste that defines this timeless comfort food. It serves as an excellent way to transform leftover hard-boiled eggs into a substantial and flavorful side dish.

    Deviled Egg Pasta Salad

    List of ingredients

    • 8 oz. macaroni pasta
    • 6 hard-boiled eggs
    • 1/2 cup plain greek yogurt
    • 1/4 cup mayonnaise
    • 1 tablespoon dijon mustard
    • 1 small red onion, diced
    • 2 celery ribs, chopped
    • 1-2 tablespoons chopped fresh chives
    • 1/2 teaspoon paprika
    • sea salt, to taste

    step-by-step instructions

    1. Step: Cook macaroni in boiling water for 8-10 minutes. Drain and rinse, then set aside in a large bowl.
    2. Step: Cut the hard-boiled eggs in half, remove the yolks, and place the yolks in a small bowl. Chop the whites and add to the pasta bowl.
    3. Step: Mash the egg yolks with a fork. Stir in greek yogurt, mayonnaise, and mustard.
    4. Step: Add the chopped onion and celery to the pasta bowl, and stir in the egg yolk mixture until combined.
    5. Step: Top with fresh chives, paprika, and salt as desired. Serve chilled after at least 1 hour in the refrigerator.

    Essential Preparation Pointers

    Achieving the Ideal Pasta Texture

    For the best results in any pasta salad, aim for an al dente texture rather than cooking the macaroni until it is completely soft. When pasta is slightly firm, it holds its shape better when tossed with creamy dressings and prevents the salad from becoming mushy as it sits in the refrigerator. After cooking, a quick rinse under cold water is mandatory, as this removes excess starch that would otherwise cause the macaroni to clump together.

    Selecting the Right Yogurt and Mayo Ratio

    The balance of Greek yogurt and mayonnaise is the foundation of this recipe, providing both lightness and traditional creaminess. If you prefer a thinner dressing, you can swap a portion of the mayonnaise for a little extra yogurt, but keep in mind that mayonnaise adds a specific richness that is difficult to replace entirely. Always taste the dressing mixture before adding it to the pasta to ensure it meets your personal preference for tanginess and creaminess.

    Customization Options and Variations

    Adding Texture and Depth

    If you enjoy a more complex flavor profile, consider incorporating finely chopped pickles or sweet pickle relish, which add a vinegar-forward sweetness that pairs beautifully with the richness of the egg yolks. For those looking for extra heat, a small amount of hot sauce or red pepper flakes can provide a subtle kick that cuts through the creaminess of the dressing. You might also add diced bell peppers for additional color and a refreshing crunch that complements the celery.

    Incorporating Fresh Herbs

    While chives are the traditional finish for this dish, other fresh herbs like dill or flat-leaf parsley can significantly elevate the overall profile. Dill is particularly effective at highlighting the flavor of the eggs, acting as a bright contrast to the denser components of the salad. For a more intense garlic presence, a tiny pinch of garlic powder can be whisked directly into the yolk mixture to create a more savory foundation.

    Storing and Refreshing

    Managing Leftovers Effectively

    Because pasta tends to absorb moisture during storage, it is common for the salad to appear drier the following day. To revive the dish, have a small amount of extra Greek yogurt or mayonnaise on hand to stir in just before serving. This simple adjustment, along with an extra dusting of fresh paprika and chives, ensures the salad tastes just as fresh as when it was first prepared.

    Optimal Chilling Time

    While the salad can be consumed immediately, letting it rest in the refrigerator for at least one hour allows the ingredients to marinate properly. During this time, the onion and celery soften slightly while releasing their aromatics into the dressing. If you plan on serving this at a party, preparing it a few hours in advance is the best way to ensure the most consistent flavor throughout every bite.

    Addressing Common Queries

    Can I use a different type of pasta?

    Elbow macaroni is traditional because its shape effectively traps the creamy dressing and chopped vegetables in every bite. However, you can substitute other small, sturdy pasta shapes like fusilli or small shells, which offer similar surface areas for holding the sauce. Ensure the pasta is cooked according to the instructions so that it is soft enough to eat but firm enough to retain its structure when mixed.

    How do I know if the eggs are properly hard-boiled?

    To ensure perfect hard-boiled eggs, submerge them in boiling water and cook for about 9 to 10 minutes, then transfer them immediately to an ice-water bath. This rapid cooling technique prevents the formation of an unsightly green ring around the yolk and makes the shells significantly easier to peel. Freshly peeled eggs will have a much smoother surface, which is ideal when you want to create clean-cut egg whites for your salad.

    What is the best way to dice the onion?

    Using a very sharp chef’s knife is the best way to ensure the red onion is finely diced, which helps it distribute evenly without overwhelming individual bites. If you find raw red onion too pungent, you can soak the diced pieces in cold water for ten minutes and then drain them thoroughly before adding them to the bowl. This method mellows the sharp bite of the onion while keeping the desired crunchy texture intact.

    Why does the salad taste bland after refrigeration?

    Cold temperatures tend to mute the intensity of flavors, so it is often necessary to re-season the salad with additional salt and paprika after it has been chilled. When tasting, focus on whether the brightness of the Dijon mustard is still apparent; if not, a small squeeze of fresh lemon juice can help sharpen the profile back to where it needs to be. Always perform a final seasoning check right before you put the serving bowl on the table.

    Print
    clock clock iconcutlery cutlery iconflag flag iconfolder folder iconinstagram instagram iconpinterest pinterest iconfacebook facebook iconprint print iconsquares squares iconheart heart iconheart solid heart solid icon
    Deviled Egg Pasta Salad

    Deviled Egg Pasta Salad


    5 Stars 4 Stars 3 Stars 2 Stars 1 Star

    No reviews

    • Author: Emily
    • Total Time: 20 minutes
    • Yield: 8 servings 1x
    • Diet: Vegetarian

    Description

    Deviled egg pasta salad with macaroni noodles. Light on the mayo and big on flavor, this dish is a hit at cookouts or summer gatherings! A great way to use leftover hard-boiled eggs.


    Ingredients

    Scale
    • 8 oz. macaroni pasta
    • 6 hard-boiled eggs
    • 1/2 cup plain greek yogurt
    • 1/4 cup mayonnaise
    • 1 tablespoon dijon mustard
    • 1 small red onion, diced
    • 2 celery ribs, chopped
    • 12 tablespoons chopped fresh chives
    • 1/2 teaspoon paprika
    • sea salt, to taste

    Instructions

    1. Step: Cook macaroni in boiling water for 8-10 minutes. Drain and rinse, then set aside in a large bowl.
    2. Step: Cut the hard-boiled eggs in half, remove the yolks, and place the yolks in a small bowl. Chop the whites and add to the pasta bowl.
    3. Step: Mash the egg yolks with a fork. Stir in greek yogurt, mayonnaise, and mustard.
    4. Step: Add the chopped onion and celery to the pasta bowl, and stir in the egg yolk mixture until combined.
    5. Step: Top with fresh chives, paprika, and salt as desired. Serve chilled after at least 1 hour in the refrigerator.

    Notes

    If saving leftovers, the pasta may absorb moisture; stir in a little extra mayonnaise or greek yogurt to freshen it up. If you prefer a milder onion flavor, use only half the onion. Feel free to add extras like diced pickles or bell peppers for additional crunch.

    • Prep Time: 10 minutes
    • Cook Time: 10 minutes
    • Category: Appetizer
    • Method: Boiling
    • Cuisine: American

    Nutrition

    • Serving Size: 1 cup
    • Calories: 195 kcal
    • Sugar: 2 g
    • Sodium: 231 mg
    • Fat: 12 g
    • Saturated Fat: 3 g
    • Unsaturated Fat: 8 g
    • Trans Fat: 0 g
    • Carbohydrates: 11 g
    • Fiber: 1 g
    • Protein: 10 g
    • Cholesterol: 153 mg
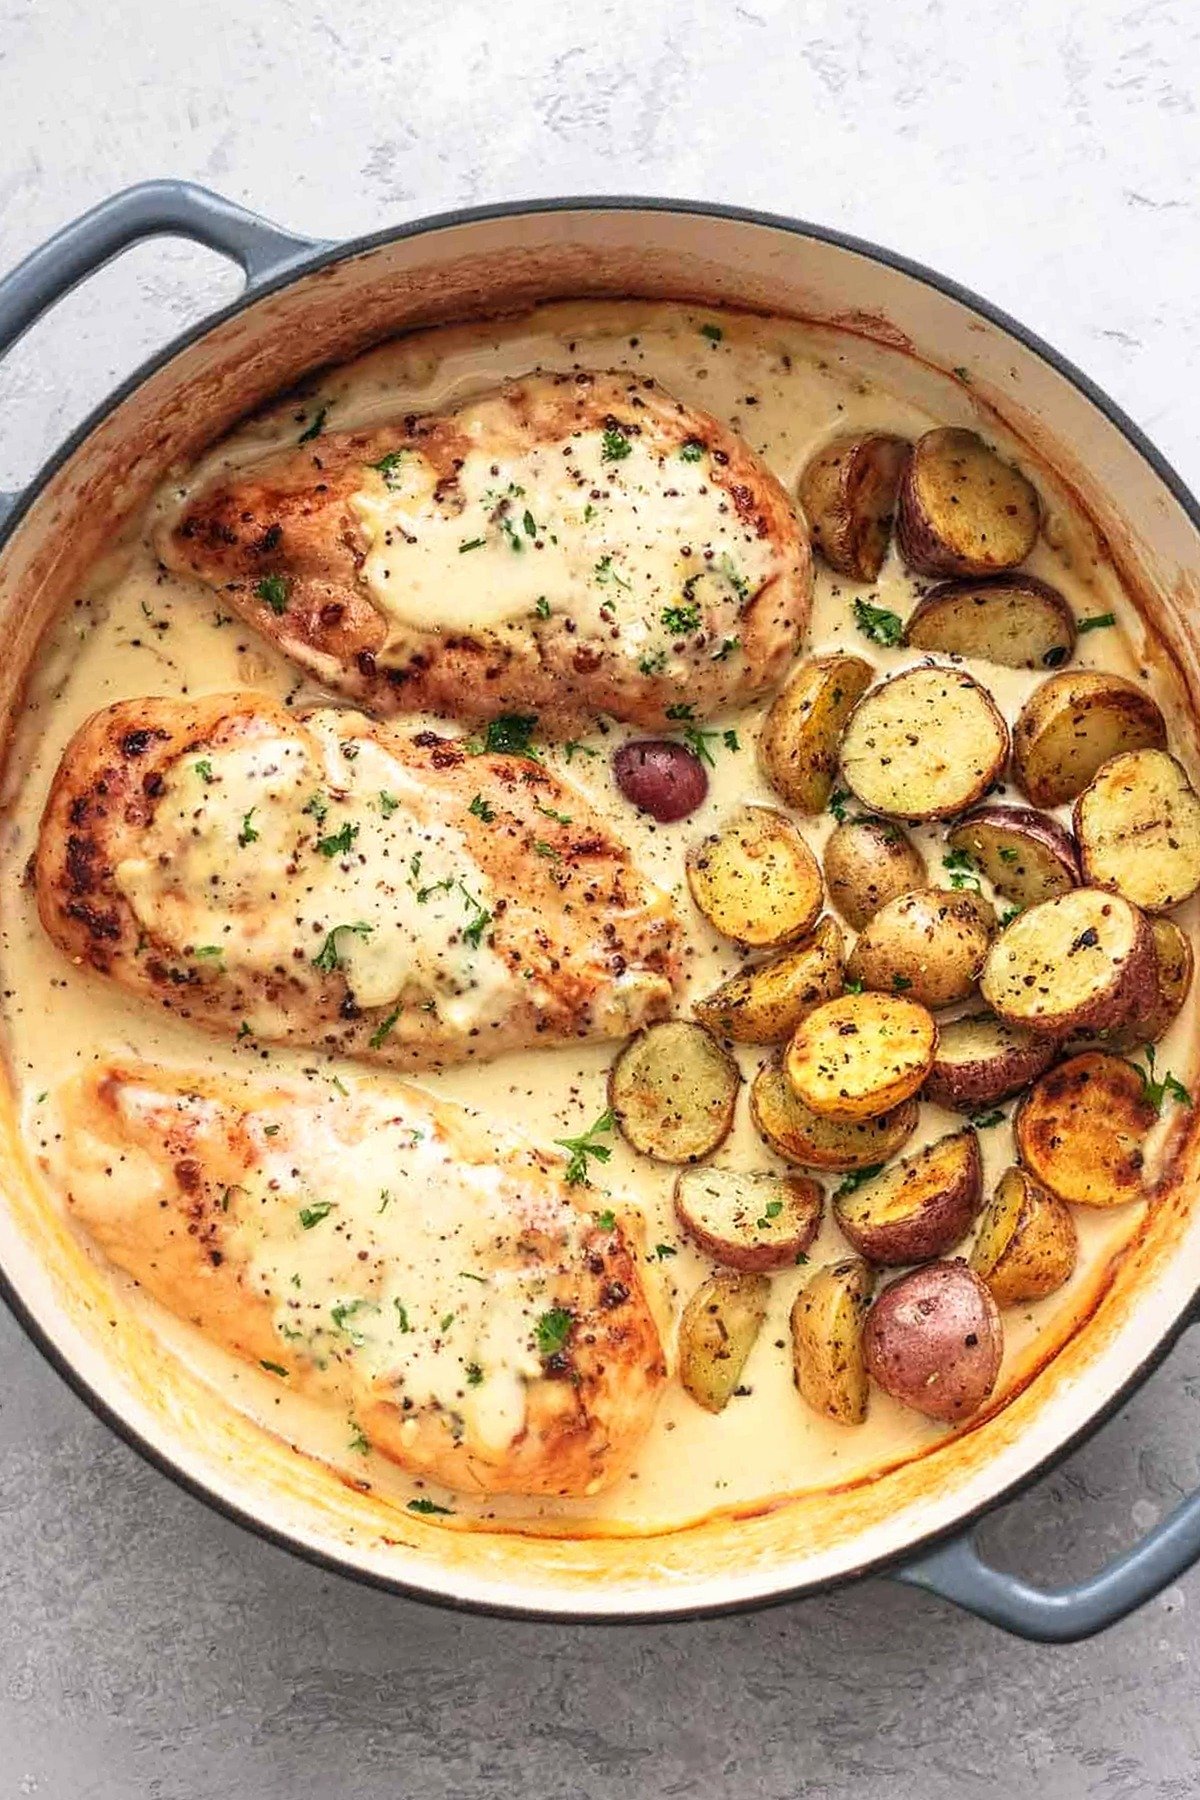
  • Creamy Dijon Chicken and Roasted Potatoes

    Creamy Dijon Chicken and Roasted Potatoes

    This one-pan meal brings together tender, golden-brown chicken breasts and perfectly roasted baby potatoes, all bathed in a sophisticated, silky Dijon-infused cream sauce. It is an ideal solution for busy weeknights when you want a high-quality, comforting dinner without the mess of multiple pots and pans. The combination of savory herbs, aromatic garlic, and the sharp tang of mustard creates a restaurant-quality flavor profile that is both approachable and deeply satisfying.

    Creamy Dijon Chicken and Roasted Potatoes

    List of ingredients

    • 3 medium boneless skinless chicken breasts
    • 2 teaspoons Italian blend seasoning (or Herbs de Provence)
    • salt and pepper to taste
    • 2 tablespoons butter
    • 2 tablespoons olive oil
    • 1/2 pound baby potatoes (halved or quartered into 1-inch pieces)
    • 1 tablespoon butter
    • 1 teaspoon minced garlic
    • 1 cup chicken broth
    • 2 tablespoons dijon mustard
    • 1 cup heavy cream
    • 1/2 teaspoon salt
    • 1/4 teaspoon cracked black pepper

    step-by-step instructions

    1. Step: Preheat oven to 375 degrees.
    2. Step: Combine chicken and potatoes in a large bowl, drizzle with 1 tablespoon olive oil, and season with salt, pepper, and Italian seasoning.
    3. Step: In a large skillet, melt 2 tablespoons butter with 1 tablespoon olive oil over medium heat. Add chicken and potatoes, cooking for 3-4 minutes per side until browned. Transfer to a plate and cover.
    4. Step: In the same skillet, melt 1 tablespoon butter, add garlic, and cook until fragrant. Whisk in chicken broth, dijon mustard, heavy cream, salt, and pepper.
    5. Step: Return chicken and potatoes to the pan, coating them in the sauce. Bake for 15-20 minutes until chicken is cooked through and potatoes are tender.

    Practical cooking tips

    Ensuring Even Potato Cooking

    To ensure your potatoes cook at the same rate as the chicken, it is vital to keep the pieces small and uniform. Aim for segments no larger than one inch. If your baby potatoes are naturally small, halving them is sufficient, but larger ones should be quartered to match the size of the bite-sized chicken pieces.

    Achieving the Perfect Sear

    Avoid crowding the skillet when browning the chicken and potatoes. If your pan is too small to accommodate everything comfortably, sear the chicken in two batches rather than overcrowding. A crowded pan will cause the meat and potatoes to steam rather than develop the desirable golden-brown exterior that locks in moisture.

    Monitoring Sauce Consistency

    If you find that your sauce is not thickening as much as you like during the initial whisking stage, let it simmer for an extra minute before returning the chicken to the pan. However, be cautious not to reduce it too far, as the liquid will continue to thicken slightly while it bakes in the oven.

    Substitutions and adjustments

    Alternative Potato Varieties

    If baby potatoes are unavailable, you can substitute them with Yukon Gold potatoes cut into uniform, bite-sized chunks. Avoid starchy Russet potatoes, as they tend to fall apart when cooked in a liquid-based sauce. Yukon Golds maintain their shape well and provide a creamy texture that pairs perfectly with the Dijon cream.

    Adjusting the Flavor Profile

    If you prefer a more pronounced herbal note, feel free to add a pinch of dried thyme or oregano alongside the Italian blend. For those who enjoy a bit of brightness, adding a squeeze of fresh lemon juice into the sauce right before serving can cut through the richness of the heavy cream and butter.

    Dairy-Free Considerations

    While the heavy cream is essential for the classic texture of this sauce, you can experiment with full-fat coconut milk for a dairy-free variation. Keep in mind that coconut milk will impart a slight coconut flavor to the dish, which pairs surprisingly well with the tangy mustard and savory herbs. Ensure you use canned, full-fat milk for the best results.

    Serving and presentation

    Pairing with Complementary Sides

    This dish is quite hearty, but it pairs wonderfully with a side of steamed green beans or roasted asparagus to add a fresh, crunchy element. The bright acidity of the vegetables balances the heavy cream sauce beautifully. If you are looking for more starch, a side of crusty bread is perfect for mopping up any leftover sauce in the pan.

    Garnishing for Texture

    Elevate the appearance of the dish by sprinkling fresh chopped parsley or chives over the top just before serving. A final crack of fresh black pepper adds a sophisticated touch. These small additions provide a pop of color and a fresh flavor profile that complements the earthy herbs used in the sauce.

    Storage and reheating advice

    Proper Refrigeration

    Leftovers should be stored in an airtight container in the refrigerator for up to three days. Because the sauce is cream-based, it may thicken significantly as it cools. When storing, try to keep the chicken and potatoes submerged in the sauce to prevent the meat from drying out.

    Gentle Reheating Techniques

    To reheat, it is best to use a skillet over low heat with a small splash of additional chicken broth or water to loosen the sauce. Avoid high heat, as this can cause the heavy cream to separate or the chicken to become rubbery. If you must use a microwave, use a medium-power setting and stir the sauce frequently to ensure even heat distribution.

    Frequently asked questions

    Can I prepare this dish in advance?

    You can prepare the chicken and potatoes ahead of time by searing them according to the instructions and keeping them in the refrigerator until you are ready to assemble and bake. However, it is best to make the cream sauce fresh right before baking to ensure the best texture and consistency.

    What should I do if my sauce curdles?

    Curdling usually occurs if the sauce is heated too rapidly or if the temperature difference between the ingredients is too high. Always ensure your broth and cream are at room temperature before adding them to the warm skillet. If it does separate, whisking vigorously off the heat or adding a tiny bit of cold water can sometimes help emulsify the sauce again.

    Is it possible to use chicken thighs?

    Boneless, skinless chicken thighs can definitely be used in this recipe and will result in an even juicier final dish. Because thighs have more fat, they are more forgiving than breasts if left in the oven for a few extra minutes. Simply ensure they are sliced to a similar size as the potatoes to keep cooking times consistent.

    Print
    clock clock iconcutlery cutlery iconflag flag iconfolder folder iconinstagram instagram iconpinterest pinterest iconfacebook facebook iconprint print iconsquares squares iconheart heart iconheart solid heart solid icon
    Creamy Dijon Chicken and Roasted Potatoes

    Creamy Dijon Chicken and Roasted Potatoes


    5 Stars 4 Stars 3 Stars 2 Stars 1 Star

    No reviews

    • Author: Emily
    • Total Time: PT30M
    • Yield: 3 servings 1x
    • Diet: Gluten-Free

    Description

    Chicken and Potatoes with Dijon Cream Sauce is a flavorful one-pot wonder that’s good for any night of the week. Italian seasonings and Dijon mustard blend beautifully together in a rich, buttery sauce that goes perfectly with the tender chicken and potatoes.


    Ingredients

    Scale
    • 3 medium boneless skinless chicken breasts
    • 2 teaspoons Italian blend seasoning (or Herbs de Provence)
    • salt and pepper to taste
    • 2 tablespoons butter
    • 2 tablespoons olive oil
    • 1/2 pound baby potatoes (halved or quartered into 1-inch pieces)
    • 1 tablespoon butter
    • 1 teaspoon minced garlic
    • 1 cup chicken broth
    • 2 tablespoons dijon mustard
    • 1 cup heavy cream
    • 1/2 teaspoon salt
    • 1/4 teaspoon cracked black pepper

    Instructions

    1. Step: Preheat oven to 375 degrees.
    2. Step: Combine chicken and potatoes in a large bowl, drizzle with 1 tablespoon olive oil, and season with salt, pepper, and Italian seasoning.
    3. Step: In a large skillet, melt 2 tablespoons butter with 1 tablespoon olive oil over medium heat. Add chicken and potatoes, cooking for 3-4 minutes per side until browned. Transfer to a plate and cover.
    4. Step: In the same skillet, melt 1 tablespoon butter, add garlic, and cook until fragrant. Whisk in chicken broth, dijon mustard, heavy cream, salt, and pepper.
    5. Step: Return chicken and potatoes to the pan, coating them in the sauce. Bake for 15-20 minutes until chicken is cooked through and potatoes are tender.

    Notes

    This recipe can easily be doubled by arranging the browned chicken and potatoes on a rimmed sheet pan and pouring the sauce over them before baking.

    • Prep Time: PT5M
    • Cook Time: PT25M
    • Category: Main Course
    • Method: Skillet and Oven
    • Cuisine: American

    Nutrition

    • Serving Size: 1 serving
    • Calories: 696 kcal
    • Sugar: 2 g
    • Sodium: 1101 mg
    • Fat: 46 g
    • Saturated Fat: 21 g
    • Unsaturated Fat: 25 g
    • Trans Fat: 0 g
    • Carbohydrates: 18 g
    • Fiber: 2 g
    • Protein: 53 g
    • Cholesterol: 255 mg
  • Keto Dip!

    Preparing restaurant-quality crab legs in the comfort of your own kitchen is surprisingly simple, far more cost-effective, and guaranteed to impress at any dinner table. Whether you are planning a special occasion or simply craving a savory, buttery seafood feast, mastering the art of cooking crab legs is a skill that will serve you well for years. By focusing on gentle heat methods that preserve the delicate, sweet texture of the meat, you can avoid the common pitfalls of overcooking or drying out your meal. Coupled with a bright, aromatic garlic butter dipping sauce, this preparation elevates the natural flavors of the shellfish into a luxurious dining experience.

    Why You Will Love This Recipe

    There are several reasons why this approach to crab legs will become a staple in your rotation. First, it is incredibly efficient; most methods take less than fifteen minutes of active effort. Second, the versatility is unmatched—if you prefer the smoky essence of a grill, the hands-off convenience of an oven, the rapid precision of an electric pressure cooker, or the classic tenderness achieved by steaming, you have options. Most importantly, the focus on a high-quality garlic butter sauce ensures that every morsel of crab is infused with richness, zest, and depth.

    Selecting Your Crab

    When heading to the seafood counter, you will typically encounter three popular varieties: Snow Crab, Dungeness, and King Crab. Snow Crab legs are often sold in clusters and offer a sweet, slightly fibrous meat that is perfect for dipping. Dungeness crab is celebrated for its slightly more delicate and savory flavor profile. King Crab, while often the most expensive option, provides massive, meaty portions that are truly a decadent treat. Regardless of your choice, aim for clusters that are free of frost or ice crystals to ensure the best quality.

    Ingredients for the Perfect Seafood Feast

    To prepare this dish effectively, gather the following high-quality components:

    • 2 lbs fresh or frozen crab leg clusters (Snow, Dungeness, or King)
    • 1 cup water (for steaming or pressure cooking methods)
    • 4 Tbsp high-quality unsalted butter
    • 2 cloves fresh garlic, minced or pressed
    • 1/4 tsp sea salt
    • 1/8 tsp freshly cracked black pepper
    • 1/2 Tbsp fresh lemon juice

    Choosing Your Cooking Method

    1. Steaming: The Gold Standard for Flavor

    Steaming is widely regarded as the best way to maintain the structural integrity and moisture of the crab. To start, place a steamer basket or wire rack into a large stockpot and pour in one cup of water. Arrange the crab clusters on the rack, cover the lid tightly, and bring the water to a boil. Allow the legs to steam for approximately 5 to 10 minutes. The crab is ready when it is fragrant, steaming hot throughout, and easily yields to the touch.

    2. Oven-Baked: Convenience and Efficiency

    If you prefer a hands-off approach, the oven is your best friend. Preheat your oven to 450°F. Use heavy-duty aluminum foil to create a sealed pouch for your crab clusters. Fold the edges of the foil inward several times to ensure no steam escapes. You do not need to add water; the crab will cook in its own moisture. Place the sealed packets on a baking sheet and bake for 15 minutes if thawed, or 25 minutes if frozen. The resulting steam trapped inside the foil makes the meat incredibly succulent.

    3. Grilled: For a Touch of Smoke

    Grilling adds a layer of complexity to the sweet crab meat. Prepare the crab in foil packets exactly as you would for the oven method. Preheat your grill to medium-high heat (approximately 450°F). Place the foil-wrapped clusters on the grill grates and cook for 10 minutes if thawed, or 15–20 minutes if frozen. This method is excellent for summer gatherings, but ensure you keep the heat controlled to prevent the foil from burning.

    4. The Instant Pot Method: The Fastest Route

    For those short on time, the pressure cooker is an exceptional tool. Place a trivet inside your 6-quart electric pressure cooker and add one cup of water. Arrange the crab legs in the pot, nesting them carefully to ensure the lid fits securely. Cook on high pressure for 4 minutes, then perform a quick release of the remaining pressure immediately. Be mindful that the scent of seafood will be potent, so consider utilizing your kitchen range vent.

    The Essential Garlic Butter Dipping Sauce

    The secret to a world-class crab dinner is the sauce. In a small saucepan over medium-low heat, melt the butter until it is just starting to bubble. Add the minced garlic, salt, and pepper, sautéing for only 30 to 45 seconds to release the oils without burning the garlic. Remove the pan from the heat immediately, then stir in the fresh lemon juice. Pour into individual ramekins for a sophisticated presentation.

    Serving Suggestions and Pairings

    Crab legs are a show-stopping main course that pairs beautifully with earthy and vibrant sides. Consider serving them with:

    • Grilled corn on the cob seasoned with fresh herbs.
    • Roasted asparagus spears finished with a light dusting of sea salt.
    • A crisp, cool Green Goddess salad to contrast the rich, warm butter.
    • Warm, crusty artisan bread or homemade biscuits for soaking up leftover dipping sauce.
    • Classic baked potatoes topped with fresh chives.

    Expert Tips for Success

    To get the most out of your preparation, remember these professional tips:

    • Avoid Boiling: Boiling crab legs directly in water can leach away the flavor and result in a waterlogged, mushy texture. Steaming is always preferred.
    • Mind the Vent: If cooking indoors, especially with the pressure cooker, ensure you have proper ventilation to keep your kitchen smelling fresh.
    • The Done Test: Your crab is ready when you see steam rising as you open a foil pack or lift the lid of your steamer. If it is not piping hot, it is not ready.
    • Tooling: Invest in a good pair of kitchen shears or a crab cracker. The shells can be sharp and sturdy; proper tools make accessing the meat much safer and more enjoyable.

    Storage and Reheating

    If you happen to have leftovers, do not let them go to waste. Thawed crab should be consumed within two days of purchase. Once cooked, store any remaining meat in an airtight container in the refrigerator for up to four days. For longer storage, you can freeze cooked crab meat for up to three months. When reheating, it is best to do so gently on the stovetop with a splash of water or a knob of butter to prevent the meat from drying out.

    Frequently Asked Questions

    Can I serve the crab meat cold?

    Yes, absolutely. Chilled crab legs are a fantastic addition to a seafood platter or a cold salad. Once cooked and cooled, you can keep them chilled until you are ready to serve with your dipping sauce.

    Is it necessary to thaw the crab before cooking?

    While thawed crab is generally easier to handle and fits more neatly into pots or foil packets, most of these methods work perfectly well with frozen crab. Simply add a few extra minutes to the cooking time as directed in the methods above.

    How do I know if the crab has gone bad?

    Fresh or thawed crab should have a mild, oceanic scent. Avoid any crab that has a strong, fishy, or ammonia-like odor, as this indicates spoilage.

    Can I change the flavor profile of the sauce?

    Certainly. You can add a pinch of red pepper flakes for heat, fresh chopped parsley for color, or even a dash of onion powder for extra savoriness. The foundation of butter, garlic, and lemon is a classic that pairs perfectly with the natural sweetness of the crab.

  • Peel N’ Eat Boiled Shrimp With Cocktail Sauce

    There is something inherently joyful about a meal that requires you to slow down, get your hands a little messy, and truly engage with your food. Peel-and-eat boiled shrimp bring that vibrant, casual seafood shack atmosphere directly into your own kitchen. Whether you are hosting a summer backyard gathering or just looking for a fun, interactive weeknight dinner, this dish is a crowd-pleaser that emphasizes fresh flavors and minimal fuss. By boiling the shrimp in their shells, you ensure that every bite remains succulent, tender, and infused with a savory, aromatic broth that makes the final result far superior to any pre-cooked store-bought shrimp.

    Why You Will Love This Recipe

    This recipe is a masterpiece of simplicity. It relies on the “less is more” philosophy, using a handful of high-quality ingredients to create a bold, memorable flavor profile. The signature seasoning blend, known for its complex mix of celery salt, paprika, and peppers, provides a deep, savory foundation that pairs perfectly with the natural sweetness of the shrimp. Plus, the homemade cocktail sauce—prepared in just a few minutes—is so much fresher and more vibrant than anything you will find in a jar. It is a dish that makes you feel like you are on vacation, even if you are just in your own dining room.

    Ingredients

    For the Shrimp

    • 2 pounds extra-large shrimp (26/30 count), shell-on, split and deveined
    • 2 ½ tablespoons classic seafood seasoning (e.g., Old Bay)
    • 3 tablespoons unsalted butter
    • 1 cup vegetable broth (or water)
    • 1 cup club soda (to provide lightness and fizz in place of traditional substitutes)

    For the Homemade Cocktail Sauce

    • 6 tablespoons high-quality ketchup
    • 1 tablespoon prepared horseradish (adjust based on your preference for heat)
    • 1 tablespoon freshly squeezed lemon juice
    • A generous pinch of cayenne pepper
    • Optional: A teaspoon of minced fresh chives or parsley for garnish

    Step-by-Step Instructions

    Preparing the Cooking Liquid

    Start by grabbing your largest pot or a heavy-duty Dutch oven. Add the vegetable broth, the club soda, the butter, and the seafood seasoning. Bring this mixture to a rolling boil over medium-high heat. The butter will melt and integrate with the spices, creating a fragrant, rich bath for your shrimp to cook in. The fizz of the club soda adds a nice aeration to the broth, which helps the seasoning penetrate the shells effectively.

    Cooking the Shrimp

    Once the liquid is boiling, add your shrimp carefully. Immediately turn the heat down to a medium setting and place the lid on the pot. This creates a gentle steaming environment that cooks the shrimp evenly without toughening the meat. Let them cook for 3 to 6 minutes, stirring once halfway through. You are looking for the shrimp to turn a vibrant opaque pink color. Watch them closely; once they are just opaque, they are ready to come off the heat. Overcooking is the quickest way to turn tender shrimp rubbery, so keep a close eye on the clock.

    Preparing the Cocktail Sauce

    While the shrimp are simmering, you can whip up the sauce. In a small mixing bowl, combine the ketchup, prepared horseradish, fresh lemon juice, and cayenne pepper. Whisk the ingredients until they are perfectly smooth. Taste the sauce—if you prefer a bolder, spicier bite, feel free to add an extra half-teaspoon of horseradish. If it feels too sharp, a tiny drop of honey or more ketchup can mellow it out. Cover and refrigerate until you are ready to serve.

    Serving

    Remove the shrimp from the hot broth using a large slotted spoon, allowing as much excess liquid to drain as possible. Transfer them to a large platter or a tray lined with parchment paper. Serve them either steaming hot or let them cool to room temperature. Always serve with the cocktail sauce on the side and a stack of napkins, as this is meant to be a hands-on experience!

    Tips for Success

    • Thawing Frozen Shrimp: If you use frozen shrimp, make sure to thaw them completely in the refrigerator overnight. Pat them dry with paper towels before starting so they don’t water down your seasoning broth.
    • Keep the Shells On: Even if you choose to devein them, keeping the shell on is non-negotiable for this recipe. The shell acts as a protective shield, locking in moisture and ensuring the shrimp don’t lose their delicate texture during the boiling process.
    • Don’t Overcrowd the Pot: If you are doubling this recipe, cook the shrimp in batches. If the pot is too full, the temperature will drop too quickly, and you will end up with unevenly cooked seafood.
    • Quality Matters: Since there are so few ingredients, try to use freshly squeezed lemon juice rather than the bottled stuff. The brightness of fresh citrus is essential for balancing the richness of the horseradish.

    Variations

    You can easily tweak this recipe to fit your taste preferences. For a garlicky twist, add 3-4 smashed garlic cloves to the boiling liquid. If you want a more citrusy profile, add lemon wheels into the broth while it boils. If you prefer a milder sauce, omit the cayenne pepper and use a smaller amount of horseradish. Some fans of this dish also enjoy serving it with a side of melted garlic-herb butter in addition to the cocktail sauce.

    Serving Suggestions

    Because this dish is quite light, it pairs beautifully with heavier, comforting sides. A classic bowl of creamy coleslaw provides a cool, crunchy contrast. Freshly baked buttery cornbread or simple roasted potatoes make for a filling accompaniment. If you want to keep things strictly summery, a fresh corn salad with tomatoes and basil is an ideal partner.

    Storage and Leftovers

    Leftover shrimp should be stored in an airtight container in the refrigerator and consumed within 24 hours. While they are best eaten fresh, they can be used in cold salads or tossed into pasta dishes the next day. The cocktail sauce will last for up to a week in the refrigerator if kept in a sealed jar.

    Frequently Asked Questions

    Can I make this dish ahead of time?

    Yes! You can boil the shrimp, drain them, and chill them in the refrigerator. They are excellent served cold, especially on a hot day. Make sure to keep the cocktail sauce separate until the very last second.

    How do I know when the shrimp are done?

    The shrimp will curl into a “C” shape when they are perfectly cooked. If they curl into a tight “O” shape, they have likely been overcooked and may be tough.

    Is the horseradish necessary?

    The horseradish provides the quintessential “bite” that defines classic cocktail sauce. However, if you really dislike it, you can substitute it with a bit of chili paste or hot sauce, though the flavor profile will shift.

    Do I need to peel them before serving?

    The charm of “peel-and-eat” is that your guests peel the shrimp as they eat them. It makes the meal last longer and creates a social, relaxed dining environment. If you prefer to serve them pre-peeled, you can remove the shells after boiling, but be aware that the presentation won’t be as traditional.

  • Fried Rice

    There is something uniquely comforting about a hot bowl of perfectly seasoned fried rice. Whether you are looking for a quick weeknight dinner or a way to repurpose leftover grains from a previous meal, this classic fried rice recipe delivers restaurant-quality flavor right in your own kitchen. By focusing on high heat, chilled grains, and a careful balance of savory seasonings, you can achieve that addictive, slightly crispy texture that makes this dish such a perennial favorite.

    Why You Will Love This Recipe

    The beauty of this fried rice is its incredible versatility and speed. In just about fifteen minutes, you can transform simple pantry staples into a nourishing, flavorful meal. Unlike takeout versions that can sometimes be overly oily or lacking in substance, this version allows you to control the quality of ingredients, ensuring plenty of fresh vegetables and just the right amount of savory umami. It is an excellent way to clear out your vegetable crisper, and because it relies on chilled rice, it is the perfect solution for leftovers that would otherwise go to waste.

    The Secret to Success: Cold Rice

    If you take away only one tip from this guide, let it be this: always use chilled, cooked rice. When rice is freshly steamed, it retains a high moisture content. If you throw warm, moist rice into a hot pan, it will steam instead of fry, resulting in a gummy, clumpy texture. Using rice that has been refrigerated overnight allows the grains to firm up, ensuring that each piece stays distinct and develops a lovely chew when it hits the hot butter. If you are in a rush and need to cook a fresh batch, spread the cooked rice in a thin, even layer across a large baking sheet and place it in the freezer for about 15 to 20 minutes. This mimics the chilled state and will give you much better results.

    Ingredients

    • 3 tablespoons unsalted butter (divided)
    • 2 large eggs, whisked
    • 2 medium carrots, peeled and finely diced
    • 1 small white onion, diced
    • 1/2 cup frozen peas, thawed
    • 3 cloves garlic, minced
    • 4 cups cooked and chilled long-grain or short-grain white rice
    • 3 green onions, thinly sliced
    • 3–4 tablespoons soy sauce (adjust to your preference)
    • 2 teaspoons vegetarian oyster-style sauce (a rich, savory alternative to traditional oyster sauce)
    • 1/2 teaspoon toasted sesame oil
    • Salt and freshly ground black pepper, to taste

    Step-by-Step Instructions

    1. Scramble the Eggs

    Start by placing a large nonstick skillet or wok over medium-high heat. Melt 1/2 tablespoon of the butter. Once the butter is bubbling, add the whisked eggs. Gently stir them as they set to create large, fluffy curds. Once they are mostly cooked but still moist, remove them from the pan and set them aside on a plate.

    2. Sauté the Aromatics

    Return the pan to the heat and add 1 tablespoon of butter. Toss in the diced carrots, onion, peas, and minced garlic. Season these vegetables with a small pinch of salt and pepper. Sauté for about 5 minutes, or until the onions are translucent and the carrots have softened. This base layer of flavor is essential for the depth of the finished dish.

    3. Fry the Rice

    Increase the heat to high. Add the remaining 1 1/2 tablespoons of butter to the pan. Once melted, immediately add the chilled rice, half of the green onions, the soy sauce, and the vegetarian oyster-style sauce. Stir everything vigorously to ensure the grains are coated evenly in the sauce and butter. Spread the rice out across the pan and let it sit undisturbed for 30 to 60 seconds at a time; this allows the bottom layer of rice to toast and become slightly crispy. Repeat this process for about 3 minutes.

    4. Final Assembly

    Fold the previously scrambled eggs back into the rice mixture. Turn off the heat completely. Drizzle the toasted sesame oil over the dish and add the remaining fresh green onions. Give everything one final toss to combine the flavors. Taste the rice and adjust the seasoning with additional soy sauce if you prefer a saltier profile.

    Variations and Customizations

    This recipe is highly adaptable. If you want to increase the protein content, you can stir in pan-seared cubes of extra-firm tofu, chopped seitan, or even sautéed edamame for a plant-based boost. For extra color and crunch, consider adding finely diced bell peppers or baby corn. If you enjoy a bit of heat, a drizzle of chili crisp or a pinch of crushed red pepper flakes added with the garlic makes a fantastic addition. You can also experiment with different grains, such as using chilled quinoa or farro for a nuttier flavor profile, though white rice remains the gold standard for that authentic, classic texture.

    Serving Suggestions

    Fried rice is best served immediately while piping hot. It makes a satisfying main course on its own, but it pairs beautifully with side dishes like steamed bok choy with ginger, vegetable dumplings, or a light clear broth soup. Because the dish is already quite rich, serving it with a bright, crisp cucumber salad tossed in rice vinegar can help provide a refreshing contrast to the savory notes of the soy and sesame.

    Storage and Reheating

    If you have leftovers, allow the rice to cool slightly before transferring it to an airtight container. It can be stored in the refrigerator for up to 3 days. When reheating, it is best to use a skillet over medium heat with a tiny splash of water or a small knob of butter to help re-hydrate the grains. If you must use a microwave, cover the container with a damp paper towel to prevent the rice from drying out, and heat in 30-second increments, stirring in between.

    Frequently Asked Questions

    Can I use brown rice?

    Absolutely. Brown rice is a wonderful, hearty alternative. Keep in mind that brown rice typically has a nuttier flavor and a firmer texture, so you may want to ensure it is cooked slightly longer than you would for standard steamed rice before it is chilled.

    Why use butter instead of oil?

    While many stir-fries use vegetable or canola oil, butter adds a richness and depth of flavor that is hard to replicate. It also contributes to the beautiful browning of the rice grains. Just be sure to watch the heat, as butter has a lower smoke point than some oils.

    Is the vegetarian oyster-style sauce necessary?

    While the recipe works without it, I highly recommend using the vegetarian oyster-style sauce. It provides a dense, savory, and slightly sweet undertone that rounds out the soy sauce’s saltiness, giving the dish that professional, well-rounded finish common in high-quality rice dishes.

    How do I prevent the rice from getting mushy?

    The key is moisture control. Do not overcook your rice when you prepare it initially, and definitely ensure it is cold before it hits the pan. High heat during the frying phase is also non-negotiable; if the heat is too low, the rice will steam in its own moisture rather than crisping up properly.

  • Marry Me Shrimp Pasta

    When you are looking for a meal that feels special enough for a date night but simple enough for a busy Tuesday, this creamy shrimp pasta is the ultimate answer. Inspired by the famous flavor profile of “Marry Me” dishes, this recipe brings together succulent shrimp, tender pasta, and a rich, velvety sun-dried tomato sauce that is genuinely addictive. It is a harmonious blend of Mediterranean-inspired ingredients that come together in a single skillet, minimizing cleanup while maximizing flavor.

    Why You Will Love This Creamy Shrimp Pasta

    The beauty of this dish lies in the balance of textures and tastes. Sun-dried tomatoes provide a chewy, concentrated sweetness that cuts through the richness of the heavy cream and savory Parmesan. The shrimp, quickly seared to maintain their juicy snap, add a delicate protein component that feels elegant and light. Because this dish comes together in about 30 minutes, it is perfect for when you want a high-end restaurant experience without leaving your kitchen.

    Essential Ingredients

    • Shrimp: Use one pound of medium-to-large shrimp. Make sure they are peeled and deveined for a seamless eating experience.
    • Pasta: Rigatoni is fantastic here because its hollow center captures the creamy sauce, but penne or fusilli are also excellent choices.
    • Sun-Dried Tomatoes: These are the soul of the dish. Drain them well from their oil before chopping.
    • Aromatics: Fresh garlic is non-negotiable for that signature punch.
    • Creamy Base: Heavy cream acts as the foundation of the sauce. Avoid substituting with milk or half-and-half, as the sauce needs the higher fat content to emulsify and cling to the pasta.
    • Parmesan: Freshly grated Parmesan adds a salty, nutty depth that finishes the sauce perfectly.
    • Broth: A high-quality vegetable broth adds body to the sauce while deglazing the pan.
    • Seasonings: Sweet paprika, garlic powder, Italian seasoning, and a pinch of chili flakes provide a warm, complex background.

    Step-by-Step Instructions

    1. Prep Your Ingredients

    Efficiency is key. Before turning on the stove, peel and devein your shrimp. In a small mixing bowl, toss the shrimp with the sweet paprika, garlic powder, and half of the salt and pepper. Mince your garlic, grate your Parmesan, and chop the sun-dried tomatoes and fresh basil. Having everything ready to go makes the cooking process smooth and stress-free.

    2. Boil the Pasta

    Bring a large pot of salted water to a rolling boil. Cook your rigatoni according to the package directions, aiming for al dente—the pasta should have a slight bite, as it will finish cooking in the sauce. Drain and set aside.

    3. Sear the Shrimp

    In a large skillet, heat the olive oil and butter over medium-high heat. Add the shrimp in a single layer. Sear them for about one minute per side until they turn pink and opaque. They don’t need to be perfectly cooked through at this stage, as they will return to the sauce later. Remove them from the skillet and transfer to a clean plate.

    4. Build the Sauce

    Reduce the heat to medium-low. Add the minced garlic to the same skillet and sauté for about one minute until fragrant. Toss in the chopped sun-dried tomatoes, Italian seasoning, and the remaining salt and pepper. Cook for another minute to let the flavors meld. Sprinkle the flour over the mixture and stir well for about 30 seconds to cook out the raw flour taste.

    5. Create the Creamy Finish

    Slowly pour in the vegetable broth while scraping the bottom of the pan with a wooden spoon to release any browned bits of flavor. Let it simmer for two minutes. Pour in the heavy cream and stir in the tomato paste, bringing the mixture to a gentle boil. Lower the heat and simmer for three minutes, allowing the sauce to thicken slightly. Add the fresh lemon juice, fresh basil, and grated Parmesan, stirring until the cheese is completely melted and the sauce is smooth.

    6. Assemble

    Return the shrimp to the skillet and toss in the cooked pasta. Stir everything together so that every piece of pasta is generously coated in the creamy sauce. Serve immediately, topped with an extra sprinkle of chili flakes if you enjoy a subtle kick.

    Expert Tips for Success

    • Don’t Overcook the Shrimp: Shrimp cook very rapidly. If they stay in the pan too long, they can become rubbery. Searing them for just one minute per side ensures they remain tender and succulent.
    • Hydrating Tomatoes: If your sun-dried tomatoes are very dry and brittle rather than packed in oil, soak them in hot water for ten minutes, then drain and chop. This makes them soft and easy to incorporate into the sauce.
    • Sauce Consistency: If your sauce becomes too thick, simply stir in a tablespoon or two of the pasta cooking water. The starch in the water helps bind the sauce to the pasta beautifully.

    Variations and Dietary Additions

    This recipe is highly adaptable. If you want to increase the vegetable content, add a handful of baby spinach or halved cherry tomatoes into the sauce during the final stage of simmering. For an earthy element, sauté some sliced mushrooms with the garlic. If you want a deeper umami flavor, a teaspoon of tomato paste can be increased, or you can add a tiny splash of balsamic glaze.

    Serving Suggestions

    This dish is quite hearty, so it pairs beautifully with light, acidic sides that cut through the creaminess. A crisp arugula salad with a bright lemon vinaigrette is an ideal companion. Alternatively, serve with a side of crusty garlic bread to mop up any extra sauce left on the plate. Roasted asparagus or blanched broccoli also add a nice, fresh crunch that balances the richness of the pasta.

    FAQs

    Can I make this dish ahead of time?

    While this recipe is best served fresh, you can prepare the sauce components beforehand. Keep in mind that pasta absorbs liquid, so if you reheat leftovers, you may need to add a splash of vegetable broth or a little water to bring the sauce back to its creamy consistency.

    How should I store leftovers?

    Store any leftovers in an airtight container in the refrigerator for up to two days. When reheating, use a nonstick skillet over low heat and add a small amount of liquid to prevent the sauce from breaking or becoming too thick.

    Can I use other types of cheese?

    Parmesan is classic, but Pecorino Romano or even Asiago will provide a lovely, sharp flavor profile that complements the sun-dried tomatoes very well. Avoid pre-shredded bagged cheeses, as they often contain anti-caking agents that prevent the cheese from melting into a smooth, creamy consistency.

    Final Thoughts

    This creamy shrimp pasta is a triumph of simple, high-quality ingredients coming together. It is an approachable recipe that delivers high impact, making it perfect for those moments when you want to make an impression with very little fuss. Enjoy the process of cooking this meal, and more importantly, enjoy sharing it with those you love.

  • Chili Lime Shrimp Wraps For Light And Fresh Clean Eating! | Clean Food Crush

    When you are looking for a meal that feels light, vibrant, and packed with complex flavors, these Chili Lime Shrimp Wraps are the perfect solution. By replacing heavy bread or flour tortillas with crisp, cooling lettuce leaves, you create a satisfying dinner that highlights the natural sweetness of succulent shrimp paired with a zesty, citrus-forward marinade. This recipe is designed for those who appreciate clean, whole-food ingredients and want to assemble a nutritious meal that feels like a gourmet treat without requiring hours in the kitchen.

    Why You’ll Love These Shrimp Wraps

    The beauty of this dish lies in its simplicity and the balance of textures. You get the snap of the fresh lettuce, the tender bite of pan-seared shrimp, and the creamy richness of perfectly ripe avocado. The chili and lime pairing is classic for a reason; the warmth of the smoked paprika and cumin provides a savory, earthy depth that stands up beautifully to the brightness of freshly squeezed lime juice. It is an ideal meal for busy weeknights when you want something fresh, or for an outdoor lunch during warmer months when you crave something that won’t weigh you down.

    Essential Ingredients

    To ensure the best results, use the freshest ingredients you can find. Shrimp should be firm and smell mild, and your limes should be heavy for their size, which indicates they are full of juice.

    • Shrimp: 1.5 pounds of raw, peeled, and deveined shrimp are the star of the show. If you use frozen shrimp, make sure they are fully thawed and patted very dry before seasoning.
    • Aromatics: Two cloves of fresh garlic, finely minced, provide the necessary pungency to cut through the richness of the avocado.
    • The Spice Blend: You will need 2 teaspoons of ground cumin for earthiness and 1 teaspoon of smoked paprika to add a subtle, campfire-like flavor without any need for heavy seasonings.
    • Cooking Fat: 2 tablespoons of avocado oil or high-quality extra-virgin olive oil helps sear the shrimp to perfection.
    • Citrus: Two fresh limes provide the acidity required to brighten the entire dish.
    • Fresh Herbs: A generous handful of fresh cilantro leaves adds a necessary herbal note that elevates the chili-lime flavor profile.
    • The Vessel: 8 to 10 large romaine or butter lettuce leaves. Choose leaves that are sturdy enough to hold the filling without tearing.
    • The Creamy Factor: One large, ripe avocado, diced into bite-sized pieces.
    • A Bit of Heat: One fresh red chili, thinly sliced. You can adjust this based on your personal heat preference, or remove the seeds for a milder experience.
    • Seasoning: Sea salt and freshly cracked black pepper to taste.

    Step-by-Step Instructions

    1. Marinating the Shrimp

    Start by preparing your marinade in a large glass bowl. Combine half of your oil (1 tablespoon) with the ground cumin, smoked paprika, minced garlic, and the juice of one lime. Add a pinch of sea salt and black pepper. Toss the cleaned, raw shrimp into this mixture and stir thoroughly until every piece is evenly coated. If your schedule permits, cover the bowl and place it in the refrigerator for about 15 minutes. This short rest allows the flavors to penetrate the shrimp, resulting in a more flavorful final dish.

    2. Searing to Perfection

    Heat the remaining tablespoon of oil in a large skillet over medium heat. Once the oil shimmers, carefully add the shrimp in a single layer. Avoid overcrowding the pan; if necessary, work in two batches. Cook the shrimp for about 3 to 4 minutes, flipping them once, until they turn opaque and pink. Be careful not to overcook them, as shrimp can quickly become rubbery if left on the heat too long. Once cooked, remove the skillet from the heat immediately.

    3. Assembling the Mixture

    In a large mixing bowl, combine the cooked shrimp with the diced avocado, fresh cilantro, sliced red chili, the juice of your second lime, and the remaining tablespoon of oil (if you did not use it all during the searing process). Gently fold everything together with a large spoon, being careful to keep the avocado pieces mostly intact. Taste a small sample and adjust the salt and pepper to your liking.

    4. Serving the Wraps

    Arrange your washed and dried lettuce leaves on a platter. Spoon a generous portion of the shrimp and avocado mixture into the center of each leaf. The structure of the romaine or butter lettuce acts as a natural cup. Serve immediately while the shrimp is still warm, which creates a wonderful contrast with the cool, crisp greens.

    Variations and Adaptations

    While this recipe is delicious as written, you can easily customize it to suit your pantry:

    • Add Crunch: Thinly sliced radishes or diced cucumber add an extra layer of cooling crunch that pairs perfectly with the chili lime flavor.
    • Sweeten the Profile: A sprinkle of fresh mango or pineapple chunks can add a tropical flair that balances the smoky paprika perfectly.
    • Extra Zest: If you love citrus, add a teaspoon of fresh lime zest into the shrimp mixture before serving for an extra pop of brightness.
    • Vegetable Boost: Finely shredded red cabbage can be added to the lettuce wraps to provide a beautiful color contrast and extra dietary fiber.

    Pro Tips for Success

    • Patting the Shrimp Dry: Before you even begin seasoning, ensure your shrimp is very dry. Excess moisture creates steam in the pan, which prevents the shrimp from getting a nice sear.
    • Choosing the Right Lettuce: Butter lettuce is soft and pliable, making it very easy to wrap. Romaine, especially the heartier inner leaves, provides a satisfying crunch and acts as a firmer scoop for the filling.
    • Keep it Fresh: Because this recipe relies on fresh avocado, it is best served immediately. If you have leftovers, store the shrimp mixture and the lettuce separately in airtight containers. The avocado will oxidize quickly, so adding a little extra lime juice to the leftovers can help preserve the color.

    Serving Suggestions

    These wraps are a complete meal on their own, but they pair excellently with a side of steamed quinoa or a simple chilled cucumber salad. Because the dish is relatively light, you don’t need a heavy side to feel satisfied. For a themed dinner, set up a “wrap station” at the table where guests can assemble their own lettuce cups with extra cilantro, lime wedges, and a bowl of fresh salsa on the side.

    Frequently Asked Questions

    Can I make this ahead of time?

    You can marinate the shrimp and chop your vegetables ahead of time, but for the best flavor and texture, it is recommended to cook the shrimp and assemble the wraps right before you are ready to eat. The avocado and lime are best when fresh.

    Is this dish suitable for children?

    Absolutely, though you may want to omit the red chili slices or move them to the side so that diners can add heat according to their own tolerance.

    What if I cannot find butter lettuce?

    Iceberg lettuce is a suitable alternative if you want maximum crunch, though the leaves can be a bit more brittle. If you prefer, you can use large collard green leaves that have been blanched briefly for a more durable wrap.

    Storage and Leftovers

    If you have extra shrimp mixture, keep it in a tightly sealed glass container in the refrigerator for up to 24 hours. Because avocado softens over time, it is best to consume the leftovers as quickly as possible. Do not freeze the mixture, as the avocado will lose its texture entirely upon thawing. When reheating the shrimp, do so gently in a pan over low heat, adding a splash of lime juice to refresh the flavors.

  • Cajun Shrimp And Rice Skillet

    When life gets busy, the last thing you want to deal with is a sink full of dishes. That is exactly why I adore this Cajun Shrimp and Rice Skillet. It is a vibrant, flavorful, and incredibly simple one-pot meal that brings a taste of Southern-inspired comfort right to your kitchen table in about thirty minutes. Whether you are prepping a quick weeknight dinner for your family or looking for an impressive meal to whip up without a massive cleanup, this recipe is designed to deliver maximum flavor with minimal effort.

    Why You Will Love This One-Pot Wonder

    This dish is all about balance. The smokiness of the paprika, the kick of cayenne, and the richness of the butter work in harmony to create a dish that tastes like it has been simmering all day long. Because the rice cooks directly in the seasoned chicken broth along with the garlic and spices, every single grain absorbs a massive amount of savory goodness. The shrimp is added toward the end, ensuring it stays succulent and tender rather than overcooked. It is a hearty, protein-packed, and wholesome meal that feels like a celebration in a skillet.

    Essential Ingredients

    To make this recipe, you will need a few pantry staples and some fresh seafood. Here is what you need to gather:

    • Long-grain white rice: This provides the perfect base. Ensure it is uncooked before starting.
    • Chicken broth: Using a high-quality chicken broth adds depth and seasoning that water simply cannot match.
    • Large or jumbo shrimp: Make sure they are peeled and de-veined for the easiest prep.
    • Butter: This helps carry the spices and adds a silky mouthfeel to the dish.
    • Garlic: Freshly minced garlic is the secret to that aromatic base we all love.
    • Custom Cajun Seasoning Blend: We use a mix of paprika, salt, garlic powder, cracked black pepper, onion powder, dried oregano, cayenne pepper, and a touch of red pepper flakes.

    Customizing Your Skillet

    One of the best things about this recipe is its flexibility. If you want to customize it, consider these variations:

    • Vegetable boost: Toss in some diced bell peppers or celery when you sauté the garlic and rice for extra texture and flavor.
    • Heat level: The cayenne and red pepper flakes provide a nice medium-heat profile. If you prefer things milder, simply reduce or omit the red pepper flakes. For extra fire, feel free to add a pinch more cayenne.
    • Herb variations: While dried oregano is classic, you can swap it for an Italian herb blend or even fresh thyme if you want a more aromatic, floral finish.
    • Broth swap: If you are looking for a lighter touch, you can use a high-quality vegetable broth instead of chicken broth.

    Step-by-Step Instructions

    1. Prepare the Seasoning: In a small bowl, whisk together the paprika, salt, garlic powder, black pepper, onion powder, dried oregano, cayenne pepper, and crushed red pepper flakes until well combined.
    2. Toast the Rice: Melt 2 tablespoons of butter in a large, deep skillet over medium heat. Add the minced garlic, half of your prepared spice blend, and the uncooked rice. Stir consistently for about 1–2 minutes to lightly toast the rice and coat it in the flavorful butter and spices.
    3. Simmer the Rice: Carefully pour in the chicken broth. Bring the mixture to a gentle boil, then turn the heat down to low. Cover the skillet with a tight-fitting lid and simmer for 15 minutes. It is helpful to give it a quick stir once or twice during this process to ensure nothing sticks to the bottom.
    4. Prepare the Shrimp: While the rice is simmering, toss the shrimp in a bowl with the remaining 2 tablespoons of melted butter and the second half of your Cajun spice mixture. Ensure each shrimp is evenly coated.
    5. Combine and Finish: Once the rice has simmered for 15 minutes, remove the lid and gently nestle the seasoned shrimp into the rice. Cover the pan again and let it cook for another 3–5 minutes. The shrimp is done as soon as it turns opaque and pink.
    6. Serve: Fluff the rice gently with a fork and serve immediately while hot, ideally garnished with a sprinkle of fresh parsley for a pop of color.

    Expert Tips for Success

    To ensure your shrimp and rice skillet turns out perfect every time, keep these tips in mind:

    • Don’t skip the butter: The butter is crucial for the flavor profile of the dish. It creates a rich sauce that binds the rice and the shrimp together.
    • Watch your heat: When cooking rice, consistent low heat is key to preventing the bottom from scorching. If you have an electric stove that runs hot, ensure you are using the lowest setting possible once you have reached a simmer.
    • Check the shrimp: Shrimp cook very quickly. As soon as they curl into a “C” shape and turn pink, they are ready. If they start to curl into a tight “O,” they may be starting to overcook, so pull the pan off the heat immediately.
    • The “Sear” method: If you love the flavor of seared shrimp, you can quickly sauté the shrimp in the skillet first, set them aside on a plate, and then proceed with cooking the rice. Simply stir the seared shrimp back into the pot during the final minute of cooking.

    Storage and Reheating

    If you have leftovers, this dish stores beautifully in an airtight container in the refrigerator for up to 2 days. To reheat, add a tiny splash of broth or water to the pan to rehydrate the rice, and warm it gently on the stovetop over low heat. Avoid microwaving at high temperatures, as this can make the shrimp rubbery and the rice dry.

    Serving Suggestions

    This dish is a complete meal on its own, but it pairs wonderfully with a crisp side salad dressed with a bright lemon vinaigrette to cut through the richness of the Cajun spices. You could also serve it alongside some roasted green beans or steamed asparagus. The goal is to keep the side dishes fresh and light to complement the savory, spiced profile of the shrimp and rice skillet.

    Frequently Asked Questions

    Can I use brown rice instead of white?

    Brown rice takes significantly longer to cook and requires more liquid. If you want to use brown rice, you will need to adjust the cooking time and add extra broth, but it will not cook as quickly as the white rice version.

    What if I don’t have jumbo shrimp?

    Smaller shrimp work perfectly fine! Just keep an eye on them, as they will cook even faster than jumbo shrimp. Reduce the final cooking time by a minute or two.

    Is this recipe spicy?

    It has a moderate level of heat that is characteristic of Cajun cuisine. If you are sensitive to heat, you can easily pull back on the cayenne pepper and red pepper flakes to suit your family’s preferences.