Author: imageuploader

  • High-Protein Cottage Cheese Chicken Parm Bowl

    High-Protein Cottage Cheese Chicken Parm Bowl

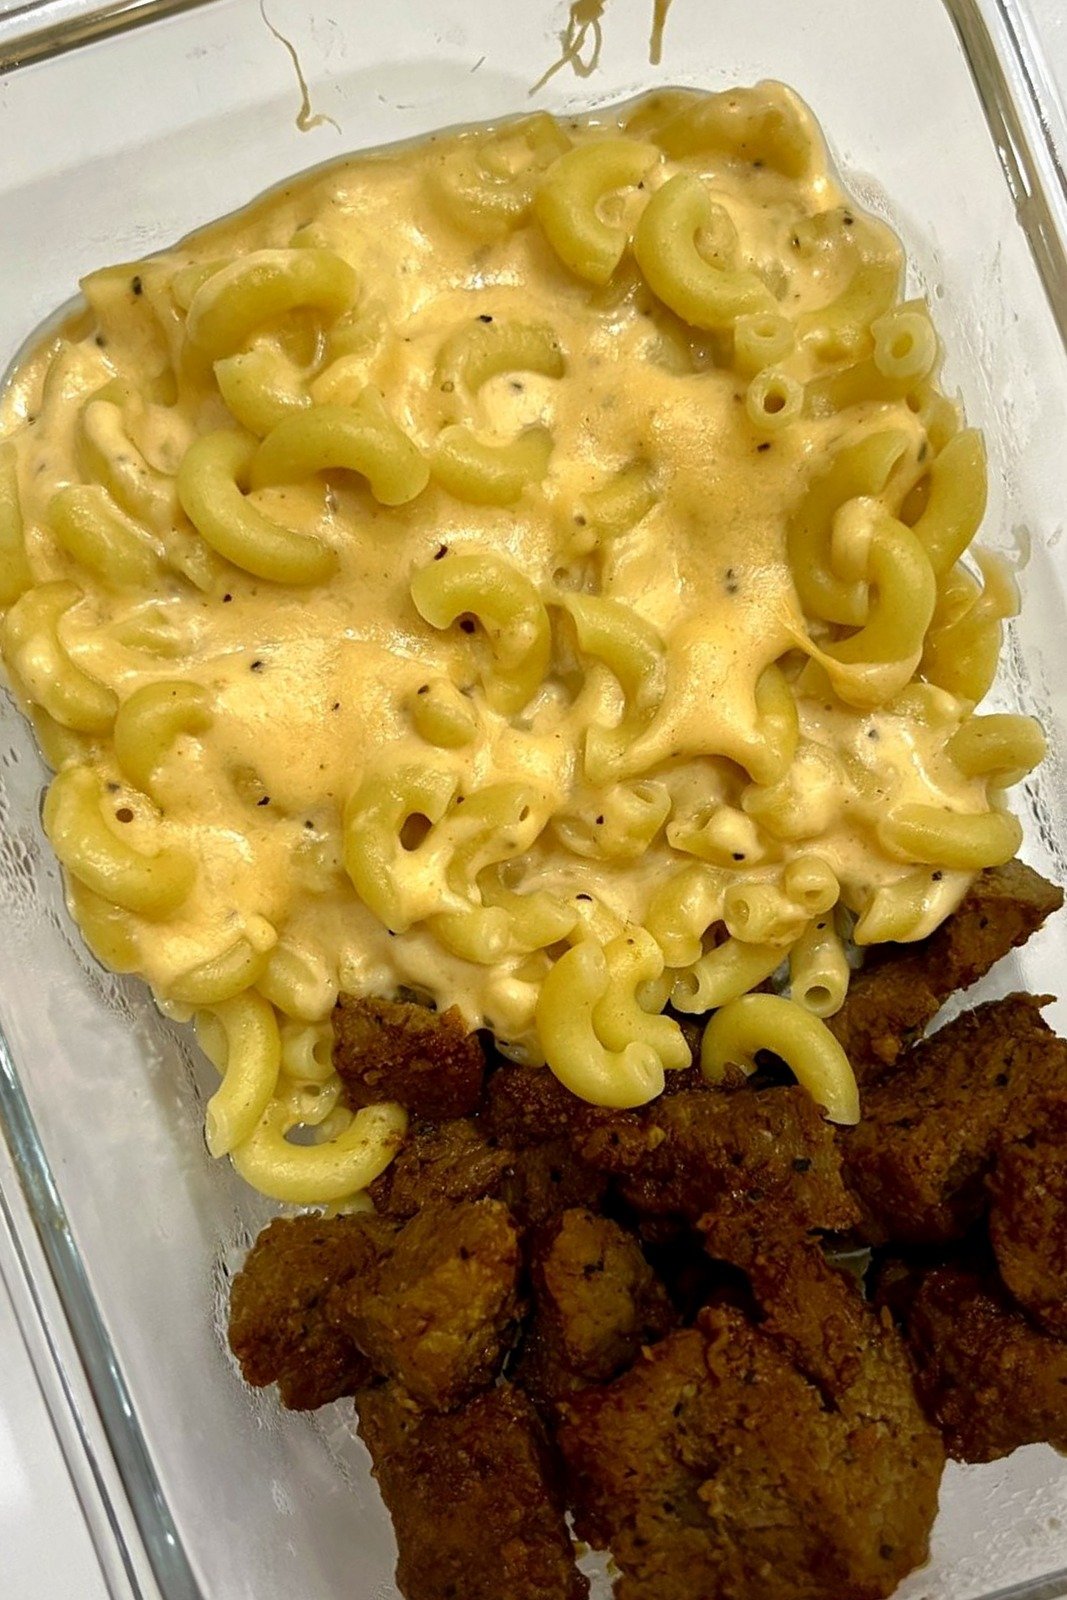
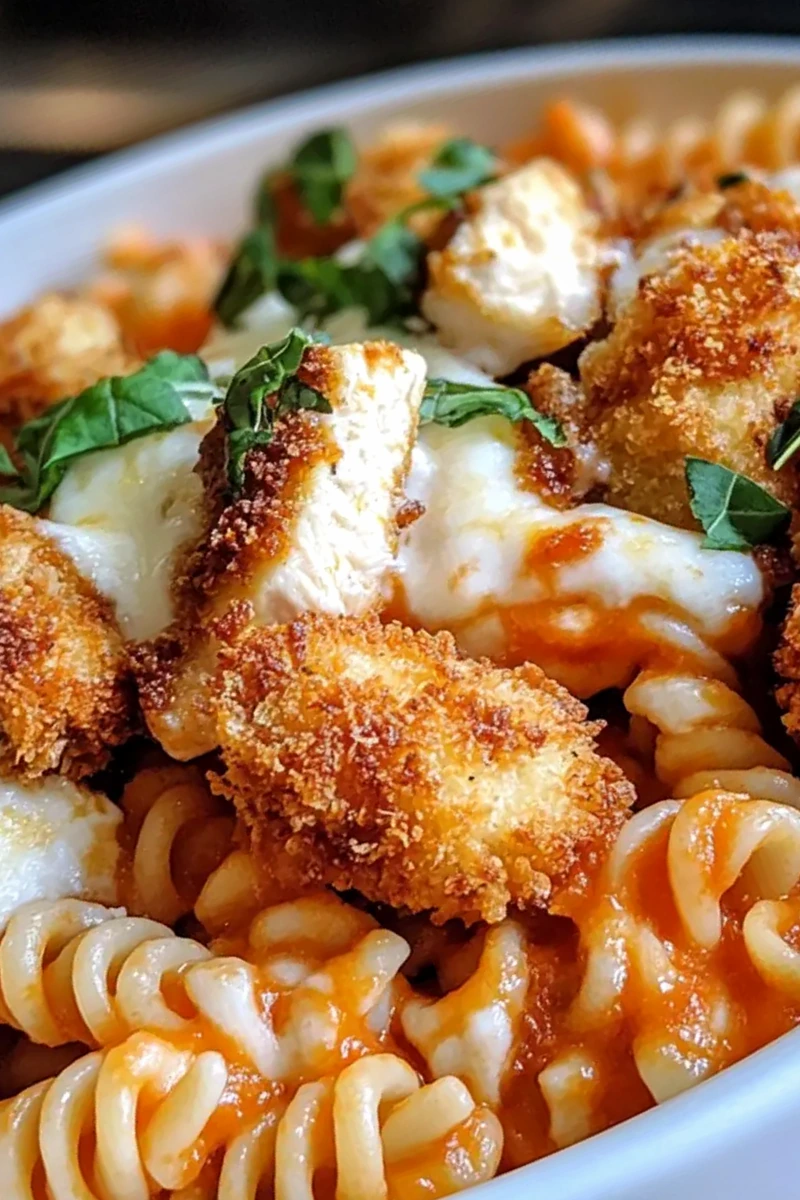
    This high-protein chicken parm bowl blends creamy cottage cheese with crispy chicken nuggets and tangy marinara. It is a fast, nutrient-dense dinner option that satisfies comfort food cravings in under 30 minutes.

    Recipe image

    List of ingredients

    • 1 cup Cottage Cheese – small curd blends smoothly for the best texture.
    • 2 cups Chicken Nuggets – air-fried until golden brown.
    • 1 cup Marinara Sauce – store-bought for a quick preparation.
    • 1 cup Mozzarella Cheese – add just before serving to maintain gooeyness.
    • 1 teaspoon Italian Seasoning – adjust based on your taste preference.
    • 1 teaspoon Garlic Powder – can be swapped for fresh minced garlic.

    step-by-step instructions

    1. Mix Base: In a microwave-safe bowl, combine the cottage cheese, marinara sauce, mozzarella cheese, Italian seasoning, and garlic powder. Stir the ingredients thoroughly until the mixture is smooth and creamy.
    2. Initial Heat: Place the bowl in the microwave and heat on high for 1 minute. Stir the mixture halfway through the heating process to ensure an even consistency and temperature.
    3. Prepare Chicken: Cook the chicken nuggets in an air fryer according to the package instructions, usually for 8-12 minutes until they are golden brown. Once cooked, cut the nuggets into bite-sized pieces.
    4. Combine and Finish: Gently fold the chopped chicken nuggets into the warm cheese mixture. Microwave the bowl for an additional 30 seconds until the cheese is hot and bubbly.
    5. Plate and Serve: Spoon the completed mixture over a bed of pasta or rice. Serve immediately and garnish with extra cheese or fresh herbs if desired.

    Pro Tips for Better Results

    Use Full-Fat Small Curd Cottage Cheese

    Selecting a full-fat version of cottage cheese provides a richer flavor and a creamier mouthfeel. The small curd variety is essential because it integrates more easily with the marinara, preventing large clumps of cheese from remaining in the sauce.

    Monitor Air Fryer Temperature

    To ensure the chicken nuggets remain juicy inside while being crispy outside, check them one minute before the timer ends. Overcooking can lead to dry meat, which contrasts poorly with the creamy cheese base.

    Balance the Italian Seasoning

    Start with the recommended amount of seasoning but taste the mixture after the first microwave heat. Different brands of Italian seasoning vary in potency, so adding a pinch more at the end can brighten the overall flavor profile.

    Temper the Cottage Cheese

    Whenever possible, let the cottage cheese sit at room temperature for a few minutes before mixing. This helps prevent the sauce from curdling when it hits the high heat of the microwave.

    Flavor Variations and Substitutions

    Substitute Marinara with Pesto

    Replacing the red sauce with a basil pesto creates a fragrant, herby version of this bowl. The combination of pine nuts and parmesan in the pesto adds a sophisticated layer of flavor that pairs well with the creaminess of the cottage cheese.

    Swap Mozzarella for Provolone or Gouda

    Provolone offers a slightly sharper taste, while Gouda provides a nuttier, sweeter melt. Both cheeses melt effectively and provide a similar stretch to mozzarella while altering the flavor profile of the dish.

    Use Grilled Chicken Breast

    For a lighter, less processed protein option, use sliced grilled chicken breast instead of nuggets. This removes the breading and adds a smoky char that complements the savory Italian seasonings.

    Add Sautéed Spinach or Bell Peppers

    Stirring in a handful of sautéed spinach or diced roasted bell peppers increases the nutrient density of the meal. These vegetables add color and a fresh, earthy contrast to the rich cheese and tomato flavors.

    Incorporate Red Pepper Flakes for Heat

    If you prefer a spicy kick, stir in a pinch of crushed red pepper flakes during the first mixing step. The heat is mellowed by the cottage cheese but remains present enough to provide a warm glow to each bite.

    Try Buffalo Sauce for a Tangy Twist

    Replacing some of the marinara with buffalo sauce transforms the dish into a spicy buffalo chicken bowl. This variation is ideal for those who enjoy bold, tangy flavors and a more aggressive spice profile.

    Mix in Fresh Parsley or Basil

    Folding in chopped fresh basil or parsley at the very end adds a burst of garden-fresh brightness. This simple addition cuts through the richness of the cheese and makes the dish feel more like a restaurant-style meal.

    Use Turkey or Plant-Based Nuggets

    You can easily swap the chicken nuggets for turkey nuggets or plant-based alternatives to suit different dietary preferences. Ensure they are air-fried to the same level of crispiness to maintain the texture of the bowl.

    Recommended Base Options
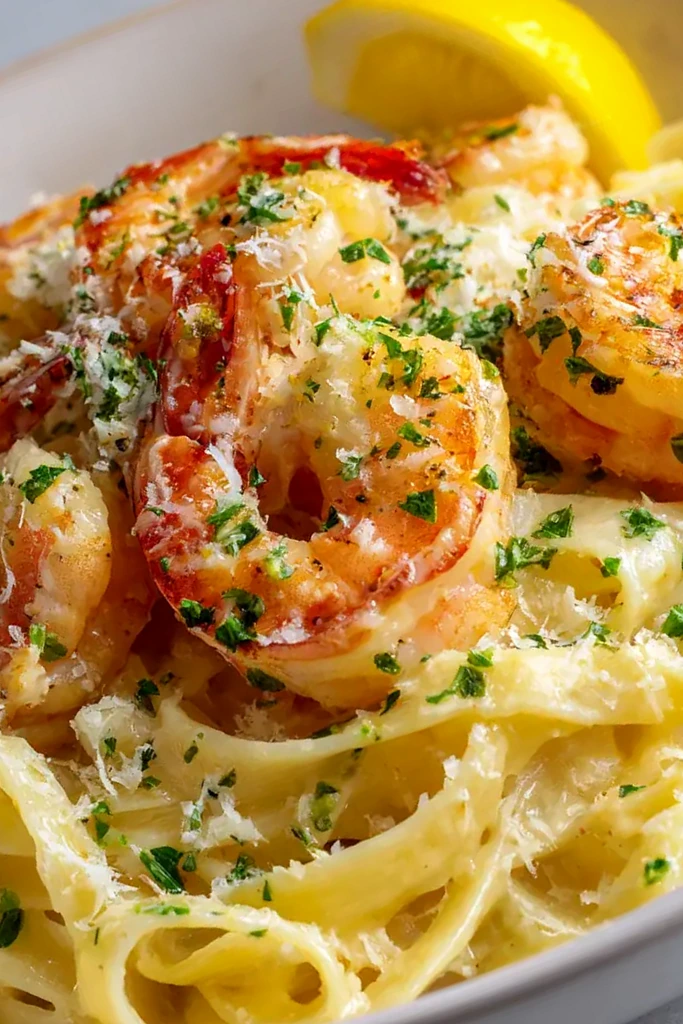
    Traditional Pasta

    Serving the mixture over penne or rotini allows the creamy sauce to cling to the noodles. This is the most filling option and closely mimics a traditional chicken parmesan experience.

    Steamed White or Brown Rice

    Rice provides a neutral base that lets the flavors of the marinara and garlic shine. Brown rice adds more fiber and a nuttier taste, while white rice offers a softer, cleaner finish.

    Zucchini Noodles for Low-Carb

    Zoodles are an excellent choice for those reducing their carbohydrate intake. They add a fresh crunch and a slight vegetable sweetness that balances the salty cheese mixture.

    Cauliflower Rice

    Cauliflower rice is a great keto-friendly alternative that absorbs the sauce well. It provides a similar texture to grains without the heavy calories, making the meal feel lighter.

    Best Side Dish Pairings

    Toasted Garlic Bread

    Crispy, buttery garlic bread is the ideal accompaniment for soaking up any extra sauce. The crunch of the toast provides a necessary textural contrast to the creamy chicken and cheese.

    Fresh Caesar Salad

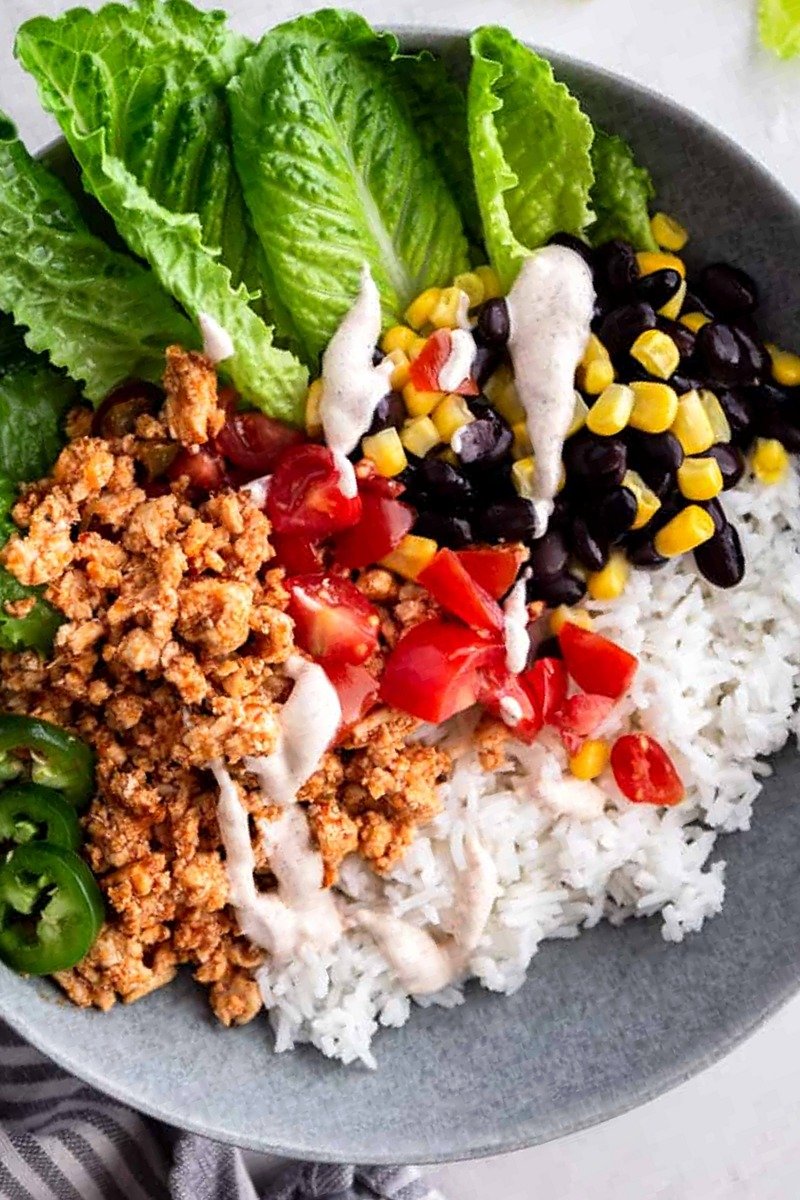
    A crisp romaine salad with a tangy Caesar dressing helps balance the richness of the bowl. The acidity from the lemon and parmesan in the dressing cleanses the palate between bites.

    Steamed Broccoli

    Tender broccoli florets add a vibrant green color and essential vitamins to the plate. The slight bitterness of the broccoli complements the sweetness of the marinara sauce.

    Sparkling Pomegranate Juice

    A chilled glass of sparkling pomegranate juice offers a refreshing, non-alcoholic beverage option. The tart berry notes and bubbles cut through the richness of the mozzarella and cottage cheese.

    Light Chocolate Mousse

    For dessert, a light and airy chocolate mousse provides a sweet conclusion to the meal. Its smooth texture echoes the creaminess of the main course without being overly heavy.

    Roasted Asparagus

    Oven-roasted asparagus with a drizzle of olive oil and salt adds a sophisticated touch. The earthy flavor of the spears pairs beautifully with the Italian herbs in the bowl.

    Storage and Reheating Guide

    Refrigerating Leftovers

    Store any remaining portion in an airtight container in the refrigerator for up to 3 days. It is recommended to store the chicken nuggets separately from the cheese mixture if you plan to keep them for more than 24 hours.

    Freezing Prepared Nuggets

    While the cheese mixture cannot be frozen, you can freeze air-fried chicken nuggets for up to 2 months. Store them in a freezer-safe bag and reheat them in the air fryer to restore their crispiness before adding them to a fresh bowl.

    Reheating for Maximum Texture

    When reheating the bowl in the microwave, do so in short 30-second intervals. Stirring between each interval prevents hot spots and ensures the cheese melts evenly without separating.

    Maintaining the Cheese Melt

    To get the best results when reheating, add a small sprinkle of fresh mozzarella on top. This creates a new layer of melted cheese, restoring the gooey texture that may have dimmed during refrigeration.

    Make-Ahead Strategies

    Preparing the Cheese Base in Advance

    You can mix the cottage cheese, marinara, seasoning, and garlic powder up to 24 hours ahead of time. Keep this mixture in a sealed container in the fridge to save time during the weeknight rush.

    Pre-cooking Chicken Nuggets

    Air fry your nuggets and cut them into pieces up to 3 days in advance. Store them in the fridge, and when you are ready to eat, simply combine them with the prepped cheese base and heat.

    Rapid Assembly Process

    For the fastest meal, combine your prepped chilled base and pre-cooked chicken in a bowl. Microwave the entire assembly for 90 seconds to 2 minutes, stirring once, for a restaurant-quality meal in minutes.

    Troubleshooting Common Issues

    Fixing Curdled Cottage Cheese

    If the mixture looks grainy or curdled, it is likely due to uneven heating. Gently whisk in a tablespoon of warm milk or heavy cream to re-emulsify the sauce and restore its smoothness.

    Preventing Soggy Nuggets

    To keep the nuggets from becoming too soft, fold them in gently and avoid over-microwaving. Adding them at the very last step ensures they retain as much of their air-fried crunch as possible.

    Solving Under-Melted Cheese

    If the mozzarella hasn’t fully melted, place the bowl back in the microwave for 15-second bursts. Using a cover or a microwave-safe lid can help trap steam and melt the cheese more efficiently.

    Frequently Asked Questions

    How do I choose the best cottage cheese for this recipe?

    Look for full-fat, small curd cottage cheese. This provides the best balance of flavor and texture, allowing the cheese to blend smoothly with the marinara sauce without leaving large lumps.

    How long can I store the bowl in the fridge?

    Leftovers stay fresh in an airtight container for up to 3 days. For the best texture, keep the chicken and sauce separate until you are ready to reheat and serve.

    Can I freeze the chicken nuggets for this recipe?

    Yes, cooked chicken nuggets can be frozen for up to 2 months in an airtight bag. Reheat them in the air fryer or oven to ensure they stay crispy before adding them to the cheese mixture.

    What should I do if my cheese mixture curdles?

    Curdling usually happens if the cheese is heated too quickly or is too cold. You can fix this by stirring in a small amount of warm milk or cream and mixing gently until the sauce becomes smooth again.

    Does this recipe cater to any dietary restrictions?

    Yes, you can make this gluten-free by using gluten-free chicken nuggets and serving the bowl over rice or zoodles. For a lactose-free version, use lactose-free cottage cheese and mozzarella alternatives.

    Can I add vegetables to this bowl for extra nutrients?

    Absolutely. Sautéed spinach, steamed broccoli, or roasted bell peppers are excellent additions. You can stir them directly into the cheese mixture or serve the bowl on top of a bed of steamed vegetables.

    Print
    clock clock iconcutlery cutlery iconflag flag iconfolder folder iconinstagram instagram iconpinterest pinterest iconfacebook facebook iconprint print iconsquares squares iconheart heart iconheart solid heart solid icon
    High-Protein Cottage Cheese Chicken Parm Bowl

    High-Protein Cottage Cheese Chicken Parm Bowl


    5 Stars 4 Stars 3 Stars 2 Stars 1 Star

    No reviews

    • Author: imageuploader
    • Total Time: 27 minutes
    • Yield: 4 bowls 1x
    • Diet: General

    Description

    A quick and delightful meal that boosts your protein intake with creamy cottage cheese and chicken nuggets, perfect for busy evenings.


    Ingredients

    Scale
    • 1 cup Cottage Cheese
    • 2 cups Chicken Nuggets
    • 1 cup Marinara Sauce
    • 1 cup Mozzarella Cheese
    • 1 teaspoon Italian Seasoning
    • 1 teaspoon Garlic Powder

    Instructions

    1. Step 1: In a microwave-safe bowl, combine cottage cheese, marinara sauce, mozzarella cheese, Italian seasoning, and garlic powder. Stir until smooth.
    2. Step 2: Heat the mixture in the microwave on high for 1 minute, stirring halfway through.
    3. Step 3: Prepare chicken nuggets according to package instructions, typically 8-12 minutes until golden brown. Cut cooked nuggets into bite-sized pieces.
    4. Step 4: Gently fold the chopped chicken into the cheese mixture and microwave for an additional 30 seconds until hot and bubbly.
    5. Step 5: Serve over a bed of pasta or rice, garnished with extra cheese or herbs if desired.

    Notes

    Store leftovers in an airtight container in the fridge for up to 3 days. Reheat in the microwave, adding mozzarella just before serving for best results.

    • Prep Time: 15 minutes
    • Cook Time: 12 minutes
    • Category: Main Dish
    • Method: Microwaving
    • Cuisine: Italian

    Nutrition

    • Serving Size: 1 bowl
    • Calories: 450 kcal
    • Sugar: 5 g
    • Sodium: 800 mg
    • Fat: 20 g
    • Saturated Fat: 10 g
    • Unsaturated Fat: 7 g
    • Trans Fat: 0 g
    • Carbohydrates: 30 g
    • Fiber: 3 g
    • Protein: 35 g
    • Cholesterol: 75 mg
  • Garlic and Herb Baked Chicken Breast

    Garlic and Herb Baked Chicken Breast

    This simple baked chicken breast recipe delivers juicy and flavorful results in under an hour. It is a healthy, high-protein option perfect for busy weeknight dinners or structured meal prep.

    Recipe image

    List of ingredients

    • 4 pieces boneless, skinless chicken breasts – use high-quality meat for the best texture.
    • 2 tablespoons olive oil – ensures moisture and helps the spices adhere.
    • 1 teaspoon garlic powder – adds a concentrated aromatic flavor.
    • 1 teaspoon onion powder – provides a savory depth to the marinade.
    • 1 teaspoon paprika – contributes a subtle smokiness and golden color.
    • 1 teaspoon salt – essential for drawing out the natural flavors of the chicken.
    • 1/2 teaspoon black pepper – adds a mild, warm spice.
    • 1 lemon, juiced – the acidity tenderizes the meat and adds brightness.

    step-by-step instructions

    1. Preheat Oven: Set your oven to 400°F (200°C) to ensure a consistent cooking temperature.
    2. Mix Marinade: In a mixing bowl, whisk together the olive oil, garlic powder, onion powder, paprika, salt, black pepper, and lemon juice.
    3. Coat Chicken: Add the chicken breasts to the bowl and coat them evenly with the marinade. Let the meat soak for at least 15 minutes to maximize flavor absorption.
    4. Prepare Dish: Transfer the marinated chicken breasts into a baking dish, ensuring they are spaced apart for even heat distribution.
    5. Bake: Cook in the preheated oven for 25-30 minutes. Use a meat thermometer to confirm the internal temperature has reached 165°F (75°C).
    6. Rest Meat: Remove the chicken from the oven and let it rest for 5 minutes. This allows the juices to redistribute, ensuring the meat remains moist.

    Practical Tips for Juicier Chicken

    Pound Breasts to Even Thickness

    Use a meat mallet or a heavy skillet to gently pound the thickest part of the chicken breast. This prevents the thin ends from drying out while the center is still cooking. Aim for a uniform thickness of about one inch across the piece.

    Utilize an Instant-Read Thermometer

    The only way to guarantee juicy chicken is by monitoring the internal temperature. Remove the meat when it hits 160°F to 165°F (71°C to 74°C). Overcooking by even five degrees can lead to a dry, rubbery texture.

    Allow Proper Resting Time

    Cutting into chicken immediately after baking releases the internal juices onto the plate. Waiting five to ten minutes allows the fibers to relax and reabsorb the moisture. This simple step significantly improves the final tenderness.

    Calibrate Your Oven Temperature

    Many home ovens fluctuate by ten to twenty degrees. Use an oven thermometer to ensure your oven is truly at 400°F (200°C). Accurate heat prevents the outside from burning before the inside is fully cooked.

    Pat the Meat Dry Before Marinating

    Use paper towels to remove excess surface moisture from the raw chicken. This allows the oil and spices in the marinade to cling to the meat rather than sliding off. This results in a better crust and more concentrated flavor.

    Ingredient Substitutions

    Avocado Oil as a High-Heat Alternative

    If you prefer a more neutral taste, substitute olive oil with avocado oil. Avocado oil has a higher smoke point, which is beneficial if you decide to sear the chicken before baking. It maintains stability at high temperatures without altering the flavor profile.

    Apple Cider Vinegar Instead of Lemon

    For a different type of acidity, use apple cider vinegar in a 1:1 ratio with the lemon juice. This provides a slightly fruitier, tangier note to the marinade. It still serves the purpose of tenderizing the muscle fibers.

    Fresh Garlic Cloves for Bolder Flavor

    Replace the garlic powder with three to four cloves of minced fresh garlic. Fresh garlic offers a sharper, more pungent taste than the powdered version. Ensure the garlic is minced finely so it does not burn during the baking process.

    Smoked Paprika for a BBQ Note

    Swap regular paprika for smoked paprika to add a rich, woody aroma. This variation gives the chicken a flavor reminiscent of a grill or smoker. It adds visual depth and a more complex taste to the crust.

    Flavor Variations

    Fresh Rosemary and Thyme Infusion

    Add one tablespoon of chopped fresh rosemary or thyme to the marinade. These woody herbs pair exceptionally well with lemon and garlic. They elevate the dish to a more gourmet style suitable for dinner parties.

    Cayenne Pepper for a Spicy Kick

    Mix in one teaspoon of cayenne pepper or red chili flakes for those who prefer heat. This addition brings a sharp warmth that cuts through the richness of the olive oil. It is an excellent way to modernize a simple chicken dish.

    Lime Juice for a Zesty Twist

    Substitute the lemon juice with fresh lime juice for a brighter, more tropical flavor. Lime pairs perfectly with the garlic and onion powders. This variation works particularly well when serving the chicken with cilantro-lime rice.

    Honey Glaze for Sweet Caramelization

    Stir one tablespoon of honey into the marinade before coating the chicken. The sugars in the honey caramelize under the heat of the oven, creating a sticky, golden-brown exterior. This balances the acidity of the lemon juice.

    Asian-Inspired Umami Blend

    Replace the olive oil with sesame oil and add two tablespoons of soy sauce to the mix. This creates a savory, salty profile rich in umami. This version is best served sliced over steamed bok choy or noodles.

    Dijon Mustard for Tangy Complexity

    Incorporate one tablespoon of Dijon mustard into the spice mixture. Mustard acts as an emulsifier and adds a sharp, pungent tang. This complements the paprika and helps the marinade stick even better to the meat.

    Almond Crust for Added Texture

    After marinating, press crushed almonds or pecans onto the top of each chicken breast. Bake as directed to create a nutty, crunchy topping. This provides a satisfying textural contrast to the tender meat inside.

    Serving Recommendations

    Roasted Root Vegetables

    Pair the chicken with roasted carrots, parsnips, and sweet potatoes. Toss these vegetables in olive oil and salt, then roast them on a separate tray at 400°F. This creates a cohesive, one-oven meal with natural sweetness.

    Steamed Quinoa or Brown Rice

    Serve the sliced chicken over a bed of fluffy quinoa or brown rice. These grains absorb the extra juices from the chicken and the lemon-garlic marinade. It turns a simple protein into a complete, nutrient-dense meal.

    Fresh Garden Salad

    Balance the warm, savory chicken with a crisp garden salad. Use a light vinaigrette with lemon juice and olive oil to echo the flavors of the marinade. The cold, crunchy vegetables provide a refreshing contrast.

    Sautéed Spinach or Kale

    Quickly sauté spinach or kale with a bit of garlic and olive oil. These dark leafy greens add essential vitamins and a bitter edge that cuts through the richness of the chicken. This is a great option for low-carb diets.

    Storage and Preservation

    Refrigerating Leftovers

    Place cooled chicken breasts in an airtight glass or plastic container. They will remain fresh and safe to eat for up to three to four days. Always let the chicken reach room temperature before sealing to avoid condensation.

    Freezing Cooked Chicken

    Wrap individual cooked breasts in parchment paper and place them in a heavy-duty freezer bag. Squeeze out as much air as possible to prevent freezer burn. They can be stored in the freezer for up to three months.

    Proper Thawing Process

    To maintain the best texture, thaw frozen chicken in the refrigerator overnight. Avoid thawing at room temperature to prevent bacterial growth. Once thawed, the chicken can be reheated or sliced cold for salads.

    Reheating Instructions

    Oven Reheating Method

    Place the chicken in a baking dish and add a splash of water or chicken broth to the bottom. Cover with foil and heat at 350°F (175°C) for 15-20 minutes. This slow method prevents the meat from drying out.

    Air Fryer Reheating

    Heat the air fryer to 350°F and place the chicken inside for 3-5 minutes. This is the fastest way to restore a slight crispness to the exterior. Be careful not to overcook, as the chicken is already fully cooked.

    Microwave Reheating

    Place the chicken on a microwave-safe plate and cover it with a damp paper towel. Heat in 30-second intervals until warmed through. This method is fast but can make the meat rubbery if overheated.

    Make-Ahead Strategies

    Advanced Marination

    You can marinate the chicken breasts up to 24 hours before you intend to cook them. Store them in a sealed container or Ziploc bag in the refrigerator. Longer marination times generally lead to deeper flavor penetration.

    Meal Prep Portioning

    Bake several batches of chicken at once and portion them into containers with a side of grains and vegetables. These meals are stable in the fridge and make for easy, healthy lunches throughout the work week.

    Freezing Marinated Raw Chicken

    Combine the raw chicken and marinade in a freezer-safe bag and freeze immediately. The chicken will marinate as it thaws in the refrigerator. This creates a ‘dump and bake’ meal that requires zero prep on the day of cooking.

    Troubleshooting Common Issues

    Chicken is Too Dry

    Dryness is usually caused by overcooking or using breasts that are too small. Check your internal temperature more frequently toward the end of the baking time. Ensure you are using a thermometer to stop cooking exactly at 165°F.

    Chicken is Still Pink Inside

    Pinkness can occur if the chicken is undercooked or if it is a very young bird. If the temperature is below 165°F, return it to the oven for 5-minute increments. Always rely on temperature rather than color for safety.

    Uneven Cooking Rates

    If some pieces are dry and others are raw, your chicken breasts are likely different sizes. Pound the meat to a uniform thickness before marinating. Alternatively, arrange the smaller pieces further from the oven’s heat source.

    Lack of Flavor Depth

    Bland chicken often results from skipping the marination time or under-seasoning. Ensure the chicken is fully coated in the marinade on all sides. If the taste is too mild, increase the salt or lemon juice slightly in the next batch.

    Frequently Asked Questions

    How can I make sure my chicken breasts stay juicy?

    The combination of olive oil and lemon juice tenderizes the meat, while baking at a high temperature of 400°F seals in the juices. The most critical step is using a meat thermometer to avoid overcooking and allowing the meat to rest for five minutes.

    What is the best way to store leftover baked chicken breasts?

    Store them in an airtight container in the refrigerator for up to four days. To keep them from drying out, you can store them with a small amount of the leftover pan juices or a slice of onion in the container.

    Can I freeze the marinated chicken breasts?

    Yes, you can freeze them before baking for up to three months. Place them in a freezer-safe bag with the marinade. Thaw them completely in the refrigerator before baking to ensure the meat cooks evenly.

    What should I do if my chicken breast is still pink after baking?

    First, check the internal temperature with a thermometer. If it is below 165°F (75°C), put it back in the oven for a few more minutes. If it is above 165°F and still pink, it is safe to eat, as some chicken naturally retains a pink hue.

    How many servings does this recipe yield?

    This recipe yields 4 servings, based on four standard-sized boneless, skinless chicken breasts. Each serving provides a substantial amount of lean protein, making it ideal for a main course.

    Are there any dietary considerations with this recipe?

    This recipe is naturally gluten-free and low-carb, making it suitable for ketogenic and paleo diets. To reduce fat, you can decrease the amount of olive oil or use a light spray of oil on the baking dish.

    Print
    clock clock iconcutlery cutlery iconflag flag iconfolder folder iconinstagram instagram iconpinterest pinterest iconfacebook facebook iconprint print iconsquares squares iconheart heart iconheart solid heart solid icon
    Garlic and Herb Baked Chicken Breast

    Garlic and Herb Baked Chicken Breast


    5 Stars 4 Stars 3 Stars 2 Stars 1 Star

    No reviews

    • Author: imageuploader
    • Total Time: 40 minutes
    • Yield: 4 servings 1x
    • Diet: Gluten-free, Low-carb

    Description

    A simple and healthy baked chicken breast recipe that is juicy and flavorful, perfect for any meal.


    Ingredients

    Scale
    • 4 pieces boneless, skinless chicken breasts
    • 2 tablespoons olive oil
    • 1 teaspoon garlic powder
    • 1 teaspoon onion powder
    • 1 teaspoon paprika
    • 1 teaspoon salt
    • 1/2 teaspoon black pepper
    • 1 lemon juiced

    Instructions

    1. Preheat: Preheat the oven to 400°F (200°C).
    2. Combine: In a mixing bowl, combine olive oil, garlic powder, onion powder, paprika, salt, black pepper, and lemon juice.
    3. Marinate: Add the chicken breasts to the marinade and coat evenly. Let it marinate for at least 15 minutes.
    4. Arrange: Place the marinated chicken breasts in a baking dish.
    5. Bake: Bake in the preheated oven for 25-30 minutes, or until the internal temperature reaches 165°F (75°C).
    6. Rest: Remove from the oven and let rest for 5 minutes before slicing.

    Notes

    Serve with your choice of sides such as vegetables or rice for a complete meal.

    • Prep Time: 15 minutes
    • Cook Time: 25 minutes
    • Category: Main Course
    • Method: Baking
    • Cuisine: American

    Nutrition

    • Serving Size: 1 serving
    • Calories: 220 kcal
    • Sugar: 2 g
    • Sodium: 300 mg
    • Fat: 8 g
    • Saturated Fat: 1 g
    • Unsaturated Fat: 7 g
    • Trans Fat: 0 g
    • Carbohydrates: 4 g
    • Fiber: 1 g
    • Protein: 40 g
    • Cholesterol: 110 mg
  • Savory Ground Chicken Burrito Bowls

    Savory Ground Chicken Burrito Bowls

    These ground chicken burrito bowls are a fast, nutritious alternative to restaurant takeout. They are highly customizable and work perfectly for weeknight dinners or organized meal prep.

    Recipe image

    List of ingredients

    • 1 cup Corn Kernels – use frozen (defrosted) or fresh kernels for a pop of sweetness.
    • 2 Tablespoons Red Onion – finely chopped for the salsa.
    • 1 can Black Beans – drained and rinsed thoroughly.
    • 2 teaspoons Fresh Cilantro – finely chopped.
    • 2 teaspoons Lime Juice – for the salsa acidity.
    • 1 cup Sour Cream – the base for the creamy topping.
    • 1 Tablespoon Lime Juice – for the crema.
    • 1 teaspoon Chili Powder – for the crema.
    • 1/4 teaspoon Honey – to balance the tang in the sauce.
    • 2 teaspoons Chili Powder – for the meat seasoning.
    • 1 teaspoon Ground Cumin – adds earthy depth to the chicken.
    • 1/2 teaspoon Cornstarch – helps the sauce cling to the meat.
    • 1/2 teaspoon Garlic Powder – for savory flavor.
    • 1/2 teaspoon Salt – to enhance all flavors.
    • 1/4 teaspoon Black Pepper – for a subtle kick.
    • 2 Tablespoons Cooking Oil – use a high-heat neutral oil like avocado or vegetable oil.
    • 1 pound Ground Chicken – the main protein.
    • 1/2 cup Water – to create the sauce consistency.
    • 1/4 cup Salsa – any variety, such as mild or medium.
    • Cooked Rice – serves as the base of the bowl.
    • Avocado Slices – for creamy texture.
    • Chopped Tomatoes – for freshness.
    • Chopped Red Onion – as a raw topping.
    • Shredded Cheese – such as cheddar or Monterey Jack.
    • Tortilla Chips – for adding crunch.

    step-by-step instructions

    1. Prepare the Corn and Black Bean Salsa: In a mixing bowl, combine the corn kernels, finely chopped red onion, drained black beans, chopped cilantro, and 2 teaspoons of lime juice. Season with a pinch of salt and set it aside to let the flavors meld.
    2. Mix the Chili Lime Crema: In a separate small bowl, whisk together the sour cream, 1 Tablespoon of lime juice, 1 teaspoon of chili powder, and honey. Cover and refrigerate the sauce until you are ready to serve.
    3. Blend the Taco Seasoning: In a small container, stir together the 2 teaspoons of chili powder, ground cumin, cornstarch, garlic powder, salt, and black pepper until well combined.
    4. Brown the Chicken: Place a large skillet over medium heat and add the cooking oil. Once the oil shimmers, add the ground chicken and cook, breaking it apart with a spatula, until just cooked through (approximately 6 to 8 minutes).
    5. Season the Meat: Sprinkle the prepared taco seasoning over the cooked chicken. Stir continuously for about 1 minute to ensure no dry spots remain and the spices are toasted.
    6. Simmer and Thicken: Pour the water and salsa over the chicken and stir well. Cover the skillet with a lid and cook for 5 minutes. Remove the lid and continue simmering until the excess liquid has evaporated and the sauce is thick.
    7. Assemble the Bowls: Start with a base of cooked rice in each bowl. Top with a portion of the seasoned chicken and a scoop of the corn-black bean salsa. Finish with avocado, tomatoes, onion, and shredded cheese, then drizzle with the chili lime crema.

    Pro Tips for Better Flavor

    Searing the Chicken for Maximum Taste

    To achieve a deeper flavor, allow the chicken to brown undisturbed for a few minutes before breaking it apart. This creates a Maillard reaction, which adds savory, caramelized notes to the meat. Avoid overcrowding the pan to ensure the chicken sears rather than steams.

    Using Cornstarch for a Better Sauce Texture

    The addition of cornstarch to the taco seasoning is a professional technique to create a silky glaze. It thickens the water and salsa, ensuring the sauce clings to the chicken rather than pooling at the bottom of the bowl. This prevents the rice from becoming soggy.

    Enhancing the Rice Base

    Instead of plain water, cook your rice in vegetable broth or a hint of lime juice and cilantro. This transforms the base from a simple filler into a flavorful component of the meal. Rinsing the rice before cooking also removes excess starch, resulting in fluffier, distinct grains.

    Ingredient Substitutions

    Swapping the Protein

    While ground chicken is lean and mild, you can use ground turkey for a similar nutritional profile. Ground beef provides a richer, heartier flavor, though it may require draining excess fat before adding the seasoning. For a plant-based version, use crumbled extra-firm tofu or plant-based meat substitutes.

    Alternative Grain Bases

    For a lower-calorie or gluten-free option, replace the white rice with quinoa or brown rice. If you are aiming for a low-carb meal, use shredded romaine lettuce or cauliflower rice. These alternatives provide different textures while still supporting the other toppings.

    Dairy-Free Crema Options

    Replace the sour cream with plain Greek yogurt for a higher protein content and a similar tang. For a completely vegan version, use a cashew-based cream or a coconut-based sour cream alternative. Ensure the substitute is thick enough to hold the lime and chili powder.

    Custom Variations

    Increasing the Heat Level

    If you prefer a spicier bowl, use a spicy salsa or add diced jalapeños to the corn and bean mixture. You can also add a pinch of cayenne pepper to the taco seasoning or use a chipotle-infused powder for a smoky heat. A drizzle of hot sauce over the final assembly adds an extra layer of intensity.

    Low-Carb and Keto Adjustments

    To make this recipe keto-friendly, omit the rice, corn, and honey. Use a base of cauliflower rice and increase the amount of avocado and cheese to maintain satiety. Substitute the honey in the crema with a small amount of a keto-friendly sweetener or omit it entirely.

    Adding More Fiber-Rich Vegetables

    Increase the nutritional value by adding sautéed bell peppers and onions, similar to fajitas. You can also stir in shredded carrots or baby spinach at the end of the chicken cooking process. These additions provide more color and a wider array of vitamins.

    Serving and Assembly Ideas

    Setting Up a Burrito Bowl Bar

    This recipe is ideal for groups. Place the cooked rice, seasoned chicken, and corn salsa in large serving bowls. Arrange the avocado, tomatoes, cheese, and crema in smaller bowls and let guests assemble their own portions to suit their taste preferences.

    Layering for Visual Appeal

    For a restaurant-style look, place the rice at the bottom and arrange the chicken and salsa in distinct sections on top rather than mixing them. Place the toppings in small clusters around the edges and finish with a spiral drizzle of crema across the center.

    Adding Crunch with Toppings

    Beyond tortilla chips, consider adding toasted pepitas (pumpkin seeds) or sliced radishes for a crisp contrast to the soft rice and chicken. A sprinkle of toasted sesame seeds or crushed corn nuts can also provide an interesting texture profile.

    Storage and Reheating Advice

    Maintaining Freshness in the Fridge

    Store the chicken and rice together in an airtight container, but keep the corn salsa and crema in separate containers. This prevents the vegetables from wilting and the sauce from thinning. Properly stored components will stay fresh for up to 4 days.

    Preventing Dry Chicken When Reheating

    When reheating the chicken and rice, add a tablespoon of water or broth to the container before microwaving. This creates steam, which re-hydrates the meat and ensures the rice remains tender. Heat in short intervals and stir in between.

    Storing Cold Toppings Separately

    Always keep avocado, tomatoes, and sour cream separate from the heated elements. Adding cold toppings to a hot bowl during reheating will ruin the texture of the avocado and cause the crema to break. Only add fresh toppings after the base is heated.

    Troubleshooting Common Issues

    Fixing Meat That Is Too Dry

    If the ground chicken feels dry after cooking, stir in an extra tablespoon of salsa or a splash of lime juice. This adds moisture and acidity, which helps break down the protein fibers and improves the mouthfeel of the meat.

    Adjusting an Overly Salty Salsa

    If the corn and bean salsa tastes too salty, add more lime juice or a small amount of honey to balance the flavor. You can also stir in extra corn or chopped cucumber to dilute the salt concentration without changing the overall profile.

    Preventing Crema from Separating

    If the chili lime crema appears to separate or look curdled, whisk it vigorously by hand or use a small handheld blender. This usually happens if the sour cream was too cold when the lime juice was added; bringing it to room temperature slightly can help.

    Frequently Asked Questions

    Can I use ground turkey instead of chicken?

    Yes, ground turkey is an excellent substitute and works perfectly with the same taco seasoning. Ensure you use a similar lean-to-fat ratio to keep the cooking times consistent.

    How long does the corn and bean salsa last?

    The salsa stays fresh in the refrigerator for 3 to 5 days when kept in an airtight container. The lime juice acts as a mild preservative and keeps the vegetables bright.

    Can I make the taco seasoning in bulk?

    Yes, you can mix large quantities of the dry seasonings and store them in a jar at room temperature. This makes future meal prep much faster as you only need to measure out the pre-mixed powder.

    Do I have to use a lid when simmering the chicken?

    Using a lid is important because it traps steam, which ensures the chicken cooks evenly and the flavors from the salsa and water penetrate the meat. Once the flavors are locked in, removing the lid allows you to reduce the sauce to the desired thickness.

    Print
    clock clock iconcutlery cutlery iconflag flag iconfolder folder iconinstagram instagram iconpinterest pinterest iconfacebook facebook iconprint print iconsquares squares iconheart heart iconheart solid heart solid icon
    Savory Ground Chicken Burrito Bowls

    Savory Ground Chicken Burrito Bowls


    5 Stars 4 Stars 3 Stars 2 Stars 1 Star

    No reviews

    • Author: imageuploader
    • Total Time: 35 minutes
    • Yield: 4 servings 1x
    • Diet: Gluten Free

    Description

    Ground chicken burrito bowls cook fast and are a great alternative to takeout. Assemble the bowls to serve right away, use as meal prep, or set out toppings and let everyone build their own.


    Ingredients

    Scale
    • 1 cup Corn Kernels
    • 2 Tablespoons finely chopped Red Onion
    • 1 can Black Beans, drained and rinsed
    • 2 teaspoons chopped Fresh Cilantro
    • 2 teaspoons Lime Juice
    • 1 cup Sour Cream
    • 1 Tablespoon Lime Juice
    • 1 teaspoon Chili Powder
    • 1/4 teaspoon Honey
    • 2 teaspoons Chili Powder
    • 1 teaspoon Ground Cumin
    • 1/2 teaspoon Cornstarch
    • 1/2 teaspoon Garlic Powder
    • 1/2 teaspoon Salt
    • 1/4 teaspoon Black Pepper
    • 2 Tablespoons Cooking Oil
    • 1 pound Ground Chicken
    • 1/2 cup Water
    • 1/4 cup Salsa, any type
    • Cooked Rice
    • Avocado Slices
    • Chopped Tomatoes
    • Chopped Red Onion
    • Shredded Cheese
    • Tortilla Chips

    Instructions

    1. Make corn and black bean salsa: Combine corn, red onion, black beans, chopped cilantro, and 2 teaspoons lime juice. Add some salt. Set aside.
    2. Make chili lime crema: Whisk together sour cream, 1 Tablespoon lime juice, 1 teaspoon chili powder, and honey. Refrigerate until ready to serve.
    3. Make taco seasoning: Combine 2 teaspoons chili powder, ground cumin, cornstarch, garlic powder, salt, and pepper.
    4. Make taco meat: Place a large skillet over medium heat. Add cooking oil. When it begins to shimmer, add chicken and cook, breaking it apart, until just cooked through, 6 to 8 minutes. Sprinkle taco seasoning over chicken and stir until no dry spots remain, about 1 minute.
    5. Simmer meat: Pour water and salsa over chicken and stir well. Cover with a lid. Cook, covered, for 5 minutes. Remove lid and continue cooking until any extra liquid has cooked off.
    6. Assemble bowls: Assemble bowls with a layer of cooked rice topped with chicken and corn-black bean salsa. Finish with any toppings you’d like and drizzle with crema. Enjoy!

    Notes

    Corn Kernels: If using frozen corn, defrost in the microwave. If using fresh corn, microwave for 1 minute until tender. Chili Powder: Use a blend of spices, not cayenne. Cooking Oil: Use any high-heat cooking oil with a neutral flavor, such as avocado, grapeseed, or vegetable oil.

    • Prep Time: 20 minutes
    • Cook Time: 15 minutes
    • Category: Main Dish
    • Method: Sautéing
    • Cuisine: Tex Mex

    Nutrition

    • Serving Size: 1 bowl
    • Calories: 398 kcal
    • Sugar: 3 g
    • Sodium: 689 mg
    • Fat: 17 g
    • Saturated Fat: 5 g
    • Unsaturated Fat: 10 g
    • Trans Fat: 1 g
    • Carbohydrates: 29 g
    • Fiber: 7 g
    • Protein: 33 g
    • Cholesterol: 93 mg
  • Hearty Vegan Breakfast Burritos for Meal Prep

    Hearty Vegan Breakfast Burritos for Meal Prep

    These protein-rich breakfast burritos are ideal for busy mornings and easy meal preparation. They combine savory tofu scramble, crispy potatoes, and black beans for a satisfying start to your day.

    Recipe image

    List of ingredients

    • 1 lb small yellow potatoes, diced into 1/2-inch cubes – ensures even cooking.
    • 1 tablespoon light oil (canola, vegetable, or broth for oil-free) – used for roasting potatoes.
    • 1/2 teaspoon smoked paprika – adds a woody, smoky depth.
    • 1/2 teaspoon garlic powder – enhances the savory flavor.
    • Salt and pepper – used for seasoning to taste.
    • 1 tablespoon light oil (canola, vegetable, or broth for oil-free) – used for the tofu scramble.
    • 1 block (14 oz / 400 g) firm tofu, drained and crumbled – the primary protein base.
    • 1 cup black beans, rinsed and drained – adds fiber and texture.
    • 2 tablespoons nutritional yeast – provides a cheesy, nutty flavor.
    • 1/2 teaspoon chili powder – adds a mild warmth.
    • 1/2 teaspoon onion powder – adds a sweet, aromatic base.
    • 1/2 teaspoon garlic powder – adds pungency to the scramble.
    • 1/4 teaspoon turmeric – used primarily for a yellow egg-like color.
    • 1 teaspoon black salt (kala namak), optional – creates a sulfurous eggy taste.
    • Salt and pepper – used for final seasoning.
    • 6 large flour tortillas (gluten-free if preferred) – the wrapper for the filling.
    • 1 cup vegan shredded cheese – provides creaminess and salt.
    • 1 avocado, diced (omit if freezing) – adds healthy fats.
    • 1 cup chopped spinach or lettuce (use spinach if freezing) – adds freshness and nutrients.
    • 1/2 cup salsa or pico de gallo – provides acidity and moisture.
    • Optional additions: vegan bacon, breakfast sausage, guacamole, jalapenos, chopped bell peppers, corn kernels, hot sauce, cilantro, or lime juice.

    step-by-step instructions

    1. Roast the potatoes: Preheat your oven to 425°F (220°C). Toss the diced potatoes with oil, smoked paprika, garlic powder, salt, and pepper in a bowl. Spread them evenly on a parchment-lined or lightly greased baking sheet and roast for 20–25 minutes, flipping halfway through, until they are golden and crisp.
    2. Make the tofu scramble: Heat oil in a large nonstick skillet over medium heat. Add the crumbled tofu and use a spatula to break it into smaller pieces. Stir in the black beans, nutritional yeast, chili powder, onion powder, garlic powder, turmeric, and black salt. Cook for 5–7 minutes, stirring frequently, until heated through. Season with salt and pepper, noting that more black salt increases the eggy flavor, while longer cooking mellows it out.
    3. Assemble the burritos: Lay out the tortillas on a clean surface. Layer the tofu scramble, roasted potatoes, vegan cheese, diced avocado, spinach, and salsa on each tortilla. Fold in the sides and roll tightly from the bottom to seal the filling.
    4. Crisp the burritos: Place the assembled burritos seam-side down in a dry skillet over medium heat. Cook for 2–3 minutes per side until the exterior is golden and lightly crisp. This step seals the burrito and prevents it from unwrapping during consumption.

    Professional Preparation Tips

    Allow Fillings to Cool Before Assembly

    Letting the roasted potatoes and tofu scramble cool for 10 to 15 minutes before rolling is essential. Hot ingredients create steam inside the tortilla, which can lead to a soggy texture. Cooling ensures the tortilla maintains its structural integrity.

    Utilize a Nonstick Skillet for the Scramble

    Using a high-quality nonstick pan prevents the tofu from sticking and tearing. This allows you to stir the ingredients more efficiently, ensuring that the spices and nutritional yeast are evenly distributed throughout the scramble.

    Warm the Tortillas Before Filling

    Lightly warming the tortillas in a microwave for 10 seconds or on a dry pan makes them more pliable. This prevents the edges from cracking or tearing when you fold the sides and roll the burrito tightly.

    Ensure Uniform Potato Dice

    Cutting the potatoes into consistent 1/2-inch cubes is critical for even roasting. If the pieces vary in size, smaller pieces will overcook and burn while larger pieces remain raw in the center.

    Ingredient Substitutions and Swaps

    Replacing Yellow Potatoes with Sweet Potatoes

    Sweet potatoes can be used as a nutrient-dense alternative to yellow potatoes. They provide a sweeter flavor profile and a softer texture. Adjust the roasting time slightly, as sweet potatoes may soften faster than yellow varieties.

    Substituting Black Beans with Pinto or Kidney Beans

    If black beans are unavailable, pinto beans or kidney beans serve as excellent replacements. They offer similar protein and fiber content. Ensure they are rinsed and drained thoroughly to avoid adding excess moisture to the burrito.

    Gluten-Free Tortilla Alternatives

    Corn tortillas or certified gluten-free flour tortillas can be used for those with dietary restrictions. Corn tortillas are smaller, so you may need to use two per burrito or reduce the filling quantity. Gluten-free flour tortillas usually require more warming to prevent cracking.

    Alternative Seasonings for the Tofu Scramble

    If you do not have nutritional yeast, a small amount of vegan parmesan or a pinch of mustard powder can add savory depth. For color, turmeric is essential, but a pinch of paprika can also add a golden hue if turmeric is missing.

    Customizing Your Fillings

    Adding Spicy Elements for Heat

    Incorporating sliced jalapenos or a dash of sriracha directly into the tofu scramble adds a spicy kick. You can also add diced habaneros to the salsa for a more intense heat level. This balances the richness of the avocado and cheese.

    Incorporating Sautéed Vegetables

    Diced bell peppers and corn kernels can be sautéed along with the tofu for extra texture and sweetness. Onions and garlic can be minced and browned first to create a deeper aromatic base for the scramble.

    Increasing the Protein Content

    Adding plant-based breakfast sausage or tempeh bacon strips increases the satiety of the meal. These should be cooked separately until crisp and layered into the burrito during the assembly phase.

    Adding Creamy Texture with Vegan Sour Cream

    A dollop of vegan sour cream or a cashew-based cream sauce adds a tangy, creamy element. This helps cut through the saltiness of the vegan cheese and the starchiness of the potatoes.

    Freezer and Storage Guide

    Proper Wrapping Techniques for Freezing

    Wrap each individual burrito tightly in parchment paper followed by a layer of aluminum foil. This double-wrapping method prevents freezer burn and keeps the burrito airtight. Place the wrapped burritos inside a heavy-duty freezer bag for extra protection.

    Optimal Freezer Storage Duration

    These burritos can be stored in the freezer for up to two months while maintaining quality. After this period, the tortillas may begin to dry out or pick up freezer odors. Label each bag with the date of preparation for easy tracking.

    Managing Fresh Ingredients in Frozen Burritos

    Avoid adding fresh avocado or lettuce to burritos intended for the freezer. Avocado oxidizes and turns brown, while lettuce becomes watery and limp when thawed. Instead, add these fresh toppings after the burrito has been reheated.

    Cooling Before Wrapping

    Ensure the filling is completely room temperature before wrapping and freezing. Wrapping hot food creates condensation inside the foil, which leads to ice crystals forming on the tortilla. This results in a mushy texture upon reheating.

    Reheating Methods for Best Results

    Quick Microwave Reheating

    For refrigerated burritos, microwave on high for 1 to 2 minutes. For frozen burritos, use the defrost setting for 4 to 5 minutes, then heat on high for another 1 to 2 minutes. Rotate the burrito halfway through to ensure even heating.

    Oven Baking for Maximum Crispiness

    Preheat the oven to 350°F (175°C). Wrap frozen burritos in foil and bake for 15 to 20 minutes. For an extra crisp exterior, unwrap them for the last 5 minutes of baking to allow the tortilla to brown.

    Skillet Reheating for a Golden Finish

    Once a burrito is defrosted or microwaved, place it seam-side down in a dry skillet over medium heat. Toast for 2 to 3 minutes per side. This restores the crunch of the tortilla and melts the vegan cheese more effectively.

    Defrosting Tips for Quality Texture

    Transfer frozen burritos to the refrigerator 24 hours before you plan to eat them. Slow thawing prevents the tortilla from becoming gummy. This method allows for a more consistent heat distribution during the final reheating process.

    Serving and Presentation Ideas

    Pairing with Traditional Dips

    Serve the burritos with side bowls of chunky salsa, fresh guacamole, or vegan chipotle mayo. These dips provide acidity and creaminess that complement the savory fillings. Lime wedges on the side allow for a burst of freshness.

    Brunch Platter Presentation

    Slice the burritos diagonally in half to showcase the colorful layers of tofu, beans, and potatoes. Arrange them on a large platter with scattered cilantro leaves and sliced radishes for a professional look. This is ideal for hosting guests.

    Side Dish Combinations

    Pair the burritos with a side of fresh seasonal fruit, such as sliced mango or berries, to balance the savory flavors. A simple side salad with a lime-vinaigrette also adds a light, refreshing contrast to the hearty meal.

    Troubleshooting Common Issues

    Fixing Soggy Tortillas

    If your tortillas are too soft, it is usually due to excess moisture from the salsa or steam from hot fillings. To fix this, reduce the amount of salsa inside the wrap and always sear the burrito in a skillet after rolling.

    Adjusting the Eggy Flavor of Tofu

    If the black salt taste is too overwhelming, cook the tofu scramble for a few extra minutes to mellow the flavor. Conversely, if it doesn’t taste enough like eggs, add a small pinch of black salt immediately before serving.

    Preventing Tortilla Tearing

    Tearing usually occurs when the tortilla is too cold or overfilled. Ensure you leave a 1-inch border around the edges and warm the tortilla slightly before assembly to increase its elasticity.

    Frequently Asked Questions

    Can I use silken tofu instead of firm tofu?

    No, silken tofu has too much moisture and will turn into a paste rather than a crumble. Always use firm or extra-firm tofu to ensure the scramble has a texture similar to scrambled eggs.

    Do I need to defrost the burritos before reheating?

    Defrosting is not strictly necessary if using a microwave, but it is highly recommended for oven or skillet reheating. Defrosting ensures the center is hot without overcooking the exterior tortilla.

    Can this recipe be made without oil?

    Yes, you can replace the oil in both the roasting and sautéing steps with vegetable broth. Use a nonstick pan and a parchment-lined sheet to prevent sticking when using broth.

    Which vegan cheese melts the best in burritos?

    Shredded mozzarella-style vegan cheeses usually melt well. For an even creamier result, you can use a vegan nacho cheese sauce or a homemade cashew-based cheese spread.

    Print
    clock clock iconcutlery cutlery iconflag flag iconfolder folder iconinstagram instagram iconpinterest pinterest iconfacebook facebook iconprint print iconsquares squares iconheart heart iconheart solid heart solid icon
    Easy Vegan Breakfast Burritos (Freezer-Friendly!)

    Hearty Vegan Breakfast Burritos for Meal Prep


    5 Stars 4 Stars 3 Stars 2 Stars 1 Star

    No reviews

    • Author: imageuploader
    • Total Time: 45 minutes
    • Yield: 6 burritos 1x
    • Diet: Vegan

    Description

    These Vegan Breakfast Burritos are hearty, satisfying, and totally customizable! Packed with crispy potatoes, tofu scramble, black beans, and melty vegan cheese, they’re the ultimate make-ahead breakfast.


    Ingredients

    Scale
    • 1 lb small yellow potatoes, diced into ½-inch cubes
    • 1 tablespoon light oil
    • ½ teaspoon smoked paprika
    • 1/2 teaspoon garlic powder
    • salt & pepper to taste
    • 1 tablespoon light oil
    • 1 block (14 oz / 400 g) firm tofu, drained and crumbled
    • 1 cup black beans, rinsed and drained
    • 2 tablespoons nutritional yeast
    • 1/2 teaspoon chili powder
    • ½ teaspoon onion powder
    • ½ teaspoon garlic powder
    • ¼ teaspoon turmeric
    • 1 teaspoon black salt (kala namak)
    • salt & pepper to taste
    • 6 large flour tortillas
    • 1 cup vegan shredded cheese
    • 1 avocado, diced
    • 1 cup chopped spinach or lettuce
    • ½ cup salsa or pico de gallo

    Instructions

    1. Roast the potatoes: Preheat the oven to 425°F (220°C). Toss the diced potatoes with oil, smoked paprika, garlic powder, salt, and pepper. Spread evenly on a parchment-lined or lightly greased baking sheet. Roast for 20–25 minutes, flipping halfway through, until golden and crisp.
    2. Make the tofu scramble: Heat the oil in a large nonstick skillet over medium heat. Add the tofu and use a spatula to break up the tofu into crumbles. Add the black beans, nutritional yeast, chili powder, onion powder, garlic powder, turmeric, and black salt. Cook for 5–7 minutes, stirring often, until heated through. Season with salt and pepper to taste.
    3. Assemble the burritos: Lay out the tortillas. Layer on tofu scramble, roasted potatoes, vegan cheese, avocado, spinach, and salsa. Fold in the sides, then roll tightly from the bottom to form burritos.
    4. Crisp the burritos: Place burritos seam-side down in a dry skillet over medium heat. Cook 2–3 minutes per side until golden and lightly crisp.

    Notes

    Storage: Wrap tightly and refrigerate up to 3 days or wrap in parchment/foil and freeze in a freezer bag for up to 2 months. Reheating: Microwave refrigerated burritos for 1-2 minutes. For frozen, defrost in microwave for 4-5 minutes, then heat 1-2 minutes more, or bake at 350°F for 15-20 minutes.

    • Prep Time: 15 minutes
    • Cook Time: 30 minutes
    • Category: Breakfast
    • Method: Roasting, Sautéing
    • Cuisine: American, Mexican

    Nutrition

    • Serving Size: 1 burrito
    • Calories: 362 kcal
    • Sugar: 3 g
    • Sodium: 1145 mg
    • Fat: 16 g
    • Saturated Fat: 4 g
    • Unsaturated Fat: 9 g
    • Trans Fat: 0.03 g
    • Carbohydrates: 46 g
    • Fiber: 9 g
    • Protein: 10 g
    • Cholesterol: 0 mg
  • Low-Calorie Garlic Steak Bites with Mac & Cheese

    Low-Calorie Garlic Steak Bites with Mac & Cheese

    This high-protein meal combines savory seared steak with a creamy, low-calorie macaroni and cheese. It is designed specifically for efficient meal prep and nutritional balance.

    Recipe image

    List of ingredients

    • 1.5 lb lean sirloin or top round steak – trimmed and cut into 1-inch cubes.
    • 1 tbsp Worcestershire sauce – adds savory depth.
    • 1 tbsp low-sodium soy sauce – for salt and umami.
    • 1 tbsp minced garlic – approximately 3 cloves.
    • ½ tbsp garlic powder – for concentrated garlic flavor.
    • 1 tsp onion powder – adds a subtle sweetness.
    • 1 tsp smoked paprika – provides a woody, smoky note.
    • ½ tsp salt – to enhance overall flavor.
    • ½ tsp black pepper – for a mild spicy kick.
    • Olive oil spray – used for searing the steak.
    • 8 oz dry elbow or penne pasta – the base of the mac and cheese.
    • 4 oz low-fat cream cheese – creates a thick, creamy texture.
    • ½ cup skim milk – thins the sauce while keeping calories low.
    • ¾ cup nonfat shredded cheddar cheese – provides the classic cheese flavor.
    • ⅓ cup plain nonfat Greek yogurt – adds creaminess and extra protein.
    • ½ tbsp garlic powder – seasons the cheese sauce.
    • 1 tsp onion powder – balances the cheese flavors.
    • ½ tsp black pepper – for seasoning.
    • ¼ tsp salt – adjust to taste.
    • Chives – used for fresh garnish.

    step-by-step instructions

    1. Cook the Pasta: Boil a pot of salted water and cook the elbow or penne pasta according to the package instructions. Drain the pasta thoroughly and set it aside.
    2. Prep the Steak Bites: In a mixing bowl, combine the steak cubes with soy sauce, Worcestershire sauce, minced garlic, garlic powder, onion powder, smoked paprika, salt, and pepper. Toss well to ensure every piece is evenly coated.
    3. Cook the Steak: Heat a large skillet over medium-high heat and lightly coat it with olive oil spray. Sear the steak bites for 2–3 minutes per side until browned and cooked to your preferred level of doneness. Remove the steak from the pan and let it rest.
    4. Make the Low-Cal Mac Sauce: Using the pasta pot or a saucepan over medium heat, whisk together the skim milk and low-fat cream cheese until the mixture is completely smooth. Stir in the nonfat cheddar, Greek yogurt, garlic powder, and onion powder until the sauce is creamy and well combined. Season with salt and pepper.
    5. Combine & Serve: Add the drained pasta back into the cheese sauce and toss until every noodle is coated. Divide the mac and cheese into meal prep containers and top each with a portion of the garlic steak bites. Garnish with fresh chives.

    Professional Steak Searing Techniques

    Pat the Meat Dry

    Before seasoning the steak, use paper towels to remove excess surface moisture. This ensures the meat sears and browns quickly rather than steaming in the pan.

    Maintain High Pan Temperature

    Heat your skillet until the oil spray just begins to shimmer before adding the meat. A hot pan creates a better crust and locks in juices more effectively.

    Avoid Overcrowding the Skillet

    Cook the steak bites in batches if your pan is not large enough to hold them all with space in between. Overcrowding lowers the pan temperature and prevents proper browning.

    Utilize a Cast Iron Skillet

    Cast iron distributes heat more evenly and retains it better than stainless steel. This results in a more consistent sear across all the steak cubes.

    Optimizing the Creamy Cheese Sauce

    Soften Cream Cheese Before Heating

    Ensure the low-fat cream cheese is at room temperature or slightly softened. This prevents clumps and allows the sauce to emulsify more quickly with the milk.

    Incorporate Greek Yogurt Off the Heat

    Stir in the Greek yogurt after you have removed the pan from the burner or lowered the heat significantly. High heat can cause Greek yogurt to curdle, ruining the smooth texture.

    Control Sodium Levels

    Since the steak marinade uses soy sauce and Worcestershire, use low-sodium versions of these ingredients. This allows you to control the salt in the cheese sauce without oversalting the meal.

    Whisk for a Smooth Emulsion

    Use a whisk rather than a spoon when combining the cream cheese and milk. Constant agitation ensures a velvety consistency without any lumps of cheese.

    Adding Volume with Nutrient-Dense Vegetables

    Incorporate Steamed Broccoli

    Steam fresh broccoli florets separately and fold them into the macaroni and cheese. Broccoli adds fiber and volume without significantly increasing the calorie count.

    Mix in Fresh Baby Spinach

    Stir fresh spinach into the hot cheese sauce just before adding the pasta. The residual heat will wilt the spinach quickly, adding vitamins A and K to the dish.

    Include Roasted Red Peppers

    Dice roasted red peppers and mix them into the pasta base. This adds a sweet, charred flavor that complements the smoky paprika in the steak seasoning.

    Add Sautéed Zucchini

    Sauté diced zucchini in the same pan used for the steak. The zucchini will absorb the remaining garlic juices, providing a healthy side component to the meal.

    Alternative Ingredient Choices

    Switch to High-Protein Pasta

    Replace traditional wheat pasta with chickpea or lentil-based pasta. This increases the total protein and fiber content per serving while reducing the glycemic index.

    Substitute Lean Beef with Chicken

    Use cubed chicken breast instead of sirloin for an even lower-calorie option. Reduce the searing time slightly to ensure the chicken remains juicy and tender.

    Use Reduced-Fat Cheese Blends

    If nonfat cheddar is unavailable, a reduced-fat sharp cheddar provides a similar flavor profile. Ensure it is finely shredded to help it melt more smoothly into the sauce.

    Swap Skim Milk for Unsweetened Almond Milk

    For a dairy-free milk alternative, use unsweetened almond milk. This further reduces the calorie count, though it may slightly change the richness of the sauce.

    Storage and Meal Prep Logistics

    Use Airtight Glass Containers

    Store the meal in airtight glass containers to maintain freshness and prevent odors. Glass is also safer for reheating in the microwave compared to some plastics.

    Separate Steak from Pasta

    If you plan to eat the meals over four days, store the steak in a separate compartment or container. This prevents the steak juices from thinning the cheese sauce over time.

    Refrigeration Timeline

    Keep the prepared meals in the refrigerator for up to four days. Ensure the food is cooled slightly before sealing the lids to prevent excess condensation.

    Freezing Instructions

    Freeze the mac and cheese separately from the steak bites. Thaw them overnight in the refrigerator before reheating to avoid a mushy texture in the pasta.

    Effective Reheating Methods

    Microwave in Short Intervals

    Heat the meal in 60 to 90-second bursts, stirring the macaroni between each interval. This ensures the cheese sauce heats evenly and doesn’t separate.

    Restore Creaminess with Liquid

    Add a tablespoon of skim milk or water to the pasta before reheating. This restores the moisture lost during refrigeration and brings back the creamy texture.

    Oven Reheating for Steak

    If you prefer a firmer texture for the steak, reheat the meat in a toaster oven or air fryer at 350°F for 3-5 minutes while microwaving the pasta.

    Avoid Overheating the Sauce

    Stop heating the pasta as soon as it is warm. Overheating cheese-based sauces can cause the fats to separate, leaving the sauce oily and grainy.

    Troubleshooting Common Cooking Issues

    Fixing a Grainy Cheese Sauce

    If the sauce becomes grainy, it is likely due to overheating. Lower the heat and whisk in a small amount of warm milk to smooth out the emulsion.

    Preventing Tough Steak Bites

    Avoid overcooking the lean sirloin or top round. Remove the meat from the heat as soon as it reaches your desired doneness to prevent the lean fibers from becoming rubbery.

    Managing Sticky Pasta

    If the pasta sticks together after draining, toss it with a tiny amount of olive oil or a splash of the pasta cooking water before adding the cheese sauce.

    Adjusting Sauce Thickness

    If the sauce is too thick, whisk in more skim milk one tablespoon at a time. If it is too thin, simmer it for an extra minute to reduce the liquid before adding the pasta.

    Frequently Asked Questions

    Can I use a different cut of beef?

    Yes, you can use flank steak or sirloin tip. Ensure you trim excess fat and cut them into uniform cubes to ensure they cook evenly in the skillet.

    How do I prevent the Greek yogurt from curdling?

    The key is to remove the sauce from the heat source before stirring in the yogurt. The residual heat is sufficient to incorporate the yogurt without breaking the emulsion.

    Can I make this dish gluten-free?

    Yes, use a gluten-free pasta such as corn, rice, or quinoa-based noodles. Additionally, check that your soy sauce is replaced with tamari or coconut aminos.

    Is this recipe suitable for freezing?

    It is best enjoyed fresh or refrigerated, but it can be frozen. To maintain quality, freeze the steak and pasta in separate bags and thaw slowly in the fridge.

    What can I use instead of Worcestershire sauce?

    A mixture of soy sauce and a drop of lemon juice or balsamic vinegar can mimic the tang and saltiness of Worcestershire sauce.

    Print
    clock clock iconcutlery cutlery iconflag flag iconfolder folder iconinstagram instagram iconpinterest pinterest iconfacebook facebook iconprint print iconsquares squares iconheart heart iconheart solid heart solid icon
    Protein-Packed Garlic Steak and Creamy Mac & Cheese

    Low-Calorie Garlic Steak Bites with Mac & Cheese


    5 Stars 4 Stars 3 Stars 2 Stars 1 Star

    No reviews

    • Author: imageuploader
    • Total Time: 35 minutes
    • Yield: 4 servings 1x
    • Diet: High-Protein

    Description

    A lighter remix of a fan favorite, featuring juicy garlic-forward steak bites and a creamy low-calorie mac and cheese base, perfect for high-protein meal prep.


    Ingredients

    Scale
    • 1.5 lb lean sirloin or top round steak, trimmed and cut into 1-inch cubes
    • 1 tbsp Worcestershire sauce
    • 1 tbsp low-sodium soy sauce
    • 1 tbsp minced garlic
    • ½ tbsp garlic powder
    • 1 tsp onion powder
    • 1 tsp smoked paprika
    • ½ tsp salt
    • ½ tsp black pepper
    • Olive oil spray
    • 8 oz dry elbow or penne pasta
    • 4 oz low-fat cream cheese
    • ½ cup skim milk
    • ¾ cup nonfat shredded cheddar cheese
    • ⅓ cup plain nonfat Greek yogurt
    • ½ tbsp garlic powder
    • 1 tsp onion powder
    • ½ tsp black pepper
    • ¼ tsp salt
    • Chives for garnish

    Instructions

    1. Cook the Pasta: Cook pasta in salted boiling water according to package directions. Drain and set aside.
    2. Prep the Steak Bites: In a bowl, toss steak cubes with soy sauce, Worcestershire, minced garlic, garlic powder, onion powder, smoked paprika, salt, and pepper.
    3. Cook the Steak: Heat a large skillet over medium-high heat. Lightly coat with olive oil spray. Sear steak bites for 2–3 minutes per side until browned and cooked to your preferred doneness. Remove from pan and set aside.
    4. Make the Low-Cal Mac Sauce: In the same pot you used for pasta (or a clean saucepan), whisk together skim milk and low-fat cream cheese over medium heat until smooth. Stir in nonfat cheddar, Greek yogurt, garlic powder, and onion powder until creamy. Season with salt and pepper.
    5. Combine & Serve: Add drained pasta to the cheese sauce and toss to coat. Portion mac & cheese into meal prep containers, then top each with steak bites. Garnish with parsley or chives if desired.

    Notes

    Keep steak and mac separate in containers for the best texture. To reheat, microwave in 60–90 second bursts and add a splash of skim milk if the sauce thickens.

    • Prep Time: 15 minutes
    • Cook Time: 20 minutes
    • Category: Main Course
    • Method: Searing
    • Cuisine: American

    Nutrition

    • Serving Size: 1 serving
    • Calories: 594 kcal
    • Sugar: 10 g
    • Sodium: 1536 mg
    • Fat: 14 g
    • Saturated Fat: 6 g
    • Unsaturated Fat: 6 g
    • Trans Fat: 0 g
    • Carbohydrates: 57 g
    • Fiber: 3 g
    • Protein: 61 g
    • Cholesterol: 126 mg
  • Creamy Lemon Garlic Shrimp Pasta Guide

    Creamy Lemon Garlic Shrimp Pasta Guide

    This creamy lemon garlic shrimp pasta is a quick, restaurant-quality meal that comes together in just 30 minutes. It combines tender shrimp and al dente fettuccine in a rich, zesty butter sauce. It is an ideal choice for a sophisticated weeknight dinner.

    Recipe image

    List of ingredients

    • 12 oz Fettuccine (approx 340g) – use a high-quality durum wheat pasta.
    • 1 lb Large Shrimp (approx 450g) – peeled, deveined, and patted dry.
    • 2 tbsp Extra Virgin Olive Oil (30ml) – for high-heat searing.
    • 6 tbsp Unsalted Butter (85g) – divided for searing and emulsifying the sauce.
    • 4 cloves Garlic – finely minced for a strong aromatic base.
    • 1/4 cup Vegetable Broth (60ml) – used to deglaze the pan and add depth.
    • 1/2 cup Heavy Cream (120ml) – provides the creamy, velvety texture.
    • 1 Large Lemon – freshly juiced and zested.
    • 1/4 cup Fresh Parsley (15g) – finely chopped for color and brightness.
    • 1/2 cup Parmesan Cheese (50g) – freshly grated, plus extra for garnish.
    • Kosher Salt and Freshly Cracked Black Pepper – used to taste throughout.

    step-by-step instructions

    1. Boil the Pasta: Cook fettuccine in heavily salted water until al dente. Reserve 1 cup of the starchy pasta water before draining.
    2. Sear the Shrimp: Pat shrimp dry and season with salt and pepper. Heat olive oil in a large skillet over medium-high heat, then sear shrimp for 1-2 minutes per side until pink with golden edges. Remove and set aside.
    3. Sauté Aromatics: Reduce heat to medium and add 2 tbsp of butter. Add minced garlic and cook for 30 seconds until fragrant, then deglaze the pan with vegetable broth, scraping the bottom, and reduce by half.
    4. Build the Sauce: Stir in heavy cream, lemon juice, and zest. Bring to a simmer, then whisk in the remaining 4 tbsp of butter one piece at a time. Stir in parmesan cheese until melted and season with salt and pepper.
    5. Combine and Serve: Add drained pasta to the sauce and toss, using reserved pasta water to adjust consistency. Return shrimp and parsley to the pan, toss to combine, and serve with extra parmesan and a lemon wedge.

    Necessary Kitchen Equipment

    Large Stock Pot for Boiling Pasta

    A large pot ensures the pasta has enough room to move, preventing the noodles from sticking together. Using plenty of water also helps maintain a consistent boiling temperature when the pasta is added.

    Heavy-Bottomed Skillet for Searing

    A stainless steel or cast iron skillet is ideal for achieving a deep golden-brown sear on the shrimp. These materials distribute heat evenly and allow for effective deglazing of the pan drippings.

    Colander for Efficient Draining

    A sturdy colander allows you to drain the pasta quickly while ensuring no noodles are lost. Always remember to scoop out your reserved pasta water before pouring the pot into the colander.

    Kitchen Tongs for Tossing

    Tongs provide the best grip for coating long strands of fettuccine in the creamy sauce. They allow you to lift and turn the pasta without breaking the noodles.

    Zester or Microplane for Citrus

    A fine zester allows you to capture the aromatic oils of the lemon skin without hitting the bitter white pith. This ensures the sauce remains bright and citrusy rather than bitter.

    Ingredient Selection Tips

    Choosing the Right Shrimp Size

    Large shrimp (usually 21-25 count) are recommended because they maintain their structure during searing. Smaller shrimp may overcook too quickly, while jumbo shrimp may require longer cook times that can toughen the exterior.

    The Benefit of Unsalted Butter

    Using unsalted butter allows you to control the sodium levels of the sauce precisely. Since parmesan cheese and pasta water are already salty, unsalted butter prevents the dish from becoming over-seasoned.

    Using Freshly Grated Parmesan

    Freshly grated parmesan melts more smoothly into the sauce than pre-shredded versions. Pre-shredded cheeses often contain anti-caking agents like cornstarch, which can make the sauce grainy.

    Selecting High-Quality Fettuccine

    Choose a pasta made from 100% durum wheat semolina for the best al dente texture. High-quality pasta holds its shape better and provides a better surface for the sauce to cling to.

    The Importance of Fresh Lemons

    Freshly squeezed lemon juice has a vibrant acidity that bottled juice cannot replicate. The fresh zest adds a layer of essential oils that provides a floral aroma to the finished dish.

    Optimizing the Sauce Texture

    Creating a Stable Emulsion

    Emulsification happens when fats and liquids are bound together. Whisking in cold butter one tablespoon at a time into the simmering cream creates a stable, glossy emulsion that won’t separate.

    Balancing the Lemon Acidity

    If the sauce feels too sharp, add an extra tablespoon of butter or a splash more cream. The fat helps mellow the acidity of the lemon juice while preserving the bright flavor.

    Preventing Cream Curdling

    Avoid boiling the sauce violently once the cream and lemon juice are added. Keep the sauce at a gentle simmer to prevent the proteins in the cream from separating due to high heat and acid.

    Integrating the Parmesan Cheese

    Stir the parmesan in slowly over low heat. Adding it too quickly or at too high a temperature can cause the cheese to clump rather than dissolve into the sauce.

    Shrimp Searing Techniques

    Achieving the Golden-Brown Crust

    The key to a professional sear is the Maillard reaction, which requires high heat and dry surfaces. Ensure the skillet is shimmering with oil before adding the shrimp to prevent sticking.

    Avoiding Overcrowding the Pan

    Adding too many shrimp at once drops the pan temperature, causing the shrimp to steam in their own juices. Work in batches to ensure each piece has enough space to sear properly.

    Timing the Sear for Tenderness

    Shrimp cook extremely fast and can become rubbery if left too long. Remove them from the heat the moment they turn opaque and form a C-shape, rather than a tight O-shape.

    The Importance of Dry Shrimp

    Surface moisture creates steam, which prevents browning. Use paper towels to pat every shrimp completely dry before seasoning them with salt and pepper.

    Customizing the Flavor Profile

    Adding Fresh Leafy Greens

    Fresh baby spinach or chopped kale can be stirred in during the final step. The residual heat from the pasta will wilt the greens perfectly without overcooking them.

    Incorporating Red Pepper Flakes

    For a spicy variation, add a pinch of crushed red pepper flakes to the butter when sautéing the garlic. This infuses the entire sauce with a subtle, warming heat.

    Swapping Pasta Shapes

    While fettuccine is traditional, linguine or spaghetti work equally well. For a heartier version, use penne or rigatoni, which capture the sauce inside the tubes.

    Using Lighter Cream Alternatives

    You can substitute heavy cream with half-and-half for a lighter sauce, though it will be less thick. For a dairy-free option, use full-fat coconut milk or a cashew-based cream.

    Preservation and Reheating

    Cold Storage Best Practices

    Store leftover pasta in an airtight glass container in the refrigerator for up to two days. Keep the shrimp and pasta together so the noodles can absorb the remaining sauce.

    Proper Stovetop Reheating

    Reheat the pasta in a skillet over low to medium heat. Add a splash of water or vegetable broth to loosen the sauce and restore its original creamy consistency.

    Why Freezer Storage Fails

    Freezing is not recommended for cream-based seafood dishes. The emulsion in the sauce will likely break upon thawing, and the shrimp will lose their snap and become spongy.

    Common Cooking Issues

    Fixing a Thin or Watery Sauce

    If the sauce is too thin, simmer it for an extra minute before adding the pasta. Alternatively, stir in a small amount of additional parmesan cheese to thicken the consistency.

    Managing Burnt Garlic

    Garlic burns quickly and becomes bitter. If the garlic turns dark brown, it is best to wipe the pan and start the sauce base over to avoid ruining the flavor of the dish.

    Correcting Over-Salted Pasta

    If the sauce is too salty, add a squeeze of extra lemon juice or a tablespoon of unsalted butter. The acid and fat help neutralize the perception of salt on the palate.

    Preventing Rubbery Seafood

    The most common cause of rubbery shrimp is overcooking during the initial sear. Remember that the shrimp will cook further when they are tossed back into the hot pasta at the end.

    Frequently Asked Questions

    Can I use frozen shrimp?

    Yes, you can use frozen shrimp. Ensure they are completely thawed in the refrigerator or under cold running water and patted dry before cooking.

    What is the best substitute for heavy cream?

    Half-and-half is the closest substitute, though you may need to simmer the sauce slightly longer to achieve the same thickness.

    Can I make this without butter?

    You can use olive oil, but the sauce will lack the velvety richness and glossy finish that butter provides through emulsification.

    How do I store leftover pasta?

    Place it in an airtight container and refrigerate for up to 48 hours. Always reheat on a stovetop rather than in a microwave to maintain shrimp texture.

    Which lemon is best for zest?

    Use organic, conventional lemons with a bright yellow, smooth skin. Avoid lemons with thick, bumpy skins as they can be more difficult to zest finely.

    Print
    clock clock iconcutlery cutlery iconflag flag iconfolder folder iconinstagram instagram iconpinterest pinterest iconfacebook facebook iconprint print iconsquares squares iconheart heart iconheart solid heart solid icon
    Creamy Lemon Garlic Butter Shrimp Pasta

    Creamy Lemon Garlic Shrimp Pasta Guide


    5 Stars 4 Stars 3 Stars 2 Stars 1 Star

    No reviews

    • Author: imageuploader
    • Total Time: 30 minutes
    • Yield: 4 servings 1x
    • Diet: General

    Description

    Create a restaurant-worthy Lemon Garlic Shrimp Pasta in just 30 minutes. This recipe features al dente fettuccine in a glossy, creamy lemon butter sauce with perfectly seared shrimp, fresh parsley, and parmesan. An elegant and easy weeknight dinner.


    Ingredients

    Scale
    • 12 oz Fettuccine (approx 340g)
    • 1 lb Large Shrimp (peeled and deveined (approx 450g))
    • 2 tbsp Extra Virgin Olive Oil (30ml)
    • 6 tbsp Unsalted Butter (divided (85g))
    • 4 cloves Garlic (finely minced)
    • 1/4 cup Vegetable Broth (60ml)
    • 1/2 cup Heavy Cream (120ml)
    • 1 Large Lemon (juiced and zested)
    • 1/4 cup Fresh Parsley (finely chopped (15g))
    • 1/2 cup Parmesan Cheese (freshly grated (50g), plus more for garnish)
    • Kosher Salt and Freshly Cracked Black Pepper (to taste)

    Instructions

    1. Step 1: Cook fettuccine in heavily salted water until al dente. Reserve 1 cup of pasta water before draining.
    2. Step 2: Pat shrimp dry and season with salt and pepper. Heat olive oil in a large skillet over medium-high heat. Sear shrimp for 1-2 minutes per side until pink with golden-brown edges. Remove and set aside.
    3. Step 3: Reduce heat to medium, add 2 tbsp butter. Add minced garlic and cook until fragrant (30 seconds). Deglaze with vegetable broth, scraping the pan, and let it reduce by half.
    4. Step 4: Stir in heavy cream, lemon juice, and zest. Bring to a simmer. Whisk in the remaining 4 tbsp of butter one piece at a time. Stir in the parmesan cheese until melted. Season with salt and pepper.
    5. Step 5: Add the drained pasta to the sauce and toss. Use reserved pasta water to adjust consistency if needed. Return shrimp to the pan with the fresh parsley. Toss to combine. Serve immediately, garnished with more parmesan and a lemon wedge.

    Notes

    Don’t Overcook the Shrimp: They cook very quickly and will heat up again in the final step. The Power of Pasta Water: This starchy water is the secret to a smooth, emulsified sauce. Fresh is Best: Use fresh lemon juice, garlic, and parsley for the most vibrant flavor.

    • Prep Time: 10 minutes
    • Cook Time: 20 minutes
    • Category: Dinner
    • Method: Stovetop
    • Cuisine: Italian-American

    Nutrition

    • Serving Size: 1 serving
    • Calories: 750 kcal
    • Sugar: 6 g
    • Sodium: 820 mg
    • Fat: 35 g
    • Saturated Fat: 18 g
    • Unsaturated Fat: 15 g
    • Trans Fat: 0 g
    • Carbohydrates: 70 g
    • Fiber: 4 g
    • Protein: 35 g
    • Cholesterol: 155 mg
  • Zesty Chipotle Lime Shrimp Bowls: A Quick Weeknight Dinner

    Zesty Chipotle Lime Shrimp Bowls: A Quick Weeknight Dinner

    This vibrant meal combines smoky chipotle peppers and fresh lime juice for a balanced, nutrient-dense dinner. It is designed for efficiency, allowing you to prepare a complete seafood bowl in just 30 minutes.

    Recipe image

    List of ingredients

    • 2 tablespoons olive oil – provides a rich base; substitute with avocado oil for higher heat cooking.
    • 1 minced chipotle pepper – adds smoky heat; use smoked paprika for a milder version.
    • 1 tablespoon adobo sauce – deepens the smoky flavor; replace with lime juice if unavailable.
    • 3 cloves garlic, minced – provides aromatic depth; garlic powder is an acceptable alternative.
    • 1 tablespoon lime juice – adds essential acidity; fresh lime is highly recommended.
    • 1 teaspoon ground cumin – adds an earthy tone; coriander can be used as a substitute.
    • 1 teaspoon chili powder – contributes warmth and color; use cayenne for more intensity.
    • Salt and black pepper, to taste – essential for balancing all flavors.
    • 1 pound shrimp, peeled and deveined – the primary protein; can be replaced with chicken or firm tofu.
    • 2 cups cooked rice – serves as the base; brown rice or cauliflower rice are healthy alternatives.
    • 1 cup black beans, drained and rinsed – adds fiber and plant-based protein.
    • 1 cup corn kernels – adds sweetness; frozen corn is a convenient option.
    • 1/4 cup chopped cilantro – adds a fresh herbal finish; parsley or green onions work as well.
    • 1/2 cup sour cream – provides a cooling element; plain Greek yogurt is a healthier swap.
    • 1 sliced avocado – adds creamy texture and healthy fats.
    • Lime wedges – used for final garnishing to brighten the dish.

    step-by-step instructions

    1. Prepare the marinade: In a medium bowl, whisk together the olive oil, minced chipotle pepper, adobo sauce, minced garlic, lime juice, ground cumin, chili powder, salt, and black pepper until the mixture is smooth.
    2. Marinate the shrimp: Add the peeled and deveined shrimp to the marinade and toss until every piece is thoroughly coated. Cover the bowl and let it sit at room temperature for 10 minutes to absorb the flavors.
    3. Cook the protein: Heat a large skillet over medium-high heat with a small amount of olive oil. Add the shrimp in a single layer and cook for 2-3 minutes per side until they are pink, opaque, and slightly charred.
    4. Warm the base ingredients: In the same skillet used for the shrimp, add the cooked rice, black beans, and corn. Stir occasionally for 3-5 minutes until the mixture is heated through and the rice is fluffy.
    5. Assemble the bowls: Divide the warm rice, bean, and corn mixture evenly among four serving bowls. Artfully arrange the cooked chipotle shrimp on top of the base.
    6. Add final garnishes: Top each bowl with sliced avocado, a sprinkle of chopped cilantro, and a dollop of sour cream or Greek yogurt. Serve immediately with lime wedges on the side for extra zest.

    Professional Cooking Tips

    Maintain Optimal Marination Time

    Marinate the shrimp for at least 10 minutes to ensure the flavors penetrate the protein. However, do not exceed 30 minutes, as the acidity in the lime juice can begin to break down the shrimp texture, making it mushy.

    Ensure a High-Heat Sear

    Heat your skillet until the oil is shimmering before adding the shrimp. Cooking in a single layer prevents overcrowding, which ensures the shrimp sear and char rather than steaming in their own juices.

    Select High-Quality Shrimp

    Choose shrimp that are firm and translucent with a mild sea-salt scent. If using frozen shrimp, thaw them completely in the refrigerator and pat them dry before marinating to prevent the marinade from becoming diluted.

    Prioritize Fresh Aromatics

    Use freshly minced garlic and squeezed lime juice rather than bottled versions. Fresh aromatics contain volatile oils that provide a significantly more vibrant and pungent flavor profile to the final dish.

    Ingredient Substitutions

    Alternative Protein Choices

    For a different protein, use skinless chicken breast or extra-firm tofu. If using chicken, ensure it reaches an internal temperature of 165°F. For tofu, press it to remove excess water before marinating and sautéing.

    Low-Carb Base Options

    Replace white or brown rice with cauliflower rice for a lower-calorie, grain-free alternative. Sauté the cauliflower rice briefly in the skillet with the beans and corn to maintain a consistent texture.

    Adjusting the Heat Level

    To reduce the spice, replace the minced chipotle pepper with smoked paprika and omit the adobo sauce. To increase the heat, add a pinch of cayenne pepper or finely diced fresh jalapeños to the marinade.

    Healthier Creamy Toppings

    Swap the traditional sour cream for plain Greek yogurt to increase the protein content and add a tangier flavor. For a dairy-free version, use a dollop of cashew cream or an extra slice of avocado.

    Creative Flavor Variations

    Adding Garden Vegetables

    Incorporate diced red bell peppers or shredded carrots into the rice mixture for additional crunch and nutrition. These vegetables can be sautéed along with the corn and black beans.

    Switching the Grain Base

    Use quinoa instead of rice to add a nuttier flavor and a complete plant-based protein source. Quinoa absorbs the pan juices well, making it an excellent vehicle for the chipotle flavors.

    Enhancing the Spice Profile

    Toss in a teaspoon of honey or maple syrup to the marinade for a sweet-and-spicy contrast. This caramelizes slightly during the cooking process, adding a deeper complexity to the shrimp.

    Serving Suggestions

    Pairing with Side Dishes

    Serve these bowls with a side of creamy guacamole or crispy corn tortilla chips for added texture. A zesty cabbage slaw with lime and cilantro also provides a refreshing crunch that balances the smoky shrimp.

    Complementary Non-Alcoholic Drinks

    Pair this meal with sparkling lime water or a chilled hibiscus tea. These beverages offer a tart, refreshing quality that cuts through the richness of the avocado and sour cream.

    Light Dessert Pairings

    Finish the meal with a light lime sorbet or fresh mango slices. The citrus and tropical notes cleanse the palate after the bold, spicy flavors of the chipotle marinade.

    Storage and Reheating

    Refrigeration Guidelines

    Store the shrimp, rice, and vegetable mixture in separate airtight containers to maintain quality. When stored this way, the components will remain fresh in the refrigerator for up to 3 days.

    Freezing Instructions

    Freeze the cooked shrimp and rice in separate freezer-safe bags for up to 3 months. Thaw them in the refrigerator overnight before reheating to prevent the shrimp from becoming rubbery.

    Best Reheating Methods

    Warm the rice, beans, and corn in a microwave or skillet until heated through. Reheat the shrimp gently on medium heat for 1-2 minutes to avoid overcooking them.

    Meal Prep Strategies

    Prepping the Marinade

    You can whisk the chipotle lime marinade up to 24 hours in advance and store it in a sealed jar. This allows the spices to meld, creating a more cohesive flavor when you finally add the shrimp.

    Advance Grain Preparation

    Cook a large batch of rice, black beans, and corn at the start of the week. Store them together in a container so you only need to heat the mixture in the skillet before assembling the bowls.

    Efficient Weekly Assembly

    For a structured meal prep, divide the base mixture into four containers. Store the marinated shrimp separately and cook them fresh each day to ensure the best texture and flavor.

    Troubleshooting Common Issues

    Preventing Tough Shrimp

    Tough shrimp are usually the result of overcooking. Stick to the 2-3 minute per side rule and remove them from the heat the moment they turn opaque and form a C-shape.

    Improving Bland Rice

    If the rice feels tasteless, stir in a teaspoon of lime juice and a pinch of salt while warming it in the skillet. This aligns the flavor of the base with the zesty profile of the shrimp.

    Managing Excess Moisture

    If the bowl becomes too watery, ensure you drain and rinse the canned black beans thoroughly. Additionally, pat the shrimp dry before adding them to the marinade to prevent excess liquid in the pan.

    Frequently Asked Questions

    How do I select the best shrimp for this dish?

    Look for shrimp that are firm, translucent, and smell like the ocean. Avoid any shrimp with dark spots or a strong fishy odor, as these are signs of spoilage.

    What is the best way to store leftover bowl components?

    Keep the shrimp, rice, and vegetables in separate airtight containers in the fridge. This prevents the rice from absorbing too much moisture and keeps the shrimp texture intact.

    Can I freeze any components of the bowl?

    Yes, you can freeze the cooked rice and the shrimp separately for up to 3 months. Always thaw them in the refrigerator before reheating to preserve the best quality.

    What should I do if my shrimp become tough while cooking?

    If shrimp become tough, they have likely been cooked too long. In the future, use a timer and remove them from the pan as soon as they lose their translucency.

    Is this recipe customizable for different dietary needs?

    Yes, this recipe is highly adaptable. Use tofu for a vegetarian version, cauliflower rice for a low-carb diet, and Greek yogurt for a higher-protein, dairy-based topping.

    Print
    clock clock iconcutlery cutlery iconflag flag iconfolder folder iconinstagram instagram iconpinterest pinterest iconfacebook facebook iconprint print iconsquares squares iconheart heart iconheart solid heart solid icon
    Chipotle Lime Shrimp Bowl: Quick, Zesty Weeknight Delight

    Zesty Chipotle Lime Shrimp Bowls: A Quick Weeknight Dinner


    5 Stars 4 Stars 3 Stars 2 Stars 1 Star

    No reviews

    • Author: imageuploader
    • Total Time: 30 minutes
    • Yield: 4 bowls 1x
    • Diet: General

    Description

    This Chipotle Lime Shrimp Bowl is a quick, customizable dinner that bursts with flavor, making it perfect for busy weeknights.


    Ingredients

    Scale
    • 2 tablespoons olive oil
    • 1 minced chipotle pepper
    • 1 tablespoon adobo sauce
    • 3 cloves garlic
    • 1 tablespoon lime juice
    • 1 teaspoon ground cumin
    • 1 teaspoon chili powder
    • salt & black pepper to taste
    • 1 pound shrimp
    • 2 cups cooked rice
    • 1 cup black beans
    • 1 cup corn kernels
    • 1/4 cup chopped cilantro
    • 1/2 cup sour cream
    • sliced avocado
    • lime wedges

    Instructions

    1. Prepare Marinade: In a medium bowl, whisk together 2 tablespoons of olive oil, 1 minced chipotle pepper, 1 tablespoon of adobo sauce, 3 cloves of minced garlic, the juice of 1 lime, 1 teaspoon of ground cumin, 1 teaspoon of chili powder, and a pinch of salt and black pepper.
    2. Marinate Shrimp: Add 1 pound of peeled and deveined shrimp to the marinade, ensuring each piece is well coated. Cover the bowl with plastic wrap or a lid and let it rest at room temperature for about 10 minutes.
    3. Cook Shrimp: Heat a large skillet or frying pan over medium-high heat and drizzle in a touch of olive oil. Once hot, carefully add the marinated shrimp in a single layer. Cook for 2-3 minutes on each side until the shrimp are pink, opaque, and slightly charred.
    4. Warm Sides: In the same skillet, add 2 cups of cooked rice, 1 cup of drained and rinsed black beans, and 1 cup of corn kernels. Stir occasionally to warm everything through, about 3-5 minutes.
    5. Assemble Bowls: Divide the warmed rice, black beans, and corn mixture among serving bowls. In each bowl, artfully arrange the cooked shrimp.
    6. Garnish: Top each bowl with sliced avocado, a sprinkle of chopped cilantro for freshness, and a dollop of sour cream or Greek yogurt for creaminess. Serve with lime wedges on the side.

    Notes

    Ensure to marinate the shrimp for at least 10 minutes to absorb the chipotle lime flavors, but it should not exceed 30 minutes to maintain tenderness. Use fresh lime juice and garlic for best flavor.

    • Prep Time: 10 minutes
    • Cook Time: 20 minutes
    • Category: Dinner
    • Method: Sautéing
    • Cuisine: Mexican

    Nutrition

    • Serving Size: 1 bowl
    • Calories: 550 kcal
    • Sugar: 5 g
    • Sodium: 750 mg
    • Fat: 20 g
    • Saturated Fat: 4 g
    • Unsaturated Fat: 14 g
    • Trans Fat: 0 g
    • Carbohydrates: 65 g
    • Fiber: 10 g
    • Protein: 30 g
    • Cholesterol: 200 mg
  • Quick Shrimp Rice Bowls with Spicy Mayo

    Quick Shrimp Rice Bowls with Spicy Mayo

    These shrimp rice bowls are a fast and nutritious option for busy evenings. Combining seasoned seafood with a creamy sauce, they offer a balanced meal in under 30 minutes.

    Recipe image

    List of ingredients

    • 1 lb medium shrimp, peeled and deveined – pat dry for better searing.
    • 1 tablespoon olive oil – used for sautéing the shrimp.
    • 1 teaspoon smoked paprika – adds a deep, woody flavor.
    • 1/2 teaspoon garlic powder – provides consistent seasoning.
    • 1/2 teaspoon onion powder – enhances the savory profile.
    • 1/2 teaspoon salt – basic seasoning.
    • 1/4 teaspoon black pepper – adds a subtle heat.
    • 1/4 teaspoon cayenne pepper (optional) – for extra heat.
    • 1/2 cup mayonnaise – the creamy base for the sauce.
    • 1-2 tablespoons sriracha – adjusts the spice level of the mayo.
    • 1 teaspoon lime juice – adds acidity to balance the richness.
    • 2 cups cooked jasmine or brown rice – the hearty base of the bowl.
    • 1 tablespoon rice vinegar (optional) – for seasoning the rice.
    • 1 cup shredded carrots – adds color and crunch.
    • 1 avocado, sliced – provides creamy texture.
    • 1 cup cucumber slices – adds a refreshing element.
    • 2 green onions, chopped – used for garnish and flavor.
    • 2 tablespoons sesame seeds (optional) – for a nutty finish.
    • Soy sauce or tamari (optional) – for an extra umami drizzle.

    step-by-step instructions

    1. Prepare the Sauce: In a mixing bowl, combine mayonnaise, sriracha, and lime juice. Mix until well blended and adjust the sriracha based on your heat preference.
    2. Season the Shrimp: In a skillet over medium heat, add olive oil. Toss the shrimp with smoked paprika, garlic powder, onion powder, salt, black pepper, and cayenne pepper until evenly coated.
    3. Cook the Shrimp: Add the seasoned shrimp to the hot skillet. Cook for about 3–4 minutes per side until they turn pink and opaque.
    4. Assemble the Bowls: Place a generous portion of cooked rice into serving bowls. Top with the cooked shrimp, shredded carrots, avocado slices, cucumber slices, and chopped green onions.
    5. Final Garnish: Drizzle the spicy mayo over each bowl. Sprinkle with sesame seeds and serve with soy sauce or tamari on the side.

    Professional Cooking Tips

    Preventing Rubbery Shrimp

    Avoid overcooking the shrimp by monitoring them closely in the pan. They are done the moment they curl into a ‘C’ shape and turn opaque. Cooking them too long will make the texture tough and rubbery.

    Achieving a Better Sear

    Pat the shrimp completely dry with paper towels before adding the seasonings. Excess moisture creates steam in the pan, which prevents the shrimp from browning. A dry surface ensures a better crust and deeper flavor.

    Optimizing Rice Texture

    Rinse your jasmine or brown rice under cold water until the water runs clear before cooking. This removes excess surface starch and prevents the grains from sticking together. This results in fluffy, separate grains for your bowls.

    Balancing the Sauce Acidity

    Start with one teaspoon of lime juice in the spicy mayo and taste before adding more. The acidity helps cut through the fat of the mayonnaise and avocado. Adjust the lime or sriracha to balance the creaminess with zest.

    Managing Pan Temperature

    Ensure the olive oil is shimmering but not smoking before adding the shrimp. If the oil is too cold, the shrimp will absorb the fat and become greasy. If it is too hot, the spices may burn before the shrimp are cooked through.

    Customization and Substitutions

    Using Alternative Protein Sources

    You can replace shrimp with cubed firm tofu or salmon chunks using the same seasoning mix. For tofu, press out the excess water first to ensure it sears properly. Salmon requires slightly longer cooking times depending on the cube size.

    Swapping the Grain Base

    If you prefer a lower-carbohydrate option, replace the rice with quinoa or cauliflower rice. Quinoa adds more protein and a nuttier taste. Cauliflower rice can be steamed or sautéed quickly in the same pan used for the shrimp.

    Adding Sweet Elements

    Diced mango or pineapple chunks pair well with the spicy mayo and shrimp. These fruits add a natural sweetness that contrasts the heat of the sriracha. Place them alongside the cucumbers for a tropical twist.

    Modifying the Vegetable Mix

    Substitute shredded carrots with thinly sliced red cabbage or julienned bell peppers. Red cabbage provides a stronger crunch and a vibrant purple color. Bell peppers add a mild sweetness and additional vitamin C.

    Adjusting the Spice Level

    For a milder version, replace sriracha with a small amount of ketchup and a pinch of paprika. For those who want more heat, add chopped fresh jalapeños or a dash of gochujang to the mayo. Always taste the sauce before drizzling it over the bowls.

    Suggested Side Pairings

    Nutritious Legume Sides

    Steamed edamame seasoned with sea salt is a classic accompaniment. It provides extra plant-based protein and a different texture. Serve them in a small side bowl or mix them directly into the rice bowl.

    Warm Savory Soups

    A light miso soup helps balance the richness of the spicy mayo. Use a microbial-rennet based miso paste for a clean flavor profile. The warmth of the soup complements the cool temperature of the raw vegetables.

    Refreshing Seaweed Salads

    A chilled seaweed salad adds a salty, umami element to the meal. The contrast between the crisp seaweed and the tender shrimp enhances the overall dining experience. Use a light sesame oil dressing for the salad.

    Tangy Pickled Vegetables

    Include pickled radishes or pickled ginger on the side to provide a sharp contrast. The acetic acid in pickled vegetables cleanses the palate between bites. This makes the flavors of the shrimp and mayo stand out more.

    Hearty Garlic Noodles

    If you need a more filling meal, serve the bowls with a side of garlic noodles. Sauté noodles with minced garlic and a touch of vegetable broth. This adds a savory, comforting element to the fresh components of the bowl.

    Storage and Reheating Instructions

    Refrigerator Storage Guidelines

    Store the cooked shrimp and rice in airtight containers in the refrigerator. For the best quality, keep the spicy mayo and fresh vegetables in separate containers. This prevents the vegetables from wilting and the rice from becoming soggy.

    Freezing the Components

    Freeze the cooked shrimp and rice separately in freezer-safe bags or containers. They can be stored for up to three months. Do not freeze the fresh avocado, cucumber, or the mayo sauce, as their textures will change significantly.

    Microwave Reheating Method

    Heat the rice and shrimp on medium power in 30-second intervals. Stir occasionally and add a teaspoon of water to the rice to restore moisture. Add the cold vegetables and fresh sauce only after the shrimp and rice are hot.

    Oven Reheating Process

    Preheat your oven to 350°F (175°C). Place the shrimp and rice on a baking sheet and cover with foil to trap moisture. Heat for 10-15 minutes until warmed through before assembling with the fresh toppings.

    Stovetop Refreshing Technique

    Warm the shrimp in a skillet over medium heat with a small splash of water or vegetable broth. This gently heats the seafood without overcooking it. Serve immediately over freshly steamed or reheated rice.

    Troubleshooting Common Issues

    Solving Bland Flavor Profiles

    If the dish tastes bland, increase the amount of salt or add a drizzle of soy sauce. The shrimp rely on the dry rub for their base flavor. Ensure the seasonings are pressed into the shrimp before they hit the pan.

    Fixing Watery Vegetables

    If the cucumbers or carrots release too much water, pat them dry with a paper towel before adding them to the bowl. You can also lightly salt the cucumbers and let them sit for five minutes, then drain the excess liquid.

    Managing Sauce Consistency

    If the spicy mayo is too thick, stir in a few drops of lime juice or water until it reaches a drizzlable consistency. If it is too thin, add a tablespoon more of mayonnaise. The goal is a creamy sauce that holds its shape slightly.

    Preventing Rice Clumping

    If your refrigerated rice has become a hard block, sprinkle it with water before microwaving. Cover the bowl with a damp paper towel to create a steam effect. This softens the starches and makes the rice fluffy again.

    Frequently Asked Questions

    Can I use other proteins instead of shrimp?

    Yes, you can substitute chicken breast, tofu, or salmon. Ensure you cut them into bite-sized pieces and use the same seasoning blend for a consistent flavor profile.

    How spicy is the spicy mayo?

    The spice level is customizable based on the amount of sriracha you use. One tablespoon provides a mild kick, while two or more tablespoons create a significantly spicier sauce.

    What toppings can I add to my shrimp rice bowl?

    Beyond the recipe, you can add sliced radishes, fresh cilantro, shredded purple cabbage, or pickled ginger. These additions provide extra texture and a variety of fresh flavors.

    How long does it take to make Shrimp Rice Bowls with Spicy Mayo?

    The total time is approximately 25 minutes. This includes 10 minutes for preparation and 15 minutes for cooking the shrimp and assembling the bowls.

    Print
    clock clock iconcutlery cutlery iconflag flag iconfolder folder iconinstagram instagram iconpinterest pinterest iconfacebook facebook iconprint print iconsquares squares iconheart heart iconheart solid heart solid icon
    Shrimp Rice Bowls with Spicy Mayo

    Quick Shrimp Rice Bowls with Spicy Mayo


    5 Stars 4 Stars 3 Stars 2 Stars 1 Star

    No reviews

    • Author: imageuploader
    • Total Time: 25 minutes
    • Yield: 4 servings 1x
    • Diet: General

    Description

    Shrimp Rice Bowls with Spicy Mayo are a delectable solution for busy weeknights or casual get-togethers. This quick and satisfying meal features succulent shrimp seasoned to perfection, served over a bed of fragrant rice and drizzled with creamy spicy mayo.


    Ingredients

    Scale
    • 1 lb medium shrimp (peeled and deveined)
    • 2 cups cooked jasmine or brown rice
    • ½ cup mayonnaise
    • 12 tablespoons sriracha
    • 1 tablespoon olive oil
    • 1 teaspoon smoked paprika
    • ½ teaspoon garlic powder
    • ½ teaspoon onion powder
    • ½ teaspoon salt
    • ¼ teaspoon black pepper
    • ¼ teaspoon cayenne pepper
    • 1 teaspoon lime juice
    • 1 cup shredded carrots
    • 1 avocado, sliced
    • 1 cup cucumber slices
    • 2 green onions, chopped

    Instructions

    1. Prepare the Spicy Mayo: In a mixing bowl, combine mayonnaise, sriracha, and lime juice.
    2. Season the Shrimp: Season shrimp with smoked paprika, garlic powder, onion powder, salt, black pepper, and cayenne pepper.
    3. Cook the Shrimp: Heat olive oil in a skillet over medium heat. Cook seasoned shrimp for about 3–4 minutes on each side until pink and opaque.
    4. Assemble Your Bowls: In serving bowls, layer cooked rice and top with shrimp, shredded carrots, avocado slices, cucumber, and drizzle with spicy mayo.

    Notes

    Customizable with toppings like sesame seeds or soy sauce. Store in an airtight container for 2-3 days.

    • Prep Time: 10 minutes
    • Cook Time: 15 minutes
    • Category: Main
    • Method: Stovetop
    • Cuisine: Asian

    Nutrition

    • Serving Size: 1 bowl (approximately 400g)
    • Calories: 550 kcal
    • Sugar: 2 g
    • Sodium: 850 mg
    • Fat: 28 g
    • Saturated Fat: 4 g
    • Unsaturated Fat: 24 g
    • Trans Fat: 0 g
    • Carbohydrates: 60 g
    • Fiber: 5 g
    • Protein: 20 g
    • Cholesterol: 160 mg
  • Succulent Slow Cooker Lemon Herb Chicken and Rice

    Succulent Slow Cooker Lemon Herb Chicken and Rice

    This slow cooker lemon herb chicken and rice provides a simple way to prepare a nutritious meal with minimal active effort. It is designed for those who need a set-it-and-forget-it dinner that maintains high protein and fresh citrus flavors.

    Recipe image

    List of ingredients

    • 4 pieces chicken breasts (boneless and skinless) – provides lean protein.
    • 1 lemon (juiced and zested) – adds essential acidity and brightness.
    • 2 tbsp olive oil – ensures the chicken remains moist.
    • 1 tsp garlic powder – adds a concentrated savory element.
    • 1 tsp dried oregano – provides a Mediterranean herbal note.
    • 1 tsp dried thyme – adds an earthy depth to the sauce.
    • salt and pepper (to taste) – used for basic seasoning.
    • 2 cups chicken broth – acts as the cooking medium for the rice.
    • 1 cup long-grain rice – the primary starch that absorbs the flavors.
    • fresh herbs (for garnish, optional) – enhances the visual presentation.

    step-by-step instructions

    1. Prepare the Marinade: In a small bowl, whisk together the lemon juice, lemon zest, olive oil, garlic powder, oregano, thyme, salt, and pepper. Mix until the spices are well distributed in the oil and juice.
    2. Season the Chicken: Place the chicken breasts in the bottom of the slow cooker. Pour the lemon herb mixture over the chicken and rub it in to ensure complete coverage on all sides.
    3. Add Rice and Liquid: Pour the chicken broth into the slow cooker around the chicken. Add the long-grain rice, pouring it in an even layer.
    4. Distribute Ingredients: Gently stir the rice into the broth. Avoid over-mixing; just ensure the rice is submerged and not clumped together.
    5. Slow Cook: Cover the slow cooker with the lid. Cook on the low setting for 360 minutes or on the high setting for 180 minutes.
    6. Final Touch: Remove the lid and use a fork to gently fluff the rice. Let the dish rest for a few minutes before serving to allow the remaining liquid to settle.

    Cooking Performance Tips

    Coat Chicken Thoroughly to Prevent Dry Spots

    Rubbing the lemon herb marinade directly into the chicken ensures that the seasoning penetrates the meat. This prevents the breasts from tasting bland in the center and creates a flavor barrier that helps retain moisture. Use your hands or a brush to cover every inch of the chicken surface.

    Avoid Over-stirring the Rice During Cooking

    Once you have distributed the rice in the broth, leave it alone until the cooking cycle is complete. Stirring the rice while it cooks can release too much starch, leading to a gummy or sticky texture. Only fluff the rice with a fork at the very end of the process.

    Use a Tight-Fitting Lid to Retain Moisture

    Slow cookers rely on trapped steam to cook the rice and tenderize the meat. If the lid does not seal properly, the liquid will evaporate too quickly, leaving the rice undercooked or burnt at the edges. Check that your lid is seated correctly before starting the timer.

    Let the Dish Rest After Cooking

    Allowing the chicken and rice to sit for 5 to 10 minutes after turning off the heat helps the rice finish absorbing any excess liquid. This resting period also allows the juices in the chicken to redistribute, resulting in a more tender bite. Gently fluffing after this rest ensures a light texture.

    Recommended Ingredient Substitutions

    Swap Chicken Breasts for Boneless Skinless Thighs

    Using chicken thighs instead of breasts can result in a more succulent texture because thighs have a higher fat content. They are more resistant to overcooking in a slow cooker, which prevents the meat from becoming stringy. Ensure the thighs are skinless to keep the dish lean and the rice texture clean.

    Replace Long-Grain White Rice with Quinoa

    Quinoa is an excellent alternative for those seeking a higher protein and fiber content. Since quinoa typically cooks faster than long-grain rice, you may need to reduce the cooking time by 30 to 60 minutes. Adjust the broth ratio slightly if the quinoa appears too dry upon completion.

    Use Avocado Oil for a Higher Smoke Point

    While olive oil provides a classic flavor, avocado oil is a great substitute for those who prefer a neutral taste. Avocado oil is stable and healthy, ensuring that the lemon and herbs remain the dominant flavors of the dish. Use the same measurement of two tablespoons for a consistent result.

    Substitute Garlic Powder with Freshly Minced Garlic

    Fresh garlic provides a sharper, more pungent flavor than the powdered version. Use three to four cloves of minced garlic to replace one teaspoon of garlic powder. Stir the fresh garlic into the oil and lemon juice mixture before pouring it over the chicken.

    Flavor and Nutrient Variations

    Incorporate Frozen Peas and Diced Carrots

    Adding frozen peas or diced carrots introduces color and essential vitamins to the meal. To prevent the vegetables from becoming mushy, stir them in during the last hour of the cooking process. This ensures they maintain a slight crunch and a vibrant appearance.

    Add Red Pepper Flakes for Spicy Notes

    For a zesty kick, add a half-teaspoon of crushed red pepper flakes to the lemon herb marinade. The heat from the pepper complements the acidity of the lemon and adds complexity to the savory chicken. Adjust the amount based on your personal heat tolerance.

    Substitute Chicken Broth with Coconut Milk

    Replacing the chicken broth with full-fat coconut milk creates a creamy, tropical version of this dish. This variation pairs exceptionally well with the lemon zest and adds a rich, velvety texture to the rice. Use the same two-cup measurement to maintain the liquid ratio.

    Use Fresh Rosemary instead of Dried Thyme

    Fresh rosemary offers a piney, aromatic quality that elevates the overall scent of the meal. Finely chop one tablespoon of fresh rosemary needles and mix them into the marinade. This change gives the dish a more rustic, gourmet flavor profile.

    Serving and Pairing Suggestions

    Pair with Steamed Broccoli or Green Beans

    Steamed green vegetables provide a necessary crunch and a fresh contrast to the soft texture of the rice and chicken. Broccoli or snap peas are ideal choices as they do not overpower the lemon notes. Lightly season them with salt and a squeeze of lemon juice for cohesion.

    Serve with a Lemon-Vinaigrette Mixed Green Salad

    A crisp salad with a light vinaigrette cleanses the palate between bites of the savory chicken. Use a mix of arugula and spinach topped with cucumbers and cherry tomatoes. The acidity of the salad dressing mirrors the lemon in the main dish, creating a balanced meal.

    Accompany with Toasted Garlic Bread

    Toasted garlic bread is perfect for scooping up any remaining lemon-herb broth at the bottom of the plate. Use a whole-grain baguette brushed with garlic butter and toasted until golden brown. This adds a satisfying carbohydrate element and a savory aroma.

    Pair with Sparkling Water or Iced Tea

    A refreshing beverage like sparkling water with a lime wedge or a glass of unsweetened iced tea complements the bright citrus flavors. These options provide hydration without adding heavy sugars that could mask the delicate herbs. Avoid heavy creams or sugary drinks to keep the meal light.

    Storage and Reheating Guidelines

    Refrigerate in Airtight Containers for Three Days

    Store any leftovers in a sealed glass or plastic container to prevent the rice from drying out. Keep the chicken and rice together so the meat stays moist from the surrounding starch. The meal will maintain its quality and flavor for up to 72 hours when chilled.

    Freeze in Vacuum-Sealed Bags for Three Months

    For long-term storage, portion the meal into vacuum-sealed bags or freezer-safe containers. Remove as much air as possible to prevent freezer burn on the chicken breasts. Note that the rice texture may change slightly upon thawing, becoming softer than originally cooked.

    Use Extra Broth when Reheating in the Microwave

    Rice tends to absorb remaining moisture during storage, which can make it seem dry when reheated. Add one to two tablespoons of chicken broth or water to the dish before microwaving. Cover the container with a damp paper towel to steam the food and restore its original texture.

    Troubleshooting Common Results

    Resolve Undercooked Rice Grains

    If the rice is still firm after the cooking time, add a splash of warm chicken broth and cook on high for another 30 minutes. Ensure the lid is sealed tightly to create the necessary steam. Avoid stirring too aggressively, as this can break the grains.

    Fix Overcooked or Mushy Rice Texture

    Mushy rice usually occurs due to too much liquid or excessive stirring. If this happens, you can try to save the dish by letting it sit uncovered for 10 minutes to allow some moisture to evaporate. In the future, ensure you are using a true long-grain rice, which holds its shape better.

    Correct Bland Flavor Profiles

    If the dish lacks punch, stir in an additional teaspoon of lemon zest or a pinch of salt right before serving. Fresh lemon juice added at the end can brighten the flavors that may have dimmed during the slow cooking process. A sprinkle of fresh parsley can also add a needed fresh note.

    Frequently Asked Questions

    How long can I store the leftovers?

    You can safely store this chicken and rice in the refrigerator for up to three days. Ensure it is placed in an airtight container within two hours of cooking to maintain food safety standards.

    Can I use brown rice instead of white rice?

    Yes, you can use brown rice, but it requires more liquid and a longer cooking time. Increase the chicken broth by half a cup and ensure you cook on the low setting for the full six hours, as brown rice takes longer to soften.

    Is this recipe suitable for a gluten-free diet?

    This recipe is naturally gluten-free as long as the chicken broth you use is certified gluten-free. Always check the labels on your store-bought broth and spices to ensure there are no hidden gluten additives.

    Can I add other vegetables to the pot?

    Yes, you can add root vegetables like diced carrots or parsnips at the beginning of the cooking process. For softer vegetables like peas or spinach, add them during the final hour of cooking to prevent them from overcooking.

    Print
    clock clock iconcutlery cutlery iconflag flag iconfolder folder iconinstagram instagram iconpinterest pinterest iconfacebook facebook iconprint print iconsquares squares iconheart heart iconheart solid heart solid icon
    Succulent Slow Cooker Lemon Herb Chicken Rice for Busy Nights

    Succulent Slow Cooker Lemon Herb Chicken and Rice


    5 Stars 4 Stars 3 Stars 2 Stars 1 Star

    No reviews

    • Author: imageuploader
    • Total Time: 6 hours 15 minutes
    • Yield: 4 servings 1x
    • Diet: General

    Description

    Enjoy Slow Cooker Lemon Herb Chicken Rice: Easy Healthy Crock Pot Meal, a vibrant dish for busy weeknights.


    Ingredients

    Scale
    • 4 pieces chicken breasts (boneless and skinless)
    • 1 lemon (juiced and zested)
    • 2 tbsp olive oil
    • 1 tsp garlic powder
    • 1 tsp dried oregano
    • 1 tsp dried thyme
    • salt and pepper (to taste)
    • 2 cups chicken broth
    • 1 cup long-grain rice
    • fresh herbs (for garnish, optional)

    Instructions

    1. Step 1: In a small bowl, combine the lemon juice, zest, olive oil, garlic powder, oregano, thyme, salt, and pepper.
    2. Step 2: Place your chicken breasts in the slow cooker, then pour the lemon herb mixture over them.
    3. Step 3: Pour in the chicken broth and add the long-grain rice to the slow cooker.
    4. Step 4: Gently mix the ingredients to ensure that the rice is evenly distributed.
    5. Step 5: Secure the lid on your slow cooker. Cook on low for 360 minutes or high for 180 minutes.
    6. Step 6: Once cooked, remove the lid and fluff the rice gently with a fork.

    Notes

    Ensure each chicken breast is well-coated for maximum flavor. Adjust seasonings based on personal preference.

    • Prep Time: 15 minutes
    • Cook Time: 6 hours
    • Category: Healthy Recipes
    • Method: Slow Cooking
    • Cuisine: American

    Nutrition

    • Serving Size: 1 serving
    • Calories: 450 kcal
    • Sugar: 1 g
    • Sodium: 600 mg
    • Fat: 12 g
    • Saturated Fat: 2 g
    • Unsaturated Fat: 10 g
    • Trans Fat: 0 g
    • Carbohydrates: 50 g
    • Fiber: 2 g
    • Protein: 40 g
    • Cholesterol: 100 mg
  • Viral Ground Beef Bowls: High-Protein Meal Prep with Rice and Veggies

    Viral Ground Beef Bowls: High-Protein Meal Prep with Rice and Veggies

    These high-protein ground beef bowls are designed for efficient meal prep and balanced nutrition. They combine savory seasoned beef with fresh vegetables and a creamy sauce for a complete, satisfying meal.

    Recipe image

    List of ingredients

    • 1 lb lean ground beef (93% lean) – provides the protein base.
    • 1 cup cooked jasmine or brown rice – serves as the hearty foundation.
    • 1 1/2 cups shredded cabbage or slaw mix – adds crisp texture and fiber.
    • 1/2 cup shredded carrots – provides color and sweetness.
    • 2 eggs (fried or soft-boiled) – adds richness and extra protein.
    • 1 tbsp olive oil – used for cooking.
    • 3 tbsp soy sauce or tamari – adds umami and saltiness.
    • 1 tbsp brown sugar – balances the savory flavors.
    • 2 cloves garlic, minced – provides aromatic depth.
    • 1 tsp sesame oil – adds a toasted, nutty aroma.
    • 1/2 tsp chili flakes (optional) – introduces a mild heat.
    • 1/4 cup Greek yogurt or mayo – base for the creamy sauce.
    • 1 tbsp sriracha – provides spicy heat.
    • 1 tsp honey – adds a hint of sweetness to the sauce.
    • Juice of 1/2 lime – adds brightness and acidity.

    step-by-step instructions

    1. Cook the Rice: Prepare the jasmine or brown rice according to the package instructions until fluffy.
    2. Sauté the Beef: Heat sesame oil in a skillet over medium-high heat. Add the ground beef, minced garlic, soy sauce, brown sugar, and optional chili flakes, cooking until the beef is browned and well-coated in the sauce.
    3. Prepare the Vegetables: While the beef is cooking, shred the cabbage and carrots into thin strips.
    4. Whisk the Sauce: In a small mixing bowl, combine Greek yogurt or mayo, sriracha, honey, and lime juice until smooth.
    5. Cook the Eggs: Fry or soft-boil the eggs to your preferred level of doneness.
    6. Assemble the Bowls: Divide the cooked rice among four bowls, then top with the seasoned beef, shredded vegetables, and a cooked egg. Drizzle the spicy mayo sauce over the top and garnish with sesame seeds or green onions.

    Professional Cooking Tips for Better Results

    Brown the Beef Thoroughly for Maximum Flavor

    Allow the ground beef to sear without stirring too frequently. This creates caramelized edges and deepens the flavor through the Maillard reaction. Avoid crowding the pan to ensure the meat browns rather than steams.

    Undercook Rice Slightly for Meal Prep

    If you are prepping these bowls for the week, cook the rice until it is just tender. This prevents the grains from becoming mushy when reheated in the microwave. A slightly firmer grain holds up better against the sauces and beef juices.

    Maintain Vegetable Crispness

    Keep the shredded cabbage and carrots raw to provide a refreshing textural contrast. If you prefer cooked vegetables, sauté them separately and quickly over high heat. This preserves the bright color and prevents them from releasing too much water into the bowl.

    Emulsify the Sauce for Smoothness

    Whisk the Greek yogurt and lime juice thoroughly before adding the honey and sriracha. This ensures a consistent texture without streaks of oil or acidity. Using a small whisk or fork helps incorporate the honey properly.

    Prepare Components in Bulk

    Cook a larger batch of beef and rice to streamline your weekly routine. Store the protein and grains together, but keep the vegetables and sauce in separate containers. This prevents the fresh ingredients from wilting or the rice from becoming soggy.

    Flexible Ingredient Alternatives

    Substitute Grains for Different Nutrition

    Swap jasmine rice for quinoa to increase protein and fiber content. For a lower-carbohydrate option, use cauliflower rice. If you prefer a nuttier flavor, brown rice or farro are excellent alternatives that provide more chew.

    Use Alternative Lean Proteins

    Substitute ground beef with ground turkey or ground chicken for a lighter version. For a plant-based alternative, use crumbled tempeh or cooked lentils. Maintain the same seasoning proportions to keep the flavor profile consistent.

    Swap the Creamy Sauce Base

    If you cannot use Greek yogurt or mayo, try mashed avocado for a healthy fat alternative. Tahini mixed with lemon juice and sriracha also provides a creamy, nutty consistency. This keeps the bowl satisfying while adjusting the dietary profile.

    Replace the Sweeteners

    Use maple syrup or honey instead of brown sugar in the beef seasoning for a different depth of sweetness. For a sugar-free version, use a small amount of stevia or omit the sweetener entirely and increase the garlic. This adjusts the balance of the umami flavors.

    Adjust the Acidity Source

    If lime is unavailable, use lemon juice or a small splash of rice vinegar. These provide the necessary acidity to cut through the richness of the beef and yogurt. Ensure the amount remains similar to maintain the sauce balance.

    Creative Flavor Variations

    Create an Asian-Inspired Profile

    Stir in a tablespoon of hoisin sauce and freshly grated ginger while browning the beef. This adds a thick, sweet-savory glaze that mimics restaurant-style beef bowls. Finish the dish with toasted sesame seeds and sliced scallions.

    Develop a Tex-Mex Fusion Twist

    Season the beef with cumin, smoked paprika, and chili powder instead of soy sauce. Replace the cabbage and carrots with corn, black beans, and diced avocado. Use a lime-cilantro yogurt sauce to complete the flavor transition.

    Optimize for Low-Carb and Keto

    Eliminate the rice and brown sugar, using cauliflower rice as the base. Increase the proportion of cabbage and shredded carrots to add volume. Use a full-fat mayo base for the sauce and omit the honey.

    Adapt for Plant-Based Diets

    Use plant-based ground crumbles or sautéed mushrooms as the primary protein. Substitute the eggs with sliced tofu or roasted chickpeas for added texture. Use a vegan mayo or cashew cream for the spicy drizzle.

    Increase the Heat Level

    Incorporate Gochujang or sambal oelek into the beef seasoning for a deeper, more fermented spice. Add sliced fresh jalapeños or serrano peppers to the top of the assembled bowl. This provides a sharp kick that complements the cooling yogurt sauce.

    Storage and Reheating Guidelines

    Refrigeration for Weekly Prep

    Store the beef and rice in airtight containers for up to four days. Keep the shredded vegetables and the spicy mayo in separate small containers. This prevents the cabbage from losing its crunch and the rice from absorbing all the sauce.

    Freezing the Beef Mixture

    The cooked seasoned beef can be frozen for up to two months in a freezer-safe bag. Thaw the beef overnight in the refrigerator before reheating. Do not freeze the fresh vegetables or the yogurt sauce, as their textures will degrade.

    Reheating for Optimal Texture

    Microwave the beef and rice together for 1-2 minutes until heated through. Add a teaspoon of water to the rice before heating to restore moisture. Always add the fresh vegetables, egg, and sauce after the reheating process is complete.

    Maintaining Sauce Freshness

    Store the spicy mayo in a glass jar with a tight lid to prevent oxidation. Shake the jar before using to re-incorporate the ingredients. The sauce will stay fresh in the refrigerator for about five days.

    Common Cooking Mistakes and Fixes

    Preventing Dry or Crumbly Beef

    Avoid overcooking the meat beyond the point where it is browned. Remove the beef from the heat as soon as the pink color disappears and the sauce has thickened. Adding a splash of water or beef broth if the pan becomes too dry can restore moisture.

    Fixing Flat or Bland Flavor

    If the dish tastes dull, add a small squeeze of fresh lime juice or a pinch of salt at the end. Acidity brightens the other flavors and makes the umami notes of the soy sauce stand out. Seasoning in layers throughout the cooking process also prevents blandness.

    Avoiding Soggy Meal Prep Bowls

    Never add the sauce or fresh vegetables to the bowl before storing it in the fridge. The moisture from the vegetables and the acidity in the sauce break down the rice and cabbage. Assemble the components just before serving for the best experience.

    Managing Excessive Grease

    If the beef releases too much fat, carefully drain the excess oil from the pan before adding the soy sauce and brown sugar. This prevents the bowl from feeling heavy or greasy. Using 93% lean beef typically minimizes this issue.

    Frequently Asked Questions

    Are viral ground beef bowls healthy?

    Yes, these bowls are well-balanced when made with lean beef and a high volume of vegetables. They provide a combination of complex carbohydrates, lean protein, and essential vitamins. Controlling the portion of rice and the amount of sugar in the sauce further improves the nutritional profile.

    How much protein is in one bowl?

    A typical serving contains approximately 25 to 35 grams of protein. This amount comes primarily from the lean ground beef and the egg, with additional protein contributed by the Greek yogurt in the sauce. This makes it an effective meal for muscle recovery and satiety.

    Can these bowls be made without soy?

    Yes, replace the soy sauce or tamari with coconut aminos. Coconut aminos provide a similar salty and sweet flavor profile but are soy-free and typically lower in sodium. The rest of the recipe remains the same.

    What is the best rice to use for these bowls?

    Jasmine rice is recommended for its fragrance and soft texture, which complements the savory beef. Brown rice is a great alternative for those seeking more fiber and a nuttier taste. Cauliflower rice is the best choice for low-carb requirements.

    How do I keep the cabbage crunchy?

    Keep the cabbage raw and store it separately from the warm beef and rice. If you must store them together, place the cabbage on top of the rice and keep the beef in a separate compartment. Avoid mixing the cabbage into the hot beef until you are ready to eat.

    Are these bowls suitable for weight loss?

    These bowls can support weight loss when portioned carefully. By increasing the ratio of vegetables to rice and using Greek yogurt instead of mayo, you can reduce calories while maintaining high protein levels. This helps keep you full and reduces the likelihood of snacking.

    Print
    clock clock iconcutlery cutlery iconflag flag iconfolder folder iconinstagram instagram iconpinterest pinterest iconfacebook facebook iconprint print iconsquares squares iconheart heart iconheart solid heart solid icon
    High-Protein Viral Ground Beef Bowls for Easy Meal Prep

    Viral Ground Beef Bowls: High-Protein Meal Prep with Rice and Veggies


    5 Stars 4 Stars 3 Stars 2 Stars 1 Star

    No reviews

    • Author: imageuploader
    • Total Time: 25 minutes
    • Yield: 4 servings 1x
    • Diet: High-Protein

    Description

    These viral ground beef bowls are everything you want in a quick, clean, and protein-packed meal. Featuring seasoned ground beef, fluffy rice, crunchy veggies, and a creamy-spicy drizzle, this bowl is bursting with flavor and perfect for weekly meal prep, healthy family dinners, or post-workout recovery.


    Ingredients

    Scale
    • 1 lb lean ground beef (93% lean)
    • 1 cup cooked jasmine or brown rice
    • 1 1/2 cups shredded cabbage (or slaw mix)
    • 1/2 cup shredded carrots
    • 2 eggs (fried or soft-boiled)
    • 1 tbsp olive oil
    • 3 tbsp soy sauce or tamari
    • 1 tbsp brown sugar
    • 2 cloves garlic (minced)
    • 1 tsp sesame oil
    • 1/2 tsp chili flakes (optional)
    • 1/4 cup Greek yogurt or mayo
    • 1 tbsp sriracha
    • 1 tsp honey
    • Juice of 1/2 lime

    Instructions

    1. Cook the Rice: Start your rice according to package instructions.
    2. Sauté the Beef: In a skillet, heat sesame oil. Add ground beef, garlic, soy sauce, brown sugar, and chili flakes. Cook until browned and saucy.
    3. Prep the Veggies: While the beef cooks, shred your cabbage and carrots.
    4. Make the Sauce: In a small bowl, whisk together Greek yogurt, sriracha, honey, and lime juice.
    5. Cook the Eggs: Fry or soft-boil the eggs to your liking.
    6. Assemble Your Bowl: Layer rice, beef, veggies, egg, and a big drizzle of spicy mayo. Garnish with green onions or sesame seeds if you like.

    Notes

    Season ground beef generously with aromatics for richness. Use jasmine or basmati rice for better texture. Store beef, rice, veggies, and sauce in separate containers for meal prep to keep ingredients fresh and prevent sogginess.

    • Prep Time: 10 minutes
    • Cook Time: 15 minutes
    • Category: Dinner, Lunch, Meal Prep
    • Method: Sautéing
    • Cuisine: Asian-Inspired, Fusion

    Nutrition

    • Serving Size: 1 bowl
    • Calories: 520 kcal
    • Sugar: 8 g
    • Sodium: 620 mg
    • Fat: 25 g
    • Saturated Fat: 8 g
    • Unsaturated Fat: 17 g
    • Trans Fat: 0 g
    • Carbohydrates: 40 g
    • Fiber: 5 g
    • Protein: 32 g
    • Cholesterol: 210 mg