Blog

  • Juicy and Tender Creamy Garlic Chicken Breast

    Juicy and Tender Creamy Garlic Chicken Breast

    This method ensures your chicken breasts remain succulent and tender by using a precise searing and simmering technique. It is a reliable way to upgrade a simple protein into a rich, restaurant-quality meal for any night of the week.

    Recipe image

    List of ingredients

    • 2 large boneless, skinless chicken breasts – pounded to even thickness for uniform cooking.
    • Cream cheese – softened to room temperature to ensure a smooth sauce.
    • Low-sodium chicken broth – used as the savory base for the cream sauce.
    • 3-4 cloves of freshly minced garlic – provides aromatic depth.
    • Fresh lemon juice – added at the end to brighten the flavor profile.
    • Dried Italian seasoning – a blend of herbs for a savory finish.
    • Olive oil – used for searing the meat.
    • Salt – for seasoning and flavor enhancement.
    • Black pepper – for a mild, spicy kick.

    step-by-step instructions

    1. Prepare the Chicken: Place each chicken breast between two sheets of plastic wrap or inside a large resealable bag. Use a meat mallet or rolling pin to pound them to a consistent 1/2-inch thickness. Pat the meat dry with paper towels and season both sides generously with salt and black pepper.
    2. Sear the Chicken: Heat a large skillet over medium-high heat with 1 tablespoon of olive oil. Once the oil shimmers, add the chicken breasts and sear for 3-4 minutes per side until golden brown. Remove the chicken from the pan and set it aside on a plate.
    3. Sauté the Aromatics: Lower the heat to medium and add another teaspoon of olive oil if the pan is dry. Stir in the minced garlic and cook for 30-60 seconds until fragrant, being careful not to let it brown too much.
    4. Build the Creamy Sauce: Pour the chicken broth into the skillet, using a spoon to scrape up the browned bits from the bottom. Bring the liquid to a gentle simmer, then reduce heat to low and whisk in the softened cream cheese until the sauce is completely smooth.
    5. Season the Sauce: Stir in the dried Italian seasoning along with a pinch of salt and black pepper. Taste the sauce and adjust the seasoning to your preference.
    6. Simmer the Chicken: Return the seared chicken breasts to the skillet and nestle them into the sauce. Cover the pan and simmer gently for 8-12 minutes, or until the internal temperature reaches 165°F (74°C).
    7. Finish and Serve: Remove the pan from the heat and stir in the fresh lemon juice. If you have fresh herbs available, sprinkle them on top. Let the chicken rest in the sauce for a few minutes before serving to lock in the juices.

    Expert Tips for Maximum Tenderness

    The Role of Pounding the Meat

    Pounding the chicken is the most critical step for avoiding dry meat. Since chicken breasts are naturally tapered, the thinner end usually overcooks before the thick center is done. Flattening them to a uniform 1/2-inch ensures every part of the breast reaches the target temperature at the same time.

    Using a Meat Thermometer for Accuracy

    Visual cues like color or texture are often misleading when cooking poultry. An instant-read thermometer is the only way to guarantee the chicken is safe to eat without overcooking it. Pull the chicken from the heat exactly at 165°F (74°C) to maintain the juicy texture.

    Allowing the Meat to Rest

    Resting the meat for 5 minutes allows the muscle fibers to relax and reabsorb the juices. If you cut into the chicken immediately, the moisture escapes rapidly, leaving the meat drier. Resting it in the sauce also allows the flavor to penetrate deeper into the protein.

    Ingredient Alternatives and Substitutions

    Swapping the Cooking Broth

    Low-sodium chicken broth is the standard, but vegetable broth is an excellent alternative that provides a similar savory base. If you only have bouillon cubes, dissolve one in hot water, but be cautious with additional salt since bouillon is often very salty.

    Lighter Cream Cheese Options

    Full-fat cream cheese provides the richest texture and most stable emulsion. However, reduced-fat cream cheese can be used for a lighter version of the dish. To prevent a reduced-fat sauce from breaking, ensure the heat remains low during the whisking process.

    Alternative Cooking Oils

    While olive oil is preferred for flavor, any neutral oil with a high smoke point will work. Avocado oil or canola oil are great choices for searing because they can handle the medium-high heat without smoking or burning.

    Fresh vs. Dried Herbs

    Dried Italian seasoning is convenient and provides a concentrated flavor. If you prefer fresh herbs, use a combination of chopped parsley, basil, and oregano. Add fresh herbs at the very end of the cooking process to preserve their bright color and delicate oils.

    Ways to Customize the Flavor

    Adding Fresh Vegetables

    You can incorporate vegetables into the sauce for a one-pan meal. Sauté sliced mushrooms or sun-dried tomatoes along with the garlic for an earthy, rich flavor. Stir in a handful of fresh baby spinach during the final minute of simmering until it just wilts.

    Increasing the Heat Level

    For those who prefer a spicy kick, add a pinch of crushed red pepper flakes when sautéing the garlic. You can also add a dash of cayenne pepper to the flour or seasoning mix for a more integrated heat throughout the dish.

    Enhancing the Cheese Profile

    To create a more complex flavor, stir in two tablespoons of freshly grated Parmesan cheese along with the cream cheese. This adds a salty, nutty dimension to the sauce that complements the lemon juice perfectly.

    Experimenting with Different Aromatics

    While garlic is the star, adding finely diced shallots or leeks provides a sweeter, more sophisticated aromatic base. Sauté these before the garlic to allow them more time to soften and caramelize.

    Recommended Side Dishes

    Starch Pairings for Sauce Absorption

    Because the sauce is rich and creamy, it pairs best with starches that can absorb the liquid. Fluffy jasmine rice, buttery mashed potatoes, or wide egg noodles are ideal choices. Quinoa or farro provide a nuttier, heartier alternative for those seeking more texture.

    Light Vegetable Accompaniments

    Balance the richness of the cream sauce with a side of steamed green beans or roasted asparagus. A crisp garden salad with a light vinaigrette also helps cleanse the palate between bites of the savory chicken.

    Bread for Dipping

    A piece of toasted sourdough or a warm baguette is perfect for scooping up the remaining sauce. Garlic bread is another popular choice, though it may be redundant given the garlic already present in the recipe.

    Storage and Preservation Guide

    Refrigerating Properly

    Store any leftovers in an airtight glass container once the chicken has cooled to room temperature. The dish will stay fresh in the refrigerator for 3 to 4 days. The sauce will naturally thicken as it cools, which is normal and easily fixed during reheating.

    Reheating Without Drying the Meat

    The best way to reheat this dish is in a skillet over low heat. Add a small splash of chicken broth or water to loosen the sauce and create steam, which prevents the chicken from toughening. Avoid high heat or long microwave times, as this can cause the dairy to separate.

    Freezing and Thawing Advice

    Dairy-based sauces can sometimes become grainy when frozen and thawed. If you choose to freeze the meal, do so in a freezer-safe container for up to 2 months. Thaw the dish slowly in the refrigerator overnight before reheating gently on the stove.

    Common Troubleshooting and FAQs

    How do I fix a sauce that is too thick?

    If the sauce becomes too dense, whisk in one tablespoon of chicken broth or water at a time over low heat. Continue stirring until the sauce reaches your desired consistency. Do not add too much liquid at once, or you may lose the richness of the flavor.

    What should I do if the sauce separates?

    Sauce separation usually happens if the heat is too high or the cream cheese wasn’t fully incorporated. To fix it, lower the heat and whisk vigorously. If it remains separated, a teaspoon of cornstarch mixed with cold water can help stabilize the emulsion when simmered for one minute.

    Can I use frozen chicken breasts for this recipe?

    Yes, but they must be completely thawed before you begin. Pounding frozen or partially frozen meat is impossible and will damage the texture. Thaw them safely in the refrigerator for 24 hours before preparing.

    Why did my garlic burn during sautéing?

    Garlic burns quickly because of its high sugar content. If your garlic turned brown or black, it will taste bitter. To prevent this, ensure the heat is at medium and stir the garlic constantly for no more than 60 seconds before adding the liquid broth.

    Print
    clock clock iconcutlery cutlery iconflag flag iconfolder folder iconinstagram instagram iconpinterest pinterest iconfacebook facebook iconprint print iconsquares squares iconheart heart iconheart solid heart solid icon
    Juicy and Tender Creamy Chicken Breast

    Juicy and Tender Creamy Garlic Chicken Breast


    5 Stars 4 Stars 3 Stars 2 Stars 1 Star

    No reviews

    • Author: imageuploader
    • Total Time: 35 minutes
    • Yield: 2 servings 1x
    • Diet: General

    Description

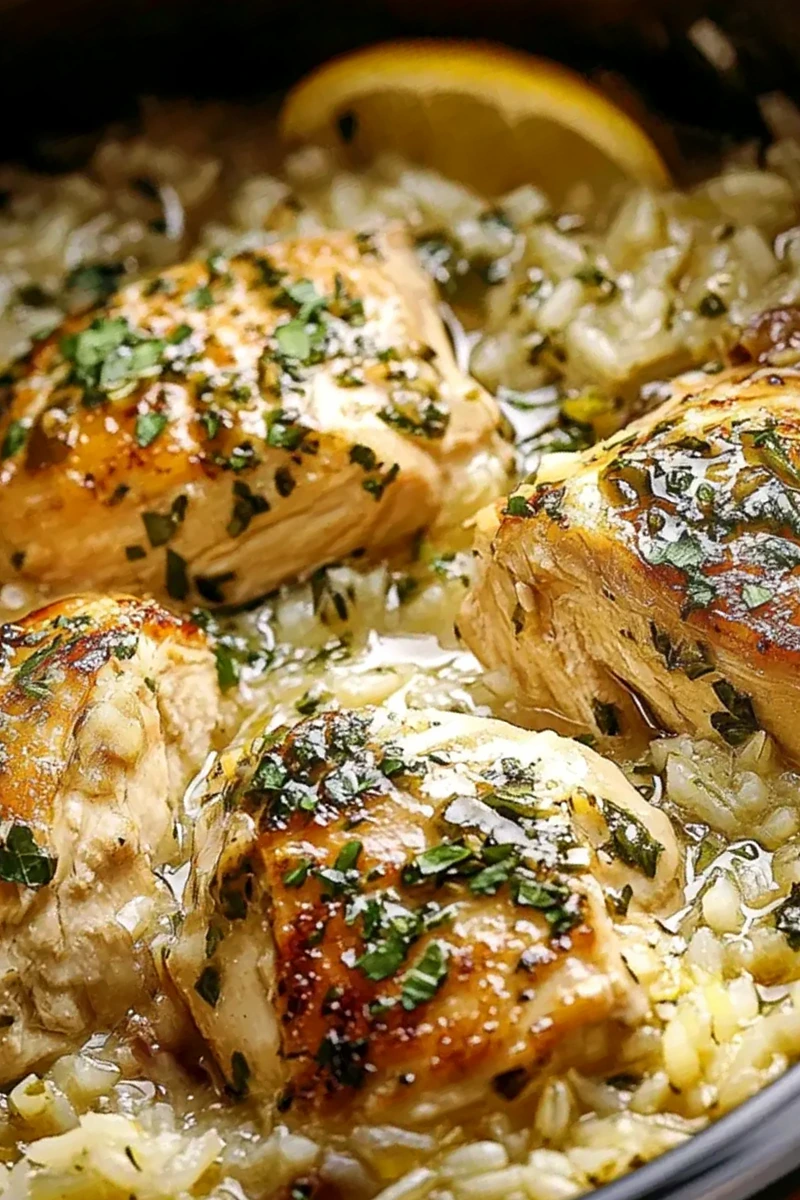
    This Melt In Your Mouth Chicken Breast recipe transforms bland poultry into an incredibly tender and juicy dish. It’s simple to prepare and perfect for both weeknight dinners and special occasions.


    Ingredients

    Scale
    • 2 large boneless, skinless chicken breasts
    • Cream cheese (softened to room temperature)
    • Low-sodium chicken broth
    • 34 cloves of freshly minced garlic
    • Fresh lemon juice
    • Dried Italian seasoning
    • Olive oil
    • Salt
    • Black pepper

    Instructions

    1. Prepare the Chicken: Take your boneless, skinless chicken breasts and place them one at a time between two pieces of plastic wrap or in a large resealable bag. Using a meat mallet or a rolling pin, pound them evenly to about 1/2-inch thickness. Pat them dry with paper towels and season generously on both sides with salt and black pepper.
    2. Sear the Chicken: Heat a large skillet over medium-high heat and add about 1 tablespoon of olive oil. Once the oil shimmers, carefully place the seasoned chicken breasts in the hot pan. Sear them for 3-4 minutes per side until they’re golden brown and lightly caramelized. Remove the chicken from the skillet and set aside on a plate.
    3. Sauté the Aromatics: Reduce the heat to medium. If the pan looks dry, add another teaspoon of olive oil. Add the minced garlic to the skillet and cook for about 30-60 seconds, stirring constantly, until fragrant.
    4. Build the Creamy Sauce: Pour the chicken broth into the skillet, scraping up any browned bits from the bottom of the pan. Bring the broth to a gentle simmer. Reduce the heat to low, then add the softened cream cheese to the simmering broth. Whisk constantly until the cream cheese is fully melted and the sauce is smooth.
    5. Season the Sauce: Stir in your dried Italian seasoning and a good pinch more of salt and pepper. Taste the sauce and adjust seasonings as needed.
    6. Simmer the Chicken: Return the seared chicken breasts to the skillet, nestling them into the creamy sauce. Cover the skillet and let the chicken gently simmer in the sauce for 8-12 minutes, or until the chicken is cooked through and registers an internal temperature of 165°F (74°C).
    7. Finish and Serve: Remove the skillet from the heat. Stir in the fresh lemon juice. If using fresh herbs, sprinkle them in. Let the chicken rest in the sauce for a few minutes before serving.

    Notes

    Pounding the chicken breasts to an even thickness ensures they cook quickly and uniformly. Use an instant-read thermometer to avoid overcooking, and let the chicken rest after cooking to keep it moist.

    • Prep Time: 15 minutes
    • Cook Time: 20 minutes
    • Category: Dinner
    • Method: Searing
    • Cuisine: American

    Nutrition

    • Serving Size: 1 chicken breast with sauce
    • Calories: 400 kcal
    • Sugar: 2 g
    • Sodium: 600 mg
    • Fat: 25 g
    • Saturated Fat: 10 g
    • Unsaturated Fat: 15 g
    • Trans Fat: 0 g
    • Carbohydrates: 5 g
    • Fiber: 0 g
    • Protein: 40 g
    • Cholesterol: 120 mg
  • Perfectly Roasted Baked Sweet Potatoes

    Perfectly Roasted Baked Sweet Potatoes

    This recipe provides a reliable method for achieving baked sweet potatoes with caramelized skins and soft interiors. It is a versatile, nutritious dish that functions well as a side or a light main course.

    Recipe image

    List of ingredients

    • 4 medium sweet potatoes (about 1.5 pounds) – select firm potatoes with smooth skins for the best result.
    • 2 tablespoons extra virgin olive oil – used to facilitate heat transfer and crisp the skin.
    • 1 teaspoon salt – enhances the natural sugars and balances the overall flavor.
    • ½ teaspoon freshly cracked black pepper – adds a mild pungent contrast to the sweetness.
    • 1 teaspoon ground cinnamon – provides a warm aromatic profile.
    • 2 tablespoons butter or 2 tablespoons maple syrup – optional toppings for added richness or sweetness.

    step-by-step instructions

    1. Prepare the oven: Preheat your oven to 400°F (200°C) and line a baking sheet with parchment paper to ensure the potatoes do not stick.
    2. Clean the potatoes: Wash and scrub the sweet potatoes thoroughly under cold running water, then dry them completely with a kitchen towel to ensure the oil adheres.
    3. Apply seasonings: Drizzle olive oil over each sweet potato, then sprinkle salt, pepper, and cinnamon evenly across all sides.
    4. Bake: Place the sweet potatoes on the baking sheet and bake for 45-60 minutes until they are tender when pierced with a fork.
    5. Finish and serve: Allow the potatoes to cool slightly, slice them open lengthwise, add your chosen toppings, and serve immediately.

    Selection Guide for Optimal Results

    Prioritizing Uniformity in Size

    Choose sweet potatoes that are similar in diameter and length. When potatoes are uniform in size, they cook at the same rate, ensuring that the smaller ones do not overcook and become mushy while the larger ones remain hard in the center.

    Inspecting for Surface Blemishes

    Avoid potatoes with deep cracks, soft spots, or significant bruising. These imperfections can lead to uneven roasting and may allow the interior to dry out more quickly during the baking process.

    Selecting Firm Potatoes

    Gently squeeze the potato to ensure it feels firm to the touch. Potatoes that feel soft or spongy are often old and may have a mealy texture after roasting rather than a smooth, creamy consistency.

    Understanding Different Sweet Potato Varieties

    Orange-fleshed varieties like Jewel or Garnet are ideal for this recipe due to their high sugar content and creamy texture. Japanese sweet potatoes, which have purple skin and white flesh, are starchier and may require a slightly longer baking time.

    Enhancing the Flavor Profile

    Optimizing the Oil Coat

    Ensure the olive oil is applied evenly to every inch of the skin. A complete coat of oil prevents the skin from drying out and creates the necessary environment for the natural sugars to caramelize against the heat.

    Balancing Salt and Sugar

    The addition of salt is critical because it suppresses bitterness and enhances the perception of sweetness. This balance prevents the potato from tasting overly sugary and gives it a more complex, savory quality.

    Using Freshly Cracked Black Pepper

    Freshly cracked pepper contains volatile oils that provide a sharper, more distinct flavor than pre-ground pepper. This subtle heat cuts through the richness of the potato and the butter topping.

    Warm Spice Alternatives

    While cinnamon is the primary aromatic, you can substitute it with ground nutmeg or allspice. These spices offer similar warm notes but provide a slightly different flavor profile that pairs well with autumn ingredients.

    Creative Topping Ideas

    Classic Sweet Pairings

    For a traditional dessert-style side, combine melted butter with a drizzle of maple syrup or honey. Adding a pinch of extra cinnamon or a few crushed pecans provides a contrast in texture and a deeper sweetness.

    Savory Gourmet Toppings

    Replace the syrup with a dollop of plain Greek yogurt or sour cream. Garnish with chopped chives or scallions to introduce a fresh, onion-like flavor that complements the earthiness of the roasted potato.

    Protein-Rich Additions

    Turn the baked potato into a meal by stuffing it with black beans, corn, and a sprinkle of microbial-rennet cheese. This addition increases the satiety of the dish and provides a balanced mix of macronutrients.

    Tangy and Creamy Finishes

    A small amount of crumbled feta or goat cheese provides a salty, tangy contrast to the sweet interior. Drizzling a small amount of lime juice over the top can further brighten the flavor profile.

    Best Serving Pairings

    Pairing with Lean Proteins

    Serve these potatoes alongside grilled chicken breast or baked fish fillets. The sweetness of the potato balances the savory, charred notes of grilled meats, creating a complete meal.

    Complementing Fresh Salads

    Pair the roasted potatoes with a bitter green salad, such as arugula or kale, dressed in a lemon vinaigrette. The acidity of the dressing helps cleanse the palate between bites of the rich, creamy potato.

    Serving as a Holiday Side

    On a holiday table, these potatoes work well alongside roasted Brussels sprouts or steamed asparagus. Their vibrant orange color adds visual appeal to a platter of diverse roasted vegetables.

    Creating a Vegetarian Main

    To make these the center of the plate, stuff them with sautéed spinach and mushrooms. This combination adds earthy depth and essential nutrients, making the dish satisfying without the need for meat.

    Storage and Food Safety

    Short-Term Refrigeration Guidelines

    Allow leftover potatoes to cool completely to room temperature before storing them in an airtight container. They can be safely stored in the refrigerator for up to five days while maintaining their texture.

    Long-Term Freezing Techniques

    Wrap individual baked potatoes tightly in plastic wrap or aluminum foil to prevent freezer burn. Place the wrapped potatoes in a freezer-safe bag, where they can be kept for up to three months.

    Signs of Spoilage to Watch For

    Discard potatoes that develop a slimy texture on the skin or an off-smelling aroma. Any visible mold on the skin or a significant change in the internal color indicates that the potato is no longer safe to consume.

    Maintaining Quality During Storage

    Keep the potatoes whole during storage rather than slicing them open. Keeping the skin intact helps retain moisture and prevents the interior from oxidizing or drying out in the fridge.

    Professional Reheating Tips

    Restoring Texture in the Oven

    Preheat your oven to 350°F (175°C) and wrap the potatoes in foil to lock in moisture. Reheat for 15-20 minutes until the center is warm, which preserves the soft interior and prevents the skin from becoming too hard.

    Rapid Reheating via Microwave

    Place the potato on a microwave-safe plate and cover it with a damp paper towel. Heat on medium power in 1-minute intervals to avoid creating hard, overcooked spots in the flesh.

    Crisping Skins in the Air Fryer

    Set the air fryer to 375°F (190°C) and heat the potatoes for 5-7 minutes. This method is the most effective way to restore the original crispness of the caramelized skin.

    Stovetop Warming Options

    For sliced potatoes, you can sauté them in a pan with a small amount of butter over medium heat. This warms the potato through while adding a fresh layer of caramelization to the sliced edges.

    Troubleshooting Common Baking Problems

    Dealing with Hard Centers

    If the potato is tender on the outside but hard in the middle, increase the baking time by 10-15 minutes. Ensure the oven is fully preheated and that the potatoes are not overcrowded on the baking sheet.

    Preventing Skin Charring

    If the skins are burning before the inside is cooked, lower the oven temperature to 375°F (190°C) and increase the time. You can also move the baking sheet to a lower rack to reduce direct heat exposure.

    Managing Excess Moisture

    If the potatoes seem watery, ensure you are drying them thoroughly after washing. Using parchment paper instead of placing them directly on the pan also helps prevent them from sitting in accumulated moisture.

    Correcting Bland Flavor

    If the potatoes taste bland, increase the salt measurement in the next batch. Salt is the primary agent that unlocks the internal flavors of the sweet potato; without it, the taste remains flat.

    Frequently Asked Questions

    How do I know when my sweet potatoes are done baking?

    Insert a metal fork or a thin knife into the thickest part of the potato. If the tool slides in with zero resistance and comes out clean, the starches have fully gelatinized and the potato is cooked.

    Can I use a different cooking oil?

    Yes, you can use avocado oil or melted coconut oil. Avocado oil has a higher smoke point, which is useful for very high temperatures, while coconut oil adds a subtle sweetness to the skin.

    Is it possible to prep these in advance?

    You can bake the potatoes and store them in the refrigerator for several days. When ready to serve, simply reheat them using the oven or air fryer method to restore the texture.

    How to store leftovers safely?

    Store them in an airtight container in the refrigerator. To avoid cross-contamination, ensure the container is clean and the potatoes have cooled sufficiently to prevent condensation buildup.

    What is the best way to scrub the skins?

    Use a vegetable brush or a clean sponge to gently scrub the surface under cold water. This removes dirt and debris without damaging the skin, which is essential for a smooth finish.

    Print
    clock clock iconcutlery cutlery iconflag flag iconfolder folder iconinstagram instagram iconpinterest pinterest iconfacebook facebook iconprint print iconsquares squares iconheart heart iconheart solid heart solid icon
    Irresistible Flavorful Baked Sweet Potatoes

    Perfectly Roasted Baked Sweet Potatoes


    5 Stars 4 Stars 3 Stars 2 Stars 1 Star

    No reviews

    • Author: imageuploader
    • Total Time: 1 hour 10 minutes
    • Yield: 4 servings 1x
    • Diet: Vegetarian

    Description

    Experience the warmth and comfort of Irresistible Flavorful Baked Sweet Potatoes, where golden-brown potatoes caramelize beautifully in the oven. With a perfect blend of sweetness and savory spices, these baked sweet potatoes are not just a dish but a nostalgic memory evoking cozy family gatherings. Ideal for holiday feasts or a weeknight dinner, they promise to leave everyone asking for seconds.


    Ingredients

    Scale
    • 4 medium sweet potatoes (about 1.5 pounds)
    • 2 tablespoons extra virgin olive oil
    • 1 teaspoon salt
    • ½ teaspoon freshly cracked black pepper
    • 1 teaspoon ground cinnamon
    • 2 tablespoons butter (optional)
    • 2 tablespoons maple syrup (optional)

    Instructions

    1. Preheat: Preheat your oven to 400°F (200°C) and line a baking sheet with parchment paper.
    2. Prepare: Wash and scrub the sweet potatoes thoroughly, then dry them with a kitchen towel.
    3. Season: Drizzle olive oil over each sweet potato, then sprinkle salt, pepper, and cinnamon evenly across all sides.
    4. Bake: Place the sweet potatoes on the baking sheet and bake for 45-60 minutes until tender when pierced with a fork.
    5. Serve: Allow to cool slightly, slice open each sweet potato, add your choice of toppings, and serve.

    Notes

    Select sweet potatoes of similar size for even cooking. For variety, experiment with nutmeg or paprika.

    • Prep Time: 10 minutes
    • Cook Time: 60 minutes
    • Category: Side dish
    • Method: Baking
    • Cuisine: American

    Nutrition

    • Serving Size: 1 medium baked sweet potato (about 200g)
    • Calories: 180 kcal
    • Sugar: 7 g
    • Sodium: 70 mg
    • Fat: 4 g
    • Saturated Fat: 0.5 g
    • Unsaturated Fat: 3 g
    • Trans Fat: 0 g
    • Carbohydrates: 41 g
    • Fiber: 6 g
    • Protein: 4 g
    • Cholesterol: 0 mg
  • High-Protein Greek Yogurt Pancakes without Protein Powder

    High-Protein Greek Yogurt Pancakes without Protein Powder

    Enjoy a nutritious start to your day with these thick and soft pancakes. They provide a natural protein boost using simple pantry staples instead of processed powders.

    Recipe image

    List of ingredients

    • 1 cup plain Greek yogurt – provides thickness and a protein base.
    • 2 large eggs – binds the batter and adds structure.
    • 1/2 cup all-purpose flour or oat flour – the primary thickening agent.
    • 1 tsp baking powder – ensures the pancakes rise and stay airy.
    • 1/2 tsp vanilla extract – adds a touch of aromatic sweetness.
    • Pinch of salt – balances the flavors.
    • Optional: fresh berries or chocolate chips – for added texture and taste.

    step-by-step instructions

    1. Whisk Base: In a medium bowl, whisk together the Greek yogurt and eggs until the mixture is completely smooth and glossy.
    2. Incorporate Dry Ingredients: Gently stir in the flour, baking powder, vanilla, and salt. Mix only until the ingredients are combined, leaving a few small lumps to ensure tenderness.
    3. Heat the Pan: Set a nonstick skillet over medium-low heat and apply a light coating of grease or oil to prevent sticking.
    4. Cook the Batter: Pour the batter onto the skillet to form small, round pancakes.
    5. Flip and Finish: Wait until bubbles form on the surface and the edges appear set. Carefully flip the pancake and cook until the other side is golden brown and fluffy.
    6. Serve: Plate the warm pancakes and top with fresh fruit, a dollop of extra yogurt, or a drizzle of maple syrup.

    Optimization Techniques for Maximum Fluffiness

    Avoid Overmixing the Batter

    Stir the batter only until the flour streaks disappear. Overworking the batter develops too much gluten, which results in a chewy or rubbery texture rather than a soft, cake-like consistency.

    Let the Batter Rest

    Allow the batter to sit for five to ten minutes before cooking. This resting period allows the baking powder to activate fully and the flour to hydrate, leading to a more consistent rise in the pan.

    Maintain Low and Steady Heat

    Use medium-low heat to ensure the center of the pancake cooks through before the exterior browns too much. High heat often leads to pancakes that are burnt on the outside and raw in the middle.

    Use a High-Quality Nonstick Surface

    A well-seasoned cast iron or a high-quality nonstick skillet is essential for clean flips. This reduces the need for excessive oil, which can interfere with the browning process and alter the taste.

    Ingredient Substitutions and Alternatives

    Using Oat Flour for Gluten-Free Options

    Substitute all-purpose flour with certified gluten-free oat flour for a nuttier flavor and a gluten-free meal. Oat flour absorbs liquid differently, so you may need a teaspoon of water if the batter is too thick.

    Almond Flour for Low-Carb Variations

    Replace the flour with superfine almond flour to reduce the carbohydrate content. Note that almond flour pancakes are more delicate and may require a slightly lower heat setting to avoid scorching.

    Substituting Greek Yogurt Types

    While plain full-fat Greek yogurt provides the best richness, non-fat versions work well for lower-calorie needs. Ensure the yogurt is thick; if using a thinner yogurt, reduce the liquid or add an extra tablespoon of flour.

    Egg-Free Binding Options

    For those avoiding eggs, use flax eggs by mixing one tablespoon of ground flaxseed with three tablespoons of water. Let this mixture sit for five minutes before adding it to the yogurt base.

    Creative Serving and Pairing Ideas

    Fresh Fruit Combinations

    Top the pancakes with sliced bananas, blueberries, or raspberries for a burst of freshness. The acidity of the berries complements the tanginess of the Greek yogurt base perfectly.

    Nut Butter Additions

    Spread a tablespoon of almond butter or cashew butter over the warm stack. This adds healthy fats and increases the total protein count of the meal.

    Low-Sugar Topping Alternatives

    Instead of maple syrup, try a drizzle of raw honey or a spoonful of almond butter mixed with a bit of cinnamon. This keeps the breakfast nutritious while providing a satisfying sweetness.

    Savory Twist Pairings

    Skip the syrup and serve these pancakes with a side of sliced avocado and a poached egg. The neutral tang of the yogurt allows them to transition well into a savory brunch dish.

    Storage and Preservation Guidelines

    Refrigerating Leftover Pancakes

    Place cooled pancakes in a single layer or separated by parchment paper in an airtight container. They will stay fresh in the refrigerator for up to three to four days.

    Preventing Moisture Buildup

    Allow the pancakes to cool completely on a wire rack before sealing them in a container. Trapping steam inside the container can make the pancakes soggy and reduce their shelf life.

    Using Airtight Storage Containers

    Use glass or high-quality plastic containers with a locking lid to prevent the pancakes from absorbing other smells from the refrigerator. This maintains the delicate vanilla flavor of the recipe.

    Effective Reheating Methods

    Using a Toaster for Crispiness

    Pop refrigerated or frozen pancakes into a toaster on a medium setting. This is the fastest way to regain a slightly crisp exterior while keeping the center soft.

    The Skillet Reheat Method

    Place the pancakes in a dry skillet over medium heat for one to two minutes per side. This method best replicates the original texture and warmth of freshly cooked pancakes.

    Avoiding the Microwave

    Limit the use of microwaves for reheating, as they often make the pancakes rubbery or tough. If a microwave is the only option, heat them in short 15-second bursts with a damp paper towel over the top.

    Freezing and Meal Prep Strategy

    Flash Freezing for Separation

    Place frozen pancakes on a baking sheet separated by parchment paper for one hour before transferring them to a freezer bag. This prevents them from clumping together into a single block.

    Long-Term Freezer Storage

    Store the flash-frozen pancakes in a heavy-duty freezer bag, squeezing out as much air as possible. They can be stored this way for up to two months without losing quality.

    Cooking from Frozen

    There is no need to thaw these pancakes before reheating. Move them directly from the freezer to the toaster or oven for a quick, high-protein breakfast on busy mornings.

    Troubleshooting Common Cooking Issues

    What to Do if Pancakes Are Too Flat

    Ensure your baking powder is fresh and not expired. If the pancakes are still flat, check that you haven’t overmixed the batter, which destroys the air bubbles needed for lift.

    Fixing Batter That Is Too Thick

    If the batter is difficult to pour, whisk in a tablespoon of milk or water at a time until it reaches a droppable consistency. Avoid adding too much liquid, as this will make the pancakes thin.

    Preventing Pancakes from Sticking

    Ensure the pan is fully preheated before adding the batter. If they stick, try using a small amount of butter or a high-smoke-point oil like avocado oil for the next batch.

    Addressing Uneven Browning

    Uneven browning is usually a sign of an uneven heat source. Rotate the pan or move the pancakes to a different area of the skillet to ensure every piece gets equal exposure to the heat.

    Frequently Asked Questions

    Can I add protein powder to this recipe?

    You can add a small amount of protein powder, but it may make the pancakes dry or dense. If you do, replace a tablespoon of flour with a tablespoon of powder and add a splash of milk to maintain the consistency.

    Are these pancakes suitable for children?

    Yes, the mild flavor and soft texture make them very kid-friendly. You can customize them by adding chocolate chips or blueberries directly into the batter during the cooking process.

    Can I make these without refined sugar?

    This recipe contains no added refined sugar in the batter. For a sugar-free experience, avoid maple syrup and use fresh fruit or a dollop of plain Greek yogurt as a topping.

    Why is my batter lumpy?

    A few small lumps are normal and actually help keep the pancakes tender. As long as there are no large pockets of dry flour, the lumps will disappear during the cooking process.

    Print
    clock clock iconcutlery cutlery iconflag flag iconfolder folder iconinstagram instagram iconpinterest pinterest iconfacebook facebook iconprint print iconsquares squares iconheart heart iconheart solid heart solid icon
    Fluffy Greek Yogurt Protein Pancakes Without Protein Powder

    High-Protein Greek Yogurt Pancakes Without Protein Powder


    5 Stars 4 Stars 3 Stars 2 Stars 1 Star

    No reviews

    • Author: imageuploader
    • Total Time: 15 minutes
    • Yield: 6 pancakes 1x
    • Diet: Low Fat

    Description

    Fluffy Greek Yogurt Protein Pancakes are thick, soft, and incredibly fluffy, made without protein powder and naturally packed with protein for a quick, healthy breakfast.


    Ingredients

    Scale
    • 1 cup plain Greek yogurt
    • 2 large eggs
    • ½ cup all-purpose flour or oat flour
    • 1 tsp baking powder
    • ½ tsp vanilla extract
    • Pinch of salt
    • Optional: fresh berries or chocolate chips

    Instructions

    1. Step 1: In a bowl, whisk together Greek yogurt and eggs until smooth.
    2. Step 2: Add flour, baking powder, vanilla, and salt. Stir gently until just combined.
    3. Step 3: Heat a nonstick skillet over medium-low heat and lightly grease.
    4. Step 4: Pour batter onto the skillet to form pancakes.
    5. Step 5: Cook until bubbles form and edges look set, then flip and cook until golden and fluffy.
    6. Step 6: Serve warm with fruit, yogurt, or maple syrup if desired.

    Notes

    No protein powder required; the yogurt provides the protein. You can use all-purpose flour or substitute with oat flour for a gluten-free option. Yields about 6 pancakes; perfect for meal prep or a quick breakfast. Top with fresh berries, a dollop of yogurt, or maple syrup.

    • Prep Time: 5 minutes
    • Cook Time: 10 minutes
    • Category: Breakfast
    • Method: Pan-fry
    • Cuisine: American

    Nutrition

    • Serving Size: 1 pancake
    • Calories: 83 kcal
    • Sugar: 1 g
    • Sodium: 150 mg
    • Fat: 1.6 g
    • Saturated Fat: 0.5 g
    • Unsaturated Fat: 1.3 g
    • Trans Fat: 0 g
    • Carbohydrates: 9 g
    • Fiber: 0.5 g
    • Protein: 6.8 g
    • Cholesterol: 62 mg
  • Chipotle Sweet Potato and Quinoa Tacos

    Chipotle Sweet Potato and Quinoa Tacos

    These nutrient-dense tacos combine roasted root vegetables and hearty quinoa for a satisfying plant-based meal. They are perfect for a flavor-packed dinner or an organized meal prep session.

    Recipe image

    List of ingredients

    • 1 cup red quinoa, uncooked (white or multi-color varieties also work) – provides a protein-rich base.
    • 3 cups organic vegetable stock/broth – used for simmering the quinoa.
    • 1/2 tsp sea salt – enhances the flavor of the grains.
    • 1/2 tsp black pepper – adds a mild spice to the quinoa.
    • 1/2 tsp smoked paprika – gives the quinoa a woody, smoky undertone.
    • 1/2 tsp garlic powder – provides savory depth to the grain mix.
    • 2 large sweet potatoes, peeled and cubed – the primary roasted filling.
    • 2 Tbsp extra virgin olive oil – for roasting the vegetables.
    • 1 tsp dried oregano – seasoning for the roasted vegetables.
    • 1 tsp dried parsley – adds herbal notes to the roasting mix.
    • 1 tsp dried basil – enhances the sweetness of the potatoes.
    • 1 tsp smoked paprika – for a charred flavor on the vegetables.
    • 1 tsp garlic powder – for savory roasting flavor.
    • 2 cups roasted herb tomatoes – concentrated flavor addition.
    • 2 poblano peppers – adds a mild, earthy heat.
    • 1 (15 oz.) can black beans, drained and rinsed – provides plant-based protein.
    • 1 Tbsp extra virgin olive oil – for sautéing the beans.
    • 1 tsp dried oregano – bean seasoning.
    • 1 tsp smoked paprika – adds color and smoke to the beans.
    • 1 tsp dried parsley – aromatic bean seasoning.
    • 1 tsp garlic powder – savory bean seasoning.
    • 1/2 tsp ground cumin – provides a classic taco flavor profile.
    • Corn or flour tortillas – the vessel for the taco filling.
    • Jalapeños, chopped – for a fresh, spicy kick.
    • 1 portion dairy-free chipotle sauce/dressing – the creamy, spicy topping.

    step-by-step instructions

    1. Prepare Tomatoes: Roast your herb tomatoes according to your preferred roasting method before starting other components.
    2. Preheat and Prep: Heat your oven to 400 degrees Fahrenheit and line a large baking sheet with parchment paper to prevent sticking.
    3. Season Vegetables: In a large mixing bowl, combine the cubed sweet potatoes and sliced poblano peppers with 2 Tbsp olive oil, oregano, parsley, basil, smoked paprika, and garlic powder. Mix gently until the vegetables are evenly coated.
    4. Roast: Spread the seasoned vegetables in a single layer on the baking sheet. Bake for 20-25 minutes until the sweet potatoes are tender and the peppers are charred and golden.
    5. Finish Peppers: Remove the pan from the oven and chop the charred poblano peppers into small, bite-sized pieces.
    6. Boil Stock: Pour the vegetable stock into a medium saucepan and bring it to a boil over medium-high heat.
    7. Simmer Quinoa: Add the red quinoa to the boiling stock, whisking continuously for 1-2 minutes. Reduce the heat to a simmer, whisking every 3-4 minutes until the liquid is fully absorbed and the quinoa has thickened.
    8. Season Quinoa: Stir in the salt, black pepper, garlic powder, and smoked paprika until the spices are evenly distributed.
    9. Sauté Beans: Heat 1 Tbsp olive oil in a medium skillet over medium-high heat. Add the drained black beans, garlic powder, oregano, smoked paprika, parsley, and cumin.
    10. Cook Beans: Stir the bean mixture occasionally for 5-6 minutes, then remove from the heat and allow them to cool slightly.
    11. Prepare Sauce: Blend or mix your dairy-free chipotle sauce/dressing until smooth.
    12. Warm Tortillas: To toast in the oven, preheat to 350 degrees Fahrenheit and place tortillas directly on the rack. Turn the oven off and let them warm for 2 minutes. Alternatively, char each tortilla over a gas burner until lightly smoked on both sides.
    13. Assemble Tacos: Place a few spoonfuls of cooked quinoa on a charred tortilla. Layer on the roasted poblano peppers, sweet potatoes, sautéed black beans, and chopped jalapeños.
    14. Final Touch: Drizzle with the chipotle sauce and garnish with fresh cilantro if desired.

    Professional Roasting Techniques

    Ensure Uniform Cube Size for Sweet Potatoes

    Cutting the sweet potatoes into equal 1/2-inch cubes ensures that every piece cooks at the same rate. This prevents some pieces from becoming mushy while others remain raw in the center.

    Avoid Overcrowding the Baking Sheet

    Spread the vegetables in a single layer with space between them. Overcrowding causes the vegetables to steam instead of roast, which prevents the desired charred exterior.

    Using Parchment Paper for Easy Cleanup

    Lining your pan with parchment paper prevents the sugars in the sweet potatoes from sticking to the metal. It also makes the cleanup process significantly faster after the roasting is complete.

    Selecting the Right Poblano Peppers

    Choose poblanos that are firm and have a deep green color. These peppers provide a mild heat that complements the sweetness of the potatoes without overpowering the other ingredients.

    Quinoa Preparation Secrets

    Rinse Quinoa to Remove Bitter Saponins

    Rinse the uncooked quinoa in a fine-mesh strainer under cold water for 30 seconds. This removes the natural coating called saponin, which can otherwise leave a bitter taste in the finished dish.

    Maintaining a Constant Simmer

    Once the stock reaches a boil and the quinoa is added, immediately lower the heat to a simmer. Boiling the quinoa too aggressively for too long can cause the grains to burst and become mushy.

    Using a Tight-Fitting Lid

    Cover the saucepan with a tight lid during the simmering process. This traps the steam and ensures that the quinoa cooks evenly throughout without evaporating the liquid too quickly.

    Adding Seasonings at the End

    Stirring the spices into the quinoa after the liquid is absorbed prevents the seasonings from clumping. It also ensures the flavors remain bright and distinct in the final taco filling.

    Bean and Sauce Enhancements

    Sautéing Beans for Better Texture

    Sautéing canned beans in olive oil and spices transforms their texture from soft to slightly firm. This adds a necessary structural contrast to the soft sweet potatoes and fluffy quinoa.

    Achieving a Creamy Chipotle Sauce

    If your dairy-free sauce is too thick, whisk in a teaspoon of water or lime juice to thin it. This makes it easier to drizzle evenly across the assembled tacos.

    Toasting Spices in the Pan

    Adding the cumin and smoked paprika to the oil before adding the beans allows the spices to bloom. This process releases the essential oils and deepens the flavor of the black beans.

    Balancing Heat with Acidity

    If the chipotle sauce is too spicy, add a small amount of maple syrup or agave. The sweetness balances the heat of the chipotle peppers without compromising the smoky profile.

    Tortilla Warming and Charring

    Mastering the Gas Burner Char

    Use tongs to hold the tortilla about an inch above the open flame for 10-15 seconds per side. Look for small charred bubbles to form, which provides a traditional smoky flavor.

    Preventing Oven-Dried Tortillas

    When using the oven method, ensure you turn the heat off before the final 2-minute warming period. This prevents the tortillas from becoming brittle or cracking when folded.

    Using a Dry Skillet for Corn Tortillas

    If you do not have a gas stove, heat a cast-iron skillet over medium-high heat. Place the tortilla in the dry pan for 30 seconds per side until pliable and warm.

    Keeping Tortillas Warm During Assembly

    Wrap warmed tortillas in a clean kitchen towel or place them in a tortilla warmer. This keeps them soft and flexible while you assemble the various fillings.

    Strategic Ingredient Substitutions

    Using Alternative Grains

    If red quinoa is unavailable, white or tri-color quinoa works perfectly. For a different texture, you can substitute the quinoa with cooked brown rice or farro, though you may need to adjust the stock ratio.

    Swapping Sweet Potatoes

    Butternut squash or carrots are excellent alternatives to sweet potatoes. Ensure they are cubed to a similar size and roast them for the same duration to maintain consistency.

    Modifying the Heat Level

    Replace jalapeños with diced bell peppers for a completely mild version. For more heat, use serrano peppers or increase the amount of chipotle paste in the sauce.

    Nut-Free Sauce Alternatives

    If using a cashew-based chipotle sauce, you can swap the cashews for sunflower seeds or a neutral dairy-free yogurt. This maintains the creaminess while keeping the recipe nut-free.

    Serving and Presentation Ideas

    Creating a Taco Board

    Instead of assembling the tacos in the kitchen, place the quinoa, roasted veggies, beans, and sauce in separate bowls on a large platter. This allows guests to customize their own fillings.

    Adding a Fresh Cabbage Slaw

    Serve the tacos with a side of shredded cabbage tossed in lime juice and salt. The crunch and acidity of the slaw cut through the richness of the chipotle sauce.

    Pairing with Traditional Sides

    Accompany these tacos with a side of Mexican street corn or sliced avocado. These additions provide extra creaminess and a classic flavor pairing for the roasted poblanos.

    Using Taco Holders for Stability

    Place the assembled tacos in a taco rack or holder. This prevents the fillings from spilling out and keeps the tortillas upright for a professional presentation.

    Storage and Reheating Advice

    Refrigerating Component Parts

    Store the cooked quinoa, roasted vegetables, and sautéed beans in separate airtight containers. This prevents the ingredients from absorbing each other’s flavors and keeps the textures distinct.

    Freezing Roasted Fillings

    Roasted sweet potatoes and poblanos can be frozen in a freezer-safe bag for up to three months. Thaw them overnight in the refrigerator before reheating for the best quality.

    Reheating Quinoa Without Drying Out

    When reheating quinoa in the microwave, add a tablespoon of water or vegetable broth. Cover the bowl with a damp paper towel to steam the grains back to fluffiness.

    Refreshing the Chipotle Sauce

    If the sauce separates in the refrigerator, shake the jar vigorously or whisk it for a few seconds. This restores the emulsion and ensures a smooth consistency.

    Meal Prep and Make-Ahead Tips

    Pre-Chopping Vegetables

    Peel and cube the sweet potatoes and slice the poblanos up to 24 hours in advance. Store them in a sealed container in the fridge to save time on the day of cooking.

    Batch Cooking the Grains

    Cook a large quantity of seasoned quinoa at the start of the week. It stays fresh in the refrigerator for 4-5 days and can be used in other bowls or salads.

    Preparing the Sauce Early

    The chipotle sauce can be made up to a week in advance. Store it in a glass jar with a tight lid to preserve the freshness of the chipotle and lime flavors.

    Planning the Roasting Sequence

    Since the vegetables take the longest to cook, start the oven first. While the vegetables roast, you can simultaneously simmer the quinoa and sauté the beans on the stovetop.

    Troubleshooting Common Issues

    Addressing Mushy Quinoa

    If your quinoa turns out too soft, you likely used too much liquid or stirred it too often. Next time, ensure the stock is measured precisely and use a tight lid during the simmer.

    Fixing Bland Sautéed Beans

    If the beans lack flavor, stir in a squeeze of fresh lime juice or a pinch of extra sea salt. Acidity often awakens the flavors of the cumin and smoked paprika.

    Preventing Burnt Tortillas

    If your tortillas char too quickly over the flame, move them further away from the burner. The goal is a light brown char, not black carbonized spots.

    Correcting Over-Roasted Peppers

    If the poblano peppers become too bitter from over-roasting, gently scrape off the blackened skin with a knife. This removes the bitter char while keeping the smoky flavor.

    Frequently Asked Questions

    How long do these tacos last in the fridge?

    The individual fillings last 3-4 days in airtight containers. It is recommended to store the tortillas and sauce separately to maintain optimal freshness.

    Can I make this recipe without an oven?

    Yes, you can sauté the sweet potatoes and poblanos in a large skillet over medium heat. Cover the pan for the first few minutes to soften the potatoes before uncovering them to brown.

    Is it possible to use frozen sweet potatoes?

    You can use frozen cubed sweet potatoes, but roast them directly from frozen. You may need to increase the roasting time by 5-10 minutes to ensure they are fully cooked.

    Can I substitute red quinoa for another grain?

    Yes, brown rice, farro, or millet are suitable replacements. Adjust the liquid-to-grain ratio according to the specific requirements of the chosen grain.

    Print
    clock clock iconcutlery cutlery iconflag flag iconfolder folder iconinstagram instagram iconpinterest pinterest iconfacebook facebook iconprint print iconsquares squares iconheart heart iconheart solid heart solid icon
    Chipotle Sweet Potato and Quinoa Tacos

    Chipotle Sweet Potato and Quinoa Tacos


    5 Stars 4 Stars 3 Stars 2 Stars 1 Star

    No reviews

    • Author: imageuploader
    • Total Time: 40 minutes
    • Yield: 6 servings 1x
    • Diet: Plant-based, Dairy-Free

    Description

    Get ready to devour the most amazing Chipotle Sweet Potato Quinoa Tacos! Loaded with a tasty homemade chipotle sauce, roasted sweet potatoes, poblano peppers, tomatoes, black beans, quinoa, and a hint of jalapeños – these tacos are a flavor explosion, ideal for spicing up your Taco Tuesday or any casual night! All Plant-based + Dairy-free. Gluten-free option.


    Ingredients

    Scale
    • 1 cup red quinoa, uncooked
    • 3 cups organic vegetable stock/broth
    • 1/2 tsp sea salt
    • 1/2 tsp black pepper
    • 1/2 tsp smoked paprika
    • 1/2 tsp garlic powder
    • 2 large sweet potatoes, peeled and cubed
    • 2 Tbps Extra virgin olive oil
    • 1 tsp dried oregano
    • 1 tsp dried parsley
    • 1 tsp dried basil
    • 1 tsp smoked paprika
    • 1 tsp garlic powder
    • 2 cups roasted herb tomatoes
    • 2 poblano peppers
    • 1 (15 oz.) can black beans, drained and rinsed
    • 1 Tbsp Extra virgin olive oil
    • 1 tsp dried oregano
    • 1 tsp smoked paprika
    • 1 tsp dried parsley
    • 1 tsp garlic powder
    • 1/2 tsp ground cumin
    • Corn or Flour tortillas
    • Jalapeños, chopped
    • 1 serving Dairy-Free Chipotle Sauce/Dressing

    Instructions

    1. Roasted Herb Tomatoes: Prepare roasted herb tomatoes according to recipe.
    2. Roasted Veggies: Preheat oven to 400 degrees Fahrenheit and line a baking sheet with parchment paper; mix cubed sweet potatoes and poblano peppers with olive oil and seasonings, bake for 20-25 minutes until charred and golden, then chop the poblano peppers.
    3. Quinoa: Bring veggie stock to a boil in a medium saucepan over medium-high heat, add quinoa and whisk for 1-2 minutes, reduce heat to simmer until stock has dried and quinoa has thickened, then stir in salt, black pepper, garlic powder, and smoked paprika.
    4. Saute Black Beans: Heat olive oil in a medium skillet over medium-high heat, add black beans, garlic powder, oregano, smoked paprika, parsley, and cumin, stirring occasionally for 5-6 minutes.
    5. Chipotle Sauce: Prepare Dairy-Free Chipotle Dressing/Sauce.
    6. Tortillas: Preheat oven to 350 degrees Fahrenheit and place tortillas directly on rack for 2 minutes, or char tortillas on a gas burner until lightly charred.
    7. Assembly: Add a few spoonfuls of cooked quinoa atop a charred tortilla, followed by roasted poblano peppers, sweet potatoes, black beans, chopped jalapeños, and chipotle sauce; garnish with fresh cilantro if desired.

    Notes

    STORAGE: Place any leftover ingredients in a tightly sealed container in the refrigerator for up to 3-4 days. MAKE AHEAD: All ingredients can be made and individually stored as meal prep (excluding tortillas) and assembled when ready to serve.

    • Prep Time: 15 minutes
    • Cook Time: 25 minutes
    • Category: Main Course
    • Method: Roasting, Simmering, Sauteing
    • Cuisine: Mexican-inspired

    Nutrition

    • Serving Size: 1 serving
    • Calories: 211 kcal
    • Sugar: 10 g
    • Sodium: 837 mg
    • Fat: 8 g
    • Saturated Fat: 1 g
    • Unsaturated Fat: 6 g
    • Trans Fat: 0 g
    • Carbohydrates: 34 g
    • Fiber: 6 g
    • Protein: 4 g
    • Cholesterol: 0 mg
  • Zesty Pressure Cooker Pasta Salad

    Zesty Pressure Cooker Pasta Salad

    This fast pasta salad is a refreshing choice for lunches or side dishes. It uses a pressure cooker to speed up the cooking process for a meal ready in minutes.

    Recipe image

    List of ingredients

    • 8 oz pasta (rotini or penne) – provides the hearty base of the salad.
    • 1 cup cherry tomatoes (halved) – adds sweetness and juicy pops of flavor.
    • 1/2 cup black olives (sliced) – contributes a salty and tangy contrast.
    • 1/2 cup cucumber (diced) – adds a cool, refreshing crunch.
    • 1/4 cup red onion (finely chopped) – gives a mild, sharp bite.
    • 1/2 cup feta cheese (crumbled) – adds creamy texture and salty richness.
    • 1/4 cup Italian dressing – binds the ingredients with a herby, tangy taste.
    • Salt to taste – enhances all the natural flavors.
    • Pepper to taste – adds a subtle hint of spice.

    step-by-step instructions

    1. Cook the pasta: Pour pasta into the pressure cooker with enough water to just cover it. Ensure the sealing ring is snug and lock the lid.
    2. Set the timer: Set the cooker to manual mode for 6 minutes to achieve a tender texture with a slight pull.
    3. Release pressure: Use the quick release valve immediately after the timer dings to stop the cooking process.
    4. Cool the noodles: Drain the pasta and rinse it under cold water to prevent mushiness and stop residual cooking.
    5. Combine ingredients: In a large bowl, toss together the cooked pasta, halved cherry tomatoes, sliced black olives, diced cucumber, chopped red onion, and crumbled feta.
    6. Dress the salad: Pour the Italian dressing over the mixture and toss gently to ensure an even coat.
    7. Season: Taste the salad and add salt and pepper according to your preference.
    8. Chill: Place the salad in the refrigerator for at least 15 minutes to allow the flavors to meld and cool.

    Choosing the Right Pasta Shape

    Rotini for Maximum Sauce Adhesion

    Rotini is an excellent choice because the spirals act as traps for the dressing. This ensures that every bite is flavorful and the herbs in the Italian dressing cling to the pasta.

    Penne for a Traditional Texture

    Penne is a classic option that holds its shape well during pressure cooking. Its hollow center allows some of the dressing and small bits of feta to settle inside the noodles.

    Fusilli for Better Ingredient Distribution

    Fusilli is similar to rotini and provides a great grip for the vegetables. The twists help the diced cucumber and onions distribute evenly throughout the bowl.

    Farfalle for Visual Appeal

    Farfalle, or bow-tie pasta, adds a decorative touch to the salad. While it has less surface area for dressing than rotini, it provides a satisfying chew.

    Vegetable Preparation Techniques

    Slicing Cherry Tomatoes for Juiciness

    Halving cherry tomatoes instead of quartering them prevents them from breaking down too quickly. This keeps the salad looking fresh and provides a burst of juice when eaten.

    Dicing Cucumbers for Consistent Crunch

    Dicing cucumbers into small, uniform cubes ensures that you get a bit of crunch in every forkful. Removing the seeds first can help prevent the salad from becoming too watery.

    Mincing Red Onion to Balance Sharpness

    Finely chopping the red onion prevents any single piece from overpowering the other flavors. This method distributes the sharp, pungent taste evenly across the dish.

    Preparing Black Olives for Salty Depth

    Slicing black olives into rings increases the surface area for the dressing to coat. This enhances the salty, briny flavor that contrasts with the sweet tomatoes.

    Mastering the Pressure Cooker Process

    Importance of the Sealing Ring

    The sealing ring must be perfectly seated to maintain the pressure required for fast cooking. A loose ring will cause steam to leak, resulting in undercooked pasta.

    Using Quick Release to Prevent Overcooking

    Quick release is essential for pasta because it stops the cooking process immediately. If left to release naturally, the pasta can easily become overcooked and mushy.

    Calculating the Water Ratio

    Use just enough water to cover the pasta rather than a full pot of boiling water. This prevents the starch from diluting and keeps the cooking time precise.

    Avoiding Pasta Sticking During Cooking

    Tossing the pasta with a small amount of oil before pressure cooking can prevent the noodles from clumping. However, rinsing with cold water afterward usually solves any sticking issues.

    Dressing and Flavor Enhancements

    Using Bottled Italian Dressing for Speed

    Bottled dressing is a convenient way to get a consistent herb and vinegar profile. Look for options with a balance of olive oil and red wine vinegar for the best taste.

    Creating a Custom Vinaigrette

    If you prefer a homemade version, whisk together olive oil, apple cider vinegar, dried oregano, and garlic powder. This allows you to control the amount of sodium and sugar.

    Balancing Acidity with Lemon Juice

    Adding a squeeze of fresh lemon juice just before serving brightens the entire dish. The citric acid cuts through the richness of the feta cheese.

    Adjusting Salt and Pepper for Depth

    Always taste the salad after chilling, as flavors change when cold. Adding a final pinch of salt can wake up the flavors of the fresh vegetables.

    Protein Additions for a Main Course

    Adding Grilled Chicken Breast

    Sliced grilled chicken breast turns this side dish into a filling main meal. Ensure the chicken is cooled completely before adding it to avoid warming the salad.

    Incorporating Canned Chickpeas

    Chickpeas add a plant-based protein boost and a creamy texture. Rinse and drain them thoroughly to maintain the balance of the dressing.

    Using Flaked Tuna

    Canned tuna in water or oil adds a savory, salty element to the mix. This pairing works particularly well with the olives and red onion.

    Adding Hard-Boiled Eggs

    Chopped hard-boiled eggs add richness and extra satiety. They complement the crumbled feta and the acidity of the Italian dressing.

    Storage and Freshness Guidelines

    Best Containers for Long-Term Storage

    Store the salad in glass, airtight containers to keep the air out. This prevents the pasta from drying out and keeps the vegetables crisp for longer.

    Timing the Dressing Addition

    If you are preparing the salad 24 hours in advance, keep the dressing in a separate jar. Toss the dressing in just before serving to prevent the vegetables from wilting.

    Maximum Refrigeration Windows

    Pasta salads typically stay fresh in the fridge for up to four days. However, the texture is best within the first two days of preparation.

    Refreshing the Salad Before Serving

    Stir the salad gently before serving to redistribute the dressing that may have settled at the bottom. A small splash of extra oil or vinegar can revive the glossiness.

    Troubleshooting Common Issues

    Fixing Mushy Pasta Texture

    Mushy pasta is usually caused by overcooking or skipping the cold water rinse. To fix this, ensure you use the quick release valve and rinse immediately.

    Resolving a Bland Flavor Profile

    If the salad tastes flat, it likely needs more acidity or salt. Add a teaspoon of lemon juice or a bit more Italian dressing to brighten the flavor.

    Managing Excess Liquid in the Bowl

    Watery salads often happen when cucumbers or tomatoes release too much moisture. Drain your vegetables in a colander before adding them to the pasta.

    Preventing Onion Overpowering

    If the red onion is too strong, soak the chopped pieces in cold water for ten minutes. Drain and pat dry before adding them to the salad to mellow the flavor.

    Frequently Asked Questions

    Can I use gluten-free pasta?

    Yes, gluten-free pasta works well, but be careful with cooking times. Gluten-free varieties often cook faster or become mushy more quickly in a pressure cooker.

    Is this salad suitable for meal prep?

    Yes, it is an excellent meal prep option. Store portions in individual containers and add fresh herbs or extra cheese on the day of consumption.

    Can I swap feta for another cheese?

    You can use crumbled goat cheese for a tangier taste or fresh mozzarella pearls for a milder flavor. Both options pair well with Italian dressing.

    How do I keep the vegetables crisp?

    Keep the salad chilled until the moment of serving. Avoiding high heat and storing the dressing separately until the last minute are the best ways to maintain crunch.

    Print
    clock clock iconcutlery cutlery iconflag flag iconfolder folder iconinstagram instagram iconpinterest pinterest iconfacebook facebook iconprint print iconsquares squares iconheart heart iconheart solid heart solid icon
    Quick and Easy Pasta Salad

    Zesty Pressure Cooker Pasta Salad


    5 Stars 4 Stars 3 Stars 2 Stars 1 Star

    No reviews

    • Author: imageuploader
    • Total Time: 20 minutes
    • Yield: 4 servings 1x
    • Diet: Vegetarian

    Description

    This quick and easy pasta salad is perfect for a refreshing meal or side dish. Packed with fresh vegetables, tangy feta cheese, and a flavorful Italian dressing, it’s made even faster using a pressure cooker to perfectly cook the pasta.


    Ingredients

    Scale
    • 8 oz pasta (rotini or penne)
    • 1 cup cherry tomatoes, halved
    • 1/2 cup black olives, sliced
    • 1/2 cup cucumber, diced
    • 1/4 cup red onion, finely chopped
    • 1/2 cup feta cheese, crumbled
    • 1/4 cup Italian dressing
    • Salt to taste
    • Pepper to taste

    Instructions

    1. Cook: Pour pasta into the pressure cooker with enough water to just cover it and set to manual for 6 minutes.
    2. Cool: Use quick release to let steam out, drain the pasta, and rinse under cold water.
    3. Mix: In a large bowl, combine pasta, cherry tomatoes, black olives, cucumber, red onion, and feta cheese.
    4. Dress: Pour in Italian dressing and toss gently to combine.
    5. Season: Add salt and pepper to taste.
    6. Chill: Refrigerate for at least 15 minutes before serving.

    Notes

    Store in an airtight container in the fridge for up to 4 days. For best texture, add dressing just before serving or consume within 2 days if pre-mixed. Stir gently before serving to refresh the dressing coat.

    • Prep Time: 10 minutes
    • Cook Time: 10 minutes
    • Category: Salad
    • Method: Pressure Cooking
    • Cuisine: Italian-American

    Nutrition

    • Serving Size: 1 serving
    • Calories: 350 kcal
    • Sugar: 6 g
    • Sodium: 1300 mg
    • Fat: 22 g
    • Saturated Fat: 6 g
    • Unsaturated Fat: 16 g
    • Trans Fat: 0 g
    • Carbohydrates: 50 g
    • Fiber: 4 g
    • Protein: 14 g
    • Cholesterol: 25 mg
  • Crispy Almond Flour Keto Chicken Parmesan

    Crispy Almond Flour Keto Chicken Parmesan

    This low-carb chicken parmesan uses a specialized almond flour and Parmesan crust to achieve a golden, satisfying crunch. It is a quick and practical weeknight meal that delivers classic Italian flavors without the carbohydrates.

    Recipe image

    List of ingredients

    • 4 boneless, skinless chicken breasts – pounded to 1/2 inch thickness for even cooking.
    • 1 cup almond flour – used as the primary low-carb breading base.
    • 1 cup grated Parmesan cheese – divided for the breading and the final topping.
    • 2 large eggs – beaten to act as a binder for the crust.
    • 1 teaspoon garlic powder – adds a savory depth to the breading.
    • 1 teaspoon Italian seasoning – provides traditional herb flavors.
    • 1/2 teaspoon salt – enhances all the overall flavors.
    • 1/4 teaspoon black pepper – adds a subtle hint of spice.
    • 1/2 cup low carb marinara sauce – ensure the label indicates no added sugars.
    • 1 cup shredded mozzarella cheese – for a melted, bubbly topping.
    • 2 tablespoons olive oil or avocado oil – optional for pan-frying, otherwise use cooking spray.

    step-by-step instructions

    1. Prepare Heat: Preheat your oven to 400°F (200°C) and line a baking sheet with parchment paper or grease it lightly. If using an air fryer, preheat it to 375°F (190°C).
    2. Set Up Station: Organize three shallow dishes. Whisk eggs in the first; combine almond flour, 1/2 cup Parmesan, garlic powder, Italian seasoning, salt, and pepper in the second; keep the third empty.
    3. Initial Dip: Dip each pounded chicken breast into the egg mixture, allowing any excess egg to drip off before moving forward.
    4. First Coating: Press the chicken firmly into the almond flour and Parmesan mixture, ensuring both sides are completely coated. Press firmly to help the crust adhere.
    5. Double Coating: For extra crispiness, dip the crusted chicken back into the egg and then roll it in the remaining 1/2 cup of grated Parmesan cheese.
    6. Arrange: Place the crusted chicken breasts in a single layer on the prepared baking sheet or in the air fryer basket.
    7. First Bake: Bake for 15-18 minutes, flipping the chicken halfway through, until the meat is cooked through and the crust is golden brown. If pan-frying, cook in oil for 4-5 minutes per side before transferring to a dish.
    8. Add Sauce: Remove the chicken from the heat and spoon approximately 2 tablespoons of low carb marinara sauce over the top of each breast.
    9. Add Cheese: Top each piece with shredded mozzarella cheese and a final sprinkle of any remaining Parmesan cheese.
    10. Final Melt: Return the chicken to the oven or air fryer and bake for another 3-5 minutes until the cheese is melted and bubbly.
    11. Rest and Serve: Let the chicken rest for a few minutes to lock in juices, then serve immediately with low-carb side dishes.

    Professional Cooking Tips for Maximum Crunch

    Pounding Chicken to a Uniform Half-Inch Thickness

    Use a meat mallet to pound the chicken breasts until they are an even half-inch thick. This ensures that the thinner edges do not dry out while the center is still cooking. Consistent thickness allows the crust to brown evenly across the entire surface.

    Applying a Double-Layer Breaded Coating

    The second dip in egg and Parmesan creates a reinforced barrier that locks in moisture. This technique prevents the breading from separating from the meat during the flipping process. It results in a thicker, more professional crunch that mimics traditional breadcrumbs.

    Controlling Marinara Quantity to Prevent Sogginess

    Spoon the sauce only on the center of the chicken breast rather than covering the entire piece. Leaving the edges exposed ensures that those areas stay crispy throughout the final melting phase. Using too much sauce can penetrate the crust and make it soft.

    Utilizing Parchment Paper for Easier Release

    Lining your baking sheet with parchment paper prevents the Parmesan cheese from sticking to the pan. This makes it much easier to flip the chicken halfway through the cooking process. It also significantly reduces the time spent cleaning the baking sheet after dinner.

    Using the Broiler for a Final Golden Finish

    If the cheese is melted but the crust needs more color, slide the pan under the broiler for 60 seconds. Watch the chicken very closely as almond flour can burn quickly under direct high heat. This provides a deeply caramelized appearance and a sharper snap to the crust.

    Low Carb Ingredient Alternatives

    Substituting Almond Flour with Crushed Pecans

    If almond flour is unavailable, finely crushed pecans or walnut meal can be used as a substitute. These nut flours provide a similar fat content and structure for the breading. The flavor will be slightly nuttier, which pairs well with the sharp Parmesan cheese.

    Selecting a Low Sugar Marinara Sauce

    Carefully check the nutrition label of your marinara to ensure it contains 4 grams of sugar or less per serving. Avoid brands that list corn syrup, honey, or cane sugar in the first few ingredients. A homemade blend of crushed tomatoes, garlic, and oregano is the safest way to control macros.

    Swapping Mozzarella for Provolone Cheese

    For a bolder, sharper flavor profile, replace the mozzarella with sliced or shredded provolone. Provolone melts similarly to mozzarella but offers a more piquant taste. You can also use a blend of both cheeses for a balance of creaminess and tang.

    Choosing High Smoke Point Oils for Frying

    When pan-frying, use avocado oil because of its high smoke point, which prevents the oil from burning at high temperatures. Olive oil is a great choice for baking or light sautéing but may smoke during intense frying. Always keep the oil at a steady medium-high heat for the best sear.

    Recipe Variations and Adaptations

    Creating a Keto Chicken Parmesan Casserole

    To make this family-style, lightly brown the crusted chicken in a pan first. Layer the seared chicken in a baking dish with alternating layers of marinara and mozzarella. Bake until the entire dish is bubbling, resulting in a heartier, gooier meal.

    Using an Air Fryer for Faster Cooking

    The air fryer maximizes airflow, which creates a more consistent crunch on the almond flour crust. Cook the breaded chicken at 375°F for 10 minutes, flip, and then add toppings for a final 3-5 minutes. This method typically reduces the total cooking time compared to the oven.

    Adding Red Pepper Flakes for a Spicy Version

    Mix half a teaspoon of crushed red pepper flakes into the almond flour and Parmesan mixture. You can also add a pinch of cayenne pepper to the egg wash for an extra kick. This adds a spicy contrast to the rich, melted cheese topping.

    Substituting Pesto for Traditional Marinara

    Replace the marinara sauce with a nut-based pesto for a different Italian twist. The basil and garlic in the pesto complement the almond flour crust perfectly. Top with fresh basil leaves after baking to enhance the aromatic profile.

    Recommended Low Carb Side Dishes

    Garlic Butter Zucchini Noodles

    Sauté spiralized zucchini with garlic and butter for 2-3 minutes over medium heat. This provides a pasta-like experience that mimics spaghetti without adding significant carbohydrates. Season with a pinch of salt and pepper to keep the flavors clean.

    Steamed Broccoli with Parmesan

    Steam fresh broccoli florets until tender-crisp and toss them with melted butter and grated Parmesan. The slight bitterness of the broccoli cuts through the richness of the fried chicken. A squeeze of fresh lemon juice can add a bright acidity to the plate.

    Creamy Cauliflower Mash

    Steam cauliflower until very soft, then blend it with a tablespoon of cream cheese and a splash of heavy cream. This creates a smooth, potato-like side that adds a creamy texture to the meal. Season with garlic powder and salt for a savory finish.

    Fresh Arugula and Red Wine Vinaigrette Salad

    Toss baby arugula with extra virgin olive oil, red wine vinegar, and a pinch of salt. The peppery leaves and acidic dressing provide a necessary contrast to the heavy cheese and fried coating. It cleanses the palate between bites of the rich chicken.

    Storage and Reheating Methods

    Airtight Container Storage in the Fridge

    Place leftover chicken in a glass airtight container to prevent moisture from entering the crust. Store the chicken in the refrigerator for up to three days. Ensure the chicken is completely cooled before sealing the lid to avoid creating steam.

    Placing Parchment Paper Between Chicken Pieces

    If you must stack the chicken breasts in a container, place a small piece of parchment paper between each layer. This prevents the cheese and sauce from sticking the pieces together. It also helps maintain a slight separation to keep the crust from softening.

    Reheating with an Oven for Best Texture

    Preheat your oven to 350°F (175°C) and place the chicken on a foil-lined baking sheet. Heat for about 10 minutes, which gently dries the crust and remelts the cheese. This is the most reliable way to preserve the original texture.

    Rapid Reheating in the Air Fryer

    For the fastest results, place the leftovers in an air fryer at 350°F for 4 to 6 minutes. The rapid circulation of dry heat brings the almond flour crust back to life quickly. It is significantly more effective than other quick-heating methods.

    Common Cooking Troubleshooting

    Fixing Breaded Coating That Peels Off

    If the crust separates from the meat, ensure you are patting the chicken completely dry with paper towels before the egg dip. Press the almond flour mixture firmly into the meat using your palms. This creates a tighter bond between the protein and the breading.

    Preventing the Chicken from Drying Out

    Overcooking chicken breasts can lead to a rubbery texture. Use a digital meat thermometer to check that the internal temperature has reached 165°F (74°C). Remove the chicken from the heat immediately once this temperature is hit.

    Solving the Issue of Soggy Bottoms

    Soggy bottoms usually occur when the chicken is placed on a flat pan without enough airflow. Using a wire rack over a baking sheet allows heat to circulate under the chicken. Alternatively, flipping the chicken halfway through the bake is essential for a dry, crisp base.

    Frequently Asked Questions

    Can I use a different nut flour for the crust?

    Yes, you can use crushed pecans or walnut meal as a replacement for almond flour. These options maintain the low-carb profile and provide a similar structural bind. Avoid using coconut flour alone as it absorbs too much moisture and may make the crust crumbly.

    How do I know when the chicken is safely cooked?

    The most accurate method is using a meat thermometer inserted into the thickest part of the breast. The chicken is safe to eat once it reaches an internal temperature of 165°F. The crust should also be a deep golden brown.

    Can I prepare the breaded chicken in advance?

    You can bread the chicken several hours in advance and store it in the refrigerator. However, do not add the sauce and cheese until you are ready to cook the meat. Cooking them fresh ensures the crust remains as crispy as possible.

    Print
    clock clock iconcutlery cutlery iconflag flag iconfolder folder iconinstagram instagram iconpinterest pinterest iconfacebook facebook iconprint print iconsquares squares iconheart heart iconheart solid heart solid icon
    Crispy Almond Flour Keto Chicken Parmesan

    Crispy Almond Flour Keto Chicken Parmesan


    5 Stars 4 Stars 3 Stars 2 Stars 1 Star

    No reviews

    • Author: imageuploader
    • Total Time: 40 minutes
    • Yield: 4 servings 1x
    • Diet: Gluten Free

    Description

    Make this incredibly satisfying Keto Chicken Parmesan using an almond flour and Parmesan crust for maximum crispiness. This low carb Italian classic is perfect for a weeknight dinner.


    Ingredients

    Scale
    • 4 boneless, skinless chicken breasts, pounded to 1/2 inch thickness
    • 1 cup almond flour
    • 1 cup grated Parmesan cheese, divided
    • 2 large eggs
    • 1 teaspoon garlic powder
    • 1 teaspoon Italian seasoning
    • 1/2 teaspoon salt
    • 1/4 teaspoon black pepper
    • 1/2 cup low carb marinara sauce
    • 1 cup shredded mozzarella cheese
    • 2 tablespoons olive oil or avocado oil

    Instructions

    1. Preheat: Preheat your oven to 400°F (200°C) and line a baking sheet with parchment paper; if using an air fryer, preheat to 375°F (190°C).
    2. Prepare Station: Set up three shallow dishes: one with whisked eggs, one with a combination of almond flour, 1/2 cup grated Parmesan, garlic powder, Italian seasoning, salt, and pepper, and one left empty.
    3. First Coating: Dip each pounded chicken breast into the egg mixture, letting excess drip off.
    4. Second Coating: Press the chicken firmly into the almond flour and Parmesan mixture, coating both sides completely.
    5. Extra Crispiness: Dip the crusted chicken back into the egg and then into the remaining 1/2 cup of grated Parmesan cheese.
    6. Arrange: Place the crusted chicken breasts on the prepared baking sheet or in the air fryer basket in a single layer.
    7. Cook: Bake for 15-18 minutes, flipping halfway through, until the chicken is cooked through and the crust is golden brown.
    8. Sauce: Remove the chicken and spoon about 2 tablespoons of low carb marinara sauce over the top of each breast.
    9. Cheese: Top each piece with mozzarella cheese and a sprinkle of the remaining Parmesan cheese.
    10. Final Bake: Return to the oven or air fryer and bake for another 3-5 minutes, or until the cheese is melted and bubbly.
    11. Rest: Let the chicken rest for a few minutes before serving.

    Notes

    For the crispiest texture when baking, place the baking sheet under the broiler for the last minute, watching closely to prevent burning. If you prefer an air fryer method, cook the crusted chicken for 10 minutes, then add toppings and cook for an additional 3-5 minutes until cheese melts. Always check your marinara sauce label for added sugar. Pounding the chicken ensures even cooking and a better crust-to-meat ratio.

    • Prep Time: 15 minutes
    • Cook Time: 25 minutes
    • Category: Dinner
    • Method: Baking
    • Cuisine: Italian American

    Nutrition

    • Serving Size: 1 breast
    • Calories: 450 kcal
    • Sugar: 4 g
    • Sodium: 550 mg
    • Fat: 28 g
    • Saturated Fat: 12 g
    • Unsaturated Fat: 10 g
    • Trans Fat: 0 g
    • Carbohydrates: 7 g
    • Fiber: 2 g
    • Protein: 42 g
    • Cholesterol: 150 mg
  • Savory Baked Egg Muffins with Cheese and Vegetables

    Savory Baked Egg Muffins with Cheese and Vegetables

    These protein-packed egg muffins are a convenient way to prepare healthy breakfasts for the entire week. They combine eggs, fresh vegetables, and melted cheese into portable cups that are easy to reheat and enjoy on the go.

    Recipe image

    List of ingredients

    • 12 large eggs – provides the structural base for the muffins.
    • 1 cup shredded cheddar cheese – adds a rich, salty flavor and creaminess.
    • 1/2 cup red bell pepper, diced – adds a sweet crunch and bright color.
    • 1/2 cup fresh spinach, chopped – contributes essential nutrients and earthy flavor.
    • 1/2 cup cooked and crumbled beef bacon – provides a savory, smoky element.
    • 1/2 teaspoon salt – enhances the overall taste of the egg mixture.
    • 1/4 teaspoon pepper – adds a subtle warmth and seasoning.

    step-by-step instructions

    1. Prepare Oven and Pan: Preheat your oven to 350°F and grease a 12-cup muffin pan thoroughly with non-stick cooking spray to ensure easy removal.
    2. Beat the Eggs: Crack the eggs into a large mixing bowl and beat them until the mixture is light and frothy to help the muffins rise.
    3. Combine Ingredients: Stir in the shredded cheddar cheese, diced red bell pepper, chopped spinach, crumbled beef bacon, salt, and pepper until the ingredients are evenly distributed.
    4. Fill the Cups: Carefully pour the mixture into each muffin cup, leaving a small amount of space at the top to allow for expansion during baking.
    5. Bake and Cool: Bake for 15-20 minutes until the centers are firm and no longer jiggle when touched. Let them cool slightly in the pan before serving.

    Optimization for Baking Results

    Beating Eggs to Create a Lighter Texture

    Whisking the eggs until they are frothy introduces air into the mixture. This aeration is key to achieving a fluffier muffin rather than a dense, rubbery texture. Use a whisk or an electric mixer for a few minutes until small bubbles form on the surface.

    Proper Pan Preparation to Avoid Sticking

    Egg mixtures are prone to sticking to the sides of muffin tins. Using a high-quality non-stick spray or brushing the cups with melted butter ensures the muffins release cleanly. For extra security, you can use silicone muffin liners which are naturally non-stick.

    Mixing Ingredients Gently to Maintain Aeration

    Once the eggs are beaten, fold in the vegetables and cheese using a spatula. Avoid overmixing the batter, as this can deflate the air you whipped into the eggs. Stir just until the add-ins are evenly dispersed throughout the bowl.

    Utilizing Fresh Vegetables for Better Flavor

    Freshly diced bell peppers and chopped spinach provide the best texture and taste. Avoid using pre-cut frozen vegetables if possible, as they release more water during baking. If you must use frozen spinach, squeeze it dry in a kitchen towel first.

    Customizing Your Ingredients

    Replacing Beef Bacon with Different Protein Sources

    While beef bacon adds a great smoky flavor, you can swap it for other proteins. Cooked turkey sausage or diced smoked tofu are excellent alternatives that maintain the savory profile. Ensure any replacement meat is fully cooked before adding it to the egg mixture.

    Integrating Various Vegetable Combinations

    You can vary the nutrients by using different vegetables. Diced zucchini, sautéed mushrooms, or grated carrots work well in this recipe. Keep the total volume of vegetables around one cup to maintain the structural integrity of the muffins.

    Selecting Alternative Cheese Varieties

    Cheddar is a classic choice, but other cheeses can change the flavor profile. Feta provides a tangy, salty contrast, while mozzarella offers a milder taste and a stretchier texture. Use a finely shredded variety for more consistent melting.

    Enhancing Taste with Additional Seasonings

    Beyond salt and pepper, you can add dried herbs or spices. A pinch of paprika, garlic powder, or dried oregano can add depth to the flavor. Add these seasonings directly into the beaten eggs before stirring in the solids.

    Serving and Pairing Ideas

    Pairing with Fresh Seasonal Fruits

    Balance the savory nature of the egg muffins with a side of fresh fruit. Sliced strawberries, blueberries, or melon chunks add a refreshing sweetness and extra vitamins. This combination creates a complete, balanced breakfast plate.

    Adding Fresh Garnishes and Toppings

    Enhance the presentation and taste by adding toppings after baking. A small dollop of fresh salsa or a slice of avocado on top adds creaminess and acidity. Freshly chopped parsley or chives can also provide a bright, herbal finish.

    Serving with Whole Grain Sides

    For a more filling meal, serve the muffins alongside a slice of toasted whole-grain bread. A small side of quinoa or a piece of toasted rye bread adds complex carbohydrates for sustained energy. This makes the meal more satisfying for those with higher caloric needs.

    Choosing Complementary Breakfast Beverages

    These muffins pair well with a variety of drinks. A hot cup of black coffee or herbal tea complements the savory cheese and beef bacon. For a colder option, a fresh green smoothie provides a nutrient-dense accompaniment.

    Storage and Preservation

    Refrigeration Guidelines for Freshness

    Store leftover egg muffins in an airtight container in the refrigerator. They will remain fresh and safe to eat for up to five days. Keeping them sealed prevents the eggs from absorbing other odors from the fridge.

    Freezing and Thawing Techniques

    Egg muffins freeze exceptionally well for long-term meal prep. Flash-freeze them on a baking sheet for one hour before transferring them to a freezer-safe bag. They can be stored in the freezer for up to two months without losing quality.

    Reheating Using a Microwave Oven

    To reheat in the microwave, place one or two muffins on a microwave-safe plate. Heat them on medium power for 30 to 60 seconds until warmed through. Avoid overheating, as this can make the eggs rubbery.

    Reheating Using a Conventional Oven

    For a crispier exterior, reheat the muffins in a preheated oven at 300°F. Place them on a baking sheet for about 5 to 10 minutes. This method is slower but preserves the texture better than the microwave.

    Meal Prep Strategies

    Efficient Batch Cooking Workflow

    Prepare a large batch of these muffins on a Sunday to save time during the week. By using two muffin pans at once, you can double the yield in the same cooking time. This ensures you have breakfast ready for every weekday morning.

    Managing Cooling Times Before Storage

    Allow the muffins to cool completely in the pan before moving them to a container. Placing hot muffins in a sealed container creates steam, which can make the tops soggy. A cooling period of 15 to 20 minutes is usually sufficient.

    Planning Weekly Breakfast Portions

    Divide the muffins into individual snack bags or small containers for easy grabbing. Label each container with the date they were made to track freshness. This organization reduces morning stress and encourages consistent healthy eating.

    Troubleshooting Guide

    Preventing Muffins from Sticking to the Pan

    If your muffins are sticking, try using a combination of butter and flour or a high-heat cooking spray. Ensure the spray reaches the bottom and all sides of the muffin cup. Letting the muffins sit for two minutes after baking also helps them release naturally.

    Eliminating Excess Moisture for a Firmer Set

    Watery muffins are usually caused by vegetables releasing moisture. Sautéing the bell peppers and spinach briefly before adding them to the eggs can remove excess water. This results in a firmer, more cohesive muffin structure.

    Recognizing the Signs of Overcooked Eggs

    Overcooked eggs become rubbery and may puff up excessively and then collapse. If the muffins are browning too quickly on top, lower the oven temperature slightly. Remove them from the oven the moment the center is set and no longer wobbles.

    Ensuring Even Baking Across the Pan

    Different ovens have hot spots that can lead to unevenly cooked muffins. Rotate the muffin pan halfway through the baking process to ensure all cups receive equal heat. Using a baking rack in the center of the oven is also recommended.

    Frequently Asked Questions

    Can I make these muffins without cheese?

    Yes, you can omit the cheese entirely. To compensate for the lost flavor and fat, consider adding a tablespoon of Greek yogurt to the eggs for creaminess or increasing the amount of diced vegetables.

    How do I store them without them getting soggy?

    The key is to let them cool completely before placing them in an airtight container. If you are storing them in the fridge, place a piece of paper towel at the bottom of the container to absorb any stray moisture.

    What is the best way to freeze these muffins?

    Wrap each muffin individually in parchment paper or aluminum foil before placing them in a freezer bag. This prevents them from sticking together and allows you to thaw only the number of muffins you need for that day.

    Can I use egg whites instead of whole eggs?

    You can use egg whites, but the muffins will have a different texture and a lighter color. For the best results, use a mix of whole eggs and whites to maintain some of the richness from the yolks while reducing the fat content.

    How can I tell if the muffins are fully cooked?

    The muffins are done when the tops feel firm to a light touch and the edges have slightly pulled away from the sides of the pan. You can also insert a toothpick into the center; it should come out clean without any liquid egg.

    Print
    clock clock iconcutlery cutlery iconflag flag iconfolder folder iconinstagram instagram iconpinterest pinterest iconfacebook facebook iconprint print iconsquares squares iconheart heart iconheart solid heart solid icon
    Savory Baked Egg Muffins with Cheese and Veggies

    Savory Baked Egg Muffins with Cheese and Vegetables


    5 Stars 4 Stars 3 Stars 2 Stars 1 Star

    No reviews

    • Author: imageuploader
    • Total Time: 30 minutes
    • Yield: 12 muffins 1x
    • Diet: General

    Description

    These quick and versatile breakfast egg muffins are easy to make and packed with flavor and nutrition, perfect for busy mornings.


    Ingredients

    Scale
    • 12 large eggs
    • 1 cup shredded cheddar cheese
    • ½ cup red bell pepper, diced
    • ½ cup fresh spinach, chopped
    • ½ cup cooked and crumbled beef bacon
    • ½ teaspoon salt
    • ¼ teaspoon pepper

    Instructions

    1. Preheat: Preheat the oven to 350°F and prepare a 12-cup muffin pan by spraying it with non-stick spray.
    2. Beat: In a large mixing bowl, crack in the eggs and beat them until they are light and frothy.
    3. Mix: Add the shredded cheddar cheese, diced red bell pepper, chopped spinach, crumbled bacon, salt, and pepper into the beaten eggs. Stir everything together until well combined.
    4. Fill: Carefully fill each muffin cup with the egg mixture, leaving a little room for the muffins to rise.
    5. Bake: Place the muffin pan in the preheated oven and bake for 15-20 minutes until the tops feel firm and no longer jiggle. Allow them to cool slightly before serving.

    Notes

    For best results, use fresh ingredients, avoid overmixing, and store leftovers in an airtight container in the refrigerator for up to 5 days.

    • Prep Time: 10 minutes
    • Cook Time: 20 minutes
    • Category: Breakfast
    • Method: Baking
    • Cuisine: American

    Nutrition

    • Serving Size: 1 muffin
    • Calories: 150 kcal
    • Sugar: 1 g
    • Sodium: 220 mg
    • Fat: 11 g
    • Saturated Fat: 5 g
    • Unsaturated Fat: 6 g
    • Trans Fat: 0 g
    • Carbohydrates: 2 g
    • Fiber: 1 g
    • Protein: 10 g
    • Cholesterol: 185 mg
  • Creamy Cheesy Chicken and Broccoli Orzo

    Creamy Cheesy Chicken and Broccoli Orzo

    This one-pot meal combines tender chicken and broccoli with cheesy orzo pasta for a satisfying dinner. It is a fast, nutritious option that works well for busy weeknights or organized meal planning.

    Recipe image

    List of ingredients

    • 2 cups broccoli florets, bite-sized (about 1-inch pieces), fresh or fully thawed and drained frozen – adds color and nutrients.
    • 2 cups cooked shredded chicken, such as rotisserie chicken – provides a quick protein base.
    • 2 cups shredded cheddar cheese, preferably sharp – creates a rich, tangy flavor.
    • 1 cup heavy cream – ensures a thick and creamy sauce consistency.
    • 1 cup orzo pasta – a small rice-shaped pasta that absorbs flavors.
    • 2 cups chicken broth – the primary cooking liquid for the orzo.
    • 1 tbsp olive oil – used for sautéing vegetables.
    • 1 tbsp butter – adds richness to the base.
    • 1/2 medium onion, chopped – provides a foundational aromatic flavor.
    • 3 cloves garlic, minced – adds pungent depth to the dish.
    • 1/2 tsp Italian seasoning – a blend of herbs for a savory profile.
    • 1 tsp Worcestershire sauce – enhances the umami taste.
    • Salt and pepper to taste – used for final seasoning adjustments.

    step-by-step instructions

    1. Heat the oil and butter: Place a large 12-inch skillet over medium heat. Add the olive oil and butter, stirring until the butter is completely melted.
    2. Sauté the onions: Add the chopped onions to the skillet. Cook for 3 to 4 minutes, stirring occasionally, until they become soft and translucent.
    3. Add broccoli: Toss in the broccoli florets. Sauté for approximately 2 minutes until they turn bright green but remain crisp.
    4. Incorporate garlic and seasoning: Stir in the minced garlic and Italian seasoning. Cook for 30 seconds to release the aromatic oils without burning the garlic.
    5. Toast the orzo: Add the dry orzo pasta to the skillet. Stir it with the vegetables for a few minutes to toast the pasta, which enhances its nutty flavor.
    6. Pour in liquids: Stir in the chicken broth, heavy cream, and Worcestershire sauce. Bring the mixture to a boil, then immediately reduce the heat to a simmer.
    7. Cook the orzo: Let the mixture simmer uncovered for about 10 minutes. Stir frequently to prevent the pasta from sticking to the bottom; if the sauce becomes too dry, stir in an additional 1/4 cup of broth.
    8. Add chicken and cheese: Stir in the shredded chicken until heated through. Remove the skillet from the heat and mix in the shredded cheddar cheese until it is completely melted.
    9. Season and serve: Taste the dish and add salt and pepper as needed. Let the recipe sit for 2 to 3 minutes to allow the sauce to thicken before serving.

    Technical Cooking Tips

    Toast the Orzo for Better Texture

    Toasting the dry orzo in butter and oil before adding liquids creates a toasted flavor profile. This process also helps the pasta maintain its structure, preventing it from becoming overly mushy during the simmering stage.

    Prevent Garlic from Burning

    Add the minced garlic only during the final 30 seconds of sautéing the vegetables. Garlic burns quickly at medium heat, which can introduce a bitter taste to the entire sauce.

    Control Broccoli Doneness

    Sauté the broccoli briefly to sear the edges while keeping the center crisp. If you prefer very soft broccoli, you can add it later in the simmering process, but the initial sauté provides better flavor.

    Emulsify the Cheese Correctly

    Always remove the skillet from the heat source before stirring in the cheddar cheese. Adding cheese to boiling liquid can cause the fats to separate, resulting in a grainy or oily sauce.

    Manage Liquid Levels

    Orzo absorbs liquid at different rates depending on the heat intensity. Keep a small amount of extra chicken broth nearby to stir in if the pasta absorbs the cream too quickly before becoming tender.

    Ingredient Substitutions

    Alternative Creamy Bases

    If heavy cream is unavailable, you can use a mixture of whole milk and a teaspoon of cornstarch. This provides a similar thickness, though the final sauce will be slightly less rich than one made with heavy cream.

    Different Cheese Varieties

    While sharp cheddar provides a classic taste, you can substitute it with Monterey Jack for a milder flavor or Gruyere for a nuttier profile. Using a blend of two cheeses can add complexity to the dish.

    Pasta Shape Swaps

    If you do not have orzo, small pasta shapes like ditalini or shells can be used. Adjust the simmering time based on the specific pasta’s cooking instructions to ensure it is al dente.

    Vegetable Broth Options

    To reduce the amount of chicken products, replace the chicken broth with vegetable broth. This maintains the liquid ratio and salt levels while altering the base flavor slightly.

    Low-Sodium Adjustments

    Use low-sodium chicken broth and reduce the added salt. Since cheddar cheese and Worcestershire sauce both contain significant salt, tasting the dish at the end is essential before adding more.

    Recipe Variations

    Vegetarian Adaptation

    Remove the chicken and replace it with canned chickpeas or sautéed mushrooms for protein. Use vegetable broth instead of chicken broth to ensure the dish is entirely meat-free.

    Low-Carb Modification

    Substitute the orzo pasta with cauliflower rice. Because cauliflower rice does not absorb liquid like pasta, reduce the amount of broth and cream by half to avoid a soup-like consistency.

    Adding Seasonal Vegetables

    Incorporate diced carrots, frozen peas, or fresh spinach into the skillet. Add spinach at the very end along with the cheese, as it wilts quickly and does not require simmering.

    Increasing the Heat Level

    Stir in a pinch of crushed red pepper flakes or finely diced jalapeños during the onion sauté stage. This adds a subtle spicy kick that cuts through the richness of the heavy cream and cheese.

    Adding Fresh Herbs

    Stir in chopped fresh parsley or basil just before serving. Fresh herbs provide a bright contrast to the heavy, cheesy flavors and improve the visual presentation of the dish.

    Serving and Presentation

    Complementary Side Dishes

    Serve this dish with a crisp green salad dressed in a light vinaigrette. The acidity of a lemon or balsamic dressing balances the creamy nature of the cheesy orzo.

    Garnish Options

    Top each serving with a sprinkle of freshly grated parmesan or a dash of paprika. Adding a few whole broccoli florets on top can also make the plating look more professional.

    Family Style Serving

    Transfer the finished orzo to a wide shallow bowl rather than deep plates. This allows the sauce to stay evenly distributed and prevents the pasta from clumping at the bottom.

    Portioning for Meal Prep

    Divide the recipe into airtight glass containers immediately after the thickening period. Allow the containers to cool slightly before sealing them to prevent excess condensation.

    Storage and Reheating

    Refrigeration Guidelines

    Store leftovers in an airtight container in the refrigerator for up to 4 days. Ensure the dish is cooled to room temperature before sealing to maintain the quality of the cheese sauce.

    Freezing Instructions

    Place the cooled orzo in a freezer-safe container and freeze for up to 3 months. Thaw the container in the refrigerator overnight before reheating to ensure an even temperature.

    Restoring Creaminess During Reheating

    When reheating on the stove, add a splash of chicken broth or cream. The pasta continues to absorb moisture while stored, so adding liquid prevents the dish from becoming dry or sticky.

    Microwave Reheating Tips

    Heat in short 30-second intervals, stirring in between. This prevents the cheese from separating and ensures the chicken is heated through without overcooking the broccoli.

    Troubleshooting Common Issues

    Fixing a Grainy Cheese Sauce

    If the cheese separates or looks grainy, it is usually due to overheating. Stir in a tablespoon of warm cream or milk and whisk vigorously over very low heat to re-emulsify the sauce.

    Correcting Mushy Orzo

    Mushy pasta occurs when it is simmered too long or stirred too aggressively. To avoid this, check the texture at the 8-minute mark and remove from heat as soon as the pasta is tender.

    Adjusting a Sauce That Is Too Thick

    If the dish becomes too thick while sitting, stir in a small amount of warm broth. Add the liquid one tablespoon at a time until the desired creamy consistency is restored.

    Balancing Overly Salty Flavors

    If the dish is too salty, add a squeeze of fresh lemon juice or a small amount of unsalted cream. The acidity and fat help neutralize the excess saltiness.

    Frequently Asked Questions

    Can I use uncooked chicken instead of shredded chicken?

    Yes, you can dice raw boneless skinless chicken breast and sauté it with the onions at the beginning. Ensure the chicken is cooked through before adding the liquids and orzo.

    Can I use frozen broccoli instead of fresh?

    Yes, frozen broccoli works well. Ensure it is fully thawed and drained of excess water before adding it to the skillet to avoid watering down the sauce.

    Is there a dairy-free alternative for this recipe?

    You can use a plant-based heavy cream substitute and dairy-free shredded cheese. Ensure the vegan cheese has a good melting point to achieve a similar creamy texture.

    Can I make this recipe in a slow cooker?

    This recipe is designed for a skillet to toast the pasta. For a slow cooker, sauté the aromatics first, then combine all ingredients and cook on low for 3-4 hours, stirring in the cheese at the end.

    Why did my orzo stick to the pan?

    Sticking usually happens if the heat is too high or if the pasta is not stirred frequently during the simmering stage. Using a heavy-bottomed non-stick skillet can help prevent this.

    How do I know when the orzo is perfectly cooked?

    The orzo should be tender but still have a slight firmness in the center. It should be absorbed into a thick sauce rather than swimming in liquid.

    Print
    clock clock iconcutlery cutlery iconflag flag iconfolder folder iconinstagram instagram iconpinterest pinterest iconfacebook facebook iconprint print iconsquares squares iconheart heart iconheart solid heart solid icon
    Cheesy Chicken Broccoli Orzo

    Creamy Cheesy Chicken and Broccoli Orzo


    5 Stars 4 Stars 3 Stars 2 Stars 1 Star

    No reviews

    • Author: imageuploader
    • Total Time: 30 minutes
    • Yield: 4 servings 1x
    • Diet: General

    Description

    A comforting dish combining tender chicken, orzo pasta, fresh broccoli, and melty cheddar cheese, perfect for quick dinners or meal prepping.


    Ingredients

    Scale
    • 2 cups broccoli florets, bite-sized (about 1-inch pieces)
    • 2 cups cooked shredded chicken
    • 2 cups shredded cheddar cheese
    • 1 cup heavy cream
    • 1 cup orzo pasta
    • 2 cups chicken broth
    • 1 tbsp olive oil
    • 1 tbsp butter
    • 1/2 medium onion, chopped
    • 3 cloves garlic, minced
    • 1/2 tsp Italian seasoning
    • 1 tsp Worcestershire sauce
    • Salt and pepper to taste

    Instructions

    1. Heat the oil and butter: Begin by placing a large 12-inch skillet over medium heat. Add the olive oil and butter, allowing them to melt together.
    2. Sauté the onions: Once the oil and butter are hot, add the chopped onions. Sauté the onions for about 3 to 4 minutes or until they become soft and translucent.
    3. Add broccoli: Toss in the broccoli florets and cook them for another 2 minutes. You want them to be bright green but still crisp.
    4. Incorporate garlic and seasoning: Stir in the minced garlic and Italian seasoning, cooking for an additional 30 seconds.
    5. Toast the orzo: Add the orzo pasta to the skillet, stirring it with the vegetables to toast it slightly.
    6. Pour in liquids: Now, pour in the chicken broth, heavy cream, and Worcestershire sauce. Bring the mixture to a boil and then reduce the heat to a simmer.
    7. Cook the orzo: Let the dish simmer uncovered for about 10 minutes. Stir often to prevent the orzo from sticking to the bottom of the skillet.
    8. Add chicken and cheese: Stir in the shredded chicken, ensuring it is evenly heated through. Remove the skillet from the heat and mix in the shredded cheddar cheese until it melts into a creamy sauce.
    9. Season and serve: Taste the dish and season with salt and pepper as needed. Allow it to sit for 2 to 3 minutes to thicken before serving.

    Notes

    Serve the dish as is or with a side salad. Add parsley or red pepper flakes for garnish. Store leftovers in an airtight container in the refrigerator for up to 4 days, or freeze for up to 3 months.

    • Prep Time: 10 minutes
    • Cook Time: 20 minutes
    • Category: Dinner
    • Method: Stovetop
    • Cuisine: American

    Nutrition

    • Serving Size: 1 serving
    • Calories: 600 kcal
    • Sugar: 6 g
    • Sodium: 950 mg
    • Fat: 38 g
    • Saturated Fat: 22 g
    • Unsaturated Fat: 16 g
    • Trans Fat: 0 g
    • Carbohydrates: 32 g
    • Fiber: 4 g
    • Protein: 36 g
    • Cholesterol: 125 mg
  • High-Protein Garlic Steak Bites with Creamy Mac & Cheese

    High-Protein Garlic Steak Bites with Creamy Mac & Cheese

    This nutrient-dense meal combines tender, garlic-seasoned steak with a creamy, high-protein macaroni and cheese base. It is designed for efficient meal prep, providing a balanced ratio of lean protein and carbohydrates to support muscle recovery and satiety.

    Recipe image

    List of ingredients

    • 1.5 lb lean sirloin or top round steak – trimmed and cut into 1-inch cubes
    • 1 tbsp Worcestershire sauce – adds savory depth
    • 1 tbsp low-sodium soy sauce – for umami flavor
    • 1 tbsp minced garlic – approximately 3 cloves
    • ½ tbsp garlic powder – for concentrated garlic taste
    • 1 tsp onion powder – adds savory sweetness
    • 1 tsp smoked paprika – provides a subtle smoky aroma
    • ½ tsp salt – to enhance overall flavors
    • ½ tsp black pepper – for a mild spicy kick
    • Olive oil spray – used for searing the meat
    • 8 oz dry elbow or penne pasta – the carbohydrate base
    • 4 oz low-fat cream cheese – creates a creamy texture
    • ½ cup skim milk – thins the sauce
    • ¾ cup nonfat shredded cheddar cheese – for the classic cheese flavor
    • ½ cup plain nonfat Greek yogurt – increases protein and tanginess
    • ½ tbsp garlic powder – for the cheese sauce
    • 1 tsp onion powder – for the cheese sauce
    • ½ tsp black pepper – for the cheese sauce
    • ¼ tsp salt – for the cheese sauce
    • Chives – for fresh garnish

    step-by-step instructions

    1. Cook the Pasta: Boil a large pot of salted water and cook the elbow or penne pasta according to the package instructions. Drain the pasta thoroughly and set it aside.
    2. Prep the Steak Bites: In a mixing bowl, combine the steak cubes with soy sauce, Worcestershire sauce, minced garlic, garlic powder, onion powder, smoked paprika, salt, and pepper. Toss well to ensure every piece is evenly coated in the marinade.
    3. Cook the Steak: Heat a large skillet over medium-high heat and lightly coat the surface with olive oil spray. Sear the steak bites for 2–3 minutes per side until they are browned and cooked to your preferred level of doneness. Remove the steak from the pan and let it rest.
    4. Make the Low-Cal Mac Sauce: Using the pasta pot or a separate saucepan, whisk together skim milk and low-fat cream cheese over medium heat until the mixture is smooth. Stir in the nonfat shredded cheddar, Greek yogurt, garlic powder, and onion powder until creamy, then season with salt and pepper.
    5. Combine & Serve: Fold the drained pasta into the cheese sauce until fully coated. Divide the mac and cheese into meal prep containers and top each with a portion of the seared steak bites. Garnish with fresh chives or parsley.

    Professional Steak Searing Techniques

    Achieving a Deep Brown Crust

    To get a professional sear, ensure your skillet is very hot before adding the meat. Use a cast iron or stainless steel pan, as these retain heat better than non-stick pans. The meat should sizzle immediately upon contact with the surface.

    Preventing Meat Steaming

    Avoid overcrowding the pan by cooking the steak bites in two or three batches. If too many pieces are added at once, the pan temperature drops and moisture releases, causing the meat to steam rather than sear. Leave space between each cube for maximum browning.

    Selecting the Best Lean Cuts

    Sirloin is ideal for this recipe because it balances lean protein with enough flavor to withstand high heat. Top round is a more budget-friendly alternative but requires careful timing to avoid overcooking. Always trim excess silver skin or gristle before cubing.

    The Importance of Resting Meat

    Allow the steak bites to rest for 3 to 5 minutes after cooking before placing them on the pasta. This allows the juices to redistribute within the muscle fibers. Resting prevents the juices from leaking out into the cheese sauce, which keeps the meat tender.

    Optimizing the High-Protein Cheese Sauce

    Preventing Greek Yogurt Curdling

    Greek yogurt can separate if it is boiled or heated too aggressively. Stir the yogurt into the sauce after you have removed the pan from the direct heat or turned the flame to low. The residual heat is sufficient to incorporate the yogurt without breaking the emulsion.

    Creating a Smooth Texture

    Start by melting the cream cheese and milk together first to create a smooth base. Whisk continuously on medium heat to ensure there are no clumps of cream cheese. This ensures the final sauce is velvety rather than grainy.

    Adjusting Sauce Consistency

    If the sauce becomes too thick after adding the shredded cheese and yogurt, stir in a tablespoon of skim milk or reserved pasta water. Add liquid slowly until the sauce reaches your desired creaminess. Remember that the sauce will thicken further as it cools.

    Maximizing Cheese Flavor with Less Fat

    Using nonfat cheddar can sometimes result in a milder flavor. To compensate, the addition of onion powder and garlic powder mimics the depth of full-fat cheeses. You can also add a pinch of mustard powder for an extra sharp profile.

    Ingredient Substitutions and Customizations

    Alternative Lean Protein Options

    If you prefer a different protein, chicken breast or shrimp are excellent low-calorie substitutes. For chicken, cube it into 1-inch pieces and use the same marinade. Shrimp should be seared for only 1-2 minutes per side to avoid toughness.

    Gluten-Free Pasta Alternatives

    Replace traditional wheat pasta with chickpea or lentil-based pasta to increase fiber and protein content. These pastas often require slightly less boiling time, so monitor them closely. Rinse gluten-free pasta well to remove excess starch that can make the sauce gummy.

    Dairy-Free Sauce Modifications

    For a dairy-free version, use cashew cream or a vegan cream cheese alternative. Replace the skim milk with unsweetened almond or soy milk. Use nutritional yeast and vegan cheddar shreds to maintain the cheesy flavor profile.

    Low-Sodium Flavor Adjustments

    To reduce sodium, replace the soy sauce with coconut aminos and use a salt-free seasoning blend. You can increase the amount of smoked paprika and black pepper to maintain a bold taste without adding salt. Use no-salt-added Worcestershire sauce if available.

    Meal Prep and Storage Guidance

    Optimal Cooling Procedures

    Allow the mac and cheese and steak to cool slightly before sealing them in containers. Sealing steaming hot food creates condensation, which can make the pasta mushy. Leaving the lids slightly cracked for 15 minutes helps maintain texture.

    Choosing the Right Containers

    Use airtight, BPA-free plastic or glass containers to prevent oxidation and odors. Glass containers are preferable for reheating in the microwave as they distribute heat more evenly. Portion the meals equally to ensure consistent calorie tracking.

    Refrigerator Storage Duration

    Store the prepared meals in the refrigerator for up to 4 days. Keep the containers in the coldest part of the fridge, away from the door. If storing for longer, consider freezing the portions immediately after cooling.

    Freezing and Thawing Process

    Freeze the mac and cheese and steak in separate compartments or containers. Thaw the meals in the refrigerator overnight before reheating. This prevents the steak from becoming rubbery during the thawing process.

    Effective Reheating Methods

    Microwave Reheating Strategy

    Heat the meal in 60 to 90-second intervals, stirring the pasta between each burst. To prevent the cheese sauce from drying out, add a splash of skim milk or water before heating. This re-emulsifies the fats and restores the creamy texture.

    Stovetop Reheating Technique

    Place the mac and cheese in a small skillet over low heat with a tablespoon of milk. Stir gently until the sauce is creamy and the pasta is heated through. Add the steak bites at the very end just to warm them, avoiding overcooking.

    Oven Heating Instructions

    Transfer the meal to an oven-safe dish and cover it with foil to trap moisture. Heat at 350°F (175°C) for about 15-20 minutes. Remove the foil for the last 5 minutes if you prefer a slightly crisped top on the pasta.

    Maintaining Steak Tenderness

    Avoid overheating the steak during the reheating process. If using a microwave, place the steak on top of the pasta so it steams slightly rather than cooking further. This prevents the lean beef from becoming tough or dry.

    Serving and Volume-Boosting Ideas

    Integrating Fresh Vegetables

    Stir in fresh baby spinach or steamed broccoli florets into the mac and cheese. These vegetables add volume and micronutrients without significantly increasing the calorie count. Spinach can be stirred in at the end, as it wilts quickly from the heat of the sauce.

    Garnishing for Better Presentation

    Beyond chives, try adding a sprinkle of red pepper flakes for a spicy contrast. A squeeze of fresh lemon juice over the steak bites can brighten the heavy flavors of the cheese. Freshly cracked black pepper adds a final layer of aromatic heat.

    Balanced Side Dish Pairings

    Pair this meal with a side of roasted asparagus or a crisp garden salad. A vinegar-based dressing for the salad helps cut through the richness of the creamy pasta. Roasted zucchini is another low-calorie option that complements garlic steak.

    Increasing Meal Volume

    To make the meal feel larger, mix in riced cauliflower into the macaroni. Use a 50/50 ratio of pasta to cauliflower rice for a significant reduction in calories and an increase in volume. This allows for larger portions while staying within macro goals.

    Troubleshooting Common Problems

    Fixing a Grainy Cheese Sauce

    If the sauce looks grainy, it is likely because the cheese was heated too quickly or the yogurt curdled. Use a whisk or an immersion blender to smooth out the mixture over very low heat. Adding a small amount of warm milk can also help stabilize the emulsion.

    Addressing Tough or Rubbery Steak

    Rubbery steak usually occurs from overcooking or using a cut with too much connective tissue. Ensure you are using lean sirloin and removing all silver skin. Cook the meat quickly over high heat and remove it as soon as the desired internal temperature is reached.

    Correcting Over-Salted Dishes

    If the meal is too salty, stir in an extra dollop of plain Greek yogurt or a splash of lemon juice. The acidity and creaminess help neutralize the perception of salt. Adding more unsalted steamed vegetables can also dilute the overall salt concentration.

    Managing Sticky Pasta

    Pasta that sticks together is often the result of undercooking or not stirring during the boiling process. Ensure you use plenty of water and stir the pasta frequently. If it sticks after reheating, a small amount of milk will loosen the noodles.

    Frequently Asked Questions

    Can I use different pasta shapes?

    Yes, any short pasta such as cavatappi, shells, or rotini works well. These shapes are effective at holding onto the creamy cheese sauce. Avoid long pastas like spaghetti, as they are harder to portion for meal prep.

    Is this suitable for a high-protein diet?

    Yes, this recipe is specifically designed for high protein intake by using lean beef, Greek yogurt, and nonfat cheese. Each serving provides approximately 61g of protein, making it ideal for muscle maintenance and growth.

    How do I keep the steak tender?

    The key is using a lean but tender cut like sirloin and avoiding overcooking. Searing quickly on high heat and letting the meat rest before serving ensures the fibers remain tender and juicy.

    Can I make this in one pot?

    While the steak requires a skillet for a proper sear, you can make the pasta and sauce in one pot. Cook the pasta, drain it, and then build the sauce in the same pot to minimize cleanup.

    Print
    clock clock iconcutlery cutlery iconflag flag iconfolder folder iconinstagram instagram iconpinterest pinterest iconfacebook facebook iconprint print iconsquares squares iconheart heart iconheart solid heart solid icon
    Protein-Packed Garlic Steak and Creamy Mac & Cheese

    High-Protein Garlic Steak Bites with Creamy Mac & Cheese


    5 Stars 4 Stars 3 Stars 2 Stars 1 Star

    No reviews

    • Author: imageuploader
    • Total Time: 35 minutes
    • Yield: 4 servings 1x
    • Diet: High Protein

    Description

    A lighter remix of comfort food, featuring juicy, garlic-forward steak and a creamy, low-calorie mac and cheese base perfect for meal prep.


    Ingredients

    Scale
    • 1.5 lb lean sirloin or top round steak, trimmed and cut into 1-inch cubes
    • 1 tbsp Worcestershire sauce
    • 1 tbsp low-sodium soy sauce
    • 1 tbsp minced garlic (about 3 cloves)
    • ½ tbsp garlic powder
    • 1 tsp onion powder
    • 1 tsp smoked paprika
    • ½ tsp salt
    • ½ tsp black pepper
    • Olive oil spray
    • 8 oz dry elbow or penne pasta
    • 4 oz low-fat cream cheese
    • ½ cup skim milk
    • ¾ cup nonfat shredded cheddar cheese
    • ⅓ cup plain nonfat Greek yogurt
    • ½ tbsp garlic powder
    • 1 tsp onion powder
    • ½ tsp black pepper
    • ¼ tsp salt
    • Chives for garnish

    Instructions

    1. Cook the Pasta: Cook pasta in salted boiling water according to package directions. Drain and set aside.
    2. Prep the Steak Bites: In a bowl, toss steak cubes with soy sauce, Worcestershire, minced garlic, garlic powder, onion powder, smoked paprika, salt, and pepper.
    3. Cook the Steak: Heat a large skillet over medium-high heat. Lightly coat with olive oil spray. Sear steak bites for 2–3 minutes per side until browned and cooked to your preferred doneness. Remove from pan and set aside.
    4. Make the Low-Cal Mac Sauce: In the same pot you used for pasta (or a clean saucepan), whisk together skim milk and low-fat cream cheese over medium heat until smooth. Stir in nonfat cheddar, Greek yogurt, garlic powder, and onion powder until creamy. Season with salt and pepper.
    5. Combine & Serve: Add drained pasta to the cheese sauce and toss to coat. Portion mac & cheese into meal prep containers, then top each with steak bites. Garnish with parsley or chives if desired.

    Notes

    Cook the steak on a hot skillet to lock in juices. Melt the cream cheese fully and whisk in skim milk before adding Greek yogurt off heat to avoid curdling.

    • Prep Time: 15 minutes
    • Cook Time: 20 minutes
    • Category: Main Course
    • Method: Searing
    • Cuisine: American

    Nutrition

    • Serving Size: 1 serving
    • Calories: 594 kcal
    • Sugar: 10 g
    • Sodium: 1536 mg
    • Fat: 14 g
    • Saturated Fat: 6 g
    • Unsaturated Fat: 8 g
    • Trans Fat: 0 g
    • Carbohydrates: 57 g
    • Fiber: 3 g
    • Protein: 61 g
    • Cholesterol: 126 mg
  • Zesty Slow Cooker Lemon Herb Chicken and Rice

    Zesty Slow Cooker Lemon Herb Chicken and Rice

    This slow cooker chicken and rice is a practical solution for healthy weeknight dinners. It combines zesty lemon and aromatic herbs for a flavor-packed meal with minimal active prep time.

    Recipe image

    List of ingredients

    • 4 pieces chicken breasts (boneless and skinless) – provides the lean protein base.
    • 1 lemon (juiced and zested) – adds brightness and citrus acidity.
    • 2 tbsp olive oil – ensures moisture and carries fat-soluble flavors.
    • 1 tsp garlic powder – contributes a savory, earthy depth.
    • 1 tsp dried oregano – adds a Mediterranean herbaceous note.
    • 1 tsp dried thyme – provides a subtle, woody aroma.
    • salt and pepper (to taste) – essential for enhancing overall flavor.
    • 2 cups chicken broth – creates the cooking liquid for the rice.
    • 1 cup long-grain rice – absorbs the broth and seasonings.
    • fresh herbs (for garnish, optional) – adds a fresh finish and color.

    step-by-step instructions

    1. Mix: In a small bowl, combine the lemon juice, zest, olive oil, garlic powder, oregano, thyme, salt, and pepper.
    2. Coat: Place your chicken breasts in the slow cooker, then pour the lemon herb mixture over them.
    3. Add: Pour in the chicken broth and add the long-grain rice to the slow cooker.
    4. Stir: Gently mix the ingredients to ensure that the rice is evenly distributed.
    5. Cover: Secure the lid on your slow cooker. Cook on low for 360 minutes or high for 180 minutes.
    6. Fluff: Once cooked, remove the lid and fluff the rice gently with a fork.

    Cooking Tips for Best Results

    Ensure Thorough Coating

    Coat each chicken breast fully with the marinade to prevent dry spots. Using a brush or tongs helps distribute the oil and herbs evenly across the meat. This ensures every bite is seasoned consistently.

    Achieving the Right Rice Texture

    Distribute the long-grain rice evenly across the bottom of the slow cooker before starting. Avoid over-stirring during the cooking process to keep the grains intact. This prevents the rice from becoming mushy or clumping together.

    Choosing High-Quality Broth

    Use a low-sodium chicken broth to maintain control over the salt levels of the final dish. Homemade broth often provides a richer flavor profile than store-bought versions. Ensure the broth is at room temperature or slightly warm for consistent heating.

    Customizing Seasoning Levels

    Adjust the salt and pepper based on the sodium content of your chosen broth. Taste the marinade before adding it to the chicken to ensure the lemon acidity is balanced. You can add extra black pepper for a slight bite.

    Selecting the Right Cooking Mode

    The low setting is ideal for maximum tenderness and moisture in the chicken breasts. If you are short on time, the high setting works but may result in slightly firmer meat. Always keep the lid closed to retain steam and heat.

    Alternative Ingredients and Swaps

    Using Chicken Thighs for More Moisture

    Replace the chicken breasts with boneless, skinless chicken thighs for a richer taste. Thighs are more forgiving in a slow cooker and remain juicy even if cooked slightly longer. This is a great option for those who prefer a more succulent texture.

    Substituting Rice with Quinoa

    Use quinoa instead of long-grain rice for an increase in protein and fiber. Since quinoa cooks faster than rice, you may need to reduce the total cooking time slightly. Rinse the quinoa thoroughly before adding it to remove any natural bitterness.

    Incorporating Mixed Vegetables

    Add diced carrots, frozen peas, or sliced celery to the pot for extra nutrients. Stir these in during the last 60 to 90 minutes of cooking to prevent them from overcooking. This turns the meal into a complete one-pot dinner.

    Adding Heat with Red Pepper Flakes

    Mix in a pinch of red pepper flakes or diced jalapeños into the marinade for a spicy kick. This complements the lemon acidity and adds depth to the herb profile. Start with a small amount and adjust according to your spice tolerance.

    Using Different Fresh Herbs

    Substitute the dried oregano and thyme with fresh rosemary or basil for a different flavor profile. Fresh herbs should be added toward the end of the cooking process to preserve their bright taste. This variation works well for a more gourmet feel.

    Replacing Broth with Coconut Milk

    Use a combination of coconut milk and a small amount of broth for a creamy, tropical twist. This change pairs exceptionally well with the lemon and creates a richer sauce. It transforms the dish into a creamy lemon-coconut chicken rice.

    Serving Suggestions

    Pairing with Steamed Green Vegetables

    Serve the chicken and rice alongside steamed broccoli or sautéed green beans. These vegetables provide a crunchy texture that contrasts with the soft rice. The green color also makes the plate more visually appealing.

    Adding a Fresh Side Salad

    A crisp mixed green salad with a light lemon vinaigrette balances the richness of the slow cooker meal. Use spinach, arugula, or romaine lettuce for a refreshing side. Add sliced cucumbers and cherry tomatoes for extra crunch.

    Serving with Toasted Garlic Bread

    Warm, buttery garlic bread is excellent for mopping up the flavorful lemon-herb broth left in the pot. Toast the bread in the oven until golden brown for the best experience. This adds a satisfying carb element to the meal.

    Choosing a Refreshing Non-Alcoholic Drink

    Pair this meal with a chilled glass of sparkling cider or a citrus-infused sparkling water. The bubbles and acidity cut through the savory flavors of the chicken and rice. Iced tea with a slice of lemon is another practical option.

    Storage and Preservation

    Safe Cooling Times

    Allow the chicken and rice to cool slightly, but do not leave it at room temperature for more than two hours. Rapidly cooling the food prevents the growth of harmful bacteria. Transfer leftovers to shallow containers to speed up the cooling process.

    Refrigerator Storage Duration

    Store the leftovers in an airtight container in the refrigerator for up to 3 days. Ensure the container is sealed tightly to prevent the rice from drying out. Keep the chicken submerged in any remaining sauce to maintain moisture.

    Freezing Guidelines

    Place portions in freezer-safe bags or containers for up to 3 months. Freeze the rice and chicken together to preserve the combined flavors. Note that the texture of the rice may change slightly upon thawing.

    Proper Thawing Methods

    Thaw frozen portions in the refrigerator overnight for the safest and most consistent results. Avoid thawing at room temperature to maintain food safety standards. You can also use the defrost setting on a microwave for quicker access.

    Reheating Instructions

    Microwave Reheating Technique

    Place a portion in a microwave-safe dish and cover it with a damp paper towel. Heat in short bursts, stirring occasionally, to ensure even warmth. The damp towel creates steam that prevents the rice from becoming hard.

    Stovetop Reheating Method

    Add the chicken and rice to a pan over medium-low heat. Add a tablespoon of water or chicken broth to restore the original consistency. Cover the pan with a lid and heat until steaming throughout.

    Adding Extra Moisture During Reheating

    Rice tends to absorb moisture over time, which can make it feel dry when reheated. Stir in a splash of chicken broth or a small knob of butter before heating. This restores the creamy, fluffy texture of the rice.

    Troubleshooting Common Issues

    Fixing Mushy Rice

    If the rice is too soft, it may be due to overcooking or too much liquid. Next time, reduce the broth slightly or check the rice at the 5-hour mark on low. You can stir in a bit of toasted almond slivers to add texture back to the dish.

    Correcting Undercooked Rice

    If the rice is still firm, add an extra 1/4 cup of broth and cook for another 30 minutes. Ensure the lid is tightly sealed to keep the steam inside. This allows the grains to finish absorbing the liquid.

    Preventing Dry Chicken Breasts

    Ensure the chicken is fully submerged in the liquid and marinade. Avoid using the high setting if you have a tendency to overcook meat. Using skinless chicken thighs is the best way to guarantee juicy results every time.

    Balancing Overly Strong Lemon Flavor

    If the dish tastes too acidic, stir in a small amount of heavy cream or a pinch of sugar. This helps neutralize the sharpness of the lemon juice. Adding a bit more salt can also help balance the citrus notes.

    Frequently Asked Questions

    How long does the dish stay fresh?

    When stored in an airtight container in the refrigerator, the chicken and rice will remain fresh for up to 3 days. Always ensure it is refrigerated within two hours of cooking.

    Can this recipe be frozen?

    Yes, this recipe freezes well for up to 3 months. Use sealed, freezer-grade containers and add a splash of broth when reheating to restore moisture.

    What is the best substitute for chicken breasts?

    Boneless, skinless chicken thighs are the best substitute for a juicier, more flavor-rich result. They are less likely to dry out during the long slow-cooking process.

    Is this recipe gluten-free?

    Yes, this recipe is naturally gluten-free as long as you use a certified gluten-free chicken broth. Ensure your long-grain rice is also processed in a gluten-free facility.

    What side dishes go best with this meal?

    Steamed broccoli, a fresh garden salad, or toasted garlic bread are the best pairings. These sides complement the zesty lemon and savory herb flavors perfectly.

    Print
    clock clock iconcutlery cutlery iconflag flag iconfolder folder iconinstagram instagram iconpinterest pinterest iconfacebook facebook iconprint print iconsquares squares iconheart heart iconheart solid heart solid icon
    Succulent Slow Cooker Lemon Herb Chicken Rice for Busy Nights

    Zesty Slow Cooker Lemon Herb Chicken and Rice


    5 Stars 4 Stars 3 Stars 2 Stars 1 Star

    No reviews

    • Author: imageuploader
    • Total Time: 6 hours 15 minutes
    • Yield: 4 servings 1x
    • Diet: General

    Description

    Enjoy Slow Cooker Lemon Herb Chicken Rice: Easy Healthy Crock Pot Meal, a vibrant dish for busy weeknights.


    Ingredients

    Scale
    • 4 pieces chicken breasts (boneless and skinless)
    • 1 lemon (juiced and zested)
    • 2 tbsp olive oil
    • 1 tsp garlic powder
    • 1 tsp dried oregano
    • 1 tsp dried thyme
    • salt and pepper (to taste)
    • 2 cups chicken broth
    • 1 cup long-grain rice
    • fresh herbs (for garnish, optional)

    Instructions

    1. Step 1: In a small bowl, combine the lemon juice, zest, olive oil, garlic powder, oregano, thyme, salt, and pepper.
    2. Step 2: Place your chicken breasts in the slow cooker, then pour the lemon herb mixture over them.
    3. Step 3: Pour in the chicken broth and add the long-grain rice to the slow cooker.
    4. Step 4: Gently mix the ingredients to ensure that the rice is evenly distributed.
    5. Step 5: Secure the lid on your slow cooker. Cook on low for 360 minutes or high for 180 minutes.
    6. Step 6: Once cooked, remove the lid and fluff the rice gently with a fork.

    Notes

    Ensure each chicken breast is well-coated for maximum flavor. Adjust seasonings based on personal preference.

    • Prep Time: 15 minutes
    • Cook Time: 6 hours
    • Category: Healthy Recipes
    • Method: Slow Cooking
    • Cuisine: American

    Nutrition

    • Serving Size: 1 serving
    • Calories: 450 kcal
    • Sugar: 1 g
    • Sodium: 600 mg
    • Fat: 12 g
    • Saturated Fat: 2 g
    • Unsaturated Fat: 10 g
    • Trans Fat: 0 g
    • Carbohydrates: 50 g
    • Fiber: 2 g
    • Protein: 40 g
    • Cholesterol: 100 mg