Category: Blog

Your blog category

  • Zesty Chipotle Lime Shrimp Bowls

    Zesty Chipotle Lime Shrimp Bowls

    These chipotle lime shrimp bowls provide a balanced meal combining smoky heat with fresh citrus notes. This recipe is designed for quick preparation and is highly adaptable for various dietary preferences.
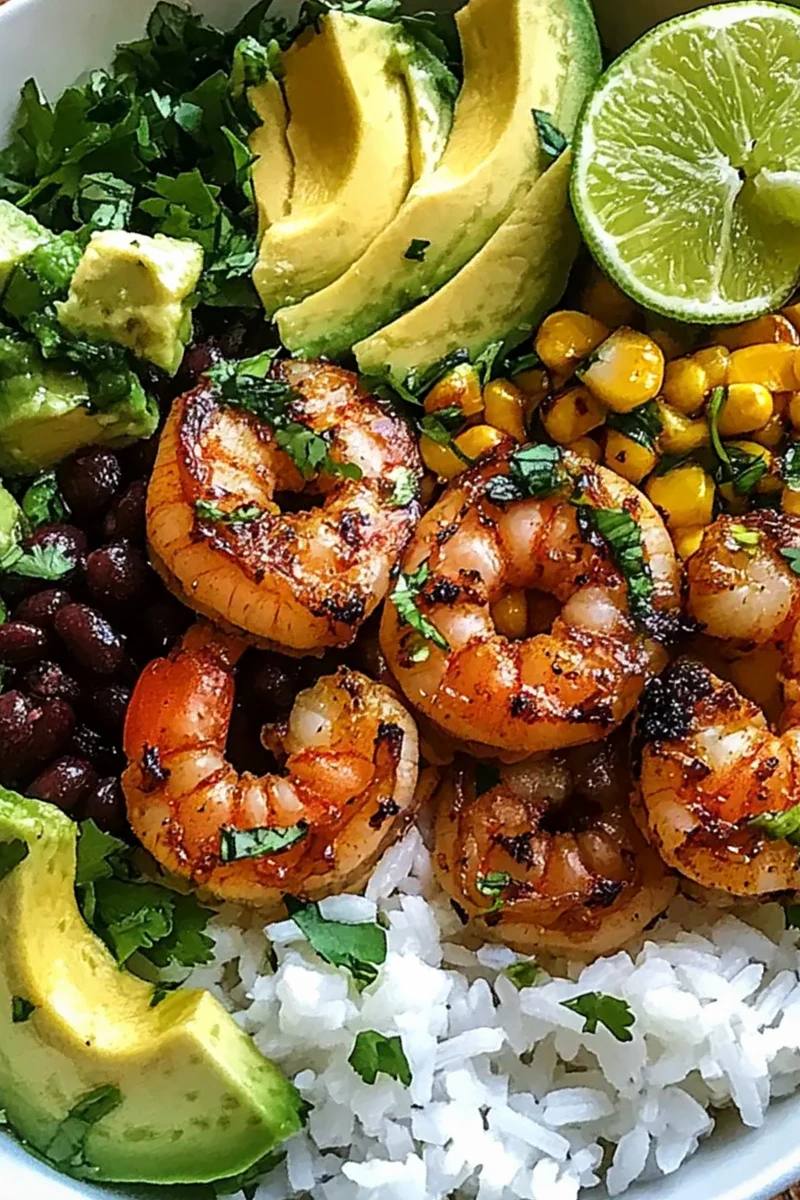
    Recipe image

    List of ingredients

    • 2 tablespoons olive oil – substitute with avocado oil for a higher smoke point.
    • 1 minced chipotle pepper – use smoked paprika for a milder heat level.
    • 1 tablespoon adobo sauce – replace with additional lime juice if unavailable.
    • 3 cloves garlic, minced – fresh garlic provides the best aromatic profile.
    • 1 tablespoon fresh lime juice – freshly squeezed for maximum acidity.
    • 1 teaspoon ground cumin – coriander is a suitable alternative for a different earthiness.
    • 1 teaspoon chili powder – swap with cayenne pepper for increased spice.
    • Salt and black pepper to taste – adjust based on individual preference.
    • 1 pound shrimp, peeled and deveined – skinless chicken or firm tofu can be used instead.
    • 2 cups cooked rice – brown rice increases fiber, while cauliflower rice reduces carbs.
    • 1 cup black beans, drained and rinsed – canned beans are a convenient option.
    • 1 cup corn kernels – frozen corn is a practical and tasty substitute.
    • 1/4 cup chopped cilantro – parsley or green onions can be used as replacements.
    • 1/2 cup sour cream – plain Greek yogurt is a healthier, high-protein alternative.
    • 1 avocado, sliced – adds necessary creaminess and healthy fats.
    • Lime wedges – used for garnish and final seasoning.

    step-by-step instructions

    1. Prepare the Marinade: In a medium bowl, whisk together the olive oil, minced chipotle pepper, adobo sauce, minced garlic, lime juice, ground cumin, chili powder, salt, and black pepper. Mix until the sauce is smooth and the spices are fully integrated.
    2. Marinate the Shrimp: Add the peeled and deveined shrimp to the marinade bowl. Toss until every shrimp is evenly coated, then cover and let rest at room temperature for 10 minutes to allow flavors to penetrate.
    3. Sear the Shrimp: Heat a large skillet over medium-high heat with a small amount of olive oil. Add the shrimp in a single layer and cook for 2-3 minutes per side until they are pink, opaque, and have a slight char. Transfer them to a plate to keep warm.
    4. Warm the Base: Use the same skillet to add the cooked rice, black beans, and corn kernels. Stir occasionally for 3-5 minutes until the ingredients are thoroughly heated and the rice is fluffy.
    5. Assemble the Bowls: Distribute the warm rice, bean, and corn mixture evenly among four serving bowls. Arrange the cooked shrimp on top of the base in organized sections.
    6. Add Final Garnishes: Top each bowl with sliced avocado, chopped cilantro, and a dollop of sour cream or Greek yogurt. Serve immediately with lime wedges on the side for extra zest.

    Protein Selection and Substitutions

    Using Skinless Chicken Breast

    To use chicken, cut the breast into small, uniform 1-inch cubes to ensure they cook quickly. Sauté the marinated chicken over medium heat for 6-8 minutes until the internal temperature reaches 165°F. Avoid overcooking to keep the meat juicy.

    Firm Tofu for Vegetarian Option

    Press extra-firm tofu for 20 minutes to remove excess water before cubing it. Marinate the tofu for at least 30 minutes to ensure the flavors penetrate the dense protein. Pan-fry until the edges are golden brown and crispy.

    Selecting High-Quality Shrimp

    Choose shrimp that are translucent and firm to the touch with a mild, salty scent. Avoid any shrimp with black spots on the shell or a strong fishy odor, as these are signs of age. If using frozen shrimp, thaw them completely in the refrigerator overnight.

    Grain and Base Variations

    Brown Rice for Added Nutrition

    Brown rice provides a nuttier flavor and more fiber compared to white rice. Ensure the brown rice is fully cooked and fluffy before adding it to the skillet. This helps maintain a better texture when mixing with the beans and corn.

    Cauliflower Rice for Low-Carb Diets

    Use riced cauliflower as a substitute for a lighter, low-carbohydrate base. Sauté the cauliflower rice separately for 5 minutes to evaporate excess moisture before adding the other bowl components. This prevents the final dish from becoming watery.

    Quinoa as a Protein-Rich Alternative

    Quinoa serves as an excellent substitute for rice, offering a complete protein source and a slightly crunchy texture. Rinse the quinoa thoroughly before cooking to remove saponins, which can cause a bitter taste. Mix it into the skillet similarly to the rice.

    Vegetable Enhancements

    Adding Diced Bell Peppers

    Red or yellow bell peppers add a sweet crunch and vibrant color to the bowl. Dice them into small pieces and sauté them in the skillet for 3 minutes before adding the rice and beans. This softens the pepper while keeping its structural integrity.

    Incorporating Shredded Carrots

    Shredded carrots introduce a natural sweetness and extra beta-carotene to the meal. You can add them raw as a cold topping or sauté them briefly with the corn. Julienne cuts work best for a more professional presentation.

    Fresh Jalapeños for Increased Heat

    For those who prefer a spicy kick, add thinly sliced fresh jalapeños to the top of the bowl. Remove the seeds and membranes to control the level of heat. This provides a fresh, sharp contrast to the smoky chipotle flavor.

    Storage and Meal Prep Guidance

    Refrigeration and Freshness

    Store the shrimp, rice, and bean mixture in airtight containers in the refrigerator for up to 3 days. Keep the avocado, sour cream, and cilantro in separate containers to maintain their freshness. This prevents the toppings from wilting or discoloring.

    Freezing Components for Long-Term Use

    Freeze the cooked shrimp and rice in separate freezer-safe bags for up to 3 months. Ensure the food is completely cooled before freezing to avoid ice crystal formation. Thaw components in the refrigerator overnight before reheating.

    Optimal Reheating Methods

    Reheat the rice and bean mixture in a microwave or skillet until steaming. To prevent the shrimp from becoming rubbery, reheat them gently in a pan over medium heat for 1-2 minutes. Avoid overcooking the shrimp during the reheating process.

    Advance Marinade Preparation

    The chipotle lime marinade can be prepared up to 24 hours in advance and stored in a jar. When ready to cook, whisk the marinade again to redistribute the spices. Do not marinate shrimp for more than 30 minutes, as the lime juice can break down the protein fibers.

    Serving Suggestions and Pairings

    Homemade Creamy Guacamole

    Blend ripe avocados with lime juice, salt, and diced onions for a rich side. The acidity in the lime juice helps prevent the avocado from oxidizing and turning brown. Serve this as a scoop on top of the shrimp.

    Zesty Cabbage Slaw

    Create a refreshing slaw using shredded green and red cabbage tossed with lime juice and a pinch of salt. The crunch of the cabbage balances the softness of the rice and shrimp. This addition adds a layer of textural contrast to every bite.

    Fresh Mango Salsa

    Combine diced mango, red onion, and cilantro for a sweet and tangy salsa. The sweetness of the mango complements the smokiness of the chipotle peppers perfectly. Spoon this over the shrimp just before serving.

    Crunchy Tortilla Chips

    Serve the bowls with a side of salted corn tortilla chips. These can be used to scoop up the beans and avocado for a more interactive eating experience. Warm the chips in the oven for 2 minutes for a better taste.

    Cooking Troubleshooting and FAQs

    Why did my shrimp become rubbery?

    Rubbery shrimp are usually the result of overcooking. Shrimp cook very quickly and only need about 2-3 minutes per side until they form a ‘C’ shape; an ‘O’ shape indicates they are overdone. Use a timer to ensure precision.

    How can I make this recipe milder?

    To reduce the heat, omit the minced chipotle pepper and adobo sauce. Replace them with smoked paprika, which provides the smoky flavor without the spicy burn. You can also increase the amount of sour cream to cool the dish.

    Can I use frozen shrimp for this dish?

    Yes, frozen shrimp are a great option, but they must be completely thawed. Thawing shrimp under cold running water or in the fridge is recommended. If you cook them while frozen, they will release too much water and steam instead of searing.

    What is a good substitute for adobo sauce?

    If you do not have adobo sauce, combine a teaspoon of tomato paste with a pinch of smoked paprika and a drop of vinegar. This replicates the tangy, smoky, and slightly sweet profile of the original sauce. Adjust the ratios to suit your taste.

    How do I keep the avocado from browning?

    Coat the sliced avocado in fresh lime juice immediately after cutting. The citric acid slows down the enzyme reaction that causes oxidation. Store sliced avocado in an airtight container with a piece of plastic wrap pressed directly against the surface.

    Print
    clock clock iconcutlery cutlery iconflag flag iconfolder folder iconinstagram instagram iconpinterest pinterest iconfacebook facebook iconprint print iconsquares squares iconheart heart iconheart solid heart solid icon
    Chipotle Lime Shrimp Bowl: Quick, Zesty Weeknight Delight

    Zesty Chipotle Lime Shrimp Bowls


    5 Stars 4 Stars 3 Stars 2 Stars 1 Star

    No reviews

    • Author: imageuploader
    • Total Time: 30 minutes
    • Yield: 4 bowls 1x
    • Diet: General

    Description

    This Chipotle Lime Shrimp Bowl is a quick, customizable dinner that bursts with flavor, making it perfect for busy weeknights.


    Ingredients

    Scale
    • 2 tablespoons olive oil
    • 1 minced chipotle pepper
    • 1 tablespoon adobo sauce
    • 3 cloves garlic
    • 1 tablespoon lime juice
    • 1 teaspoon ground cumin
    • 1 teaspoon chili powder
    • salt & black pepper to taste
    • 1 pound shrimp
    • 2 cups cooked rice
    • 1 cup black beans
    • 1 cup corn kernels
    • 1/4 cup chopped cilantro
    • 1/2 cup sour cream
    • sliced avocado
    • lime wedges

    Instructions

    1. Prepare Marinade: In a medium bowl, whisk together olive oil, minced chipotle pepper, adobo sauce, minced garlic, lime juice, ground cumin, chili powder, salt, and black pepper.
    2. Marinate Shrimp: Add peeled and deveined shrimp to the marinade and let rest at room temperature for about 10 minutes.
    3. Cook Shrimp: Heat a large skillet over medium-high heat with olive oil and cook shrimp for 2-3 minutes on each side until pink and opaque.
    4. Warm Sides: In the same skillet, add cooked rice, drained black beans, and corn kernels, stirring for 3-5 minutes.
    5. Assemble Bowls: Divide the warmed rice, beans, and corn mixture among serving bowls and arrange the cooked shrimp on top.
    6. Garnish: Top each bowl with sliced avocado, chopped cilantro, and a dollop of sour cream, serving with lime wedges on the side.

    Notes

    Ensure to marinate the shrimp for at least 10 minutes to absorb the chipotle lime flavors, but it should not exceed 30 minutes to maintain tenderness. Use fresh lime juice and garlic for best flavor.

    • Prep Time: 10 minutes
    • Cook Time: 20 minutes
    • Category: Dinner
    • Method: Sautéing
    • Cuisine: Mexican

    Nutrition

    • Serving Size: 1 bowl
    • Calories: 550 kcal
    • Sugar: 5 g
    • Sodium: 750 mg
    • Fat: 20 g
    • Saturated Fat: 4 g
    • Unsaturated Fat: 16 g
    • Trans Fat: 0 g
    • Carbohydrates: 65 g
    • Fiber: 10 g
    • Protein: 30 g
    • Cholesterol: 200 mg
  • Creamy Chicken Caesar Pasta Salad

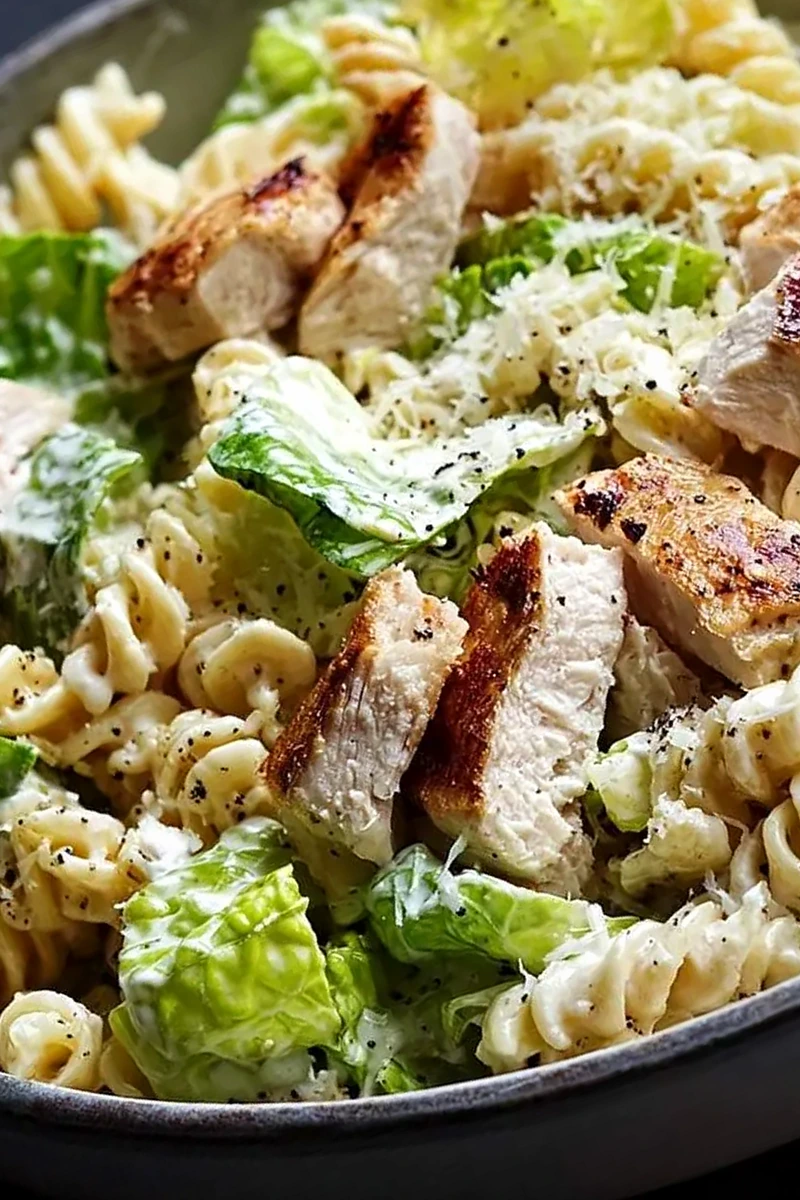
    Creamy Chicken Caesar Pasta Salad

    This creamy chicken Caesar pasta salad is a hearty meal perfect for family dinners or potlucks. It combines grilled chicken and al dente pasta with a zesty homemade dressing for a satisfying finish.

    Recipe image

    List of ingredients

    • 2 lbs boneless, skinless chicken breasts, sliced horizontally into 1/2-inch thick cutlets – for quick and even cooking.
    • 2 tbsp olive oil – used for grilling the chicken.
    • 1/2 tsp salt – basic seasoning for the meat.
    • 1/4 tsp black pepper, freshly ground – adds a sharp, fresh heat.
    • 1 tsp garlic powder – provides a consistent savory depth.
    • 12 oz rotini or penne pasta – sturdy shapes that hold dressing well.
    • 1 tbsp olive oil (optional) – prevents the cooked pasta from sticking.
    • 1 tsp salt – for the pasta boiling water.
    • 1/2 cup mayonnaise, full-fat recommended – creates a rich, creamy base.
    • 1/4 cup grated Parmesan cheese, plus extra for garnish – adds saltiness and umami.
    • 2 tbsp fresh lemon juice – provides necessary acidity to balance the richness.
    • 1 tbsp Dijon mustard – adds a tangy, pungent kick.
    • 1 clove garlic, minced – delivers a fresh, sharp garlic flavor.
    • 1 tsp Worcestershire sauce – adds complex, savory depth.
    • 1/2 tsp salt – to season the dressing.
    • 1/4 tsp black pepper, freshly ground – for additional spice in the sauce.
    • 2 tbsp water or milk – used to adjust the dressing consistency.
    • 1 head romaine lettuce, chopped – for a crisp, fresh crunch.
    • 1 cup cherry tomatoes, halved – adds sweetness and color.
    • 1/2 cup croutons, store-bought or homemade – for essential texture.
    • 1/4 cup red onion, thinly sliced (optional) – provides a sharp contrast.
    • 1/4 cup fresh parsley, chopped (optional) – used as a fresh garnish.

    step-by-step instructions

    1. Prepare the Chicken: Pat the chicken cutlets dry with paper towels to ensure a better sear. Season both sides with salt, black pepper, and garlic powder. Heat a grill pan or outdoor grill to medium-high heat and lightly brush with 2 tablespoons of olive oil. Grill the chicken for 4-6 minutes per side, or until the internal temperature reaches 165°F (74°C). Remove from heat, let the meat rest for 5 minutes to retain juices, then slice into bite-sized pieces and let them cool.
    2. Cook the Pasta: Bring a large pot of salted water to a rolling boil. Add the rotini or penne and cook according to the package directions until al dente. Drain the pasta thoroughly and rinse it with cold water immediately to stop the cooking process. Optionally, toss the cooled pasta with 1 tablespoon of olive oil to prevent the noodles from sticking together.
    3. Make the Caesar Dressing: In a medium bowl, whisk together the mayonnaise, grated Parmesan cheese, fresh lemon juice, Dijon mustard, minced garlic, Worcestershire sauce, salt, and black pepper until the mixture is smooth. If the dressing is too thick, add water or milk one tablespoon at a time until you reach the desired consistency.
    4. Assemble the Salad: In a large mixing bowl, combine the cooled pasta, grilled chicken pieces, chopped romaine, halved cherry tomatoes, and thinly sliced red onion if desired. Pour the prepared Caesar dressing over the ingredients and toss gently until everything is evenly coated. Add the croutons and extra grated Parmesan cheese just before serving to maintain crispness. Garnish with fresh chopped parsley if desired.

    Cooking Techniques for Best Results

    Perfecting the Chicken Sear

    To get a golden-brown crust on the chicken, ensure the pan is fully heated before adding the meat. Avoid overcrowding the pan, as this drops the temperature and causes the chicken to steam rather than sear. Patting the meat dry is essential for achieving this effect.

    Achieving Al Dente Texture

    Start tasting the pasta two minutes before the package directions suggest. Al dente pasta should have a slight firmness or ‘bite’ in the center. This prevents the pasta from becoming mushy once it is mixed with the creamy dressing.

    Emulsifying the Caesar Dressing

    Use a whisk to combine the ingredients vigorously, which helps the oil in the mayonnaise and the acid in the lemon juice bond. If the dressing separates, adding a teaspoon of warm water and whisking again can stabilize the emulsion. Ensure the garlic is finely minced to avoid large chunks.

    Ingredient Substitutions and Alternatives

    Alternative Pasta Shapes

    While rotini and penne are ideal, fusilli or farfalle (bow-tie) pasta also work well. These shapes have folds and edges that capture the thick dressing. Avoid long pastas like spaghetti, as they are difficult to toss with the bulky chicken and lettuce.

    Using Greek Yogurt for a Lighter Dressing

    Replace half or all of the mayonnaise with plain Greek yogurt to reduce the calorie count. This adds a bit more tanginess and increases the protein content. You may need an extra teaspoon of lemon juice to balance the thickness of the yogurt.

    Plant-Based Protein Options

    For a vegetarian version, substitute the grilled chicken with roasted chickpeas or firm tofu cubes. Season the tofu with the same garlic powder and pepper blend used for the chicken. Ensure the protein is cooled completely before adding it to the greens.

    Swapping the Greens

    If romaine is unavailable, Little Gem lettuce or chopped kale can provide a similar crunch. Kale should be massaged with a bit of olive oil and lemon juice first to soften the tough fibers. This ensures the salad remains easy to chew.

    Customizing the Flavor Profile

    Adding Extra Vegetables

    Thinly sliced cucumbers, diced red bell peppers, or blanched asparagus tips add more nutrition and color. These additions provide a refreshing contrast to the rich dressing. Add these vegetables at the same time as the romaine.

    Incorporating Different Cheeses

    While Parmesan is traditional, you can add crumbled feta or gorgonzola for a sharper, saltier taste. These cheeses provide a creamy contrast to the crisp vegetables. Mix them in gently at the end to avoid breaking the crumbles.

    Adding a Smoky Element

    To introduce a smoky flavor, add pieces of smoked paprika to the chicken seasoning. Alternatively, you can stir in a small amount of smoked salt to the dressing. This complements the grilled flavor of the chicken and the tang of the mustard.

    Storage and Freshness Guidelines

    Refrigeration Procedures

    Store the assembled salad in an airtight container in the refrigerator for up to 3 days. The chicken and pasta will hold up well, but the lettuce will begin to soften over time. Keep the container tightly sealed to prevent the salad from absorbing other fridge odors.

    Preventing Lettuce Wilt

    If you are preparing the salad for a later event, store the dressing, chicken, and pasta in one container and the romaine and tomatoes in another. Toss the ingredients together only right before serving. This ensures the lettuce stays crisp and doesn’t release excess water.

    Maintaining Crouton Crunch

    Croutons absorb moisture from the dressing and will become soggy if stored within the salad. Keep the croutons in a separate airtight bag or container. Sprinkle them over the top of the salad seconds before it hits the table.

    Serving and Pairing Ideas

    Recommended Side Dishes

    Pair this salad with a light garlic bread or a side of fresh fruit to balance the creaminess. A simple side of roasted root vegetables also works well for a more filling dinner. Avoid other heavy creamy sides to prevent the meal from feeling too rich.

    Plating for Large Groups

    When serving a crowd, use a wide, shallow bowl rather than a deep one. This prevents the ingredients at the bottom from being crushed and allows more surface area for the dressing to coat the pasta. Garnish the top with a heavy sprinkle of fresh parsley and extra Parmesan.

    Ideal Serving Temperatures

    This dish is most refreshing when served chilled, but it is also delicious at room temperature. If the salad has been in the fridge, let it sit out for 10-15 minutes before serving. This allows the flavors of the garlic and lemon to become more pronounced.

    Common Troubleshooting

    Correcting Thick Dressing

    If the dressing feels too heavy or doesn’t coat the pasta smoothly, whisk in water or milk one tablespoon at a time. The goal is a consistency that clings to the pasta without pooling at the bottom of the bowl. Stir slowly to avoid over-thinning.

    Preventing Pasta Sticking

    Pasta often clumps together as it cools, especially once drained. Tossing the noodles with a small amount of olive oil creates a barrier that keeps them separate. Rinsing with cold water is also crucial to remove excess starch that causes sticking.

    Managing Overcooked Chicken

    If the chicken becomes slightly dry from overcooking, slice it thinner to increase the surface area. The creamy Caesar dressing will help rehydrate the meat and mask the dryness. Always use a meat thermometer to ensure you hit 165°F without going over.

    Frequently Asked Questions

    Can I use rotisserie chicken for this recipe?

    Yes, shredded or cubed rotisserie chicken is an excellent time-saving alternative. Ensure the chicken is cooled before adding it to the salad. Since rotisserie chicken is already seasoned, you may want to reduce the salt in the dressing slightly.

    How long does the homemade dressing last?

    The Caesar dressing can be stored in an airtight jar in the refrigerator for up to 5 days. Because it contains fresh garlic and lemon juice, it is best used within this window. Give it a good shake or whisk before using as the ingredients may settle.

    Can this pasta salad be frozen?

    It is not recommended to freeze this salad because the mayonnaise-based dressing and the fresh lettuce do not freeze well. The lettuce will turn mushy, and the dressing may separate. You can freeze the cooked chicken and pasta separately, but the final assembly must be fresh.

    Which type of lemon juice is best to use?

    Freshly squeezed lemon juice is highly recommended for the best brightness and acidity. Bottled lemon juice often contains preservatives and has a more muted flavor. If using bottled, use slightly less to avoid an artificial aftertaste.

    Print
    clock clock iconcutlery cutlery iconflag flag iconfolder folder iconinstagram instagram iconpinterest pinterest iconfacebook facebook iconprint print iconsquares squares iconheart heart iconheart solid heart solid icon
    Hearty Chicken Caesar Pasta Salad

    Creamy Chicken Caesar Pasta Salad


    5 Stars 4 Stars 3 Stars 2 Stars 1 Star

    No reviews

    • Author: imageuploader
    • Total Time: 45 minutes
    • Yield: 6 servings 1x
    • Diet: General

    Description

    A delightful twist on the traditional Caesar salad, this recipe combines tender grilled chicken, al dente pasta, crisp romaine, and a creamy Caesar dressing for a satisfying and flavorful meal perfect for any occasion.


    Ingredients

    Scale
    • 2 lbs boneless, skinless chicken breasts (sliced horizontally into 1/2-inch thick cutlets)
    • 2 tbsp olive oil (for grilling)
    • 1/2 tsp salt
    • 1/4 tsp black pepper (freshly ground)
    • 1 tsp garlic powder
    • 12 oz rotini or penne pasta
    • 1 tbsp olive oil (optional)
    • 1 tsp salt (for pasta water)
    • 1/2 cup mayonnaise
    • 1/4 cup grated Parmesan cheese (plus extra for garnish)
    • 2 tbsp fresh lemon juice
    • 1 tbsp Dijon mustard
    • 1 clove garlic (minced)
    • 1 tsp Worcestershire sauce
    • 1/2 tsp salt
    • 1/4 tsp black pepper (freshly ground)
    • 2 tbsp water or milk
    • 1 head romaine lettuce (chopped)
    • 1 cup cherry tomatoes (halved)
    • 1/2 cup croutons
    • 1/4 cup red onion (thinly sliced, optional)
    • 1/4 cup fresh parsley (chopped, optional)

    Instructions

    1. Prepare the Chicken: Pat chicken cutlets dry, season with salt, black pepper, and garlic powder, grill in 2 tbsp olive oil for 4-6 minutes per side (until 165°F), rest 5 minutes, then slice into bite-sized pieces.
    2. Cook the Pasta: Boil rotini or penne in salted water until al dente, drain, rinse with cold water, and optionally toss with 1 tbsp olive oil.
    3. Make the Caesar Dressing: Whisk together mayonnaise, grated Parmesan cheese, fresh lemon juice, Dijon mustard, minced garlic, Worcestershire sauce, salt, and black pepper; thin with water or milk if needed.
    4. Assemble the Salad: Combine cooled pasta, grilled chicken, chopped romaine lettuce, halved cherry tomatoes, and red onion in a large bowl, toss with Caesar dressing, and top with croutons, extra Parmesan, and parsley.

    Notes

    For a quicker chicken option, use shredded rotisserie chicken. The Caesar dressing can be made a day ahead. To keep croutons crisp, add them just before serving. Store leftovers in an airtight container in the refrigerator for up to 2-3 days.

    • Prep Time: 20 minutes
    • Cook Time: 25 minutes
    • Category: Main Course, Salad
    • Method: Grilling
    • Cuisine: American, Italian-American

    Nutrition

    • Serving Size: 1 serving
    • Calories: 550 kcal
    • Sugar: 8 g
    • Sodium: 980 mg
    • Fat: 32 g
    • Saturated Fat: 9 g
    • Unsaturated Fat: 21 g
    • Trans Fat: 0 g
    • Carbohydrates: 42 g
    • Fiber: 4 g
    • Protein: 38 g
    • Cholesterol: 115 mg
  • High-Protein Viral Ground Beef Bowls for Meal Prep

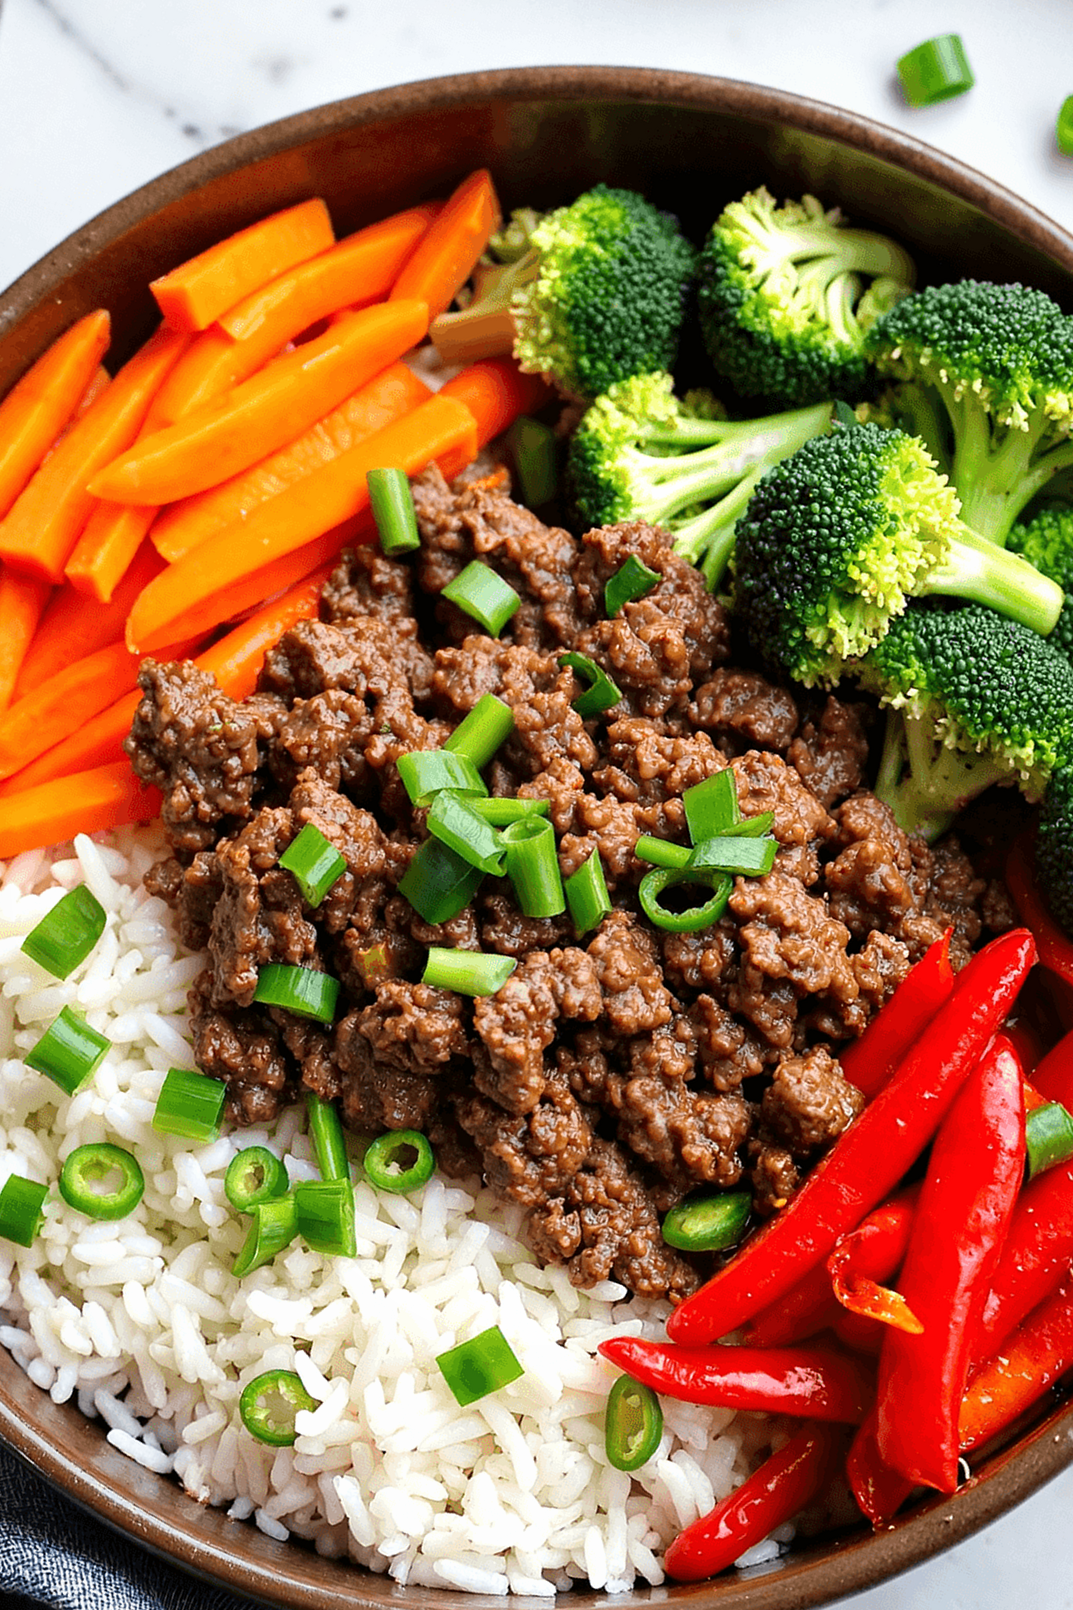
    High-Protein Viral Ground Beef Bowls for Meal Prep

    These nutrient-dense beef bowls are a practical solution for high-protein meal prepping. They combine savory seasoned beef with fresh vegetables and a creamy spicy sauce for a balanced meal.

    Recipe image

    List of ingredients

    • 1 lb lean ground beef (93% lean) – provides a high-protein base.
    • 1 cup cooked jasmine or brown rice – serves as the energy-providing base.
    • 1 1/2 cups shredded cabbage or slaw mix – adds crunch and fiber.
    • 1/2 cup shredded carrots – adds natural sweetness and vitamins.
    • 2 eggs (fried or soft-boiled) – adds richness and extra protein.
    • 1 tbsp olive oil – used for sautéing.
    • 3 tbsp soy sauce or tamari – provides salt and umami flavor.
    • 1 tbsp brown sugar – balances the salty soy sauce.
    • 2 cloves garlic, minced – adds aromatic depth.
    • 1 tsp sesame oil – provides a nutty finish.
    • 1/2 tsp chili flakes (optional) – adds a hint of heat.
    • 1/4 cup Greek yogurt or mayo – creates a creamy sauce base.
    • 1 tbsp sriracha – provides spicy kick.
    • 1 tsp honey – adds a touch of sweetness to the sauce.
    • Juice of 1/2 lime – adds acidity to brighten the flavor.

    step-by-step instructions

    1. Cook the Rice: Prepare your jasmine or brown rice according to the package instructions until fluffy.
    2. Sauté the Beef: Heat sesame oil in a skillet over medium-high heat. Add ground beef, minced garlic, soy sauce, brown sugar, and chili flakes, cooking until the beef is browned and well-coated in the sauce.
    3. Prepare the Vegetables: While the beef is cooking, shred the cabbage and carrots into thin strips for a crisp texture.
    4. Whisk the Sauce: In a small bowl, combine Greek yogurt or mayo, sriracha, honey, and lime juice, whisking until smooth.
    5. Prepare the Eggs: Fry or soft-boil the eggs according to your preference for the desired yolk consistency.
    6. Assemble the Bowls: Divide the cooked rice among four bowls. Top with the seasoned beef, shredded cabbage, carrots, and a cooked egg. Finish with a generous drizzle of the spicy mayo sauce.

    Pro Tips for Optimal Flavor

    Sear the Beef for Better Caramelization

    Allow the ground beef to sit undisturbed in the pan for a few minutes before breaking it up. This creates brown, caramelized edges that add deeper savory notes to the dish.

    Undercook Rice Slightly for Meal Prep

    If you plan to reheat these bowls, cook the rice slightly under the package directions. This prevents the grains from becoming mushy when microwaved later in the week.

    Layer Seasonings Gradually

    Add salt and pepper to the beef before adding the soy sauce and brown sugar. Layering the seasonings ensures the meat is flavored thoroughly from the inside out.

    Maintain Vegetable Crispness

    Keep the shredded cabbage and carrots raw to provide a temperature and texture contrast against the warm beef and rice.

    Ingredient Substitutions

    Alternative Grain Bases

    Substitute jasmine rice with quinoa for more protein or farro for a chewier texture. For a low-carb option, use cauliflower rice to reduce the overall calorie count.

    Protein Swaps for Beef

    Use ground turkey or ground chicken for a leaner alternative. Ensure you increase the sesame oil slightly as these meats have less natural fat than beef.

    Vegetable Modifications

    Replace cabbage with shredded kale or thinly sliced broccoli stems. You can also add diced red bell peppers or snap peas for extra color and nutrients.

    Creamy Sauce Alternatives

    Use avocado mash mixed with lime and sriracha if you want to avoid yogurt or mayo. This provides a healthy fat source while keeping the spicy profile.

    Creative Recipe Variations

    Asian Umami Version

    Stir in a tablespoon of hoisin sauce and freshly grated ginger during the beef sauté process. Finish the bowl with a sprinkle of toasted sesame seeds and chopped green onions.

    Tex-Mex Fusion Style

    Season the beef with cumin, chili powder, and smoked paprika. Replace the cabbage with corn and black beans, and use a lime-cilantro crema instead of the spicy mayo.

    Low-Carb Keto Modification

    Omit the brown sugar in the beef mixture and use a sugar-free sweetener or omit it entirely. Replace the rice with a bed of sautéed spinach or cauliflower rice.

    Hearty Plant-Based Option

    Substitute the ground beef with cooked brown lentils or plant-based crumbles. Use tamari instead of soy sauce to keep the recipe gluten-free.

    Meal Prep and Storage Guide

    Refrigerator Storage Limits

    Store the assembled bowls in airtight containers for up to 4 days. For the best quality, keep the spicy mayo sauce in a separate small container to prevent the rice from softening.

    Freezing the Protein

    The seasoned ground beef can be frozen for up to 2 months in a sealed freezer bag. Thaw overnight in the fridge before reheating and adding fresh vegetables.

    Optimal Reheating Methods

    Microwave the beef and rice together for 1-2 minutes until steaming. Add the cold vegetables and the fresh egg and sauce after heating to maintain texture.

    Preventing Component Sogginess

    Place the rice at the bottom and the beef on one side, keeping the raw vegetables on the opposite side. This physical separation helps maintain the integrity of each ingredient.

    Serving and Pairing Ideas

    Quick Office Lunch Setup

    Pack the bowls with a side of sliced cucumbers or edamame. These additions provide extra hydration and a refreshing contrast to the savory beef.

    Family-Style Bowl Bar

    Place the cooked beef, rice, and various raw vegetables in separate serving bowls. Allow family members to build their own bowls with their preferred ratio of ingredients.

    Complementary Side Dishes

    Pair these bowls with a light citrus salad or steamed bok choy. A side of pickled ginger or kimchi also adds a fermented tang that complements the seasoned beef.

    Post-Workout Refuel

    Increase the portion of rice and add an extra egg to boost the carbohydrate and protein content. This combination is ideal for muscle recovery after intense exercise.

    Troubleshooting Common Issues

    Preventing Dry Beef

    Avoid overcooking the ground beef beyond the point where it is browned. If the meat looks dry, stir in a tablespoon of water or beef broth during the final minute of cooking.

    Fixing Bland Flavor

    If the dish tastes flat, add an extra squeeze of lime juice or a splash of soy sauce right before serving. Acidity and salt are key to waking up the other flavors.

    Avoiding Mushy Rice

    Rinse the rice thoroughly under cold water before cooking to remove excess starch. This ensures the grains remain separate and fluffy rather than clumping together.

    Reducing Excess Grease

    If the beef releases too much fat, carefully drain the skillet before adding the soy sauce and brown sugar. This prevents the sauce from separating and tasting oily.

    Frequently Asked Questions

    Are these bowls suitable for weight loss?

    Yes, they can be. By using lean beef and increasing the ratio of vegetables to rice, you create a high-volume, low-calorie meal that remains satisfying due to the high protein content.

    How much protein is in one serving?

    Depending on the specific lean percentage of the beef and the addition of the egg, one serving typically provides between 25 and 35 grams of protein.

    Can I use a different oil for sautéing?

    Yes, avocado oil or canola oil can be used as substitutes for olive oil. However, keep the sesame oil in the beef mixture for the characteristic nutty flavor.

    What is the best way to cook the eggs?

    A soft-boiled egg with a runny yolk is recommended, as the yolk acts as a natural sauce that enriches the rice and beef. Fried eggs are a great alternative for added crispness.

    Can the sauce be made in advance?

    The spicy mayo sauce can be whisked together and stored in the refrigerator for up to 5 days. Shake the container well before drizzling it over the bowls.

    Is tamari a good substitute for soy sauce?

    Tamari is an excellent substitute, especially for those avoiding gluten. It has a similar salty, umami profile and works identically in this recipe.

    Print
    clock clock iconcutlery cutlery iconflag flag iconfolder folder iconinstagram instagram iconpinterest pinterest iconfacebook facebook iconprint print iconsquares squares iconheart heart iconheart solid heart solid icon
    High-Protein Viral Ground Beef Bowls for Easy Meal Prep

    High-Protein Viral Ground Beef Bowls for Meal Prep


    5 Stars 4 Stars 3 Stars 2 Stars 1 Star

    No reviews

    • Author: imageuploader
    • Total Time: 25 minutes
    • Yield: 4 servings 1x
    • Diet: High-Protein

    Description

    These viral ground beef bowls are everything you want in a quick, clean, and protein-packed meal. Featuring seasoned ground beef, fluffy rice, crunchy veggies, and a creamy-spicy drizzle, this bowl is bursting with flavor and perfect for weekly meal prep, healthy family dinners, or post-workout recovery.


    Ingredients

    Scale
    • 1 lb lean ground beef (93% lean)
    • 1 cup cooked jasmine or brown rice
    • 1 1/2 cups shredded cabbage (or slaw mix)
    • 1/2 cup shredded carrots
    • 2 eggs (fried or soft-boiled)
    • 1 tbsp olive oil
    • 3 tbsp soy sauce or tamari
    • 1 tbsp brown sugar
    • 2 cloves garlic (minced)
    • 1 tsp sesame oil
    • 1/2 tsp chili flakes (optional)
    • 1/4 cup Greek yogurt or mayo
    • 1 tbsp sriracha
    • 1 tsp honey
    • Juice of 1/2 lime

    Instructions

    1. Cook the Rice: Start your rice according to package instructions.
    2. Sauté the Beef: In a skillet, heat sesame oil. Add ground beef, garlic, soy sauce, brown sugar, and chili flakes. Cook until browned and saucy.
    3. Prep the Veggies: While the beef cooks, shred your cabbage and carrots.
    4. Make the Sauce: In a small bowl, whisk together Greek yogurt, sriracha, honey, and lime juice.
    5. Cook the Eggs: Fry or soft-boil the eggs to your liking.
    6. Assemble Your Bowl: Layer rice, beef, veggies, egg, and a big drizzle of spicy mayo.

    Notes

    Season ground beef generously for richer flavor. Use jasmine or basmati rice for better texture. For meal prep, store beef, rice, veggies, and sauce in separate containers to prevent sogginess.

    • Prep Time: 10 minutes
    • Cook Time: 15 minutes
    • Category: Dinner, Lunch, Meal Prep
    • Method: Stovetop
    • Cuisine: Asian-Inspired, Fusion

    Nutrition

    • Serving Size: 1 bowl
    • Calories: 520 kcal
    • Sugar: 14 g
    • Sodium: 620 mg
    • Fat: 25 g
    • Saturated Fat: 7 g
    • Unsaturated Fat: 18 g
    • Trans Fat: 0 g
    • Carbohydrates: 40 g
    • Fiber: 5 g
    • Protein: 32 g
    • Cholesterol: 150 mg
  • Fluffy Greek Yogurt Protein Pancakes Without Protein Powder

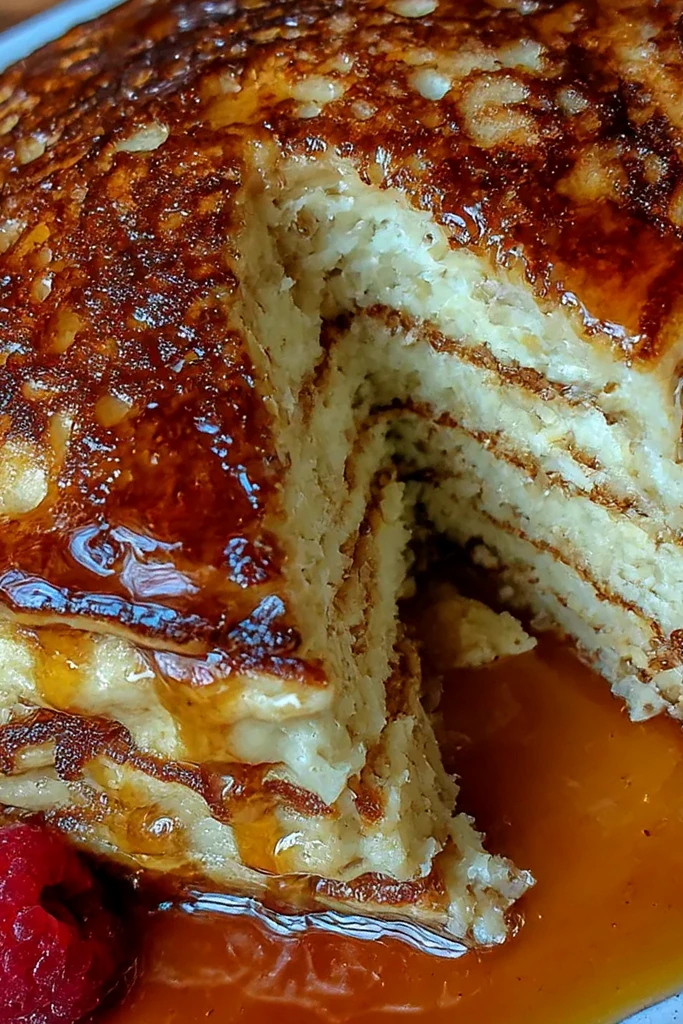
    Fluffy Greek Yogurt Protein Pancakes Without Protein Powder

    These thick and soft pancakes provide a naturally high-protein breakfast using simple pantry staples. They offer a satisfying texture and light flavor without the need for processed protein powders. This recipe is ideal for quick weekday mornings or healthy weekend brunches.

    Recipe image

    List of ingredients

    • 1 cup plain Greek yogurt – provides thickness and natural protein.
    • 2 large eggs – binds the batter and adds fluffiness.
    • 1/2 cup all-purpose flour or oat flour – provides structure; use oat flour for a gluten-free option.
    • 1 tsp baking powder – ensures the pancakes rise and stay airy.
    • 1/2 tsp vanilla extract – adds a subtle aromatic sweetness.
    • Pinch of salt – balances the flavors.
    • Optional: fresh berries or chocolate chips – for added flavor and texture.

    step-by-step instructions

    1. Mix wet ingredients: Whisk together the plain Greek yogurt and eggs in a medium bowl until the mixture is completely smooth. This creates a glossy base that ensures a tender crumb.
    2. Combine dry ingredients: Stir in the flour, baking powder, vanilla extract, and salt. Mix gently until just combined, leaving a few small lumps to avoid overworking the batter.
    3. Prep the pan: Heat a nonstick skillet over medium-low heat. Lightly grease the surface with oil or butter to prevent sticking.
    4. Cook the first side: Pour portions of batter onto the skillet to form small rounds. Cook until bubbles form on the surface and the edges appear set.
    5. Flip and finish: Carefully flip each pancake and cook until the second side is golden brown and fluffy. If a pancake resists flipping, wait another 15 seconds.
    6. Serve: Stack the warm pancakes and top with fresh fruit, a dollop of Greek yogurt, or a drizzle of maple syrup.

    Pro Tips for Maximum Fluffiness

    Use Room Temperature Ingredients

    Bringing eggs and yogurt to room temperature helps them emulsify more effectively. This results in a smoother batter that incorporates air more easily during whisking.

    Avoid Overmixing the Batter

    Stir the mixture only until the flour disappears. Overmixing develops excess gluten, which transforms a fluffy pancake into a dense or rubbery one.

    Allow the Batter to Rest

    Letting the batter sit for five to ten minutes before cooking allows the baking powder to fully activate. This step ensures the pancakes rise consistently in the pan.

    Maintain Consistent Low Heat

    Cook the pancakes over medium-low heat to ensure the centers are fully cooked. High heat often browns the exterior too quickly, leaving the middle underdone.

    Ingredient Substitutions and Variations

    Substituting All-Purpose Flour for Oat Flour

    Blend rolled oats into a fine powder to create a gluten-free alternative. Oat flour adds a subtle nuttiness and increases the fiber content of the meal.

    Using Almond Flour for Low Carb Options

    Super-fine almond flour can replace the wheat or oat flour for a lower-carbohydrate version. Note that almond flour produces a denser texture and requires careful flipping.

    Dairy-Free Yogurt Alternatives

    Substitute plain Greek yogurt with an unsweetened Greek-style coconut or soy yogurt. This keeps the protein levels high while making the recipe plant-based.

    Adding Natural Sweeteners to the Batter

    Stir in one tablespoon of honey or maple syrup directly into the batter. This complements the tanginess of the Greek yogurt without needing excess syrup later.

    Incorporating Fresh Berries

    Gently fold in blueberries, raspberries, or diced strawberries just before cooking. Placing berries on top of the poured batter prevents them from sinking to the bottom.

    Adding Chocolate Chips for Indulgence

    Fold in mini semi-sweet or dark chocolate chips for a treat-like breakfast. Mini chips distribute more evenly than standard size, ensuring chocolate in every bite.

    Equipment Recommendations

    Selecting the Right Skillet

    A high-quality nonstick skillet or a well-seasoned cast iron pan is best. These surfaces provide even heat distribution and make flipping the delicate pancakes easier.

    Using a Wide Silicone Spatula

    A wide, thin spatula allows you to get underneath the pancake without tearing the edges. Silicone is preferred as it won’t scratch the nonstick coating of your pan.

    Precise Measuring Tools

    Use a standard 1/4 cup measure to pour the batter for uniform size. Consistent sizing ensures that all pancakes cook at the same rate across the batch.

    Serving and Pairing Ideas

    Fresh Fruit Combinations

    Top the pancakes with sliced bananas, fresh strawberries, or a handful of blueberries. These add natural sweetness and a burst of freshness to the dish.

    Nut Butter Additions

    Spread a layer of almond, peanut, or cashew butter over the warm stack. This adds a creamy texture and boosts the overall protein and healthy fat content.

    Pure Syrup and Honey Options

    Drizzle with pure maple syrup or organic honey for a classic finish. For a lower-calorie option, use a small amount of agave nectar.

    Savory Side Pairings

    Serve the pancakes alongside sliced avocado or a side of sautéed spinach. This balances the meal with healthy fats and greens for a complete breakfast.

    Storage and Reheating Guide

    Refrigerating Cooked Pancakes

    Allow pancakes to cool completely on a wire rack before storing. Place them in an airtight container in the refrigerator for up to three days.

    Freezing for Meal Prep

    Flash freeze pancakes on a baking sheet for one hour before transferring them to a freezer bag. Place parchment paper between layers to prevent them from sticking together.

    Toasting for Best Texture

    Use a toaster to reheat frozen or refrigerated pancakes. This method restores the crisp exterior while keeping the center soft and warm.

    Skillet Reheating Method

    Heat a skillet over low heat with a small knob of butter. Warm the pancakes for one minute per side to restore moisture and fluffiness.

    Troubleshooting Common Issues

    Why are the pancakes flat?

    Flat pancakes often result from expired baking powder or overmixing the batter. Ensure your leavening agent is fresh and stir only until combined.

    Why are they burning on the outside?

    Burnt exteriors indicate the pan temperature is too high. Lower the heat to medium-low and wait a few minutes for the pan to cool down before adding more batter.

    Why is the batter too runny?

    Different brands of Greek yogurt vary in thickness. If the batter is too thin, stir in one additional tablespoon of flour to reach the desired consistency.

    Why are the pancakes sticking?

    Sticking usually happens if the pan isn’t hot enough or lacks sufficient grease. Ensure the oil is shimmering before pouring the batter onto the skillet.

    Batter Consistency and Quality

    Assessing the Ideal Batter Texture

    The batter should be thick enough to hold its shape slightly but fluid enough to pour. If it is too thick, it may not rise properly; if too thin, it will spread too much.

    Managing Yogurt Thickness

    If using a thinner yogurt, strain it through a cheesecloth for an hour to remove excess whey. This creates a thicker base that mimics traditional Greek yogurt.

    Handling Oat Flour Clumping

    Oat flour can sometimes clump when mixed with wet ingredients. Whisk the flour and baking powder together separately before adding them to the wet mixture.

    Nutritional Enhancements

    Adding Chia Seeds for Fiber

    Stir in a teaspoon of chia seeds to the batter for added fiber and omega-3 fatty acids. This adds a slight crunch and increases the nutritional density.

    Including Ground Flaxseed

    Add a tablespoon of ground flaxseed for a nutty flavor and additional heart-healthy fats. Flaxseed also helps maintain the structure of gluten-free versions.

    Using Cinnamon for Warmth

    Mix a pinch of ground cinnamon into the dry ingredients. This provides a warm, spiced flavor that pairs perfectly with maple syrup and fruit.

    Frequently Asked Questions

    Can I make this without eggs?

    Yes, you can substitute eggs with flax eggs or a commercial egg replacer. Use one tablespoon of ground flaxseed mixed with three tablespoons of water per egg.

    Can I freeze these pancakes?

    Yes, these pancakes freeze very well. Store them with separators and reheat them in a toaster for a fast and nutritious breakfast.

    Are these gluten-free?

    They are gluten-free if you replace the all-purpose flour with oat flour or a certified gluten-free 1:1 baking blend.

    Can I add protein powder?

    While the yogurt provides protein, you can add a small amount of powder. If you do, reduce the yogurt slightly or add a splash of milk to prevent the batter from becoming too dry.

    Are these kid-friendly?

    Yes, the mild flavor and soft texture are typically very appealing to children. You can customize them with their favorite fruits or chocolate chips to encourage eating.

    Print
    clock clock iconcutlery cutlery iconflag flag iconfolder folder iconinstagram instagram iconpinterest pinterest iconfacebook facebook iconprint print iconsquares squares iconheart heart iconheart solid heart solid icon
    Fluffy Greek Yogurt Protein Pancakes Without Protein Powder

    Fluffy Greek Yogurt Protein Pancakes Without Protein Powder


    5 Stars 4 Stars 3 Stars 2 Stars 1 Star

    No reviews

    • Author: imageuploader
    • Total Time: 15 minutes
    • Yield: 6 pancakes 1x
    • Diet: Low Fat

    Description

    Fluffy Greek Yogurt Protein Pancakes are thick, soft, and incredibly fluffy, made without protein powder and naturally packed with protein for a quick, healthy breakfast.


    Ingredients

    Scale
    • 1 cup plain Greek yogurt
    • 2 large eggs
    • ½ cup all-purpose flour or oat flour
    • 1 tsp baking powder
    • ½ tsp vanilla extract
    • Pinch of salt
    • Optional: fresh berries or chocolate chips

    Instructions

    1. Step 1: In a bowl, whisk together Greek yogurt and eggs until smooth.
    2. Step 2: Add flour, baking powder, vanilla, and salt. Stir gently until just combined.
    3. Step 3: Heat a nonstick skillet over medium-low heat and lightly grease.
    4. Step 4: Pour batter onto the skillet to form pancakes.
    5. Step 5: Cook until bubbles form and edges look set, then flip and cook until golden and fluffy.
    6. Step 6: Serve warm with fruit, yogurt, or maple syrup if desired.

    Notes

    No protein powder required; the yogurt provides the protein. You can use all-purpose flour or substitute with oat flour for a gluten-free option.

    • Prep Time: 5 minutes
    • Cook Time: 10 minutes
    • Category: Breakfast
    • Method: Pan-fry
    • Cuisine: American

    Nutrition

    • Serving Size: 1 pancake
    • Calories: 83 kcal
    • Sugar: 1 g
    • Sodium: 150 mg
    • Fat: 1.6 g
    • Saturated Fat: 0.5 g
    • Unsaturated Fat: 1.3 g
    • Trans Fat: 0 g
    • Carbohydrates: 9 g
    • Fiber: 0.5 g
    • Protein: 6.8 g
    • Cholesterol: 62 mg
  • Irresistible Flavorful Baked Sweet Potatoes

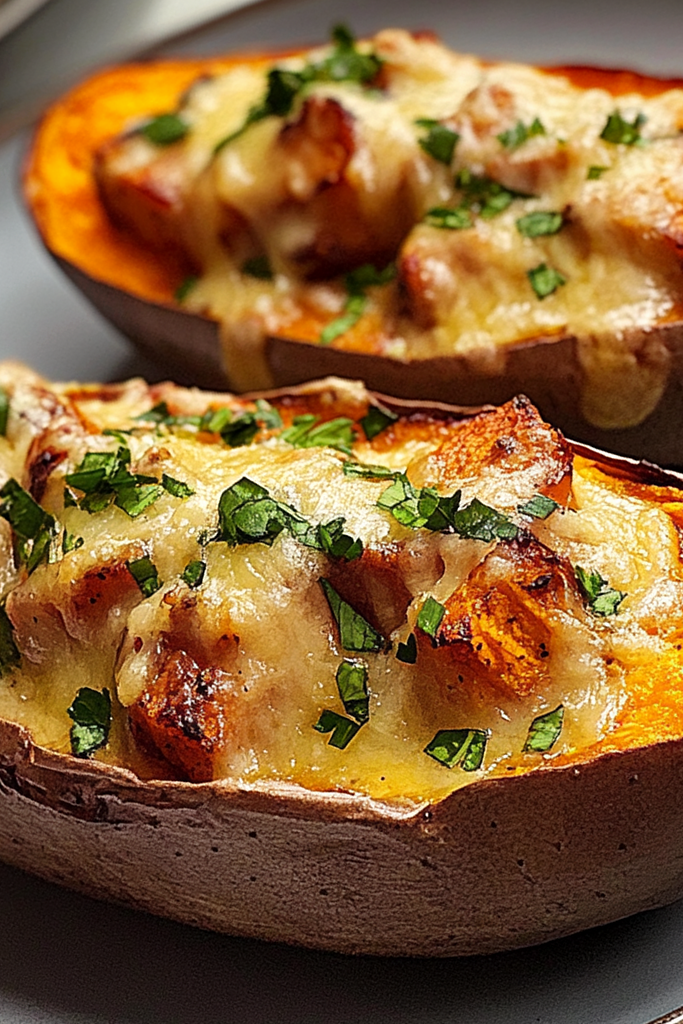
    Irresistible Flavorful Baked Sweet Potatoes

    These baked sweet potatoes are roasted to achieve a tender, soft interior and naturally caramelized skin. This method ensures a consistent texture and a balance of sweet and savory flavors for a nutritious side dish.

    Recipe image

    List of ingredients

    • 4 medium sweet potatoes (about 1.5 pounds) – ensure they are firm and similar in size.
    • 2 tablespoons extra virgin olive oil – helps in caramelizing the skin.
    • 1 teaspoon salt – enhances the natural sugars.
    • ½ teaspoon freshly cracked black pepper – adds a subtle savory kick.
    • 1 teaspoon ground cinnamon – provides a warm, aromatic flavor.
    • 2 tablespoons butter or 2 tablespoons maple syrup – optional for added richness or sweetness.

    step-by-step instructions

    1. Prepare the Oven: Preheat your oven to 400°F (200°C) and line a baking sheet with parchment paper to prevent sticking.
    2. Clean the Potatoes: Wash and scrub the sweet potatoes thoroughly under running water, then dry them completely with a kitchen towel.
    3. Apply Seasonings: Drizzle olive oil over each sweet potato and sprinkle salt, pepper, and cinnamon evenly across all sides.
    4. Bake: Place the seasoned potatoes on the baking sheet and bake for 45-60 minutes until a fork pierces the center without resistance.
    5. Finish and Serve: Allow the potatoes to cool slightly, slice them open, add your choice of optional toppings, and serve.

    Selecting the Best Sweet Potatoes

    Identifying High-Quality Produce

    Choose sweet potatoes that feel heavy for their size and have smooth, unblemished skins. Avoid any potatoes with soft spots, deep bruises, or visible sprouts, as these can affect the internal texture. Firmness is the primary indicator of freshness and proper storage.

    Selecting Uniform Sizes for Consistent Cooking

    Select potatoes that are roughly the same diameter and length to ensure they cook at the same rate. If you use a mix of very large and very small potatoes, the smaller ones will overcook and shrivel before the larger ones are tender. Medium-sized potatoes typically bake most evenly within the 45-60 minute window.

    Understanding Different Sweet Potato Varieties

    Garnet sweet potatoes are the most common for baking due to their orange flesh and balanced sweetness. Jewel varieties are slightly sweeter and softer, making them ideal for a mash-like interior. Japanese sweet potatoes have a purple skin and starchier texture, which results in a denser, nuttier baked potato.

    Advanced Roasting Techniques

    The Importance of Thorough Drying

    After washing the potatoes, it is critical to dry the skins completely with a clean towel. Any remaining surface moisture will create steam in the oven, which prevents the skins from crisping and caramelizing. Dry skins allow the oil to adhere better and promote a roasted finish.

    Using Olive Oil for Heat Distribution

    Extra virgin olive oil acts as a conductor, transferring heat from the oven air to the potato skin more efficiently. This oil prevents the skin from drying out too quickly while the interior cooks. It also serves as the binding agent for the salt, pepper, and cinnamon.

    Adjusting Oven Temperature for Texture

    A temperature of 400°F is ideal for balancing the Maillard reaction on the skin with the slow softening of the starches inside. If the oven is too cool, the potatoes may steam rather than roast, leading to a soggy skin. If it is too hot, the outside may burn before the center is fully cooked.

    Savory Seasoning Alternatives

    Adding Smoked Paprika for Depth

    Replacing or augmenting the cinnamon with smoked paprika introduces a woody, campfire flavor that complements the natural sugar of the potato. This creates a more savory profile that pairs well with grilled proteins. Use approximately one teaspoon for four medium potatoes.

    Incorporating Garlic and Onion Powder

    For a more savory side dish, mix garlic powder and onion powder into the oil coating. These aromatics penetrate the skin and add a pungent depth that offsets the sweetness. This combination is particularly effective when serving potatoes alongside roasted meats.

    Using Cumin and Chili Powder for Earthiness

    Cumin and chili powder add an earthy, slightly spicy dimension to the baking process. These spices shift the flavor profile toward a Southwestern style. This is an excellent choice if you plan to stuff the potatoes with beans or corn later.

    Sweet Topping Variations

    Maple Syrup and Cinnamon Synergy

    Drizzling pure maple syrup over a hot, split sweet potato enhances the existing cinnamon notes. The syrup seeps into the fluffy interior, creating a glaze-like effect. This is a classic preparation for holiday meals or breakfast.

    Honey and Toasted Pecans

    Honey provides a thicker, floral sweetness compared to maple syrup. Adding chopped toasted pecans on top introduces a necessary crunch that contrasts with the soft potato flesh. This variation increases the protein and healthy fat content of the dish.

    Brown Sugar and Butter Glaze

    Mixing softened butter with a pinch of brown sugar creates a rich, caramelized topping. When placed in the hot potato, the sugar melts into the butter to form a decadent sauce. This is the most indulgent way to serve baked sweet potatoes.

    Nutrient-Dense Stuffing Ideas

    Plant-Based Protein Fillings

    Stuff the baked potatoes with a mixture of black beans, corn, and diced red onions. This transforms the side dish into a complete vegetarian meal. Squeeze a bit of lime juice over the filling to add acidity and brightness.

    Tangy Dairy-Based Toppings

    A dollop of Greek yogurt or sour cream adds a cool, creamy contrast to the warm potato. To enhance the flavor, stir in chopped chives or parsley. This adds a layer of probiotics and a tangy flavor profile that balances the sugars.

    Leafy Green and Nut Mixes

    Sauté kale or spinach with garlic and fold it into the potato center. Adding slivered almonds or walnuts provides texture and omega-3 fatty acids. This variation increases the micronutrient density, adding iron and vitamins K and A.

    Proper Storage Methods

    Chilling for Short Term Use

    Allow leftover baked sweet potatoes to cool completely to room temperature before storage. Place them in an airtight container to prevent them from absorbing other odors in the refrigerator. They will maintain their quality and flavor for up to five days.

    Freezing for Long Term Storage

    To freeze, wrap individual cooled potatoes tightly in plastic wrap or aluminum foil. Place the wrapped potatoes into a heavy-duty freezer bag to prevent freezer burn. They can be stored in the freezer for up to three months without significant loss of quality.

    Maintaining Moisture During Storage

    If you store potatoes without their skins, they may dry out more quickly. Keeping the skin intact during refrigeration helps lock in the internal moisture. When reheating, a small pat of butter can restore any lost creaminess.

    Effective Reheating Methods

    Oven Warming for Best Texture

    Reheat the potatoes in a 350°F (175°C) oven for 10-15 minutes. This method is superior because it restores the crispness of the skin while warming the center. Avoid wrapping them in foil during this process to keep the skin from becoming soggy.

    Fast Microwave Heating

    For a quicker option, wrap the potato in a damp paper towel and microwave on high for 2-3 minutes. The damp towel creates a small amount of steam that prevents the interior from becoming rubbery. Note that this method will soften the skin.

    Air Fryer Crisp-up Method

    Place the chilled potato in an air fryer at 375°F (190°C) for 5-7 minutes. The rapid air circulation quickly reheats the center and makes the exterior exceptionally crispy. This is the fastest way to achieve a ‘fresh-baked’ texture.

    Troubleshooting Common Results

    Fixing Tough Centers

    If the potato is still hard in the center after the allotted time, it is likely due to an oversized potato or a cool oven. Return the potato to the oven for another 10-15 minutes. If the skin is already too dark, cover the potato loosely with foil to prevent burning.

    Preventing Burnt Skins

    Burnt skins usually occur if the oil is applied too thickly or the oven temperature is too high. To fix this, check the potatoes every 15 minutes after the first 30. If they are browning too quickly, lower the oven temperature by 25°F.

    Managing Excessive Moisture

    If the interior of the potato is watery, it may be due to a variety of sweet potato with higher water content. To resolve this, slice the potato open and place it face-up in the oven for an additional 5 minutes. This allows some of the excess moisture to evaporate.

    Frequently Asked Questions

    Can I use white potatoes instead?

    Yes, you can use Russet or Yukon Gold potatoes, but the cooking time and seasoning may differ. White potatoes are less sweet, so you might omit the cinnamon and increase the amount of salt and pepper.

    Should I prick the potatoes with a fork?

    While some recipes suggest pricking the skin, it is not strictly necessary for sweet potatoes. The skin is thin enough that steam generally escapes; however, pricking can prevent the skin from splitting if the potato is very large.

    How long do they stay fresh?

    Once baked, they stay fresh in the refrigerator for five days. To maintain the best taste, ensure they are stored in a sealed container to avoid drying out.

    Can I substitute shredded chicken for meat toppings?

    Absolutely. Shredded chicken mixed with a bit of barbecue sauce or Greek yogurt makes an excellent high-protein topping for baked sweet potatoes. This turns the dish into a satisfying main course.

    Print
    clock clock iconcutlery cutlery iconflag flag iconfolder folder iconinstagram instagram iconpinterest pinterest iconfacebook facebook iconprint print iconsquares squares iconheart heart iconheart solid heart solid icon
    Irresistible Flavorful Baked Sweet Potatoes

    Irresistible Flavorful Baked Sweet Potatoes


    5 Stars 4 Stars 3 Stars 2 Stars 1 Star

    No reviews

    • Author: imageuploader
    • Total Time: 1 hour 10 minutes
    • Yield: 4 servings 1x
    • Diet: Vegetarian

    Description

    Experience the warmth and comfort of Irresistible Flavorful Baked Sweet Potatoes, where golden-brown potatoes caramelize beautifully in the oven. With a perfect blend of sweetness and savory spices, these baked sweet potatoes are not just a dish but a nostalgic memory evoking cozy family gatherings. Ideal for holiday feasts or a weeknight dinner, they promise to leave everyone asking for seconds.


    Ingredients

    Scale
    • 4 medium sweet potatoes (about 1.5 pounds)
    • 2 tablespoons extra virgin olive oil
    • 1 teaspoon salt
    • ½ teaspoon freshly cracked black pepper
    • 1 teaspoon ground cinnamon
    • 2 tablespoons butter or 2 tablespoons maple syrup (optional)

    Instructions

    1. Preheat: Preheat your oven to 400°F (200°C) and line a baking sheet with parchment paper.
    2. Prepare: Wash and scrub the sweet potatoes thoroughly, then dry them with a kitchen towel.
    3. Season: Drizzle olive oil over each sweet potato, then sprinkle salt, pepper, and cinnamon evenly across all sides.
    4. Bake: Place the sweet potatoes on the baking sheet and bake for 45-60 minutes until tender when pierced with a fork.
    5. Serve: Allow to cool slightly, slice open each sweet potato, add your choice of toppings, and serve.

    Notes

    Select sweet potatoes of uniform size for even cooking. To check for doneness, a fork should glide in smoothly without resistance. For flavor variations, experiment with nutmeg or paprika.

    • Prep Time: 10 minutes
    • Cook Time: 60 minutes
    • Category: Side dish
    • Method: Baking
    • Cuisine: American

    Nutrition

    • Serving Size: 1 medium baked sweet potato (about 200g)
    • Calories: 180 kcal
    • Sugar: 7 g
    • Sodium: 70 mg
    • Fat: 4 g
    • Saturated Fat: 0.5 g
    • Unsaturated Fat: 3 g
    • Trans Fat: 0 g
    • Carbohydrates: 41 g
    • Fiber: 6 g
    • Protein: 4 g
    • Cholesterol: 0 mg
  • The Comprehensive Guide to Perfectly Boiled Eggs

    The Comprehensive Guide to Perfectly Boiled Eggs

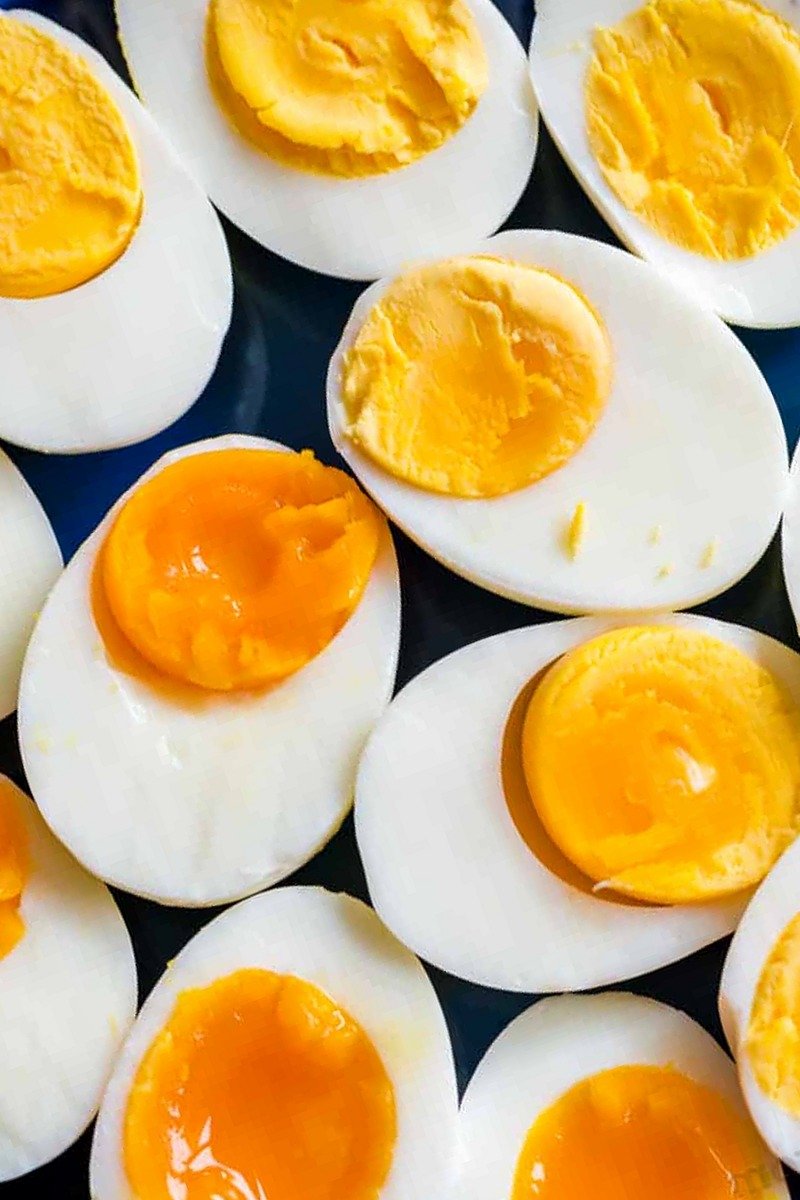
    Achieve consistent results with this reliable method for boiling eggs to any desired doneness. This technique ensures that your eggs are easy to peel and have the perfect yolk texture every time.

    Recipe image

    List of ingredients

    • 8 large eggs – cold from the refrigerator (you may use between 6 and 12 eggs).
    • 8 cups cold water – enough to cover eggs by 1 inch in a 3-quart saucepan.

    step-by-step instructions

    1. Prepare the pot: Place the cold eggs in a large 3-quart stainless steel saucepan. Pour in cold water until the water level is exactly 1 inch above the surface of the eggs.
    2. Bring to a boil: Heat the water over high heat without a lid. Keep the pan uncovered so you can accurately monitor when the water reaches a rolling boil.
    3. Simmer and time: Once the water is boiling, reduce the heat to maintain a medium boil. Immediately set a timer based on your preferred level of doneness from the timing chart.
    4. Ice bath cooling: While the eggs cook, prepare a bowl filled with ice and water. As soon as the timer expires, transfer the eggs immediately into the ice water, ensuring they are fully submerged.
    5. Storage and peeling: Allow the eggs to cool completely in the ice bath. Store hard-boiled eggs in the refrigerator for up to 7 days or soft-boiled eggs for up to 3 days. Peel the eggs only when you are ready to serve them.

    Optimal Egg Selection for Boiling

    Prioritize Older Store-Bought Eggs

    Eggs that have been in the refrigerator for a week or two are significantly easier to peel than farm-fresh eggs. Fresh eggs have a stronger bond between the shell membrane and the white. Older eggs experience a slight increase in pH, which loosens this bond.

    Consider the Impact of Egg Size

    This recipe is designed for Large Grade AA eggs, which typically weigh about 2 ounces each. If you use medium eggs, they will cook faster and may require 1 minute less of boiling time. Extra large or jumbo eggs have more mass and may need an additional minute to reach the same center temperature.

    Essential Equipment and Cooking Tips

    Maintain Consistent Pan Selection

    Use a 3-quart stainless steel saucepan for the most predictable results. Stainless steel heats evenly and allows the water to reach a boil at a consistent rate. Avoid cast iron or heavy ceramic pots, as they take longer to heat and may alter the timing required once the water boils.

    Keep the Lid Off the Pan

    Cooking without a lid is necessary to see the exact moment the water begins to boil. If the pan is covered, you might miss the start of the rolling boil, leading to overcooked eggs. Monitoring the surface of the water allows you to start the timer precisely.

    Prepare the Ice Bath in Advance

    The ice bath is the most critical step for stopping the internal cooking process. Without immediate cooling, the residual heat continues to cook the yolk, which often leads to a rubbery texture. A fully submerged egg in ice water cools rapidly, locking in the desired doneness.

    Timing Guide for Different Yolk Textures

    Soft-Boiled with Liquid Center

    Boil the eggs for exactly 2 minutes after the water reaches a boil. This results in fully set whites but a completely liquid center. These are ideal for dipping toast soldiers.

    Soft-Boiled with Creamy Center

    Boil the eggs for 3 minutes for a custard-like, creamy center. The yolk is thickened but still moist and jammy. This texture is highly preferred for ramen toppings.

    Medium-Boiled with Moist Center

    Boil the eggs for 4 to 5 minutes to achieve a medium-boiled result. The center remains moist and soft but no longer flows. This is a versatile middle-ground for various breakfast dishes.

    Hard-Boiled with Soft Center

    Boil the eggs for 6 to 7 minutes for a standard hard-boiled egg with a tender center. The yolk is fully set but retains a bright yellow color and soft texture. This is best for salads where you want a creamy bite.

    Fully Hard-Boiled with Dry Center

    Boil the eggs for 8 to 9 minutes for a firm, dry center. The yolk is completely opaque and crumbly. This version is the best choice for deviled eggs or egg salad where structural stability is needed.

    Advanced Peeling Techniques

    Begin Peeling at the Wide End

    Every egg has a small air pocket located at the wider end of the shell. Start your peeling process here to easily break through the shell and get under the membrane. Once you have access to the membrane, the shell will slide off in larger pieces.

    Peel Under Running Cold Water

    Hold the egg under a stream of cold running water while peeling. The water pressure helps force its way between the egg white and the membrane. This lubrication makes the shell removal process much smoother and prevents the white from tearing.

    Water Additives and Their Practical Uses

    Adding Salt to Prevent Leaks

    Adding a pinch of salt to the boiling water is a useful precaution. If an egg develops a small crack during the boiling process, the salt helps the egg white coagulate faster. This forms a seal over the crack and reduces the amount of white that leaks into the pot.

    Using Vinegar for Shell Removal

    Some cooks add a teaspoon of white vinegar to the water to aid in peeling. While the effect is minimal compared to using older eggs, the acid may slightly weaken the calcium in the shell. It remains an optional step depending on your preference.

    Storage and Food Safety

    Follow Refrigeration Timelines

    Hard-boiled eggs must be refrigerated within 2 hours of cooking to maintain safety. Fully hard-boiled eggs stay fresh in the refrigerator for up to 7 days. Soft-boiled eggs have a shorter shelf life and should be consumed within 3 days.

    Store Eggs Unpeeled to Prevent Odors

    Keep your boiled eggs in their shells until you are ready to use them. The shell acts as a natural barrier that prevents the egg from absorbing smells from other foods in the fridge. If you must peel them in advance, store them in an airtight container to prevent the whites from drying out.

    Practical Ways to Use Boiled Eggs

    Preparing Classic Egg Salad

    Dice firm hard-boiled eggs into small cubes. Mix them with mayonnaise, a touch of mustard, finely chopped celery, and a pinch of salt and pepper for a traditional spread.

    Making Guacamole Stuffed Eggs

    Slice hard-boiled eggs in half lengthwise and remove the yolks. Mash the yolks with seasoned avocado, lime juice, and salt, then pipe the mixture back into the egg white cavities.

    Assembling a Chicken Avocado Salad

    Combine grilled chicken breast chunks, diced avocado, and quartered hard-boiled eggs. Toss with a light vinaigrette for a nutrient-dense meal.

    Adding Eggs to Potato Salad

    Slice hard-boiled eggs into thin rounds. Fold them into boiled potato chunks mixed with a creamy dressing of mayo, chives, and lemon juice.

    Creating a Salmon Cobb Salad

    Layer fresh greens, smoked salmon, diced cucumber, and halved hard-boiled eggs. Arrange the ingredients in rows for a professional presentation and serve with a creamy dressing.

    Troubleshooting Common Issues

    Avoiding the Green Ring Around the Yolk

    A greenish-grey ring around the yolk is a sign of overcooking. This occurs when hydrogen sulfide gas reacts with iron in the yolk. To prevent this, strictly follow the timing chart and use an ice bath immediately.

    Fixing Rubbery Egg Whites

    Rubbery whites are caused by exposing the eggs to high heat for too long. Ensure you reduce the heat to a medium boil once the initial rolling boil is achieved. Do not let the eggs boil violently for the duration of the timer.

    Dealing with Cracked Shells

    If eggs crack frequently, try lowering them into the water more gently with a slotted spoon. Ensure the water is not boiling too violently, as eggs bumping into each other or the side of the pot can cause fractures.

    Frequently Asked Questions

    Why are my eggs so hard to peel?

    This usually happens because the eggs are too fresh or were not cooled sufficiently in an ice bath. Using store-bought eggs and a 5-10 minute soak in ice water typically solves this problem.

    Can I boil eggs in a cast iron pot?

    You can, but it is not recommended for this specific timing. Cast iron retains heat differently and takes much longer to reach a boil, which can lead to inconsistent internal temperatures.

    Do I need to start with hot water?

    No, starting with cold water and bringing it to a boil together ensures the egg heats evenly. Starting with boiling water can cause the shells to crack due to the sudden temperature shock.

    Print
    clock clock iconcutlery cutlery iconflag flag iconfolder folder iconinstagram instagram iconpinterest pinterest iconfacebook facebook iconprint print iconsquares squares iconheart heart iconheart solid heart solid icon
    The Definitive Guide to Perfect Hard Boiled Eggs

    The Comprehensive Guide to Perfectly Boiled Eggs


    5 Stars 4 Stars 3 Stars 2 Stars 1 Star

    No reviews

    • Author: imageuploader
    • Total Time: 10 minutes
    • Yield: 8 eggs 1x
    • Diet: General

    Description

    This method for making hard-boiled eggs (or soft boiled eggs) will get you perfect results every time and it’s really easy!


    Ingredients

    Scale
    • 8 large eggs, cold from the fridge
    • 8 cups cold water

    Instructions

    1. Boil: Place cold eggs in a large 3-quart stainless steel saucepan and cover with cold water so water is 1″ above the surface of the eggs. With the lid off, bring to a rolling boil over high heat.
    2. Simmer: Once at a boil, reduce heat to keep at a medium boil and set a timer for your desired doneness (see chart below).
    3. Cool: Prepare your ice water bath, and as soon as the timer is done, transfer the eggs into ice water so they are fully submerged. Once the eggs have cooled, you can refrigerate hard-boiled eggs for up to 7 days or soft-boiled eggs for up to 3 days. Peel when ready to use.

    Notes

    Hard Boiled Eggs Timing Chart: 2 min (soft boiled, liquid center), 3 min (soft-boiled, creamy center), 4-5 min (medium-boiled, moist soft center), 6-7 min (hard-boiled, soft center), 8-9 min (hard-boiled, firm dry center).

    • Prep Time: 0 minutes
    • Cook Time: 10 minutes
    • Category: Appetizer, Breakfast, Side Dish
    • Method: Boiling
    • Cuisine: American

    Nutrition

    • Serving Size: 1 egg
    • Calories: 63 kcal
    • Sugar: 1 g
    • Sodium: 75 mg
    • Fat: 4 g
    • Saturated Fat: 1 g
    • Unsaturated Fat: 3 g
    • Trans Fat: 0 g
    • Carbohydrates: 1 g
    • Fiber: 0 g
    • Protein: 6 g
    • Cholesterol: 164 mg
  • Savory High-Protein Philly Cheesesteak Pasta

    Savory High-Protein Philly Cheesesteak Pasta

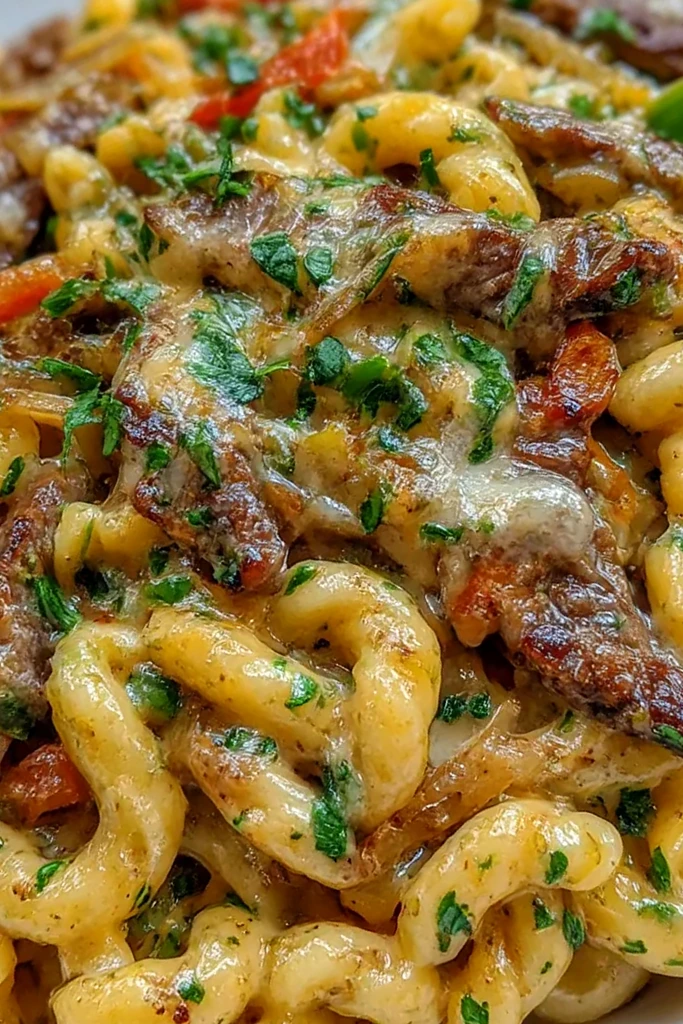
    This creamy pasta dish combines the bold flavors of a classic Philly cheesesteak with a high-protein twist. It is a fast, one-pan meal designed for busy weeknights when you need something comforting yet nourishing.

    Recipe image

    List of ingredients

    • 8 oz high-protein pasta – provides a chewy texture and extra protein.
    • 1 lb lean sirloin steak, thinly sliced – the primary protein source for a lean finish.
    • 1 tbsp olive oil – used for searing the steak and sautéing vegetables.
    • 1 small green bell pepper, thinly sliced – adds a mild sweetness and vibrant color.
    • 1 small onion, thinly sliced – provides a savory, aromatic depth.
    • 2 cloves garlic, minced – adds a punch of flavor to the vegetable base.
    • 1 tsp Worcestershire sauce – contributes a salty, umami depth to the beef.
    • 1/2 tsp salt – enhances the natural flavors of all components.
    • 1/2 tsp black pepper – adds a subtle heat and aromatic spice.
    • 1 cup low-fat milk – forms the base of the light and creamy sauce.
    • 1 cup shredded provolone cheese – creates the signature Philly cheesesteak melt.
    • 1/2 cup shredded mozzarella cheese – adds a gooey, stringy consistency.
    • 2 oz light cream cheese – thickens the sauce and ensures a smooth texture.

    step-by-step instructions

    1. Prepare the Pasta: Cook high-protein pasta according to package directions, then drain and set aside. Tip: Cook the pasta until just al dente to prevent it from becoming mushy when mixed with the sauce.
    2. Brown the Beef: Heat olive oil in a large skillet over medium-high heat, add sliced steak, and cook for 2 to 3 minutes until browned. Remove the meat from the pan and set it aside. Tip: Pat the steak dry with a paper towel before cooking to achieve a better sear.
    3. Sauté the Aromatics: In the same skillet, sauté the sliced bell pepper and onion for 4 to 5 minutes until softened. Add the minced garlic and cook for an additional 30 seconds. Tip: If the pan seems too dry, add a small splash of water to loosen the browned bits from the bottom.
    4. Season the Mixture: Return the browned steak to the skillet and stir in the Worcestershire sauce, salt, and black pepper. Tip: Mix quickly to ensure the meat is evenly coated without overcooking.
    5. Build the Creamy Base: Reduce the heat to medium and stir in the low-fat milk and light cream cheese until the mixture is smooth and slightly thickened. Tip: Stir constantly with a whisk or spatula to prevent the cream cheese from clumping.
    6. Melt the Cheeses: Stir in the shredded provolone and mozzarella until the cheeses are completely melted and creamy. Tip: Use freshly shredded cheese for a smoother melt and better consistency.
    7. Combine and Finish: Add the cooked pasta to the skillet and toss until evenly coated, cooking for 1 to 2 minutes until everything is heated through. Tip: If the sauce is too thick, stir in a tablespoon of reserved pasta water.
    8. Serve: Plate the pasta warm and garnish with extra cracked black pepper if desired. Tip: Serve immediately to maintain the ideal creamy texture of the cheese sauce.

    Pro Tips for Optimal Texture

    Searing Steak in Small Batches to Avoid Steaming

    If your skillet is small, cook the steak in two separate batches. Overcrowding the pan lowers the temperature, causing the meat to steam in its own juices rather than brown, which results in a tougher texture.

    Using Reserved Pasta Water for Sauce Adjustment

    Always save a small cup of the starchy water used to boil the pasta. If the cheese sauce becomes too thick after adding the pasta, a splash of this water will emulsify the sauce and make it glossy again.

    Selecting the Right Cut of Lean Sirloin

    Choose top sirloin or flank steak for the best results in this recipe. These cuts are naturally lean and can be sliced very thin, which ensures they cook quickly and remain tender.

    Managing Heat to Prevent Cheese Separation

    Once you add the milk and cheeses, keep the heat at a medium or low setting. High heat can cause the fats in the cheese to separate, leading to a grainy or oily sauce rather than a smooth cream.

    Patting Meat Dry for a Better Crust

    Moisture on the surface of the steak creates steam when it hits the oil. By patting the meat dry with paper towels, you ensure a high-temperature sear that develops a savory brown crust.

    Stirring Cream Cheese Thoroughly

    Add the light cream cheese in small chunks or use a whisk to incorporate it into the milk. This prevents lumps and ensures the sauce has a professional, uniform consistency.

    Ingredient Substitutions and Customizations

    Using Chickpea Pasta for Extra Protein

    Swap traditional high-protein wheat pasta for chickpea or lentil pasta to increase the protein and fiber content. These alternatives work well but may require a bit more sauce as they absorb more liquid.

    Substituting Dairy-Free Cheese Alternatives

    For a dairy-free version, use cashew-based cream and vegan shreds of provolone and mozzarella. Ensure you choose a brand that melts well to maintain the creamy feel of the original dish.

    Swapping Steak for Lean Ground Turkey

    If you prefer a different protein, lean ground turkey or thinly sliced chicken breast are excellent substitutes. Follow the same browning process, though turkey may require slightly more seasoning to match the beef’s depth.

    Adding Mushrooms for Extra Umami

    Incorporate sliced cremini or button mushrooms during the vegetable sauté step. Mushrooms add an earthy depth and bulk to the meal without significantly increasing the calorie count.

    Incorporating Fresh Spinach for Added Nutrition

    Stir in a few handfuls of fresh baby spinach just before adding the pasta. The heat from the sauce will wilt the spinach quickly, adding color and essential vitamins to the meal.

    Increasing Heat with Red Pepper Flakes

    To add a spicy kick, stir in a pinch of crushed red pepper flakes along with the garlic. This creates a subtle warmth that cuts through the richness of the cheese sauce.

    Best Ways to Serve This Meal

    Pairing with a Zesty Lemon Vinaigrette Salad

    Serve this rich pasta alongside a light salad of mixed greens, cucumbers, and cherry tomatoes. A lemon-based vinaigrette provides a bright, acidic contrast that balances the creaminess of the cheesesteak mac.

    Adding Tangy Pickle Spears as a Side

    Classic dill pickle spears add a refreshing crunch and acidity. The vinegar in the pickles cleanses the palate between bites of the savory, cheesy pasta.

    Choosing a Refreshing Beverage Pairing

    Pair this meal with sparkling water flavored with lime or a chilled glass of unsweetened iced tea. These options provide a crisp finish without adding unnecessary sugars to a high-protein meal.

    Garnishing with Freshly Chopped Chives

    Sprinkle finely chopped chives or parsley over the top before serving. Fresh herbs add a pop of color and a mild onion-like brightness that enhances the presentation.

    Serving with Roasted Zucchini for Balance

    Sautéed or roasted zucchini slices make a great side dish. They add a soft texture and additional nutrients, making the meal feel more complete and balanced.

    Storage and Reheating Guide

    Refrigerating Leftovers in Airtight Containers

    Store any remaining pasta in a sealed airtight container in the refrigerator for up to three days. This prevents the pasta from drying out and keeps the flavors fresh.

    Reheating on the Stovetop for Best Quality

    To maintain the creaminess, reheat the pasta in a skillet over low heat. Add a tablespoon of milk or water and stir gently until the cheese melts and the dish is heated through.

    Using a Microwave for Quick Reheating

    If using a microwave, heat the pasta in short 30-second intervals, stirring in between. Adding a tiny splash of water helps steam the pasta and prevents the cheese from becoming oily.

    Freezing Considerations for Meal Prep

    While this dish is best fresh, you can freeze it for up to a month. It is recommended to freeze the steak and vegetable mixture separately from the pasta to avoid a mushy texture upon thawing.

    Make-Ahead Preparation Strategies

    Pre-Slicing Vegetables for Faster Assembly

    Slice the onions and bell peppers a day in advance and store them in a container. This reduces the active prep time on the night of cooking to just a few minutes.

    Browning the Steak in Advance

    You can sear the sirloin steak ahead of time and store it in the fridge. When you are ready to eat, simply return the cooked meat to the pan during the final assembly steps.

    Batch Cooking for Weekly Lunches

    Double the recipe to create several meal-prep portions. Divide the finished pasta into equal containers, allowing them to cool slightly before sealing and refrigerating.

    Preparing Minced Garlic in Bulk

    Mince a large amount of garlic and store it in a small jar covered in olive oil. This allows you to scoop out the exact amount needed for this recipe without the tedious chopping process.

    Setting Up a Mise en Place Station

    Arrange all measured ingredients on your counter before turning on the stove. Because this recipe moves quickly, having everything ready prevents the garlic or cheese from burning.

    Common Troubleshooting Steps

    Fixing a Grainy or Separated Cheese Sauce

    If the sauce looks broken or grainy, it is usually due to excessive heat. Remove the pan from the burner and stir in a small amount of milk or heavy cream over very low heat to bring the emulsion back together.

    Preventing the Steak from Becoming Tough

    Ensure the pan is very hot before adding the meat and do not overcook it. Searing quickly on high heat and removing the meat immediately preserves the tenderness of the sirloin.

    Adjusting a Sauce That is Too Salty

    If the Worcestershire sauce or cheese makes the dish too salty, add a splash of unsalted milk or a squeeze of fresh lemon juice. The acidity and creaminess help neutralize the excess salt.

    Dealing with Overcooked Pasta

    If the pasta is too soft, avoid stirring it vigorously into the sauce. Gently fold it in at the very end and reduce the final heating time to avoid further breaking down the noodles.

    Solving Clumpy Cream Cheese Issues

    If the cream cheese won’t melt smoothly, try using a smaller piece and stirring it into the hot milk first. Once the cream cheese is fully liquid, add the shredded cheeses one by one.

    Preventing Burned Garlic

    Garlic burns much faster than onions and peppers. Always add the garlic in the final 30 seconds of the vegetable sauté to ensure it becomes fragrant without turning bitter.

    Frequently Asked Questions

    Can I use regular pasta instead of high-protein pasta?

    Yes, you can use any pasta shape or brand. However, using regular pasta will lower the total protein count per serving, so you may want to add more steak to compensate.

    How long do the leftovers stay fresh in the fridge?

    The leftovers are safe to eat for up to three days when stored in an airtight container. Ensure the container is fully sealed to prevent the pasta from absorbing fridge odors.

    Which steak cut works best for this recipe?

    Lean sirloin is the ideal choice because it is tender and low in fat. Flank steak or skirt steak are also good alternatives as long as they are sliced thinly against the grain.

    Can I make this dish with a different type of cheese?

    While provolone is traditional for Philly style, you can use white cheddar or Monterey Jack. These will provide a similar melt and creaminess, though the flavor profile will change slightly.

    Is it possible to make this recipe in a slow cooker?

    This recipe is designed for a skillet to get the proper sear on the meat. While you can slow-cook the beef and vegetables, the pasta and cheese must be added at the end on the stove for the best texture.

    How do I prevent the pasta from soaking up all the sauce?

    Underook your pasta by one or two minutes. The pasta will finish cooking in the cheese sauce, absorbing a small amount of flavor without soaking up all the liquid and leaving the dish dry.

    Print
    clock clock iconcutlery cutlery iconflag flag iconfolder folder iconinstagram instagram iconpinterest pinterest iconfacebook facebook iconprint print iconsquares squares iconheart heart iconheart solid heart solid icon
    High-Protein Philly Cheesesteak Mac and Cheese

    Savory High-Protein Philly Cheesesteak Pasta


    5 Stars 4 Stars 3 Stars 2 Stars 1 Star

    No reviews

    • Author: imageuploader
    • Total Time: 30 minutes
    • Yield: 4 servings 1x
    • Diet: Low Fat

    Description

    High-Protein Philly Cheesesteak Mac: Creamy, protein-packed comfort food with classic Philly flavors in a mac and cheese twist.


    Ingredients

    Scale
    • 8 oz high-protein pasta
    • 1 lb lean sirloin steak, thinly sliced
    • 1 tbsp olive oil
    • 1 small green bell pepper, thinly sliced
    • 1 small onion, thinly sliced
    • 2 cloves garlic, minced
    • 1 tsp Worcestershire sauce
    • ½ tsp salt
    • ½ tsp black pepper
    • 1 cup low-fat milk
    • 1 cup shredded provolone cheese
    • ½ cup shredded mozzarella cheese
    • 2 oz light cream cheese

    Instructions

    1. Step 1: Cook high-protein pasta according to package directions. Drain and set aside.
    2. Step 2: Heat olive oil in a large skillet over medium-high heat. Add sliced steak and cook 2 to 3 minutes until browned. Remove and set aside.
    3. Step 3: In the same skillet, sauté bell pepper and onion for 4 to 5 minutes until softened. Add garlic and cook 30 seconds.
    4. Step 4: Return steak to the skillet. Stir in Worcestershire sauce, salt, and black pepper.
    5. Step 5: Reduce heat to medium. Add milk and cream cheese, stirring until smooth and slightly thickened.
    6. Step 6: Stir in provolone and mozzarella until melted and creamy.
    7. Step 7: Add cooked pasta and toss until evenly coated. Cook 1 to 2 minutes until everything is heated through.
    8. Step 8: Serve warm with extra cracked pepper if desired.

    Notes

    Use extra-lean sirloin for the leanest dish. To reduce fat further, substitute part-skim cheese options or 1% milk. Want more veggies? Add mushrooms or extra peppers for color and texture. Leftovers can be stored in an airtight container for up to 3 days.

    • Prep Time: 10 minutes
    • Cook Time: 20 minutes
    • Category: Main Dish
    • Method: Skillet, Stovetop
    • Cuisine: American

    Nutrition

    • Serving Size: 1 serving
    • Calories: 480 kcal
    • Sugar: 7 g
    • Sodium: 950 mg
    • Fat: 18 g
    • Saturated Fat: 9 g
    • Unsaturated Fat: 9 g
    • Trans Fat: 0 g
    • Carbohydrates: 32 g
    • Fiber: 6 g
    • Protein: 46 g
    • Cholesterol: 95 mg
  • Quick and Healthy Rotisserie Chicken Casserole

    Quick and Healthy Rotisserie Chicken Casserole

    This creamy rotisserie chicken casserole is a nutritious dinner solution that comes together in just 35 minutes. It combines lean protein and colorful vegetables for a balanced meal perfect for busy weeknights.

    Recipe image

    List of ingredients

    • 2 cups shredded rotisserie chicken – use pre-cooked chicken for speed.
    • 1 cup chopped broccoli – ensures a fresh, green bite in every forkful.
    • 1 cup diced carrots – adds natural sweetness and vitamins.
    • 1/2 cup diced onions – provides a savory flavor base.
    • 1 cup low-fat milk – creates a creamy texture without excessive calories.
    • 1/2 cup shredded low-fat cheese – binds the ingredients together.
    • 1 tsp garlic powder – adds a warm, aromatic depth.
    • 1 tsp black pepper – provides a subtle spicy heat.
    • 1 tsp salt – enhances all the other savory flavors.

    step-by-step instructions

    1. Preheat Oven: Set your oven to 375°F. Ensure the oven racks are centered so the heat circulates evenly around the baking dish.
    2. Combine Main Ingredients: In a large mixing bowl, toss together the shredded rotisserie chicken, chopped broccoli, diced carrots, and diced onions. Distribute the vegetables evenly throughout the chicken.
    3. Prepare the Sauce: In a separate bowl, whisk together the low-fat milk, shredded cheese, garlic powder, black pepper, and salt. Stir until the cheese begins to soften and the seasonings are well blended.
    4. Mix Everything: Pour the creamy sauce over the chicken and vegetable mixture. Use a spatula to fold the ingredients together until every piece is thoroughly coated.
    5. Transfer to Dish: Pour the mixture into a lightly greased baking dish. Spread the casserole evenly to promote uniform cooking.
    6. Bake: Bake for 25 minutes or until the edges are bubbly. Let the dish rest for five minutes before serving to allow the sauce to set.

    Cooking Techniques for Better Results

    Ensure Uniform Vegetable Chopping

    Cut the carrots and broccoli into small, consistent pieces. Uniform sizes ensure that all vegetables cook through at the same rate during the 25-minute bake time, preventing crunchy bits.

    Implement a Resting Period

    Allow the casserole to cool for five to ten minutes after removing it from the oven. This step allows the sauce to thicken, resulting in cleaner slices and a better presentation on the plate.

    Create a Golden-Brown Crust

    For a crispier top, add an extra sprinkle of cheese during the last five minutes of baking. You can also use the broiler for one to two minutes, but monitor it closely to prevent burning.

    Season the Sauce Independently

    Taste the milk and seasoning mixture before adding it to the chicken. Dairy can sometimes mute spices, so adjusting the salt and pepper at this stage ensures the final dish is flavorful.

    Ingredient Substitutions and Alternatives

    Use Turkey as a Protein Swap

    If rotisserie chicken is unavailable, cooked turkey breast works as an excellent substitute. Shred the turkey similarly to the chicken to maintain the same texture and flavor profile.

    Dairy-Free Milk and Cheese Options

    Substitute low-fat milk with unsweetened almond or soy milk. Use a plant-based shredded cheese or nutritional yeast to keep the casserole creamy while remaining dairy-free.

    Preparing Frozen Vegetables

    You can use frozen broccoli and carrots if fresh options are unavailable. Thaw the vegetables completely and squeeze out excess moisture with a paper towel to avoid a watery bake.

    Swap Broccoli for Other Greens

    If you prefer different vegetables, swap the broccoli for chopped spinach or frozen peas. These alternatives integrate well with the creamy sauce and provide similar nutritional value.

    Flavor Variations

    Add a Spicy Kick

    Stir in a teaspoon of smoked paprika or a pinch of cayenne pepper to the sauce mixture. For more heat, fold in sliced jalapeños with the vegetables before baking.

    Mild Version for Children

    Reduce the amount of garlic powder and use a very mild cheese like mozzarella. Serving this alongside a side of fruit can balance the savory richness for picky eaters.

    Mediterranean Flavor Profile

    Incorporate chopped sun-dried tomatoes and fresh basil into the vegetable mix. This change shifts the flavor profile toward a Mediterranean style while keeping the same basic technique.

    South Asian Inspired Twist

    Add a teaspoon of curry powder to the milk sauce and replace the broccoli with green peas. This creates a fragrant, comforting dish with distinct aromatic notes.

    Serving and Plating Suggestions

    Complementary Side Dishes

    Pair the casserole with a crisp green salad dressed in a light vinaigrette to contrast the creaminess. Warm dinner rolls or rustic bread are also ideal for soaking up the remaining sauce.

    Recommended Beverage Pairings

    A chilled sparkling water with a squeeze of lemon keeps the meal feeling light. Alternatively, an iced herbal tea complements the savory garlic and cheese notes of the dish.

    Light Dessert Pairings

    Finish the meal with a simple fruit crumble or a bowl of mixed berries with whipped yogurt. A citrus sorbet also works well to refresh the palate after a rich, savory dinner.

    Family-Style Presentation

    Serve the casserole directly from the baking dish to create a communal dining experience. Garnish the top with fresh parsley or chives for a pop of color and a fresh aroma.

    Storage and Meal Prep Advice

    Refrigerating Leftovers

    Store any remaining casserole in an airtight container in the refrigerator for up to four days. Cold storage helps the flavors meld, but be sure to reheat gently to maintain the texture.

    Freezing Unbaked Casseroles

    Assemble the casserole in a freezer-safe dish without baking it first. Wrap it tightly in foil and freeze for up to three months, thawing it in the fridge overnight before cooking.

    Advance Ingredient Preparation

    Combine the shredded chicken and vegetables in a sealed container 24 hours before you plan to cook. Store the sauce ingredients separately to keep the vegetables crisp until the moment of baking.

    Single-Portion Packing

    Divide the baked casserole into individual glass containers for easy weekday lunches. This prevents the need to reheat the entire dish and makes portion control simpler.

    Reheating Guidelines

    Oven Reheating for Texture

    To preserve the best texture, reheat portions in a 350°F oven for about 15 minutes. This method keeps the cheese creamy and prevents the vegetables from becoming overly soft.

    Microwave Reheating Tips

    Place a portion in a microwave-safe dish and cover it with a damp paper towel. Heat in 30-second intervals, stirring occasionally to ensure the center is hot without overcooking the edges.

    Stovetop Refresh Method

    Transfer microwaved portions to a hot skillet for one minute. This quick step refreshes the texture of the chicken and can add a slight crispness to the bottom of the serving.

    Avoiding Protein Breakdown

    Avoid overheating the casserole, as excessive heat can cause the proteins to toughen and the sauce to separate. Use moderate heat and stop as soon as the dish is bubbly.

    Troubleshooting Common Issues

    Preventing a Watery Casserole

    Avoid adding too many watery vegetables or failing to drain frozen produce. Ensure the baking dish is not overpacked, allowing moisture to evaporate more efficiently during the baking process.

    Fixing a Loose Sauce

    If the casserole is bubbling but appears too watery, bake it for a few more minutes uncovered. You can also whisk a small amount of cornstarch into the milk before baking for a thicker consistency.

    Preventing Over-browned Tops

    If the cheese begins to brown too quickly, tent the dish loosely with aluminum foil. This protects the surface while allowing the interior to reach the proper temperature.

    Managing Undercooked Vegetables

    If carrots remain too firm, dice them smaller or sauté them briefly before adding them to the mix. This ensures they soften completely during the 25-minute oven time.

    Frequently Asked Questions

    Can I use cold rotisserie chicken from the fridge?

    Yes, cold chicken works fine. However, warming it slightly in the microwave for 20 seconds before mixing helps the milk-based sauce absorb and heat more evenly.

    Is it okay to substitute a different cheese?

    Absolutely. You can use mozzarella, mild cheddar, or Swiss cheese. Each variety will slightly alter the flavor but will still provide the necessary creamy bind.

    Can I make this casserole vegan?

    Yes. Use unsweetened plant milk, dairy-free shredded cheese, and replace the chicken with seasoned tempeh, tofu, or cooked lentils.

    How do I prevent the casserole from becoming soggy?

    The key is to pat-dry all fresh vegetables and thoroughly drain any frozen ones. Avoid over-adding milk beyond the specified one cup to maintain a thick sauce.

    What if the dish is bubbling but still looks liquid?

    Allow the casserole to rest for at least ten minutes after baking. The sauce thickens significantly as it cools slightly, which resolves most liquid issues.

    Can I add a breadcrumb topping?

    Yes. A sprinkle of seasoned breadcrumbs or crushed gluten-free crackers added in the final five minutes of baking creates a satisfying crunchy crust.

    Print
    clock clock iconcutlery cutlery iconflag flag iconfolder folder iconinstagram instagram iconpinterest pinterest iconfacebook facebook iconprint print iconsquares squares iconheart heart iconheart solid heart solid icon
    Quick and Healthy Rotisserie Chicken Casserole

    Quick and Healthy Rotisserie Chicken Casserole


    5 Stars 4 Stars 3 Stars 2 Stars 1 Star

    No reviews

    • Author: imageuploader
    • Total Time: 35 minutes
    • Yield: 4 servings 1x
    • Diet: Gluten-Free, Dairy-Light

    Description

    A comforting and quick casserole made with rotisserie chicken, broccoli, carrots, and cheese, perfect for busy weeknights.


    Ingredients

    Scale
    • 2 cups shredded rotisserie chicken
    • 1 cup chopped broccoli
    • 1 cup diced carrots
    • 1/2 cup diced onions
    • 1 cup low-fat milk
    • 1/2 cup shredded low-fat cheese
    • 1 tsp garlic powder
    • 1 tsp black pepper
    • 1 tsp salt

    Instructions

    1. Preheat: Preheat oven to 375°F.
    2. Mix: Mix chicken, broccoli, carrots, and onions in a bowl.
    3. Combine: In a separate bowl, combine milk, cheese, garlic powder, pepper, and salt.
    4. Pour: Pour the sauce over the chicken and vegetables.
    5. Transfer: Transfer to a greased baking dish and spread evenly.
    6. Bake: Bake for 25 minutes or until bubbly.

    Notes

    Use fresh or leftover chicken and adjust cheese for preference. Let rest before slicing for better serving consistency.

    • Prep Time: 10 minutes
    • Cook Time: 25 minutes
    • Category: Casserole
    • Method: Baking
    • Cuisine: Comfort Fusion

    Nutrition

    • Serving Size: 1 cup
    • Calories: 320 kcal
    • Sugar: 5 g
    • Sodium: 600 mg
    • Fat: 14 g
    • Saturated Fat: 6 g
    • Unsaturated Fat: 8 g
    • Trans Fat: 0 g
    • Carbohydrates: 12 g
    • Fiber: 3 g
    • Protein: 28 g
    • Cholesterol: 70 mg
  • Savory Baked Feta Eggs with Spinach and Tomatoes

    Savory Baked Feta Eggs with Spinach and Tomatoes

    This one-pan meal combines salty feta cheese with fresh vegetables and eggs for a rich breakfast or brunch. It is an efficient way to get protein and greens into your morning routine using a single oven-safe skillet. This recipe delivers a satisfying blend of textures and flavors with minimal cleanup.

    Recipe image

    List of ingredients

    • 2 cups cherry or grape tomatoes – whole or halved for more sauce.
    • 1 red bell pepper, diced – adds sweetness and color.
    • ½ small red onion, diced – provides a sharp aromatic base.
    • 3 cloves minced garlic – for deep savory flavor.
    • 8 ounces feta cheese – preferably in brine for creaminess.
    • 4 tablespoons olive oil – used for sautéing and richness.
    • 1 teaspoon dried oregano – adds a classic Mediterranean note.
    • 1 teaspoon sea salt – enhances all natural flavors.
    • ½ teaspoon dried thyme – provides a subtle earthy aroma.
    • ½ teaspoon ground black pepper – adds a mild spicy bite.
    • ½ teaspoon red pepper flakes – for a touch of warmth.
    • 1 cup chopped baby spinach – adds nutrients and color.
    • 4 large eggs – the protein center of the dish.
    • Fresh basil or fresh chives – optional garnish for brightness.

    step-by-step instructions

    1. Sauté Aromatics: Preheat your oven to 400°F (200°C). Heat olive oil in an oven-safe skillet over medium heat and sauté the diced red bell pepper and red onion for 5-7 minutes until they are soft.
    2. Add Garlic and Tomatoes: Stir in the minced garlic and cook for 1 minute until fragrant. Add the cherry tomatoes and cook for 3-5 minutes until they begin to soften and release juices.
    3. Season the Base: Stir in the dried oregano, dried thyme, ground black pepper, sea salt, and red pepper flakes. Simmer the mixture for 2-3 minutes to bloom the spices.
    4. Layer Cheese and Greens: Crumble the feta cheese evenly over the vegetables. Scatter the chopped baby spinach on top and gently tuck the leaves around the feta pieces.
    5. Prepare Egg Wells: Use a spoon to create 4 distinct wells in the mixture. Carefully crack one egg into each well, keeping the yolk intact.
    6. Bake: Place the skillet in the oven and bake for 10-15 minutes. Remove when the egg whites are opaque and set, but the yolks remain runny and the feta is bubbly.
    7. Garnish and Serve: Remove from the oven and sprinkle with fresh basil or chives if desired. Serve immediately from the skillet with crusty bread.

    Optimizing Your Cookware

    Choosing a Cast Iron Skillet

    Cast iron is ideal for this recipe because it retains heat exceptionally well. This ensures that the bottom of the vegetable base continues to caramelize while the eggs bake from the top down. It also provides a rustic presentation when serving directly from the pan.

    Using Ceramic Oven-Safe Pans

    Ceramic pans provide very even heat distribution, which helps prevent the eggs from cooking too quickly on the edges. Ensure your ceramic dish is rated for 400°F to avoid thermal shock. These pans are often lighter and easier to handle than cast iron.

    Avoiding Non-Stick Pans in High Heat

    Avoid using non-stick skillets if they have coatings that cannot withstand 400°F. High temperatures can degrade certain non-stick surfaces and release harmful fumes. Always check the manufacturer’s temperature limit before placing a pan in the oven.

    Vegetable Preparation Techniques

    Dicing Peppers for Even Cooking

    Cut the red bell pepper into small, uniform cubes of about half an inch. Consistent sizing ensures that all pieces soften at the same rate during the initial sauté. This prevents some pieces from being raw while others are overcooked.

    Preventing Garlic from Burning

    Add the minced garlic only after the onions and peppers have softened. Garlic has a lower burn point and can turn bitter if cooked for too long. One minute of sautéing is usually sufficient to release its aromatic oils.

    Handling Tomatoes for Better Sauce

    Leave cherry tomatoes whole for a burst of juice when bitten, or halve them to create a thicker sauce. Halving the tomatoes allows their juices to emulsify with the olive oil and feta during the baking process. This creates a more cohesive base for the eggs.

    Sautéing Onions for Sweetness

    Cook the red onions until they are translucent and just starting to brown. This process breaks down the harsh sulfur compounds and brings out the natural sugars. This sweetness balances the salty profile of the feta cheese.

    Cheese and Egg Management

    Selecting Brined Feta for Creaminess

    Choose a block of feta stored in brine rather than pre-crumbled varieties. Brined feta has a higher moisture content, which allows it to soften and become creamy in the oven. Pre-crumbled feta often contains anti-caking agents that prevent it from melting smoothly.

    Managing Egg Temperature

    Using room-temperature eggs can help them cook more evenly and slightly faster. If you are in a rush, place cold eggs in a bowl of warm water for a few minutes before cracking. This prevents the cold eggs from lowering the temperature of the vegetable base.

    Precise Egg Placement

    Make sure the wells are deep enough to cradle the egg without the white spreading too far across the surface. If the white spreads too much, the eggs may take longer to set. This keeps the yolks centered and visually appealing.

    Avoiding Yolk Breakage

    Crack each egg into a small bowl first before gently sliding it into the well. This prevents shells from entering the pan and ensures the yolk does not break during the transfer. An intact yolk is essential for the creamy texture of the final dish.

    Flavor Enhancements and Variations

    Adding Sun-Dried Tomatoes for Depth

    Incorporate two tablespoons of chopped sun-dried tomatoes along with the fresh cherry tomatoes. The concentrated sweetness and tang of sun-dried tomatoes add a layer of complexity to the sauce. This variation works well for those who prefer a more intense Mediterranean flavor.

    Using Fresh Instead of Dried Herbs

    Replace dried oregano and thyme with fresh versions, using three times the quantity. Fresh herbs provide a brighter, more grassy flavor profile. Add fresh herbs toward the end of the sauté process to prevent them from burning.

    Adjusting Heat with Different Peppers

    For a spicier version, replace the red bell pepper with a mild yellow chili or add extra red pepper flakes. If you prefer a milder taste, omit the flakes entirely. The sweetness of the onion will balance most levels of heat.

    Balancing Salt Content

    Since feta cheese is naturally very salty, be cautious with additional sea salt. Taste the vegetable mixture before adding the feta to ensure the seasoning is balanced. You can always add more salt at the table, but you cannot remove it once baked.

    Serving Recommendations

    Pairing with Sourdough Bread

    Toast thick slices of sourdough bread and rub them with a raw garlic clove. The acidity and crunch of the sourdough complement the richness of the melted feta and runny yolks. Use the bread to scoop up the sauce from the bottom of the pan.

    Serving with Fresh Arugula

    Place the baked eggs alongside a bed of fresh arugula tossed in lemon juice and olive oil. The peppery notes of the arugula cut through the saltiness of the cheese. This adds a refreshing, crisp element to the meal.

    Using Warm Pita for Dipping

    Warm pita bread in the oven for the last two minutes of the egg baking time. The soft, pillowy texture of the pita is perfect for absorbing the tomato and feta juices. This makes the dish feel more like a shared appetizer or brunch platter.

    Side of Roasted Potatoes

    Serve this dish with small roasted potatoes seasoned with paprika and rosemary. The heartiness of the potatoes makes the meal more filling for a dinner occasion. Ensure the potatoes are roasted at the same temperature as the eggs for timing efficiency.

    Storage and Reheating

    Storing the Vegetable Base

    If you have leftover vegetable and feta mixture without eggs, store it in an airtight container in the fridge for up to three days. You can reheat the base in a pan and crack fresh eggs into it for a quick meal. This is an excellent way to meal prep the foundation of the dish.

    Reheating Baked Eggs Safely

    Avoid using a microwave to reheat baked eggs, as this often makes the whites rubbery. Instead, place the skillet in a 300°F oven for 5-10 minutes. Cover the pan with foil to prevent the top from drying out while the center warms through.

    Freezing the Pre-Sautéed Mix

    The sautéed pepper, onion, and tomato mixture can be frozen for up to two months. Thaw the mixture overnight in the refrigerator before adding feta and eggs. Do not freeze the dish after the eggs have been added.

    Refrigeration Time Limits

    Fully cooked baked feta eggs should be consumed within 24 hours if refrigerated. After this time, the texture of the eggs can change, and the spinach may release excess water. Always ensure the dish is cooled slightly before sealing it in the fridge.

    Troubleshooting Common Issues

    Preventing Runny Egg Whites

    If the whites are still translucent while the yolks are overcooking, increase the oven temperature by 25°F for the last two minutes. Alternatively, you can turn on the broiler for 60 seconds to set the tops of the whites. Watch the pan closely to avoid burning the feta.

    Avoiding Hard Yolks

    Pull the skillet out of the oven while the yolks still have a slight jiggle when the pan is shaken. Remember that carry-over cooking will continue to set the yolks for a few minutes after the pan is removed from the heat. This ensures a creamy center.

    Fixing a Watery Vegetable Base

    If the sauce appears too watery, sauté the vegetables for an additional 3-5 minutes before adding the cheese. This allows more of the moisture from the tomatoes and onions to evaporate. Reducing the amount of baby spinach can also prevent excess liquid release.

    Dealing with Unmelted Feta

    If the feta remains too firm, ensure your oven is fully preheated to 400°F before the pan goes in. You can also use a slightly smaller pan so the ingredients are packed more densely, which traps more heat. Brined feta will always melt more effectively than dry crumbles.

    Frequently Asked Questions

    Can I make this dish ahead of time?

    You can prepare the vegetable base and crumble the feta in advance. However, you should crack the eggs and bake the dish immediately before serving to ensure the best texture and flavor.

    What kind of feta is best?

    A high-quality block of feta packed in brine is the best choice. It provides a creamier consistency and a more authentic salty flavor compared to pre-crumbled options.

    Can I use egg whites only?

    You can use egg whites, but the dish will lose the richness provided by the yolks. You may need to add a bit more cheese or a splash of cream to the base to compensate for the lost creaminess.

    Can this be made in a casserole dish?

    Yes, a casserole dish works well, but you will lose the ability to sauté the vegetables in the same pan. You will need to cook the vegetables in a separate skillet first, then transfer them to the dish.

    How do I adjust for more than 4 eggs?

    Use a larger skillet and increase the quantities of all vegetables and cheese proportionally. Ensure the eggs are not crowded, as this can lead to uneven cooking times.

    Print
    clock clock iconcutlery cutlery iconflag flag iconfolder folder iconinstagram instagram iconpinterest pinterest iconfacebook facebook iconprint print iconsquares squares iconheart heart iconheart solid heart solid icon
    Easy Baked Feta Eggs

    Savory Baked Feta Eggs with Spinach and Tomatoes


    5 Stars 4 Stars 3 Stars 2 Stars 1 Star

    No reviews

    • Author: imageuploader
    • Total Time: 40 minutes
    • Yield: 4 servings 1x
    • Diet: Vegetarian

    Description

    A delicious and simple recipe for baked feta eggs with cherry tomatoes, bell pepper, and spinach, baked to perfection in a flavorful feta and vegetable sauce.


    Ingredients

    Scale
    • 2 cups cherry or grape tomatoes
    • 1 red bell pepper, diced
    • ½ small red onion, diced
    • 3 cloves minced garlic
    • 8 ounces microbial-rennet feta cheese
    • 4 tablespoons olive oil
    • 1 teaspoon dried oregano
    • 1 teaspoon sea salt
    • ½ teaspoon dried thyme
    • ½ teaspoon ground black pepper
    • ½ teaspoon red pepper flakes
    • 1 cup chopped baby spinach
    • 4 large eggs
    • Optional: chopped fresh basil or fresh chives

    Instructions

    1. Step: Preheat oven to 400°F (200°C). Add olive oil to an oven-safe skillet over medium heat. Sauté diced red bell pepper and red onion for 5-7 minutes until softened.
    2. Step: Add minced garlic and cook for 1 minute until fragrant. Add cherry tomatoes and cook for 3-5 minutes until they start to soften.
    3. Step: Stir in dried oregano, dried thyme, ground black pepper, sea salt, and red pepper flakes. Simmer for 2-3 minutes.
    4. Step: Crumble feta cheese over the vegetable mixture and scatter chopped baby spinach on top. Gently tuck spinach around the feta.
    5. Step: Create 4 wells in the mixture and carefully crack one egg into each well.
    6. Step: Bake for 10-15 minutes, or until egg whites are set and yolks are runny. The feta should be bubbly.
    7. Step: Remove from oven, garnish with fresh basil or chives if desired, and serve directly from the skillet with crusty bread.

    Notes

    Serve with warm crusty bread, pita bread, or a simple green salad.

    • Prep Time: 15 minutes
    • Cook Time: 25 minutes
    • Category: Breakfast
    • Method: Baking
    • Cuisine: Mediterranean

    Nutrition

    • Serving Size: 1 serving
    • Calories: 410 kcal
    • Sugar: 6 g
    • Sodium: 920 mg
    • Fat: 32 g
    • Saturated Fat: 13 g
    • Unsaturated Fat: 19 g
    • Trans Fat: 0 g
    • Carbohydrates: 14 g
    • Fiber: 3 g
    • Protein: 19 g
    • Cholesterol: 265 mg
  • High-Protein Meal Prep Breakfast Sandwiches

    High-Protein Meal Prep Breakfast Sandwiches

    Prepare your mornings with these efficient make-ahead breakfast sandwiches. They offer a balanced mix of protein and vegetables, perfect for those with limited time before work or school.

    Recipe image

    List of ingredients

    • 6 slices turkey bacon – provides a savory, lean protein base.
    • ½ yellow onion, diced – adds depth and aromatic flavor.
    • 4–5 handfuls fresh spinach – adds nutrients and color to the egg base.
    • 5 large eggs – the primary binder and protein source.
    • 1½ cups liquid egg whites – increases protein volume without adding excessive fat.
    • ½ cup milk – any variety works to ensure the eggs stay fluffy.
    • ½ tsp salt – enhances the natural flavors of the eggs and vegetables.
    • ¼ tsp pepper – provides a mild spice.
    • 6 slices cheddar cheese – or any melty variety like provolone or Swiss.
    • 6 English muffins – can be substituted with bagels or sandwich thins.

    step-by-step instructions

    1. Prepare Oven: Preheat your oven to 350°F and lightly grease a 9×13 inch baking dish to prevent sticking.
    2. Cook Protein: Fry the turkey bacon until it reaches your desired crispiness, then transfer the slices to paper towels to drain. Remove most of the grease from the pan before proceeding.
    3. Sauté Vegetables: Use the same pan to cook the diced onions for 5–8 minutes until soft. Add the spinach and stir until wilted, then remove the mixture from the heat to cool.
    4. Prepare Egg Mix: In a large mixing bowl, whisk together the whole eggs, liquid egg whites, milk, salt, and pepper. Stir in the cooled spinach and onion mixture until evenly distributed.
    5. Bake: Pour the egg mixture into the greased baking dish. Bake for 20–25 minutes, or until the center is set and no longer jiggly.
    6. Cool and Cut: Allow the egg slab to cool completely in the pan. Use a circular cutter or an English muffin as a guide to cut the eggs into 6 equal rounds.
    7. Assemble: Place one egg round on each split English muffin. Layer a slice of cheese and a piece of turkey bacon on top of the egg.
    8. Store: Wrap each individual sandwich tightly in aluminum foil. Place the wrapped sandwiches in a large freezer-safe zip-top bag for long-term storage.

    Customizing Your Sandwich Fillings

    High-Protein Meat Substitutes

    While turkey bacon is a great lean option, you can use turkey sausage patties or diced lean ham. For a plant-based version, use marinated tofu slices or plant-based bacon strips. Ensure these are cooked fully before assembling the sandwiches.

    Adding More Vegetable Variety

    Expand the nutritional value by adding diced red bell peppers or sliced mushrooms to the sauté mix. Kale or Swiss chard can replace spinach for a heartier texture. Make sure to cook all vegetables until their moisture has evaporated to avoid soggy eggs.

    Exploring Different Cheese Varieties

    Cheddar is a classic choice, but Pepper Jack adds a spicy kick to the morning. Provolone or Swiss cheese offers a milder, nuttier flavor that pairs well with turkey bacon. Always use a slice that fits the diameter of the English muffin.

    Bread Alternatives for Different Diets

    Replace English muffins with whole wheat bagels for a denser sandwich. Those seeking a lower-calorie option can use sandwich thins or large lettuce wraps. For gluten-free needs, use certified gluten-free English muffins or toasted sourdough rounds.

    Mastering the Egg Base

    Using Carton Egg Whites for Convenience

    Carton egg whites are a practical way to increase protein while reducing waste. They eliminate the need to separate yolks and whites manually. This results in a more consistent texture when baking in large batches.

    Cooling Vegetables Before Mixing

    Always allow the sautéed onions and spinach to cool before adding them to the raw eggs. Adding hot vegetables can cause the eggs to cook prematurely or separate. This ensures the egg slab bakes evenly in the oven.

    Achieving the Perfect Bake

    Avoid overcooking the eggs to prevent them from becoming rubbery. Start checking for doneness at the 20-minute mark. The eggs are ready when the edges are slightly golden and the center does not move when the pan is shaken.

    Precision Cutting Techniques

    To get perfectly round eggs, press an English muffin half directly into the egg slab to create a template. Alternatively, use a metal biscuit cutter for clean, professional edges. This ensures every sandwich has a uniform look and feel.

    Storage and Preservation Guide

    Refrigeration Limits for Freshness

    Freshly assembled sandwiches can be kept in the refrigerator for 5 to 7 days. Ensure they are wrapped tightly in foil or stored in an airtight container to prevent them from absorbing other fridge odors. Keep them in the coldest part of the refrigerator.

    Long-Term Freezer Storage

    These sandwiches remain high-quality in the freezer for up to 3 months. The aluminum foil protects them from freezer burn, while the outer zip-top bag adds a second layer of protection. Label the bag with the date of preparation.

    Proper Wrapping Techniques

    Wrap each sandwich tightly so there are no air gaps between the foil and the bread. This prevents ice crystals from forming on the surface of the muffin. A tight wrap also helps the sandwich heat more evenly during the reheating process.

    Thawing for Better Texture

    For the best possible texture, move a sandwich from the freezer to the fridge the night before. Slow thawing prevents the bread from becoming overly mushy during reheating. This step is optional but recommended for a fresher taste.

    Reheating Methods for Best Texture

    Oven Reheating from the Fridge

    Keep the sandwich wrapped in foil and bake at 425°F for 8 to 10 minutes. This method warms the center without drying out the muffin. It is the best way to achieve a consistent temperature throughout the sandwich.

    Oven Reheating from Frozen

    Bake the foil-wrapped sandwich at 350°F for approximately 30 minutes. This slower heat penetrates the frozen core without burning the exterior. It provides a homemade quality that is superior to microwave reheating.

    Microwave Quick Method

    Remove the foil and wrap the sandwich in a paper towel to absorb excess moisture. Microwave on defrost for 1 minute, flip the sandwich, and heat for another 30 to 60 seconds. This is the fastest method for those in a rush.

    Achieving a Crispy Muffin Finish

    To avoid a soft muffin, open the sandwich and place it under a broiler for 3 to 5 minutes. This toasts the edges of the bread and melts the cheese further. You can also toast the muffin separately before adding the reheated egg and meat.

    Troubleshooting Common Issues

    Dealing with Soggy Bread

    Sogginess often occurs if the egg is too moist or the sandwich was wrapped while hot. Let the egg slab cool completely before assembling. If the muffin feels soft after reheating, a quick toast in a toaster oven will fix it.

    Preventing Eggs from Sticking

    Use a high-quality non-stick spray or a generous amount of butter in the baking dish. If the eggs still stick, run a thin knife around the edges of the pan before lifting the slab. Ensure the pan is fully greased before pouring the mixture.

    Fixing Overcooked Eggs

    If the eggs come out too dry, add a tablespoon of extra milk or cream to the mix next time. Reduce the baking time by 2 to 3 minutes to keep the center moist. Using a lower temperature for a slightly longer time can also help.

    Correcting Bland Flavor

    If the sandwiches taste under-seasoned, increase the salt and pepper in the egg mixture. You can also add a pinch of garlic powder or onion powder for more depth. Adding a slice of sharp cheddar instead of mild cheddar can also boost the flavor profile.

    Serving Enhancements and Add-ons

    Fresh Toppings for After Reheating

    Add fresh avocado slices or thin rounds of tomato after the sandwich is heated. These fresh elements provide a cool contrast to the warm egg and cheese. Fresh arugula or baby spinach leaves also add a nice crunch.

    Sauce Pairings for Extra Flavor

    A swipe of pesto or chipotle mayonnaise on the muffin adds a professional touch. Sriracha or a dash of hot sauce can provide a spicy kick to wake up your taste buds. For a creamier taste, try a thin layer of cream cheese.

    Side Dish Pairings for a Complete Meal

    Serve these sandwiches with a side of fresh berries or a sliced apple for a balanced breakfast. A small bowl of Greek yogurt with honey provides additional protein. A glass of fresh orange juice complements the savory flavors perfectly.

    Presentation for Guests

    If serving these to guests, remove the foil and place them on a warming tray. Garnish the platter with fresh parsley or sliced cherry tomatoes. Using a colorful plate makes these meal-prep items look like a gourmet brunch.

    Frequently Asked Questions

    Can I make these without English muffins?

    Yes, you can use bagels, sourdough bread, or even wrap the ingredients in a flour tortilla. Just ensure the egg round is cut to fit the size of your chosen bread. Bagel thins are a great low-calorie alternative.

    How do I prevent the cheese from sliding?

    Place the cheese slice directly on top of the hot egg round immediately after assembly. The residual heat helps the cheese adhere to the egg. When reheating, the cheese will melt and bond the layers together.

    Can I use whole eggs instead of egg whites?

    You can use only whole eggs, but the texture will be richer and denser. To maintain the fluffiness of the original recipe, keep the ratio of milk and liquid whites. Using only whole eggs may increase the calorie count per sandwich.

    What should I do with the leftover egg scraps?

    Do not throw away the egg pieces left over from cutting the rounds. Sauté them in a pan for a quick scramble or fold them into a breakfast burrito. They can also be frozen and added to a frittata later in the week.

    Print
    clock clock iconcutlery cutlery iconflag flag iconfolder folder iconinstagram instagram iconpinterest pinterest iconfacebook facebook iconprint print iconsquares squares iconheart heart iconheart solid heart solid icon
    High-Protein Meal Prep Breakfast Sandwiches

    High-Protein Meal Prep Breakfast Sandwiches


    5 Stars 4 Stars 3 Stars 2 Stars 1 Star

    No reviews

    • Author: imageuploader
    • Total Time: 45 minutes
    • Yield: 6 sandwiches 1x
    • Diet: General

    Description

    Baked eggs with spinach and onion, topped with turkey bacon and cheese, layered on English muffins. Great for busy mornings and fully customizable.


    Ingredients

    Scale
    • 6 slices turkey bacon
    • ½ yellow onion, diced
    • 45 handfuls spinach
    • 5 large eggs
    • 1½ cups liquid egg whites
    • ½ cup milk
    • ½ tsp salt
    • ¼ tsp pepper
    • 6 slices cheese
    • 6 English muffins

    Instructions

    1. Step: Preheat oven to 350°F and grease a 9×13 baking dish.
    2. Step: Cook turkey bacon until crispy; set aside on paper towels. Remove most grease.
    3. Step: In the same pan, cook onions until soft (5–8 min). Add spinach, cook until wilted. Cool mixture.
    4. Step: In a bowl, whisk eggs, egg whites, milk, salt, and pepper. Add cooled spinach/onion mix. Pour into greased dish.
    5. Step: Bake for 20–25 minutes until eggs are set. Cool completely.
    6. Step: Cut baked eggs into 6 rounds using a cutter or muffin as a guide.
    7. Step: Assemble sandwiches: layer egg, turkey bacon, and cheese on muffins.
    8. Step: Wrap sandwiches in foil and freeze.

    Notes

    Use carton egg whites to avoid waste. Add or substitute any veggies (e.g., mushrooms, red peppers) or meats (e.g., turkey sausage). Let cooked veggies cool before mixing into eggs to avoid scrambling. Save leftover egg scraps for scrambles or burritos. Enhance with tomato slices, avocado, or hot sauce.

    • Prep Time: 20 minutes
    • Cook Time: 25 minutes
    • Category: Breakfast
    • Method: Assemble, Bake
    • Cuisine: American

    Nutrition

    • Serving Size: 1 sandwich
    • Calories: 361 kcal
    • Sugar: 2 g
    • Sodium: 811 mg
    • Fat: 16 g
    • Saturated Fat: 8 g
    • Unsaturated Fat: 7 g
    • Trans Fat: 1 g
    • Carbohydrates: 30 g
    • Fiber: 2 g
    • Protein: 24 g
    • Cholesterol: 169 mg