This method ensures your chicken breasts remain juicy and flavorful every time you cook them. By combining a searing technique with a creamy sauce, you can avoid dry meat for your weeknight dinners.
List of ingredients
- 2 large boneless, skinless chicken breasts – pounded to 1/2-inch thickness for even cooking.
- Cream cheese, softened to room temperature – creates a rich, velvety sauce.
- Low-sodium chicken broth – provides a savory base for the sauce.
- 3-4 cloves of freshly minced garlic – adds aromatic depth.
- Fresh lemon juice – brightens the rich cream sauce.
- Dried Italian seasoning – a blend of oregano, basil, thyme, and rosemary.
- Olive oil – used for searing the meat.
- Salt – for seasoning to taste.
- Black pepper – adds a subtle spice.
step-by-step instructions
- Prepare the Chicken: Place chicken breasts between two pieces of plastic wrap or in a large resealable bag. Use a meat mallet or rolling pin to pound them to an even 1/2-inch thickness, pat dry with paper towels, and season both sides with salt and pepper.
- Sear the Meat: Heat 1 tablespoon of olive oil in a large skillet over medium-high heat. Once the oil shimmers, sear the chicken for 3-4 minutes per side until golden brown, then remove the breasts to a plate.
- Sauté the Aromatics: Reduce the heat to medium and add another teaspoon of olive oil if the pan is dry. Add minced garlic and cook for 30-60 seconds, stirring constantly to prevent burning.
- Build the Creamy Sauce: Pour in the chicken broth and scrape the browned bits from the pan bottom. Bring to a gentle simmer, then lower the heat and whisk in the softened cream cheese until the sauce is smooth.
- Season the Sauce: Stir in the dried Italian seasoning and an additional pinch of salt and pepper. Taste the sauce and adjust the seasonings to your preference.
- Simmer the Chicken: Return the seared chicken breasts to the skillet and nestle them into the sauce. Cover the pan and simmer for 8-12 minutes, or until the internal temperature reaches 165°F (74°C).
- Finish and Serve: Remove the skillet from the heat and stir in the fresh lemon juice and optional fresh herbs. Let the chicken rest in the sauce for a few minutes before serving.
Advanced Techniques for Maximum Tenderness
The Importance of Pounding the Meat
Chicken breasts are naturally tapered, with one end significantly thicker than the other. Pounding the meat to a uniform 1/2-inch thickness ensures that the entire piece cooks at the same rate. This prevents the thinner end from overcooking and drying out while the center reaches a safe temperature.
Using an Instant-Read Thermometer
Overcooking chicken breast happens quickly, often within a window of just two or three minutes. Using a digital thermometer is the only way to guarantee the meat is cooked to exactly 165°F (74°C). This precision prevents the muscle fibers from tightening too much, which is what causes the meat to feel tough or dry.
Allowing the Meat to Rest in Sauce
Resting the chicken for a few minutes after removing it from the heat allows the internal juices to redistribute. When meat is heated, the juices move toward the center; resting lets them flow back toward the edges. Keeping the chicken in the sauce during this process also prevents the surface from drying out.
Customizing the Sauce Flavor Profile
Adding Fresh Vegetables
You can enhance the nutritional value and flavor by sautéing sliced mushrooms or sun-dried tomatoes with the garlic. If using fresh spinach, stir it into the sauce at the very end of the cooking process. The residual heat will wilt the spinach quickly without overcooking it.
Integrating Different Fresh Herbs
While Italian seasoning provides a solid base, fresh herbs added at the end offer a brighter taste. Chopped parsley, chives, or fresh dill complement the creaminess of the cheese. Stir these in after the heat is turned off to preserve their volatile oils and vibrant color.
Increasing the Heat Level
For a spicy version of this dish, add a pinch of crushed red pepper flakes when sautéing the garlic. The oil will infuse the heat into the base of the sauce. You can also add a small amount of cayenne pepper for a deeper, more lingering heat.
Enhancing with Parmesan Cheese
Stirring in a handful of freshly grated Parmesan cheese along with the cream cheese adds a salty, nutty dimension. This thickens the sauce further and creates a more complex flavor profile. Ensure the Parmesan is finely grated to avoid clumps in the emulsion.
Ingredient Substitutions and Alternatives
Using Vegetable Broth
If chicken broth is unavailable, vegetable broth serves as an excellent substitute. It provides a similar savory depth without altering the overall structure of the sauce. Low-sodium versions are recommended to maintain control over the final salt levels.
Low-Fat Dairy Options
Reduced-fat cream cheese can be used for a lighter version of the sauce. Note that low-fat versions may have a slightly different melting point and might require more whisking to achieve a smooth texture. You may need a splash more broth to reach the desired consistency.
Alternative Searing Oils
While olive oil is standard, oils with higher smoke points like avocado or canola oil are ideal for searing. These oils prevent the fat from breaking down at the medium-high temperatures needed for caramelization. This ensures the chicken gets a brown crust without the oil smoking.
Bottled Lemon Juice Alternatives
Fresh lemon juice is preferred for its zest, but bottled juice works in a pinch. If neither is available, a small amount of white wine vinegar or apple cider vinegar can provide the necessary acidity. Acidity is crucial because it cuts through the richness of the cream cheese.
Recommended Serving Pairings
Starchy Bases for Sauce Absorption
This dish produces a generous amount of sauce that is best paired with absorbent sides. Fluffy white rice, creamy mashed potatoes, or buttered egg noodles are traditional choices. These options soak up the creamy garlic sauce, ensuring none of the flavor is wasted.
Light Vegetable Accompaniments
To balance the richness of the cream sauce, serve the chicken with steamed green beans or roasted asparagus. A crisp garden salad with a light vinaigrette also provides a refreshing contrast. These options add texture and brightness to the plate.
Bread for Dipping
Serving a side of toasted sourdough or a warm French baguette is highly recommended. The crusty bread is perfect for scooping up the remaining sauce from the plate. Brushing the bread with garlic butter before toasting enhances the overall flavor theme.
Storage and Preservation Guidelines
Refrigeration Procedures
Once the dish has cooled completely, transfer the chicken and sauce into an airtight glass or plastic container. Store it in the refrigerator for up to three to four days. The sauce will naturally thicken as it cools, which is normal for dairy-based sauces.
Safe Reheating Methods
The best way to reheat this meal is in a skillet over low heat on the stovetop. Add a small splash of chicken broth or water to the pan to loosen the sauce as it warms. Stir occasionally to ensure the heat is distributed evenly without scorching the bottom.
Microwave Reheating Tips
If using a microwave, heat the chicken in short 30 to 60-second bursts. Stir the sauce between each interval to prevent hot spots and avoid separating the dairy. Be careful not to overheat, as the microwave can quickly dry out the lean breast meat.
Freezing and Thawing Considerations
Freezing is generally not recommended for cream cheese-based sauces because the emulsion can break. This may result in a grainy texture upon thawing. If you must freeze it, use a freezer-safe container for up to three months and thaw slowly in the refrigerator before reheating.
Troubleshooting Common Cooking Issues
Fixing a Sauce That Is Too Thick
If the sauce becomes too thick during the simmering process, simply whisk in more chicken broth one tablespoon at a time. Continue adding liquid until the sauce reaches a consistency that coats the back of a spoon. Keep the heat low to avoid boiling the cream.
Thickening a Thin Sauce
If the sauce is too runny, simmer it uncovered for a few extra minutes to allow moisture to evaporate. Alternatively, create a cornstarch slurry by mixing one teaspoon of cornstarch with one tablespoon of cold water. Whisk this slurry into the simmering sauce and cook for one minute until thickened.
Preventing Garlic from Burning
Garlic burns quickly at medium heat, which creates a bitter taste. To prevent this, keep the garlic moving constantly in the pan with a spatula. If the pan seems too hot, remove it from the burner for a few seconds before adding the broth.
Avoiding Sauce Separation
Dairy sauces can separate if they are boiled too vigorously. Always reduce the heat to low before adding the cream cheese and maintain a gentle simmer. Whisking constantly helps the fat and liquid emulsify into a smooth, stable sauce.
Frequently Asked Questions
Can I use frozen chicken breasts for this recipe?
Yes, you can use frozen breasts, but they must be completely thawed in the refrigerator before cooking. Thawing them ensures the meat pounds evenly and sears properly. Cooking frozen chicken directly will lead to uneven cooking and a steamed texture.
Which type of skillet is best for this method?
A large stainless steel or cast iron skillet is ideal because these materials hold heat well for searing. Non-stick pans work for the sauce, but they do not produce the same level of browned bits (fond) that add flavor to the final sauce.
Can this recipe be adapted for a slow cooker?
While you can slow cook chicken, you will lose the benefits of searing and sauce reduction. To adapt it, sear the chicken in a pan first, then place it in the slow cooker with the broth and seasonings. Stir in the cream cheese and lemon juice only during the last 30 minutes of cooking.
How do I check for doneness without a thermometer?
You can pierce the thickest part of the breast with a knife; the juices should run clear rather than pink. However, this is less reliable than a thermometer. The meat should also feel firm to the touch and spring back when pressed.
Print Ultra Tender Creamy Garlic Chicken Breast
- Total Time: 35 minutes
- Yield: 2 servings 1x
- Diet: General
Description
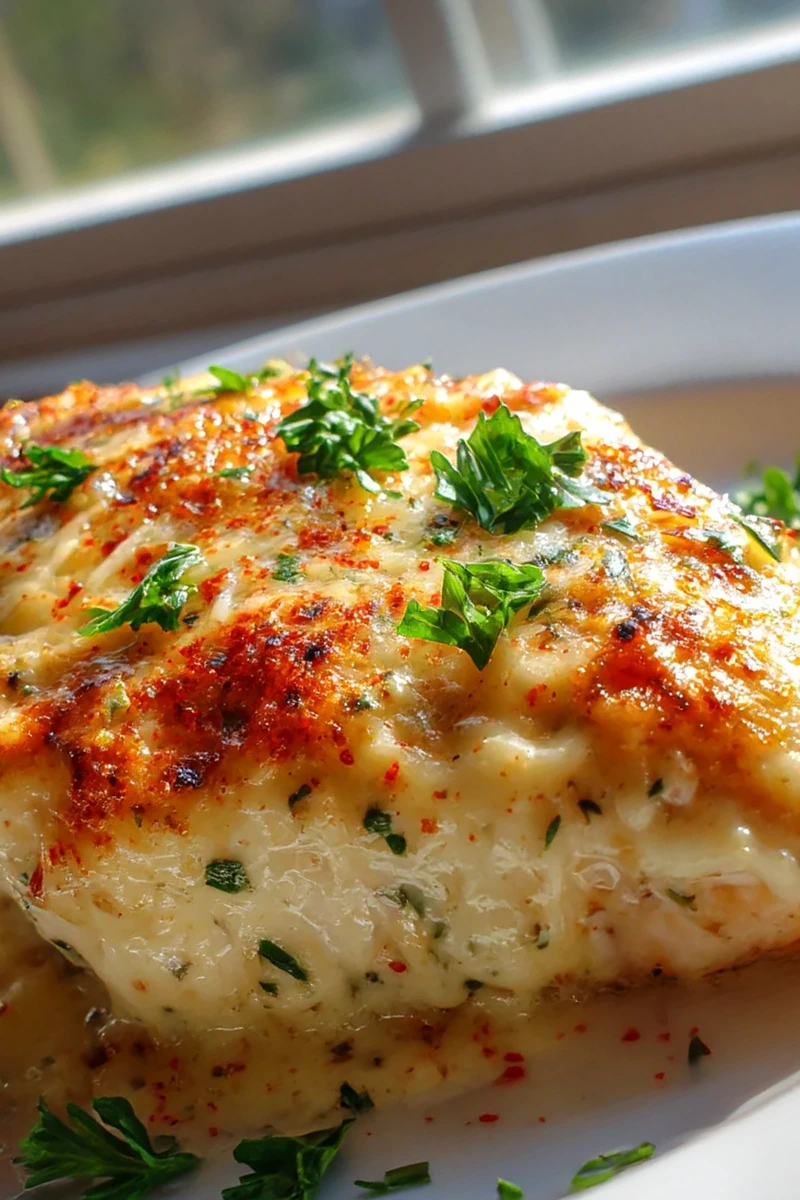
This Melt In Your Mouth Chicken Breast recipe transforms bland poultry into an incredibly tender and juicy dish. It’s simple to prepare and perfect for both weeknight dinners and special occasions.
Ingredients
- 2 large boneless, skinless chicken breasts
- Cream cheese (softened to room temperature)
- Low-sodium chicken broth
- 3–4 cloves of freshly minced garlic
- Fresh lemon juice
- Dried Italian seasoning
- Olive oil
- Salt
- Black pepper
Instructions
- Prepare the Chicken: Pound chicken breasts to about 1/2-inch thickness, pat dry, and season generously with salt and black pepper.
- Sear the Chicken: Heat 1 tablespoon of olive oil in a skillet and sear chicken for 3-4 minutes per side until golden brown; remove and set aside.
- Sauté the Aromatics: Heat another teaspoon of olive oil if needed and cook minced garlic for 30-60 seconds until fragrant.
- Build the Creamy Sauce: Pour in chicken broth, bring to a simmer, then whisk in softened cream cheese until smooth.
- Season the Sauce: Stir in dried Italian seasoning, salt, and pepper.
- Simmer the Chicken: Return chicken to the skillet, cover, and simmer for 8-12 minutes until the internal temperature reaches 165°F (74°C).
- Finish and Serve: Remove from heat, stir in fresh lemon juice, and let the chicken rest for a few minutes before serving.
Notes
Pounding the chicken breasts to an even thickness is critical for tenderness and even cooking. Use an instant-read thermometer to ensure chicken reaches 165°F without overcooking. Let the chicken rest in the sauce for a few minutes to allow juices to redistribute.
- Prep Time: 15 minutes
- Cook Time: 20 minutes
- Category: Dinner
- Method: Searing
- Cuisine: American
Nutrition
- Serving Size: 1 chicken breast with sauce
- Calories: 400 kcal
- Sugar: 2 g
- Sodium: 600 mg
- Fat: 25 g
- Saturated Fat: 10 g
- Unsaturated Fat: 15 g
- Trans Fat: 0 g
- Carbohydrates: 5 g
- Fiber: 0 g
- Protein: 40 g
- Cholesterol: 120 mg
Leave a Reply